
Some homes have a mudroom. Some have a carefully styled entryway with baskets, hooks, and a candle that smells like expensive laundry. And then there are the rest of us, who have a mysterious paper mountain growing on the kitchen counter. Bills hide under pizza coupons. School notices migrate into junk drawers. Birthday invitations vanish like tiny rectangular magicians. A DIY chalkboard mail sorter is the charming, practical solution that gives every envelope a place to land before it becomes part of the household fossil record.
This project combines three home-organization heroes: a wall-mounted mail organizer, a small chalkboard message center, and a simple entryway command station. It is compact enough for apartments, useful enough for busy families, and stylish enough that it does not scream, “I gave up and nailed a cardboard box to the wall.” With basic wood, chalkboard paint, hooks, and a few smart labels, you can build a custom sorter for incoming mail, outgoing letters, keys, reminders, grocery lists, and all those “important papers” that are somehow both urgent and impossible to find.
Below is a complete guide to designing, building, finishing, and actually using a chalkboard mail sorter that looks good and works hard. No carpentry degree required. Just patience, measuring tape, and the emotional strength to finally recycle three-month-old catalogs.
Why a DIY Chalkboard Mail Sorter Is Worth Making
A mail sorter is not just a cute wall accessory. It is a paper traffic-control system. The goal is to stop mail from spreading across every flat surface in your home. When everything has a clear categorybills, school papers, coupons, outgoing mail, receipts, or “deal with this before it becomes a problem”you spend less time searching and more time doing literally anything else.
The chalkboard section adds flexibility. Unlike printed labels or permanent signs, chalkboard notes can change with your week. On Monday, it can say “Pay electric bill.” On Wednesday, it can say “Return library books.” On Friday, it can say “Buy stamps,” which is adult code for “I meant to do this three weeks ago.” This makes the project especially helpful in an entryway, kitchen, laundry room, mudroom, home office, or family command center.
Project Overview
This DIY chalkboard mail sorter is designed as a vertical wall organizer with two or three mail pockets, a chalkboard panel, and optional hooks at the bottom. You can make it rustic with stained wood, modern with matte black paint, farmhouse-style with white trim, or colorful enough to make your junk mail feel underdressed.
Best Places to Hang It
The best location is the place where mail naturally enters your home. That might be beside the front door, near the garage entrance, in the kitchen, or above a small desk. Avoid hiding it in a hallway nobody uses. A mail sorter only works when it is easier to use than the kitchen counter. The counter is a powerful opponent. Respect it.
Suggested Size
A practical finished size is about 16 to 22 inches wide and 24 to 32 inches tall. That gives you enough room for standard envelopes, magazines, a chalkboard note area, and a row of hooks without turning your wall into a full office supply store.
Materials and Tools You Will Need
You can build this project with new lumber, scrap wood, plywood, or even a repurposed cabinet door. The design is flexible, which is great news if your garage already contains “useful wood pieces” that everyone else calls clutter.
Materials
- One wood board or plywood panel for the back, approximately 18 by 28 inches
- Thin wood strips or boards for the mail pockets
- Small side pieces or triangular braces for angled pocket support
- Chalkboard paint or a ready-made chalkboard panel
- Primer, if painting raw wood or a glossy surface
- Wood glue
- Small finishing nails, brad nails, or screws
- Sandpaper in medium and fine grits
- Painter’s tape
- Wall hooks for keys, lanyards, or dog leashes
- Sawtooth hanger, D-rings, or wall-mounting hardware
- Optional: label holders, cork strip, small basket, decorative trim, stain, or paint
Tools
- Tape measure
- Pencil
- Saw or miter box
- Drill or screwdriver
- Hammer or brad nailer
- Foam roller or quality brush
- Level
- Clamps, if available
Step-by-Step Guide: How to Build a DIY Chalkboard Mail Sorter
Step 1: Plan Your Layout
Before cutting anything, sketch your design. Decide how many pockets you need. For most homes, three sections work beautifully: To Do, To File, and Outgoing. If your household has multiple people, you can create one slot per family member. For a smaller space, use two pockets: one for action items and one for everything else that needs to be filed or reviewed.
Leave room for the chalkboard area. It can sit at the top like a mini message board or in the center between the mail pockets and hooks. A top chalkboard is great for reminders and weekly notes. A center chalkboard makes the whole piece look like a polished command center.
Step 2: Cut the Back Panel
Cut your back panel to the size you want. A 18-by-28-inch board is a good starting point. If you are working with plywood, choose a smooth grade so the final piece looks finished. Sand the edges and front surface until everything feels smooth. Mail may be paper, but it still deserves a splinter-free home.
Step 3: Create the Mail Pockets
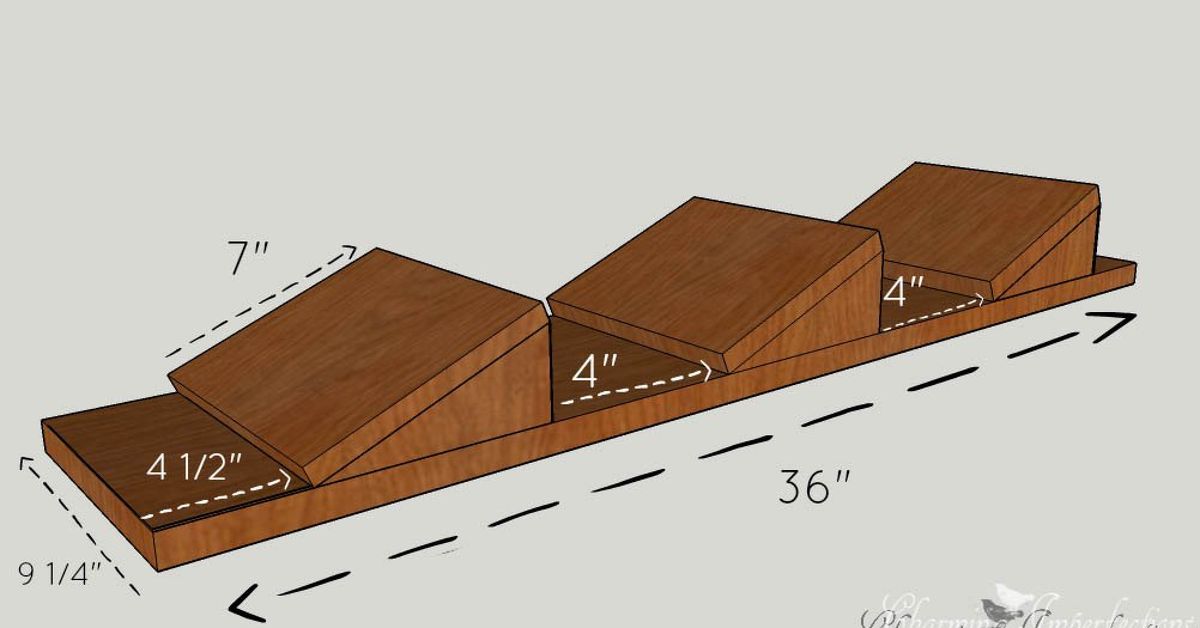
Each mail pocket needs a front board and side supports. Cut the front boards slightly narrower than the back panel, leaving a small margin on both sides. A pocket height of 4 to 6 inches is usually enough to hold envelopes without hiding the entire stack. If you want the pocket to angle outward, add small triangular side braces. If you prefer a flatter look, use thin side strips instead.
Attach each pocket with wood glue first, then secure it with nails or screws. Check that the pocket is level before fastening everything permanently. A crooked mail slot is not the end of civilization, but it will bother you every time you walk by. Save your future self the tiny daily annoyance.
Step 4: Add the Chalkboard Panel
If you are painting the chalkboard area directly onto the back panel, mark it with painter’s tape. Lightly sand the area so the paint can grip. Clean away dust with a dry cloth. Apply primer if the surface is raw, stained, glossy, or uneven. Chalkboard paint performs best on a clean, smooth surface, so do not rush this part. The smoother the base, the better your writing and erasing will feel later.
Apply chalkboard paint with a foam roller or brush in thin, even coats. Let each coat dry according to the product instructions. Many chalkboard paints require multiple coats and a longer curing time before use, so read the label instead of relying on optimism. Optimism is lovely, but it does not cure paint.
Step 5: Condition the Chalkboard Surface
Once the chalkboard paint has fully cured, condition it before writing your first note. Rub the side of a piece of chalk across the entire painted area, then erase it with a soft cloth. This helps prevent your first message from becoming a permanent ghost on the board. Without conditioning, “Buy milk” may haunt your entryway until the next renovation.
Step 6: Paint, Stain, or Seal the Wood
Now finish the rest of the organizer. For a farmhouse look, paint the frame white and distress the edges lightly. For a modern look, use satin black, navy, deep green, or warm gray. For a natural style, stain the wood and seal it with a clear protective finish. Keep the finish practical. This piece will get touched often, bumped by bags, and possibly attacked by keys, backpacks, and one person who refuses to sort their mail correctly.
Step 7: Add Hooks and Labels
Install hooks along the bottom edge for keys, small bags, pet leashes, sunglasses, or reusable shopping totes. Space them evenly and pre-drill small pilot holes to prevent splitting the wood. Then add labels to each mail pocket. You can use chalk labels, metal label holders, painted text, vinyl lettering, or simple handwritten cards.
Choose labels that match real habits. “Important” sounds useful, but everything becomes “important” when you are avoiding decisions. Better categories include “Pay,” “File,” “Return,” “School,” “Coupons,” and “Outgoing.” Specific labels reduce the mental gymnastics required to put paper away.
Step 8: Mount It Securely
A loaded mail sorter can become heavier than expected, especially if magazines, catalogs, and mystery documents pile up. Use sturdy mounting hardware and anchor it into studs when possible. If studs are not available, use wall anchors rated for the weight. Hang it at a comfortable height so adults can read the chalkboard and kids can reach their assigned slots if needed.
Smart Design Ideas for Every Home Style
Farmhouse Chalkboard Mail Sorter
Use white paint, stained wood pockets, black hooks, and small metal label frames. Add a narrow shelf at the top for a tiny plant, a small clock, or a ceramic dish for stamps. This version pairs well with shiplap walls, cozy kitchens, and anyone who owns at least one basket labeled “misc.”
Modern Entryway Mail Organizer
Choose a clean rectangle, slim pockets, matte black chalkboard paint, and brass hooks. Keep labels minimal. Use simple categories like “Now,” “Later,” and “Out.” This style looks especially good in apartments, condos, and small entryways where visual clutter needs to be kept under control.
Family Command Center Version
Make the organizer larger and add one slot per person. Include a chalkboard section for weekly reminders, a small cork strip for permission slips, and hooks for keys or lanyards. This design helps stop school forms from living inside backpacks until the morning they are due, which is a classic family tradition nobody asked for.
Budget-Friendly Upcycled Version
Repurpose a cabinet door, old drawer front, wooden crate, or thrifted wall shelf. Add chalkboard paint to one section and attach small baskets or wood slats for mail. Upcycling gives the project personality and keeps costs low. Plus, telling guests “I made it from an old cabinet door” gives you immediate DIY credibility.
How to Organize Mail Once the Sorter Is Built
The sorter is only half the system. The other half is using it consistently. Start by sorting mail as soon as it enters the house. Recycle obvious junk immediately. Put bills or forms into the action pocket. Place items that need long-term storage in the file pocket. Put outgoing letters, returns, or forms that need signatures in the outgoing slot.
Do not let the sorter become a decorative paper museum. Choose one day each week to clear it out. Sunday evening works well for many households. Friday afternoon is better if you like starting the weekend without financial envelopes judging you from the wall. The key is to empty the pockets regularly so the system stays useful.
Common Mistakes to Avoid
Making the Pockets Too Deep
Deep pockets seem helpful, but they encourage paper hiding. A good mail sorter should hold papers upright while keeping them visible. If the pockets are too deep, you will forget what is inside. Then the sorter becomes a wall-mounted junk drawer, which is not the dream.
Skipping the Chalkboard Cure Time
Chalkboard paint needs time to harden before use. Writing on it too early can damage the surface or leave marks that are difficult to erase. Follow the product directions and give the paint enough time to cure. Yes, waiting is boring. So is repainting because you got impatient.
Using Vague Labels
Labels should tell you exactly what action to take. “Stuff” is not a system. “To Pay,” “To Sign,” “To File,” and “Outgoing” are much more effective. Clear labels make the sorter easier for everyone in the household to use, including the person who claims they “didn’t know where it went” while standing directly under the label.
Installing It Too Far From the Mail Drop Zone
If the sorter is not near the place where mail naturally lands, people will ignore it. Put it where paper already enters the house. The most successful organizing systems work with your habits, not against them.
Maintenance Tips for a Chalkboard Mail Sorter
Wipe the chalkboard with a soft cloth for everyday cleaning. For deeper cleaning, use a slightly damp cloth, but only after the paint has fully cured according to the manufacturer’s instructions. Avoid abrasive scrubbers because they can damage the chalkboard finish. If the surface starts looking cloudy, recondition it by rubbing chalk over the whole area and erasing it again.
Empty the pockets weekly. Tighten hooks if they loosen. Touch up paint when needed. If your household uses the sorter heavily, consider adding a small recycling bin or shred box nearby. The easier it is to discard junk mail immediately, the less likely it is to sneak back onto the counter wearing a fake mustache.
Creative Ways to Use the Chalkboard Section
The chalkboard is more than decoration. Use it for weekly meal plans, appointment reminders, grocery notes, package tracking, chore lists, or encouraging messages. A simple “Don’t forget lunch” can save a morning. A dramatic “Return library books or face the fines” may also be effective, depending on your household’s sense of theater.
You can also use the chalkboard to create a rotating priority list. Write three tasks for the week: pay bills, mail returns, file receipts. When the list is visible, it is harder to ignore. Not impossible, of course. Humans are talented. But harder.
Cost Breakdown
A basic DIY chalkboard mail sorter can be inexpensive, especially if you already have scrap wood or leftover paint. New materials may cost more depending on the type of wood, hooks, trim, and paint you choose. A simple version can often be made with a small board, chalkboard paint, a few hooks, and basic hardware. A more polished version with decorative trim, premium hooks, metal labels, and stain will cost more but may still be less expensive than many store-bought command centers.
The best part is customization. Store-bought organizers are usually designed for imaginary people who receive exactly three envelopes and own two keys. A DIY version can match your real life, whether that means five family slots, a giant outgoing mail pocket, or a reminder board big enough to write “stop buying batteries; we already have batteries.”
Extra Experience: Lessons Learned From Making and Using a DIY Chalkboard Mail Sorter
After building and using a chalkboard mail sorter, one lesson becomes clear very quickly: the project is less about wood and paint than it is about behavior. A beautiful organizer will not magically sort the mail for you, although frankly, that would be a fantastic product. What it does is make the right habit easier. When the sorter is mounted in the right spot, labeled clearly, and emptied regularly, it becomes part of the household rhythm.
The first practical experience is that location matters more than design. A perfectly styled sorter in the wrong place will become wall art. A slightly imperfect sorter beside the door will get used every day. In one common setup, placing the organizer near the garage entry works better than putting it in the kitchen because that is where the mail, keys, backpacks, and reusable bags already enter the house. The best organizing projects do not try to turn your family into different people. They quietly support what people already do.
The second experience is that labels should be tested before they become permanent. At first, you might think “Bills,” “Coupons,” and “Miscellaneous” make sense. After a week, you may discover that “Coupons” becomes a graveyard for expired sandwich offers and “Miscellaneous” becomes a legal loophole for clutter. More useful categories are action-based: “Pay,” “Sign,” “Return,” “File,” and “Outgoing.” These labels tell you what to do next, which is exactly what tired humans need at 6:30 p.m.
The chalkboard also becomes more useful when it is not overloaded. A tiny board packed with twelve reminders looks busy and quickly becomes invisible. Three short notes work better. For example: “Mail return,” “Soccer form due Thursday,” and “Buy stamps.” Keep the board focused on immediate tasks, not life goals, inspirational quotes, and a complete inventory of pantry snacks. Your chalkboard is helpful, but it is not a life coach.
Another experience worth mentioning is the importance of drying and curing time. Chalkboard paint may feel dry before it is ready to use. Waiting the recommended time makes the surface more durable and easier to erase. Conditioning the board with chalk before writing also makes a noticeable difference. It feels like a silly step until you skip it and your first message becomes a faint chalk tattoo. Take the extra minute. Future you will approve.
Wood choice affects the final look, but it does not need to be fancy. Smooth plywood, pine boards, or repurposed wood can all work well. The trick is sanding. Rounded edges feel better, painted surfaces look cleaner, and envelopes slide in more easily. If you are using reclaimed wood, inspect it for old nails, rough patches, or warping. Character is charming. Splinters in your electric bill are less charming.
Hooks are another small feature that make a big difference. Once keys have a home, the mail sorter becomes more than a paper organizer; it becomes a launch pad. Keys, sunglasses, dog leashes, badge lanyards, and outgoing mail can all live in one zone. This reduces the morning search ritual, also known as “Where are my keys?” followed by “I just had them,” followed by checking the refrigerator for reasons no one can explain.
Finally, the best experience is seeing the counter stay clear. Not perfectly clear, because this is a home, not a museum. But clearer. The mail has a destination. The urgent papers are visible. The outgoing envelopes are not buried under snack wrappers. A DIY chalkboard mail sorter will not solve every organization problem, but it can remove one daily source of chaos with a project that is affordable, attractive, and surprisingly satisfying to build.
Conclusion
A DIY chalkboard mail sorter is one of those rare projects that looks decorative while doing real work. It helps control paper clutter, organizes daily reminders, creates a useful entryway command center, and gives your keys a place to stop disappearing. Whether you build a rustic wooden version, a sleek modern organizer, or an upcycled sorter from materials you already own, the key is to design it around your real habits. Keep the pockets visible, the labels specific, the chalkboard simple, and the location convenient.
With a little wood, paint, and planning, you can turn the daily mail pile into a system that actually works. Your kitchen counter may not know what hit it.











