
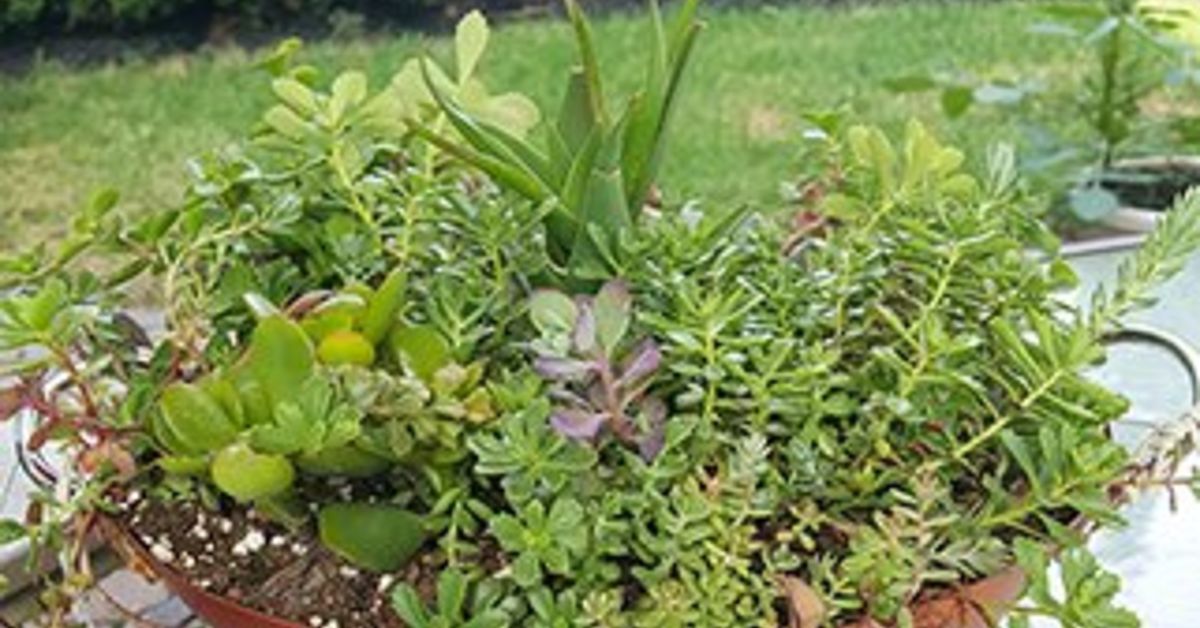
Some people look at an old grill basket and see a tired piece of metal that has flipped its last zucchini. Gardeners, however, are a different species. We see holes, handles, drainage, shape, character, and suddenly we are whispering, “This could be a succulent garden.” That is how an ordinary barbecue accessory becomes a charming upcycled planter with personality, texture, and just enough rustic drama to make your patio look like it has a tiny landscape designer on payroll.
Turning an old grill basket into a succulent garden is one of those DIY garden projects that feels almost suspiciously practical. The basket already has airflow. It already drains. It is shallow enough for many succulents, easy to move, and wonderfully imperfect. A few scratches, a little patina, and a handle or two only make it better. Instead of sending it to the trash, you can transform it into a low-maintenance container garden filled with echeveria rosettes, sedum, hens and chicks, trailing string plants, or whatever plump little plant babies make your heart do a cartwheel.
This guide walks you through the full process: choosing the right basket, cleaning it safely, lining it, mixing the best soil, arranging your plants, watering properly, and keeping the display healthy. We will also cover design ideas, common mistakes, seasonal care, and real-life experience from building this kind of planter. Spoiler alert: succulents are forgiving, but they are not magic rocks with leaves. Give them drainage, light, and restraint with the watering can, and they will reward you with a miniature garden that looks far more expensive than it is.
Why a Grill Basket Makes a Surprisingly Great Succulent Planter
A grill basket is basically a container garden in disguise. It has structure, drainage, open sides, and a compact footprint. Most grill baskets are made of metal mesh or perforated stainless steel, which means water can escape instead of pooling around roots. For succulents, this matters more than almost anything else. These plants store water in their leaves and stems, so they prefer a fast-draining setup rather than soggy soil that behaves like a swamp with Wi-Fi.
The shallow shape also works beautifully for succulent arrangements. Many popular succulents have compact root systems and grow well in wide, low containers. A grill basket gives you room to create a living mosaic: tall plants in the middle, rosette succulents along the edges, trailing varieties spilling through the sides, and decorative gravel finishing the surface like a tiny desert runway.
There is also the upcycling factor. Repurposing an old grill basket keeps usable material out of the waste stream and gives your garden a custom look. Store-bought succulent bowls are lovely, but an upcycled grill basket has a story. It says, “I used to char vegetables. Now I host a botanical spa retreat.” That is growth, in every sense.
What You Need for This DIY Succulent Garden
You do not need a professional workshop, a greenhouse, or the ability to pronounce every botanical name without blinking. This project is simple, affordable, and friendly to beginners.
Basic supplies
- One old grill basket, preferably metal mesh or perforated metal
- Gloves for cleaning and planting
- Dish soap, warm water, and a stiff brush
- White vinegar or baking soda for stubborn grease
- Coco fiber liner, sphagnum moss, burlap, or landscape-safe mesh
- Cactus or succulent potting mix
- Pumice, perlite, or coarse horticultural sand for extra drainage
- Assorted succulents
- Decorative gravel, small stones, or crushed rock
- Optional: wire cutters, small trowel, chopstick, plant labels, hanging chain
Before you begin, inspect the basket. If it is coated with peeling nonstick material, badly rusted, or contaminated with unknown chemicals, skip it. A little outdoor wear is charming. Flaking mystery coating is not charming; it is a red flag wearing gardening gloves.
Step 1: Clean the Grill Basket Thoroughly
Because the basket once lived near grease, smoke, marinades, and possibly a dramatic amount of barbecue sauce, cleaning comes first. Wash it with warm water and dish soap, then scrub the corners, hinges, and mesh openings. For stubborn buildup, make a paste with baking soda and water, let it sit for several minutes, and scrub again. White vinegar can also help loosen mineral stains or light rust.
Rinse the basket well and let it dry completely in the sun. This step matters because leftover grease can interfere with the liner and soil, and old food residue can attract pests. Your succulents want a fresh start, not the lingering ghost of last summer’s grilled peppers.
If the basket has sharp edges, bend them inward with pliers or cover them with liner material. If you plan to hang the basket, test the handle and frame strength before adding soil and plants. Wet potting mix is heavier than it looks, and gravity has no sense of humor.
Step 2: Line the Basket Without Blocking Drainage
A grill basket drains beautifully, but it also has one obvious problem: soil can fall right through it. The solution is a breathable liner. Coco fiber is one of the easiest choices because it holds soil while still allowing airflow and drainage. Sphagnum moss creates a softer, more natural look and works especially well for rustic displays. Burlap can also work, though it may break down faster outdoors.
Press the liner into the bottom and sides of the basket. If you are using sheet coco liner, trim it to fit with scissors. If you are using loose sphagnum moss, soak it first, squeeze out excess water, and pack it firmly along the inside walls. The goal is to create a nest that keeps the soil in place but does not turn the basket into a sealed container.
Avoid lining the basket with solid plastic unless you cut several drainage openings. Succulents dislike sitting in water, and a plastic-lined grill basket with no holes can become a tiny bathtub of doom. If you need extra moisture retention in a very hot climate, use plastic only on part of the sides, leaving the bottom open for drainage.
Step 3: Use a Fast-Draining Succulent Soil Mix
Good soil is the difference between a thriving succulent garden and a sad bowl of plant regrets. Regular garden soil is usually too dense for containers, and standard potting mix may hold more moisture than succulents prefer. Start with a cactus or succulent mix, then improve drainage by adding pumice, perlite, or coarse horticultural sand.
A practical blend is two parts succulent potting mix and one part pumice or perlite. If your climate is humid or your basket will receive rain, lean even grittier. If your climate is hot and dry, you can keep a slightly higher proportion of potting mix. The right soil should feel loose and airy, not heavy and sticky.
Fill the lined basket almost to the top. For a more attractive design, mound the soil slightly in the center. This creates height and makes the arrangement look intentional instead of flat. Think of it as giving your miniature garden cheekbones.
Step 4: Choose Succulents That Suit the Basket
The best plants for a grill basket succulent garden are compact, shallow-rooted, and tolerant of bright light. Mixing shapes and colors makes the design more interesting. Use rosette succulents as focal points, upright varieties for height, and trailing plants to soften the edges.
Great succulent choices
- Echeveria: Beautiful rosettes in blue, green, pink, and purple tones.
- Sedum: Tough, textural, and useful for filling gaps.
- Sempervivum: Also called hens and chicks; excellent for outdoor containers in many regions.
- Crassula: Includes jade-like forms that add structure.
- Kalanchoe: Offers colorful leaves and, in some types, cheerful flowers.
- String of bananas or string of pearls: Ideal for trailing over basket edges.
- Graptosedum or Graptoveria: Durable hybrids with lovely color variation.
Choose plants with similar light and water needs. Do not mix moisture-loving plants with desert-style succulents in the same basket. That is not a garden; it is a group project where nobody agrees on the assignment.
Step 5: Arrange Before You Plant
Before removing plants from their nursery pots, place them on top of the soil and experiment with the layout. Put the largest or most dramatic succulent slightly off-center for a natural look. Add medium-sized rosettes around it, then tuck smaller sedums and trailing plants near the edges.
For a balanced design, repeat colors or shapes in different areas. For example, pair blue echeveria with silver-gray sedum, then add a burgundy succulent for contrast. If your grill basket is rectangular, create movement by planting diagonally rather than lining everything up like soldiers at a very cute parade.
Once you like the arrangement, remove each plant from its pot and gently loosen the roots. If the soil is wet, let the plants sit bare-root for a few hours before planting. This reduces the risk of trapping excess moisture around the roots.
Step 6: Plant the Succulents Gently
Make small holes in the soil, place each succulent, and firm the mix around the roots. Use a spoon, chopstick, or small trowel to work soil into tight spaces. Keep the crown of each plant slightly above the soil line so water does not collect around the base.
Plant fairly close together if you want a full, decorative look right away. Succulents grow slowly, and a snug arrangement can look polished from day one. However, leave a little room if you want them to expand over time. The final spacing depends on your style: lush and packed, or airy and architectural.
After planting, add a thin layer of decorative gravel or crushed rock. This top dressing helps hold soil in place, reduces splash, and gives the basket a finished appearance. It also makes the whole project look like you bought it from a boutique garden shop where the price tags whisper instead of speak.
Step 7: Wait Before Watering
One of the biggest succulent mistakes is watering immediately after planting. Freshly handled roots may have tiny breaks, and wet soil can increase the chance of rot. Let the arrangement rest for two to three days in bright shade before its first watering.
When you do water, water deeply until moisture runs through the basket, then allow the soil to dry out before watering again. This wet-and-dry cycle is healthier than frequent little sips. In most conditions, outdoor succulent baskets need water more often in hot weather and far less in cool or cloudy seasons. Indoors, watering may be needed only every two or three weeks, depending on light, humidity, and airflow.
The finger test works well: push a finger into the soil. If it still feels damp, wait. If it is dry, water. Succulents are much more likely to forgive underwatering than overwatering. They may pout when dry, but they collapse dramatically when their roots rot. Nobody wants a botanical soap opera.
Where to Place Your Grill Basket Succulent Garden
Most succulents need bright light to stay compact and colorful. Outdoors, morning sun with afternoon shade is often ideal, especially in hot climates. Too much harsh midday sun can scorch newly planted succulents, while too little light can make them stretch and lose their tidy shape.
Indoors, place the basket near a bright south- or west-facing window if possible. If your home does not offer enough natural light, a grow light can help. Rotate the basket every week or two so all sides receive light evenly. This prevents the plants from leaning in one direction like they are trying to overhear gossip from the window.
Because grill baskets are open and breathable, they can dry faster than solid pots. That is helpful for succulents, but it also means you should monitor them during heat waves. If the leaves wrinkle severely or the soil dries within a day, move the basket to a spot with gentler light.
Creative Design Ideas for Your Upcycled Succulent Planter
Your grill basket does not have to sit flat on a table. Depending on its shape and strength, you can display it in several creative ways.
Tabletop centerpiece
Place the finished basket on an outdoor dining table, potting bench, or patio shelf. Add small stones, driftwood, or a weathered garden ornament for character. This works especially well with rectangular grill baskets because they naturally resemble long planter troughs.
Hanging succulent basket
If the basket has sturdy handles, attach chain or wire and hang it from a pergola, balcony hook, or shepherd’s hook. Use trailing succulents near the edges for a waterfall effect. Check the weight carefully after watering, and make sure the hanging hardware can support it.
Vertical wall display
Some flat grill baskets can be mounted at a slight angle on a fence or wall. For this style, pack the liner firmly and use rooted cuttings that can settle into place. Keep the basket horizontal for a few weeks after planting so roots can establish before tilting it upright.
Mini desert scene
Add small rocks, gravel paths, and tiny clay accents to create a miniature landscape. Avoid overcrowding with decorations; the succulents should still be the stars. A small piece of weathered wood can look beautiful beside blue-green rosettes and golden sedum.
Common Mistakes to Avoid
The project is easy, but a few missteps can turn your succulent masterpiece into a crispy or mushy tragedy. First, do not use dense soil. Heavy soil holds moisture too long and can suffocate roots. Second, do not water on a fixed schedule without checking the soil. Plants respond to conditions, not calendar reminders.
Third, do not place newly planted succulents directly in intense sun. They need time to adjust. Start in bright shade, then gradually increase sunlight. Fourth, avoid containers with unsafe coatings, heavy rust, or chemical residue. Upcycling is wonderful, but plant safety still matters.
Finally, do not forget winter. Many succulents dislike freezing temperatures. If your plants are not cold-hardy, bring the basket indoors before frost. Hardy sedum and sempervivum may handle cold better, but tender echeveria, kalanchoe, and many trailing succulents need protection.
How to Maintain Your Succulent Grill Basket
Maintenance is refreshingly simple. Remove dead leaves from the base of plants to improve airflow and discourage pests. Trim leggy growth and replant healthy cuttings in empty spaces. If one plant struggles, replace it rather than letting the entire arrangement suffer for the sake of politeness.
Feed lightly during the active growing season with a diluted succulent fertilizer. Too much fertilizer can cause weak, stretched growth, so use restraint. Succulents are not heavy feeders; they are more like minimalist guests who prefer a quiet room and a small snack.
Over time, the liner may break down, especially outdoors. If soil begins escaping or the basket loses structure, gently lift the arrangement, replace the liner, and refresh the soil. This is also a good time to divide crowded plants and redesign the basket.
Real-Life Experience: What I Learned from Turning a Grill Basket into a Succulent Garden
The first thing I learned is that old grill baskets are much more stylish after retirement than expected. Mine had a few darkened spots, a slightly bent corner, and the kind of tired handle that suggested it had survived many backyard cookouts. At first, I thought the wear would make the project look messy. Instead, it gave the finished succulent garden instant charm. A brand-new container can look nice, but an old one looks like it has stories. In garden design, a little imperfection often feels warmer than showroom perfection.
The second lesson was about liners. I tried to rush the process by using a thin layer of moss, and soil immediately began escaping through the wider openings. It was not a disaster, but it was definitely a “why is my patio wearing potting mix?” situation. A thicker coco liner worked better because it held the soil firmly while still letting water drain. For baskets with larger holes, combining coco fiber with a little damp sphagnum moss around the edges creates a snug, attractive base.
I also learned that mounding the soil makes a huge visual difference. When I filled the basket flat, the arrangement looked acceptable but plain. Once I added a gentle mound in the center, the plants had height and movement. The focal echeveria stood up like the queen of the tiny kingdom, while smaller sedums tucked around it made the whole basket look fuller. That one design trick changed the project from “cute craft” to “wait, did you buy that?”
Watering required the biggest mindset shift. Because the basket drains so quickly, it is tempting to water often. But the succulents did better when I watered deeply, then ignored them until the soil dried. During hot weather, I checked the basket every few days. During cooler weeks, I left it alone much longer. The plants looked best when I paid attention to their signals instead of following a strict schedule. Plump leaves meant they were fine. Wrinkled leaves meant they were thirsty. Yellow, translucent leaves meant I needed to back away from the watering can and rethink my life choices.
Placement mattered, too. Full afternoon sun was too harsh at first, especially for newly planted rosettes. A spot with morning sun and light afternoon shade kept the colors strong without scorching the leaves. After several weeks, the plants became tougher, but I still preferred giving them some protection from extreme heat. The metal basket can warm up quickly, so shade during the hottest part of the day is helpful in summer.
The best surprise was how easy it became to refresh the arrangement. If a trailing piece broke off, I let the cut end dry for a day or two, then tucked it back into the soil. If a plant outgrew its spot, I moved it. Unlike formal containers that feel fussy, a grill basket succulent garden invites experimentation. It is small enough to redesign on a weekend and forgiving enough for beginners. It also starts conversations. Guests notice it, ask about it, and usually laugh when they realize it used to belong on the grill. That is the magic of this project: it is practical, sustainable, beautiful, and just odd enough to be memorable.
Conclusion
Turning an old grill basket into a succulent garden is a clever way to combine upcycling, container gardening, and low-maintenance plant care. With a clean basket, breathable liner, fast-draining succulent soil, and the right mix of plants, you can create a living centerpiece that looks artistic without requiring constant attention. The project works for patios, balconies, porches, sunny windows, and garden shelves. It is affordable, customizable, and satisfying in that special DIY way where you get to say, “Oh, that? I made it,” while pretending not to enjoy the compliment too much.
The secret is simple: respect drainage, choose compatible succulents, give them bright light, and water only when the soil is dry. Do that, and your retired grill basket can begin its second life as a miniature succulent garden full of color, texture, and personality. Not bad for something that once held asparagus.












