
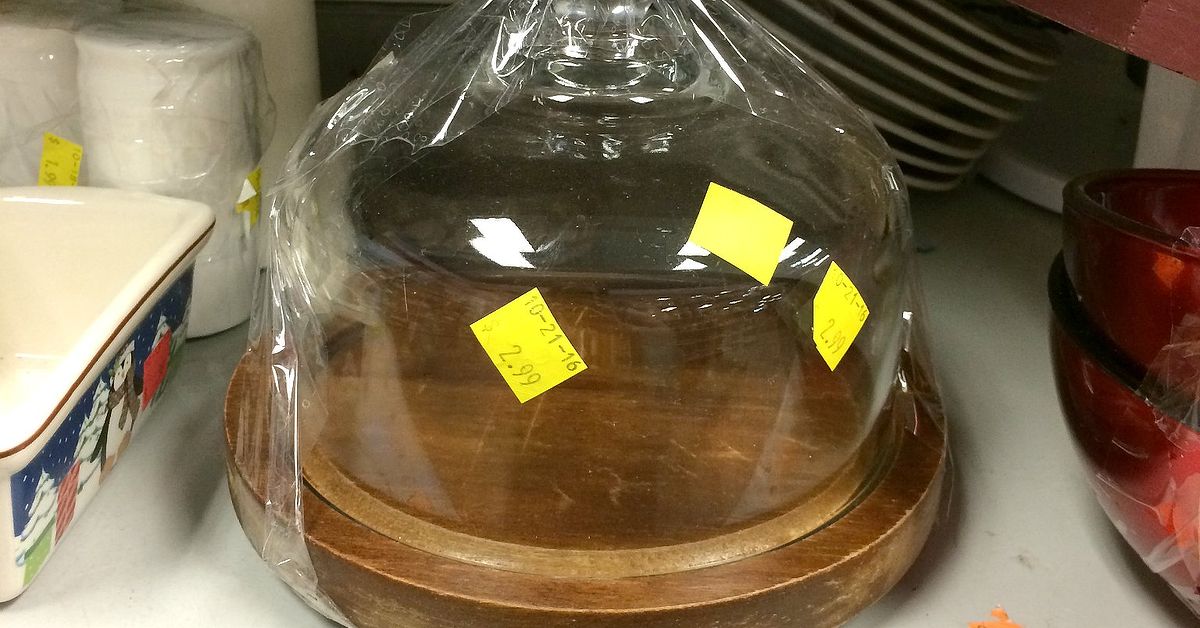
Some thrift-store finds arrive with a clear mission: a vintage vase wants flowers, a brass candlestick wants a in town. A thrifted cheese dome ice skating pond is one of those delightfully unnecessary projects that somehow becomes completely necessary the moment you see it on a mantel.
This miniature winter display turns a secondhand glass cheese dome, cloche, or covered serving dish into a charming frozen scene with skaters, trees, snow, and a little bit of make-believe. It is part holiday village, part snow globe, and part proof that a small mirror can have a much more glamorous career than reflecting your bathroom ceiling.
The best part is that this DIY winter decoration does not require expensive collectibles or a professional-level craft room. With a thrifted dome, a simple base, a reflective “ice” surface, and a few miniature accessories, you can create a cozy ice skating pond that looks wonderfully nostalgic, personal, and just polished enough to make visitors ask where you bought it.
Why a Thrifted Cheese Dome Makes the Perfect Miniature Ice Rink
A cheese dome already has the one feature miniature scenes love most: a transparent protective cover. The glass creates a little world-within-a-world effect, making the finished display feel more special than a collection of tiny trees sitting loose on a shelf. It also helps keep dust away from delicate details such as faux snow, miniature figurines, glitter, and bottle brush trees.
Unlike a standard snow globe, a cheese dome gives you room to build outward instead of upward. That means your miniature ice skating pond can include a curved skating path, a tiny bench, a snow-covered tree, a pair of skaters holding hands, or one dramatic little figure who appears to be falling with Olympic-level commitment.
Thrifted serving pieces also bring personality that new craft-store containers often lack. A brass-rimmed dome can make the project feel old-world and elegant. A plain glass dome with a wooden base works beautifully for a cottage-style winter scene. A slightly imperfect vintage base can add warmth and character, especially when paired with soft white snow and muted green trees.
What to Look for When Shopping for a Cheese Dome
Before you commit to a thrifted cheese dome, inspect it like a tiny real-estate agent evaluating waterfront property. You are looking for enough space to create a pond, enough height for small trees, and a base that feels stable on a mantel, table, or bookshelf.
Choose a Dome With Enough Interior Space
A dome that measures at least 8 to 12 inches across usually gives you enough room for a satisfying mini scene. Smaller domes can still work, but they are best for simple designs with one skater, one tree, and a compact pond. Larger domes allow room for a miniature village mood without forcing your figurines to stand shoulder-to-shoulder like they are waiting for concert tickets.
Inspect the Glass Carefully
Look for chips, cracks, deep scratches, and loose handles. Minor scuffs may not matter if the dome will stay decorative, but sharp or unstable glass is not worth the risk. Clean the dome thoroughly with warm water, mild dish soap, and a soft cloth. Let it dry completely before placing it over your finished scene.
Consider the Base
Wood, marble, metal, ceramic, and glass bases can all work. A removable base is easiest because you can build the pond directly on it. If your cheese dome has no base, use a round cake board, wood plaque, shallow tray, or thrifted plate that is slightly wider than the dome opening.
Supplies for a Thrifted Cheese Dome Ice Skating Pond
You can customize this project endlessly, but the basic supply list is pleasantly manageable:
- A thrifted cheese dome, cloche, or glass-covered serving dish
- A sturdy base, tray, plaque, plate, or cake stand
- A small round or oval mirror, mirrored coaster, silver cardstock, or reflective acrylic sheet
- Miniature skater figurines, dollhouse people, or tiny animal figures
- Bottle brush trees, faux greenery, preserved moss, or miniature pine trees
- White felt, cotton batting, faux snow, or textured white craft paste
- Hot glue, tacky glue, or double-sided mounting tape
- Small accessories such as benches, lanterns, signs, fences, or tiny gifts
- Optional battery-operated micro LED lights
For a more vintage look, use cream, silver, soft green, faded red, and natural wood tones. For a whimsical look, try pastel trees, tiny pink skates, glittery snowbanks, and a pond that looks as if it belongs in a candy-colored winter postcard.
How to Make a Cheese Dome Ice Skating Pond
1. Plan the Tiny Landscape Before Gluing
Place your mirror or reflective pond material on the base without attaching it. Arrange the trees, skaters, and accessories around it. Move everything until the composition looks balanced from the front and slightly above. The dome will magnify visual clutter, so give each piece a little breathing room.
Think in layers: the pond is the center, trees frame the scene, snow softens the edges, and tiny accessories create a story. A miniature bench beside the rink suggests someone is tying skates. A lamppost creates an evening-skate atmosphere. A tiny dog near the snowbank makes the whole project feel less like a display and more like a small neighborhood with very low property taxes.
2. Create the Frozen Pond Surface
A small mirror is one of the easiest ways to create realistic-looking ice. It reflects light, catches the movement of nearby candles or lamps, and gives the illusion of a pond that might be cold enough to make your nose regret its life choices.
For a softer or less reflective look, use silver cardstock under a sheet of clear acetate. You can lightly brush white paint around the edges to mimic frost. Another option is pale blue acrylic with a thin layer of clear gloss medium. Keep the pond smooth; real ice can be rough, but miniature ice should not look like a parking lot after a winter storm.
3. Build Snowbanks Around the Edges
Once the pond is positioned, create uneven snowbanks around the perimeter. Pull apart cotton batting or faux snow so it looks fluffy rather than packed into one solid marshmallow. White felt also works well for a clean, simple background, especially if you want the pond and figurines to stand out.
Glue the snow in small sections, leaving part of the pond open and visible. Slightly higher snowbanks toward the back add depth. A few tiny rocks, mossy patches, or miniature twigs can make the landscape feel more natural, but use restraint. This is an ice skating pond, not a tiny wilderness survival show.
4. Add Trees, Skaters, and Storytelling Details
Attach trees after the snowbanks are in place. Group trees in uneven clusters instead of lining them up like they are attending a forest staff meeting. Use different heights to create dimension, placing taller trees toward the back and smaller ones closer to the front.
Add your skaters last. Position them as if they are in motion: one near the center, one gliding toward the edge, and perhaps one assisting a smaller skater. You can use miniature people, tiny animals, or even painted wooden beads with wire arms if you enjoy making your own characters.
5. Finish With Sparkle and Gentle Light
A small amount of fine glitter can imitate snow sparkle, but moderation matters. You want “frosty morning,” not “craft-store tornado.” Add a little glitter to tree branches, snowbank edges, or the outer rim of the pond.
For evening charm, tuck a short strand of battery-operated micro LED lights behind the trees or around the base. Keep the battery pack accessible, and avoid open flames, real candles, or any lighting that creates heat near the dome. The goal is a peaceful winter scene, not a very small emergency.
Styling Ideas for Your Miniature Winter Pond
A thrifted cheese dome ice skating pond can be styled for nearly any seasonal décor theme. For a traditional Christmas village look, use dark green bottle brush trees, red scarves, tiny wrapped gifts, and a snow-covered bench. For a Scandinavian-inspired display, keep the palette neutral with white trees, light wood, pale gray skaters, and minimal sparkle.
For a vintage holiday vignette, pair the dome with old postcards, brass candlesticks, mercury glass ornaments, and a small stack of weathered books. A pastel version can sit beautifully in a child’s room or on a dessert table, using pale pink trees, mint-green benches, and tiny swans on the “ice.”
You can also make the display work after the holidays. Remove obvious Christmas details and turn it into a general winter wonderland with woodland animals, a small cabin, neutral snow, and evergreen trees. Winter deserves decorative representation beyond December; it has been carrying the dramatic weather department for centuries.
Common Mistakes to Avoid
The biggest mistake is overcrowding the dome. A miniature scene needs negative space just as much as a full-size room does. Avoid filling every inch with trees, glitter, signs, and accessories. A clear focal point makes the pond feel intentional instead of accidentally swept from the clearance aisle.
Another mistake is attaching everything permanently before testing the dome fit. Always place the dome over the scene before the glue dries. A tall tree, raised skater arm, or crooked lantern can quickly become the decorative equivalent of an airline baggage fee: unexpected and deeply annoying.
Finally, do not use water inside the display. Water can damage the base, loosen glue, cloud surfaces, and turn your pretty pond into a tiny science experiment. A reflective surface gives you the icy look without the puddle-related suspense.
Care and Storage Tips
Display the cheese dome pond away from direct sunlight, humid areas, and busy spots where it can be bumped. Dust the outside of the dome with a microfiber cloth. When storing it after winter, remove loose accessories if possible, wrap the dome in soft fabric or bubble wrap, and keep the scene in a sturdy box.
If you create the pond on a removable base, you can refresh it every season. Replace trees, swap skaters for woodland animals, add a tiny sleigh, or turn the mirror into a spring pond with miniature ducks. The thrifted cheese dome may have started life protecting cheese, but it has clearly been promoted to creative director.
The Experience of Making a Thrifted Cheese Dome Ice Skating Pond
Making a thrifted cheese dome ice skating pond feels different from buying a finished holiday decoration. It starts with the treasure-hunt part: walking through a thrift store aisle full of mismatched plates, old cake stands, cloudy glassware, and objects that may or may not have spent twenty years in someone’s dining-room cabinet. Then you spot it: a clear dome with a slightly old-fashioned shape, maybe a wooden base, maybe a brass knob, maybe a price tag that costs less than a seasonal coffee.
That first moment is oddly satisfying because the dome does not look like a winter pond yet. It looks like something designed to protect a wheel of brie from overly enthusiastic dinner guests. But once you imagine it filled with snow, tiny skaters, and miniature trees, the transformation becomes the fun. A cheese dome stops being an object with one obvious purpose and becomes a stage set.
The building process is also wonderfully low-pressure. There is no need for perfect measurements, architectural plans, or a degree in miniature engineering. You can move a tree five times. You can decide that the pond needs one more skater. You can add a tiny bench, remove it, and then put it back because apparently the tiny people need somewhere to sit after their imaginary skating lesson.
The most rewarding part usually happens when the glass dome goes on for the first time. Suddenly, the loose collection of materials becomes a finished scene. The clear cover softens the edges, reflects the room, and makes the little pond feel separate from everyday life. Even a simple mirror, cotton snow, and two figurines can look like a tiny winter story frozen in place.
There is also a sentimental side to this kind of DIY décor. A thrifted item carries a little mystery. You do not know whether it once appeared at holiday dinners, family brunches, or a very serious cheese-and-cracker gathering in 1987. By turning it into a handmade winter display, you give it another chapter instead of letting it sit forgotten on a shelf.
Once finished, the pond becomes more than a craft. It can be a centerpiece on a dining table, a conversation starter on a bookshelf, a cheerful accent near an entryway, or a small tradition you update every winter. Children may want to choose the skaters. Guests may lean closer to inspect the details. Someone will almost certainly ask whether the ice is real. That is your cue to smile mysteriously and say, “Only emotionally.”











