
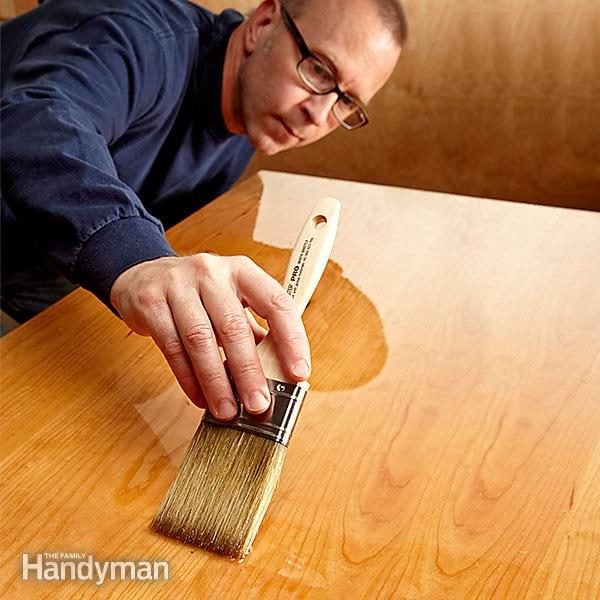
A tired tabletop can make an entire room look like it has given up and started wearing sweatpants to dinner. Scratches, cloudy rings, faded stain, sticky old varnish, mystery dents from “that one party,” and sun-bleached patches all have a way of making good furniture look ready for the curb. The good news? A solid wood tabletop can often be stained and refinished into something beautiful again with patience, the right supplies, and a healthy respect for sanding dust.
This guide walks you through how to refinish a table top from start to finish: cleaning, stripping, sanding, staining, sealing, curing, and avoiding the common mistakes that turn a weekend project into a dramatic home-improvement mini-series. Whether you are restoring a dining table, coffee table, desk, console, or side table, the process is similar: remove the old finish, prepare the wood evenly, apply stain carefully, and protect the surface with a durable topcoat.
Before you grab the sander like a superhero tool, remember this: the final result is won or lost during preparation. Stain does not hide sloppy sanding; it highlights it like a spotlight on a karaoke stage. Take your time, and your tabletop will reward you with depth, warmth, and that satisfying “I did that” glow.
Why Refinish a Table Top Instead of Replacing It?
Refinishing a table top is often more affordable and more rewarding than buying a new table. Many older tables are made from better-quality wood than modern flat-pack furniture, and a scratched surface does not mean the piece is ruined. If the table is structurally sound, refinishing can extend its life for years.
Refinishing also lets you customize the look. You can shift a dated orange-toned oak table toward a modern walnut brown, refresh a faded cherry finish, or go lighter and more natural if the wood allows it. A stained and refinished tabletop can fit your flooring, cabinets, wall color, or current decorating style without sending a perfectly useful piece to a landfill.
Before You Begin: Know What Kind of Table You Have
The first question is simple: is your tabletop solid wood, veneer, or laminate? Solid wood can usually handle deeper sanding. Veneer is a thin layer of real wood over a core material, so it must be sanded very gently. Laminate is not real wood and generally should not be stained like wood, although it can sometimes be painted with the correct primer.
How to Check for Solid Wood or Veneer
Look at the edge of the tabletop. If the grain pattern continues naturally from the top to the side, it may be solid wood. If you see a thin top layer or a repeating grain pattern, it may be veneer. Also check underneath the table. A very different material below the top can be a clue that you are working with veneer.
If you suspect veneer, proceed carefully. Aggressive sanding can burn through the thin wood layer and expose the substrate underneath. That is the furniture-refinishing equivalent of cutting your own bangs at midnight: technically possible, frequently regrettable.
Tools and Supplies You Will Need
A successful table top refinishing project does not require a professional shop, but it does require the right basics. Gather your supplies before you start so you are not running to the store with stain on your gloves and panic in your eyes.
- Drop cloths or plastic sheeting
- Painter’s tape
- Safety glasses, chemical-resistant gloves, and a respirator or dust mask
- Mild dish soap, mineral spirits, or a wood-safe cleaner
- Wood filler or grain filler if needed
- Chemical stripper for heavy old finishes, if required
- Plastic scraper or putty knife
- Orbital sander or sanding block
- Sandpaper in grits such as 80, 120, 150, 180, 220, and 320
- Tack cloth or microfiber cloth
- Pre-stain wood conditioner for blotch-prone woods
- Wood stain, gel stain, or dye stain
- Lint-free rags, foam brushes, or quality bristle brushes
- Polyurethane, polycrylic, varnish, hard wax oil, or another protective finish
- Stir sticks and disposable containers
Step 1: Set Up a Safe, Clean Workspace
Choose a well-ventilated area with good lighting and enough room to move around the table. A garage with the door open can work well, but avoid windy spaces where dust, leaves, and one ambitious mosquito can land in your wet finish. If you work indoors, protect the floor and nearby surfaces.
Safety matters. Wear eye protection and gloves, especially when using chemical stripper or oil-based products. If the table is old and painted, be cautious: furniture and homes built before 1978 may involve lead-based paint. Sanding or scraping lead paint can create hazardous dust. When in doubt, test first and follow lead-safe practices.
Step 2: Clean the Table Top Thoroughly
Do not sand dirt, grease, wax, and furniture polish into the wood. Start by cleaning the table top with mild soap and water or a suitable wood cleaner. For greasy buildup, mineral spirits can help remove residue. Let the surface dry completely before moving on.
This step may feel boring, but it is important. Old furniture can hold layers of kitchen oils, hand lotion, candle soot, and polish. If these residues remain, stain and finish may not penetrate or adhere evenly.
Step 3: Inspect and Repair Damage
Look closely at the tabletop. Are there dents, gouges, deep scratches, cracks, loose veneer, water rings, or burns? Small nail holes and dents can often be filled with stainable wood filler. Use a putty knife to apply filler slightly proud of the surface, let it dry, and sand it level.
For deep damage, decide whether you want an invisible repair or a character-rich restoration. Some dents are part of the table’s story. Others look like someone attacked it with a fork during a board game. Choose accordingly.
Step 4: Remove the Old Finish
If the existing finish is thin and you are using a compatible stain or topcoat, light sanding may be enough. But if the surface has thick varnish, peeling polyurethane, paint, lacquer, or a very dark old stain, you may need to strip the finish first.
Option A: Sanding
Sanding works well when the finish is already worn or when you are working with solid wood. Start with a coarser grit only if needed, such as 80 or 100 grit, then move through finer grits. Always sand with the grain when sanding by hand. With an orbital sander, keep it moving steadily and avoid pressing down hard.
Option B: Chemical Stripping
Chemical stripper can save time on thick finishes and detailed edges. Apply it according to the product label, let it soften the finish, and remove the loosened coating with a plastic scraper. Avoid metal scrapers that can gouge the wood. After stripping, clean the surface as directed by the product manufacturer and let the wood dry thoroughly.
Never rush this stage. If residue remains, it can interfere with stain and finish. Your tabletop should feel clean, dry, and free of old glossy patches before final sanding.
Step 5: Sand the Wood Smoothly and Evenly
Sanding is where the tabletop starts to transform. Begin with the least aggressive grit that removes the old finish and scratches. For many solid wood tops, 120 grit is a good middle-ground starting point after stripping. Then progress to 150, 180, and sometimes 220 grit.
Do not skip grits. Jumping from rough to fine paper can leave swirl marks and scratches that appear only after stain goes on, which is rude timing. Vacuum the dust between grits and wipe the surface clean.
How Smooth Is Too Smooth?
For most stain projects, sanding to 180 or 220 grit is enough. Sanding too finely can close the wood pores and reduce stain absorption. For the final protective topcoat, you can sand between coats with very fine grit, such as 320 or 400, depending on the finish instructions.
Step 6: Test the Stain First
Never judge stain color by the label on the can. Wood species, sanding grit, age, and previous finish all affect the final color. Test your stain on the underside of the table, a hidden leaf, or a scrap of similar wood.
Oak tends to show grain dramatically. Pine can turn blotchy without conditioner. Maple and birch can be stubborn and uneven. Walnut may need only a clear finish or a light color boost. Testing helps you avoid discovering that “warm chestnut” looks suspiciously like “orange camp cabin” on your particular table.
Step 7: Apply Pre-Stain Wood Conditioner When Needed
Softwoods and some hardwoods absorb stain unevenly. Pre-stain wood conditioner helps reduce blotching by evening out absorption. It is especially useful on pine, fir, birch, maple, and cherry.
Apply conditioner according to the label, let it penetrate, wipe off the excess, and stain within the recommended time window. Conditioner will not make every wood perfectly uniform, but it can dramatically improve the result.
Step 8: Apply the Wood Stain
Stir the stain thoroughly before use. Do not shake it like a protein drink unless you enjoy bubbles. Apply stain with a brush, foam applicator, or lint-free cloth. Work in manageable sections and keep a wet edge so the color blends evenly.
Let the stain penetrate for the amount of time recommended on the product label. A longer wait usually produces a darker color, but there is a limit. Wipe off all excess stain with a clean cloth, moving with the grain. Do not leave puddles or sticky areas on the surface.
Oil-Based Stain vs. Water-Based Stain vs. Gel Stain
Oil-based stains often provide rich color and longer working time. Water-based stains dry faster and usually have lower odor, but they can raise the grain, so extra sanding may be needed. Gel stains are thicker and can be easier to control, especially on vertical surfaces or blotch-prone woods.
For a table top, choose a stain that gives you the color you want and works with your planned topcoat. Always check compatibility between stain and finish. If the stain is not fully dry, the protective coat may not adhere properly.
Step 9: Let the Stain Dry Completely
Dry time depends on the product, wood type, humidity, temperature, and airflow. Do not rush it. If stain feels tacky, smells strongly, or wipes off on a cloth, it is not ready for topcoat.
Applying polyurethane over stain that has not dried fully can trap solvents and cause cloudiness, poor adhesion, or a gummy surface. Waiting is not glamorous, but neither is refinishing the same table twice.
Step 10: Seal the Table Top With a Protective Finish
A table top needs protection. Stain adds color, but the topcoat provides durability against water, heat, scratches, and daily use. For dining tables and desks, polyurethane is a popular choice because it creates a tough protective film. Water-based polyurethane dries clear and fast, while oil-based polyurethane adds warmth and amber tone.
Apply thin, even coats with the grain. Thick coats are tempting, but they can sag, bubble, or dry unevenly. Several thin coats usually look better and last longer than one heavy coat.
How Many Coats Should You Apply?
For a table top, plan on at least two coats of protective finish, and three coats is often better for surfaces that get regular use. Sand lightly between coats after the finish dries, then remove dust before applying the next coat. Follow the manufacturer’s directions for recoat windows and curing time.
Step 11: Let the Finish Cure Before Heavy Use
Dry and cured are not the same thing. A finish can feel dry to the touch but still be soft underneath. During curing, avoid placing heavy objects, hot dishes, placemats, vinyl covers, or decorative bowls on the table. Give the finish time to harden fully.
Use coasters and trivets once the table returns to service. Yes, even on your newly refinished masterpiece. Especially on your newly refinished masterpiece.
Common Table Top Refinishing Mistakes to Avoid
Skipping Surface Prep
Cleaning and sanding may not be exciting, but they are the foundation of the entire project. Stain will reveal sanding scratches, dust, and uneven patches.
Using the Wrong Sandpaper Sequence
Starting too coarse can damage veneer or create deep scratches. Ending too coarse can make stain absorb too heavily. Use a gradual grit progression for a smoother finish.
Not Wiping Off Excess Stain
Stain is not paint. It should penetrate the wood, then the excess should be wiped away. If left sitting on top, it can become sticky and uneven.
Applying Finish Too Thickly
Thick topcoats can create bubbles, ridges, drips, and cloudy spots. Thin coats give you more control and a cleaner final surface.
Ignoring Rag Safety
Oil-based stain and finish rags can generate heat as they dry and may ignite if piled together. Lay oily rags flat to dry outdoors or store them in a water-filled metal container according to safety guidance and product labels.
Best Finish Options for a Refinished Table Top
The best finish depends on how the table will be used. A decorative console table does not need the same protection as a kitchen table that hosts cereal bowls, laptops, homework, pizza boxes, and the occasional science experiment.
Polyurethane
Polyurethane is durable and widely available. Water-based polyurethane stays clearer and dries faster. Oil-based polyurethane adds amber warmth and can be very tough, but it has stronger odor and longer drying time.
Polycrylic
Polycrylic is water-based and works well when you want a clear finish, especially over lighter stains. It is commonly used on furniture, but always apply thin coats to reduce brush marks and bubbles.
Hard Wax Oil
Hard wax oil creates a natural, low-sheen finish that is popular for modern furniture. It is easier to spot-repair than some film finishes, though it may require more maintenance than polyurethane.
Lacquer or Shellac
Lacquer and shellac can look beautiful but may be less forgiving for beginners and may not offer the same everyday resistance as polyurethane on a hardworking dining table.
Experience-Based Tips for Staining and Refinishing a Table Top
After refinishing a few tabletops, you learn that the project is less about brute force and more about patience. The table always tells on you. If you rush sanding, the stain will expose it. If you forget to wipe dust from a corner, the finish will preserve that little dust bunny like a museum artifact. If you apply polyurethane too thickly, gravity will send you a reminder in the form of drips.
One useful habit is to divide the project into stages instead of trying to do everything in one heroic day. Day one can be cleaning, stripping, and rough sanding. Day two can be final sanding, conditioning, and staining. Day three can begin the topcoat process. This schedule keeps fatigue from ruining the finish. Most mistakes happen when you are tired and whispering, “Just one more coat,” even though the room is dusty and your hand is cramping.
Lighting is another secret weapon. A tabletop can look smooth from one angle and reveal scratches from another. Use a bright work light held low across the surface. This raking light shows swirl marks, glue residue, dents, and missed finish. It may feel a little dramatic, like interrogating your table, but it works.
When sanding, mark the surface lightly with pencil lines before each grit. Sand until the pencil marks disappear. This helps you sand evenly and prevents random low-effort areas. Be gentle on edges, because sanders remove finish faster there. Rounded edges can become uneven quickly, especially on veneer.
For stain color, sneak up on the final look. A second coat may deepen the color, but it can also muddy the grain if the wood is not absorbing much. If the first test looks too light, try a longer penetration time on a sample before committing to the whole tabletop. If it looks too dark, wipe sooner or choose a lighter stain. The test board is where chaos belongs.
Use clean cloths generously. A rag loaded with old stain can smear pigment back onto the surface and create uneven color. Keep a few fresh lint-free rags nearby and switch often. Also, stir stain regularly during the project because pigment settles at the bottom of the can.
For the final finish, think thin, clean, and calm. Pour a small amount into a separate container instead of dipping directly into the can. This keeps dust and dried finish bits out of your main supply. Brush with long strokes in the direction of the grain, then leave it alone. Overbrushing is a classic beginner mistake. Once the finish starts setting, continued brushing can create streaks and texture.
Finally, protect the cured table like you actually like it. Use coasters, placemats, and trivets. Wipe spills quickly. Avoid harsh cleaners. A refinished table top is durable, not invincible. Treat it well, and it can survive family dinners, coffee cups, laptops, craft projects, and many future conversations.
Conclusion
Staining and refinishing a table top is one of the most satisfying DIY furniture projects because the transformation is visible, practical, and often dramatic. The key is to respect the process: identify the wood, clean thoroughly, repair damage, remove the old finish, sand evenly, test your stain, apply thin coats, and seal the surface with a durable protective finish.
A beautiful tabletop does not happen because you found a magic stain color. It happens because each step supports the next. Prep creates even absorption. Stain adds depth. Finish adds protection. Curing adds durability. Put them together, and that scratched, dull, slightly embarrassing table can become the centerpiece of the room again.
Note: Always follow the safety instructions and drying times printed on the stain, stripper, and finish products you use. If you suspect lead-based paint or an unsafe old coating, test before sanding or hire a qualified professional.











