
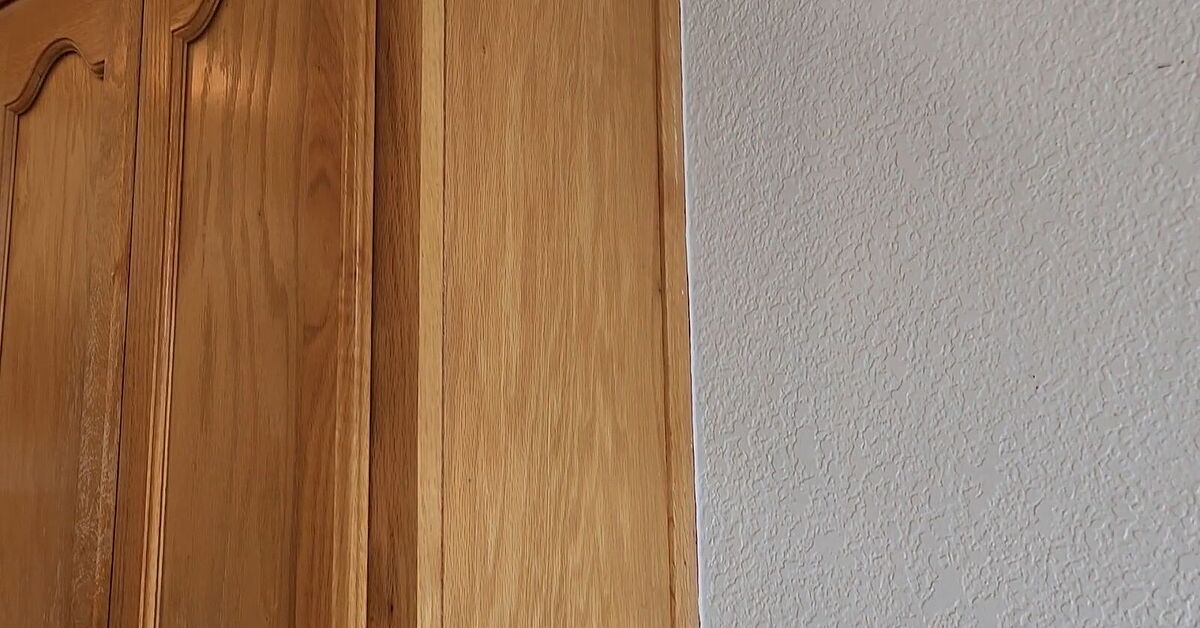
If your kitchen counter is currently hosting a family reunion of spatulas, cookbooks, measuring spoons, and that one whisk nobody remembers buying, welcome. Small kitchen clutter has a way of multiplying when your back is turned. One day you have a cute ceramic utensil crock; the next day it looks like a porcupine fell into a drawer.
The good news? You may already own a surprisingly useful piece of storage real estate: the side of a kitchen cabinet. That blank cabinet panel near the stove, prep counter, island, pantry, or coffee station can become a slim, practical, good-looking organizer for cookbooks, cutting boards, measuring spoons, towels, and frequently used utensils. This DIY side of cabinet storage project is inexpensive, beginner-friendly, and perfect for renters or homeowners who want more function without tearing apart the kitchen.
In this guide, you will learn how to build a simple cookbook and utensil holder using basic materials, smart measurements, and a few design tricks that make the finished project feel custom instead of “I built this during a snack-fueled craft emergency.”
Why Side of Cabinet Storage Works So Well
Kitchen storage is not only about having more cabinets. It is about using the right spot for the right item. A cookbook you use every week should not live behind the holiday turkey platter. A wooden spoon you grab every time you sauté onions should not be buried in a drawer under six mystery gadgets.
Side of cabinet storage solves three common kitchen problems at once: it clears the counter, uses vertical space, and keeps daily tools within arm’s reach. The side panel of a cabinet is often ignored because it is narrow and plain. But that is exactly what makes it useful. It is visible, accessible, and usually close to a work zone.
This kind of vertical kitchen storage is especially helpful in apartments, galley kitchens, older homes, and compact layouts where every inch has a job. Instead of adding another freestanding cart or crowding a drawer, you attach a shallow rack directly to the cabinet side. It stays out of the walkway, looks tidy, and can be customized to match your kitchen style.
Best Places to Install a Cabinet Side Cookbook and Utensil Holder
Before grabbing a drill, look around your kitchen and think like a person making pasta while slightly hungry. Where do your hands naturally go? Where do you read recipes? Where do utensils pile up?
Near the Stove
The cabinet side closest to the stove is ideal for wooden spoons, spatulas, tongs, a small towel, and one or two favorite cookbooks. Keep safety in mind: do not place paper recipe cards, towels, or hanging tools so close to a burner that they can swing toward heat.
Beside a Prep Counter
If you chop vegetables, mix batters, or assemble lunches in one main area, install the organizer there. Add a slim cookbook ledge, hooks for measuring spoons, and a small rail for a tea towel.
On the End of a Kitchen Island
The side of an island is prime storage territory. It is usually easy to reach and often wide enough for a cookbook pocket, wire basket, or peg rail. This option works beautifully if you bake often and want measuring tools close by.
Near a Pantry or Coffee Station
A cabinet side near the pantry can hold meal-planning notebooks, recipe binders, or grocery lists. Near a coffee station, it can hold mugs, scoops, filters, and a tiny basket for tea bags. Yes, your cabinet can become a tiny kitchen assistant. Sadly, it will not do dishes.
DIY Design Options: Choose Your Storage Style
There are several ways to build side of cabinet storage. The best version depends on what you need to store, how much weight the cabinet can support, and whether you want a permanent or removable solution.
Option 1: A Slim Cookbook Ledge
This is the simplest version. A narrow wood shelf with a small front lip keeps cookbooks, recipe binders, or a tablet stand upright. It works best for one to four slim books, not an entire library of soup encyclopedias.
Option 2: A Wall File or Magazine Holder
A metal wall file, wood magazine rack, or acrylic holder can be attached to the cabinet side for cookbooks and cutting boards. This is a great shortcut if you prefer a semi-DIY project. Paint or stain it to match the cabinets, and suddenly it looks intentional.
Option 3: A Rail and Hook System
A small rail with S-hooks can hold utensils, measuring cups, oven mitts, and towels. This is flexible because hooks can move as your cooking habits change. It is also excellent for people who own seven spatulas but insist each one has a unique personality.
Option 4: A Combo Cookbook and Utensil Holder
This is the most useful setup for many kitchens: a lower pocket or ledge for cookbooks and an upper rail or hook strip for utensils. It turns one plain cabinet panel into a compact command center.
Materials and Tools You Will Need
For a sturdy, attractive DIY cabinet side organizer, gather the following supplies. Adjust measurements based on your cabinet width and the items you want to store.
Materials
- One 1×4 wood board for the cookbook shelf back or base
- One 1×2 wood strip for the front lip
- One small wood dowel, metal rail, or hook strip for utensils
- Wood screws, usually 3/4-inch to 1-inch depending on cabinet thickness
- Wood glue
- Fine-grit sandpaper
- Paint, stain, or clear sealant
- Optional: adhesive felt pads to protect cabinet finish
- Optional: cup hooks, S-hooks, label holders, or a small wire basket
Tools
- Tape measure
- Pencil
- Level
- Drill
- Small drill bit for pilot holes
- Screwdriver
- Saw or miter box, if cutting wood yourself
- Painter’s tape
If you do not own a saw, ask your local home improvement store to cut the boards to size. That one tiny decision can turn this from a “weekend project” into an “after-lunch victory lap.”
Step-by-Step: How to DIY a Side of Cabinet Cookbook and Utensil Holder
Step 1: Measure the Cabinet Side
Measure the height and width of the cabinet side panel. Leave at least one inch of space from the cabinet edges so the organizer does not look crowded. Also check nearby drawers, appliance doors, and walkways. Open everything fully before choosing your placement. A rack that blocks the dishwasher is not storage; it is a daily argument.
Step 2: Decide What You Want to Store
Make a quick list of the items you want on the holder. For example: two cookbooks, one recipe binder, three wooden spoons, a spatula, measuring spoons, and a dish towel. This helps determine the depth and weight of the organizer.
For cookbooks, a shelf depth of about 3 to 4 inches usually works well. For utensils, a rail or hooks should sit high enough that tools hang freely without hitting the shelf below.
Step 3: Cut and Sand the Wood
Cut your main board to fit the cabinet side. A common size is 12 to 18 inches wide for the shelf area, but smaller cabinets may need a slimmer design. Sand all edges until smooth. Pay special attention to the front lip because your hands will touch it often.
Step 4: Build the Cookbook Ledge
Attach the 1×2 strip to the front bottom edge of the shelf board using wood glue and small screws or brad nails. This strip acts as a lip to keep books from sliding off. If you want a more polished look, slightly round the corners with sandpaper.
For a magazine-rack style holder, use two side supports and a front rail instead of a solid shelf. This gives the piece a lighter look and makes it easy to see book spines.
Step 5: Add the Utensil Rail or Hooks
Install a small rail, peg strip, or row of cup hooks above the cookbook ledge. Keep the spacing wide enough that utensils do not tangle. A good rule is to leave about two inches between hooks for slim tools and three inches for bulkier items like tongs or ladles.
If you use a metal rail, choose one that fits the cabinet finish. Matte black looks modern, brass feels warm, stainless steel blends with appliances, and wood feels cozy and farmhouse-friendly.
Step 6: Paint, Stain, or Seal
Finish the organizer before mounting it. Paint it the same color as your cabinets for a built-in look, stain it to match wood tones, or choose a contrasting accent color for personality. Seal raw wood with a clear protective finish, especially in kitchens where steam, splatters, and enthusiastic sauce stirring are part of life.
Step 7: Mark the Placement
Hold the organizer against the cabinet side and use a level to make sure it is straight. Mark screw locations with a pencil. Painter’s tape can help protect the finish and make marks easier to see.
Step 8: Drill Pilot Holes
Drill small pilot holes before adding screws. Pilot holes help prevent splitting and make it easier to drive screws cleanly, especially near the edge of wood or through cabinet materials like MDF or plywood.
Be careful with screw length. Many cabinet side panels are not very thick. You want screws long enough to hold the organizer securely but not so long that they poke through the inside of the cabinet like tiny metal jump scares.
Step 9: Attach the Organizer
Drive screws slowly and check that the rack stays level. If the organizer will hold heavier cookbooks, use at least four attachment points. For lighter tools, two to three screws may be enough, depending on the rack size and cabinet material.
Step 10: Load It Thoughtfully
Add items gradually. Start with one or two cookbooks, then hang utensils. Step back and check the balance. The finished holder should look useful, not overloaded. A side cabinet organizer is a storage solution, not a kitchen piñata.
Smart Storage Ideas for Your Finished Cabinet Side Holder
Once the basic holder is installed, you can customize it for your cooking routine. Small upgrades can make it even more practical.
Add a Recipe Card Clip
Attach a small binder clip, metal clip, or magnetic strip to hold printed recipes. This keeps paper off the counter and away from olive oil splashes.
Include a Measuring Conversion Chart
Paint the inside of the cookbook ledge or add a small laminated card with common conversions. Tablespoons to cups, ounces to grams, and oven temperatures are helpful when your brain forgets math halfway through banana bread.
Use Labels for Family-Friendly Organization
If several people use the kitchen, add small labels such as “baking,” “grilling,” or “weeknight dinners.” Labels prevent the organizer from becoming another clutter zone.
Add a Small Basket
A wire basket can hold measuring spoons, kitchen scissors, pens, sticky notes, or a grocery list pad. Keep it shallow so it does not stick out too far from the cabinet.
Try Removable Hooks for a Flexible Setup
If you rent or are nervous about drilling, use high-quality removable hooks for lightweight utensils. Avoid hanging heavy cookbooks from adhesive-only organizers unless the product is rated for the weight and your cabinet surface is clean and smooth.
Design Tips So It Looks Built-In, Not Bolted-On
A DIY organizer can look polished with a few simple design choices. First, match the width to another kitchen element, such as the cabinet door, drawer front, or nearby shelf. Repeating lines makes the project feel intentional.
Second, choose finishes already present in the room. If your faucet and cabinet pulls are black, use black hooks. If your kitchen has warm wood cutting boards, stain the shelf in a similar tone. If your cabinets are white, painting the organizer white creates a clean, quiet look.
Third, leave breathing room. The temptation is to hang every utensil you own. Resist. Display the tools you use often and store duplicates elsewhere. Visual clutter still counts as clutter, even if it is technically vertical.
Safety and Weight Considerations
Side cabinet storage is convenient, but it should be secure. Cookbooks can be surprisingly heavy, especially the big hardcover ones that look like they contain both recipes and family secrets. Before installing, check that the cabinet side is strong and stable.
Use short screws for thin cabinet panels, and avoid drilling into areas where hardware, shelves, or internal wiring may be present. If the cabinet side feels flimsy, mount a lightweight rail for utensils instead of a heavy book rack. For rental kitchens, consider a removable over-cabinet organizer, adhesive hooks, or a freestanding rack placed against the cabinet side.
Also think about traffic flow. Do not install anything sharp, bulky, or low enough to bump hips, knees, or curious pets. A good organizer should make the kitchen easier to use, not turn breakfast into an obstacle course.
Budget-Friendly Variations
You do not need expensive materials to make a useful cabinet side organizer. Here are a few affordable variations:
Use a Wooden Spice Rack
A narrow spice rack can double as a cookbook or recipe holder. Mount it sideways or stack two small racks for extra storage.
Repurpose a Magazine File
A wall-mounted magazine file is perfect for slim cookbooks, meal-planning notebooks, or cutting boards. Paint it to match your cabinets for a custom feel.
Install a Towel Bar with Hooks
A small towel bar plus S-hooks creates instant utensil storage. This option is sleek, affordable, and easy to update.
Use Pegboard
A small framed pegboard on the cabinet side is flexible and charming. Move hooks whenever your storage needs change. It is also a good choice for bakers because measuring cups, pastry brushes, and spatulas can hang together.
Common Mistakes to Avoid
The first mistake is making the holder too deep. Anything sticking out more than a few inches can feel awkward in a tight kitchen. Keep the profile slim unless the cabinet side is in a low-traffic area.
The second mistake is skipping pilot holes. It may seem like an extra step, but it helps protect the cabinet and makes installation cleaner.
The third mistake is storing too many heavy items. A side cabinet holder is best for everyday essentials, not every cookbook you have owned since college.
The fourth mistake is ignoring style. This project is functional, but it is also visible. A little paint, stain, or matching hardware makes a big difference.
Real-Life Experience: What This DIY Project Teaches You
The beauty of side of cabinet storage is that it solves a problem you may not notice until you fix it. Many kitchens have one awkward zone where things gather: a cookbook left open beside the sink, a wooden spoon rolling under the toaster, a dish towel thrown over a drawer pull, or measuring spoons disappearing into what can only be described as the Drawer of No Return.
After installing a side cabinet cookbook and utensil holder, the kitchen often feels calmer almost immediately. Not bigger, exactly, but smarter. The counter has room to breathe. The tools you use most often are visible. Recipe books stop being stacked under mail, sunglasses, and random batteries. It is a small project, but it changes the rhythm of cooking.
One useful lesson is that storage should follow habits, not fantasy. It is tempting to design the organizer for the person you imagine yourself becoming: someone who alphabetizes recipes, owns matching linen towels, and calmly says things like “I’ll just whip up a galette.” But the best organizer supports the cook you actually are. If you make tacos twice a week, keep the taco-night utensils nearby. If you bake every Sunday, hang measuring spoons and a pastry brush. If your favorite cookbook is splattered with tomato sauce and emotional history, give it the front-row seat.
This project also teaches restraint. The side of a cabinet is useful because it is limited. You cannot shove an entire pantry onto it, and that is a gift. The small footprint forces you to choose your real favorites. Two cookbooks. A few tools. One towel. Maybe a notepad. That is enough. In fact, “enough” is the secret ingredient in most good organization projects.
Another experience worth mentioning: the first placement idea is not always the best one. Many DIYers initially want the holder beside the stove, then realize the area gets too warm or crowded. Others plan to place it on an island end, then discover it interferes with seating. Before drilling, tape a cardboard mock-up to the cabinet side and live with it for a day. Walk past it. Open drawers. Pretend to cook. This tiny test can save you from installing a beautiful organizer exactly where your elbow wants to be.
Finally, there is the satisfaction factor. This is not a complicated remodel. It does not require demolition, permits, or a mysterious contractor named Dave. It is a practical weekend project that gives you a visible win. Every time you grab a spatula without digging through a drawer, the organizer quietly says, “See? We are adults now.” And honestly, in the kitchen, that kind of encouragement counts.
Conclusion
Side of cabinet storage is one of the easiest ways to make a kitchen work harder without making it feel crowded. With a few boards, hooks, screws, and a thoughtful layout, you can create a DIY cookbook and utensil holder that clears counter space, keeps tools handy, and adds personality to an overlooked surface.
The key is to build for your real cooking routine. Keep it shallow, secure, and simple. Choose materials that match your kitchen, drill carefully, and load the organizer with the items you reach for most. Whether you are working with a tiny apartment kitchen or simply trying to tame countertop chaos, this project turns blank cabinet space into everyday convenience.
And if your whisk still refuses to behave, at least now it has a designated place to live.












