
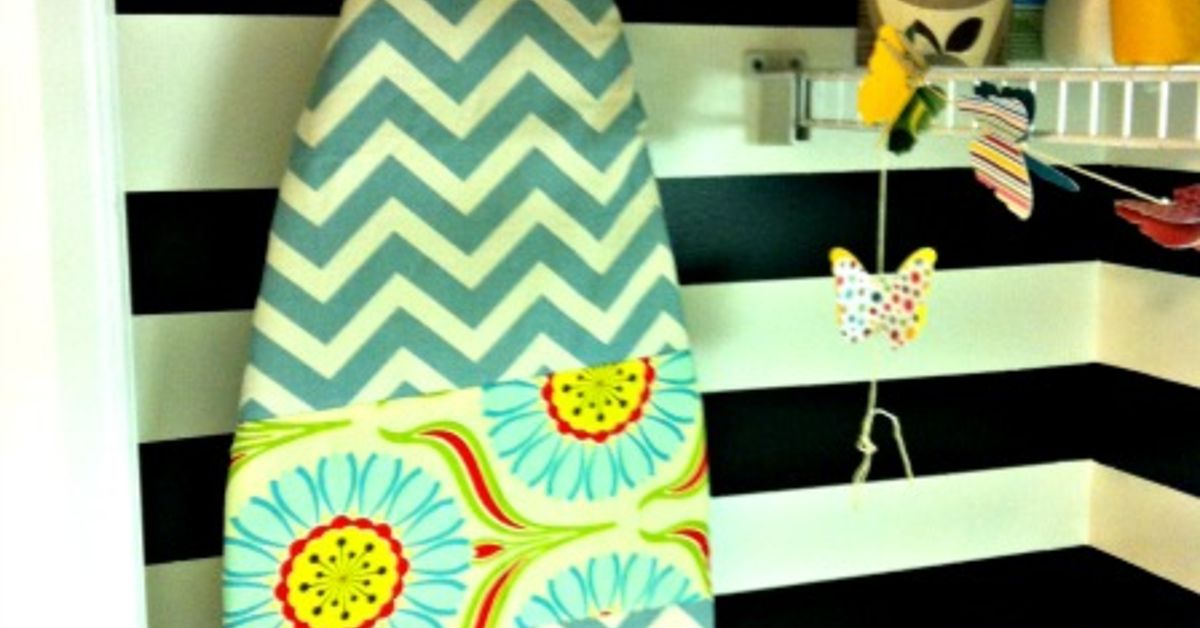
An ironing board may be a household workhorse, but that does not mean it has to look like it recently lost a wrestling match with a steam iron. With cotton scraps, fresh padding, and a simple drawstring casing, you can transform a stained or sagging cover into a colorful, practical pressing surface.
This scrap fabric ironing board makeover is an approachable sewing project for confident beginners. It reduces textile waste, costs very little, and creates a custom cover that fits your board instead of shifting around whenever you press a shirt sleeve. Better still, those oddly shaped remnants you have been “saving for something” finally get an actual job.
Why Make an Ironing Board Cover From Fabric Scraps?
Commercial ironing board covers are convenient, but their fit, padding, and fabric quality can vary. A homemade cover lets you control all three. You can customize the dimensions, replace compressed padding, and choose colors that make your laundry room or sewing space feel more inviting.
A patchwork ironing board cover is also an excellent scrap-busting project. Small pieces left from quilts, curtains, aprons, and other sewing projects can be joined into one functional panel. Unlike a decorative quilt, this project does not require flawless points or a museum-worthy color scheme. The iron will not complain if two stripes meet at an unconventional angle.
The makeover can improve performance as well as appearance. A smooth, tightly fitted cover provides a more stable surface for pressing seams and removing wrinkles. New cotton batting restores cushioning, while a drawstring or elasticized edge helps prevent the cover from sliding.
Choose Safe, Practical Materials
Use Woven Cotton for the Top
For the working surface, tightly woven 100% cotton is the most dependable choice. Quilting cotton, cotton percale, muslin, and lightweight cotton canvas tolerate regular pressing temperatures and are easy to sew. They also allow steam to move through the surface more effectively than heavily coated materials.
Avoid mystery fabrics unless you test them first. Scraps containing polyester, nylon, vinyl, metallic decorations, rubberized coatings, or heat-sensitive adhesive may scorch, melt, become shiny, or transfer residue to the iron. Stretch knits are another poor choice because they can distort and create ripples.
Select pieces with relatively smooth surfaces. Chunky embroidery, thick seams, beads, sequins, and textured upholstery fabrics can leave impressions on clothing. Save the sequins for a project that is less likely to meet a 400-degree soleplate.
Select the Right Padding
The padding should be resilient without making the board feel like a mattress. One or two layers of 100% cotton batting work well for most standard ironing boards. Needle-punched cotton batting is especially useful because it is stable, relatively dense, and less likely to shift.
A heat-resistant batting designed for potholders or pressing surfaces can be added beneath the cotton layer. Follow the manufacturer’s directions regarding placement because reflective products may have a recommended orientation. Do not substitute polyester quilt batting, foam, fleece, or an unknown synthetic blanket. Excess heat can flatten, distort, or damage those materials.
Gather Your Supplies
- Prewashed, tightly woven cotton scraps
- One or two layers of 100% cotton batting
- Heat-resistant batting, if desired
- Coordinating cotton or polyester sewing thread
- Cotton twill tape, braided cord, or narrow elastic
- Safety pin or bodkin for threading the casing
- Sewing machine and a fresh universal needle
- Fabric scissors or a rotary cutter and mat
- Measuring tape, ruler, pins, or sewing clips
- Washable fabric marker or tailor’s chalk
- Your old ironing board cover or pattern paper
Plan a Patchwork Surface That Works
Before sewing, sort the scraps by fiber content and weight. Mixing ordinary quilting cottons is easy, but combining gauze, denim, flannel, and lightweight lawn can produce an uneven pressing surface. Keep the pieces similar in thickness so the finished cover remains smooth.
Prewash the scraps if they have not already been washed. Cotton can shrink, and a cover that fits beautifully on Tuesday should not become dollhouse-sized after its first cleaning. Skip fabric softener, which can leave residue, and press the scraps flat before cutting.
Arrange the pieces using one of these beginner-friendly layouts:
- Simple strips: Join strips of different widths into a long panel. This is fast, forgiving, and ideal for narrow leftovers.
- Large rectangles: Sew remnants into rows using pieces at least 4 inches wide. Fewer seams create a smoother surface.
- Color gradient: Move from light to dark scraps for an organized look without requiring matching prints.
- Controlled scrappy: Limit the palette to three or four colors while mixing many patterns.
Use a consistent 1/4-inch seam allowance and press every seam open. Open seams distribute bulk more evenly than seams pressed to one side. Avoid placing a dense intersection of four or more seams in the center of the board, where most pressing occurs.
When the patchwork panel is larger than the ironing board plus its required overhang, give it a final press and inspect it with your hand. If you can feel a bulky ridge, your freshly ironed shirt may feel it too.
How to Complete the Scrap Fabric Ironing Board Makeover
Step 1: Remove and Inspect the Old Cover
Unplug the iron, let the board cool completely, and remove the existing cover and pad. Examine the metal top for rust, sharp edges, bent sections, or loose hardware. Light surface dust can be wiped away, but significant corrosion or structural damage should be repaired before the board is used again.
If the old cover fits well, preserve it as a pattern. Carefully remove its drawstring or elastic, flatten the fabric, and label the nose and heel. Reusing serviceable cord or hardware is perfectly reasonable, although brittle elastic should be replaced.
Step 2: Make a Custom Pattern
If the old cover is too distorted to trace, place the board upside down on pattern paper or directly on the wrong side of the patchwork panel. Trace the perimeter without marking the board itself.
Add approximately 2 to 3 inches around the entire outline. This extra fabric wraps beneath the frame and forms the casing. A thicker board or deep edge may require a little more. Measure rather than relying on a standard pattern because ironing boards have a surprising number of shapes for an object whose main qualification is “flat.”
Step 3: Cut the Cover and Padding
Cut the patchwork panel along the enlarged outline. Before cutting the batting, inspect your board. Padding generally needs to cover the entire metal pressing surface without creating a bulky bundle underneath.
For a clean fit, trace the exact top of the board onto the cotton batting and trim it to that shape. If the existing pad remains smooth, clean, and odor-free, it may be retained beneath one new layer. Replace padding that is scorched, compressed, lumpy, or stained.
Step 4: Stabilize the Patchwork
Finish the raw perimeter with a zigzag stitch or serger if the cotton frays easily. Staystitching around the edge also prevents the patchwork seams from opening while you construct the casing.
Do not add ordinary fusible interfacing beneath the pressing area. Repeated heat and steam may weaken its adhesive or cause it to transfer. The patchwork should gain stability from sound seams, closely matched fabric weights, and suitable batting.
Step 5: Sew a Drawstring Casing
A drawstring casing is adjustable, washable, and easy to repair. Turn the raw edge to the wrong side by about 1/4 inch and press. Turn it again by 3/4 inch to 1 inch, depending on the thickness of the cord. Curved areas may need small pleats or gathering stitches to help the fabric lie neatly.
Sew close to the inner folded edge, leaving an opening of approximately 2 inches near the wide end of the cover. Reinforce both sides of the opening with backstitching. Thread cotton twill tape or braided cord through the casing using a safety pin or bodkin.
If you prefer elastic, thread narrow elastic through the same channel. Elastic provides a tidy, quick fit, while a drawstring offers more control and is easier to tighten as the fabric relaxes over time.
Step 6: Install the Padding and Cover
Center the batting on the board and smooth it from the middle outward. Place the fabric cover over it with the pointed nose properly aligned. Pull the drawstring gradually, alternating between the two sides so the gathers are evenly distributed beneath the board.
Tighten the cover until the upper surface is smooth and secure, but do not pull so hard that the patchwork distorts. Tie a firm bow or use a cord lock rated for the application. Tuck long cord ends safely beneath the board, away from hinges and the hot iron.
Check underneath before folding the legs. The fabric, batting, and cord must not interfere with the height mechanism, leg joints, iron rest, or ventilation openings.
Step 7: Test the Finished Surface
Start with the iron on a moderate setting and press a clean cotton cloth rather than a favorite garment. Test several areas, especially the patchwork seams. Watch for dye transfer, odors, puckering, scorch marks, or adhesive residue.
Increase the temperature only after the cover passes the first test. If a scrap releases color or develops an unusual smell, stop using the cover and replace the questionable section. A successful DIY ironing board cover should stay flat, remain stable, and release steam without becoming soggy.
Common Mistakes to Avoid
Using Scraps Based on Color Alone
A beautiful print is not automatically suitable for high heat. Confirm the fiber content and test uncertain fabric with a hot iron beneath a protective cloth. Dark or heavily saturated prints should also be checked for color transfer.
Creating Too Many Bulky Seams
Tiny patchwork looks charming, but dozens of seam intersections can make the surface bumpy. Use medium or large scraps in the central work area and save smaller pieces for the perimeter, where clothing is pressed less frequently.
Making the Cover Too Loose
A loose cover wrinkles beneath clothing and may shift during pressing. If the top develops ripples, tighten the drawstring, redistribute the gathers, or add elastic straps beneath the board.
Adding Excessive Padding
More cushioning is not always better. Thick, soft padding can make it difficult to create sharp seams and crisp creases. Begin with one dense cotton layer and add a second only if the board’s metal mesh remains noticeable.
Ignoring the Frame
A stylish cover cannot make unstable legs safe. Tighten loose hardware when appropriate, verify that the board locks securely, and replace any unit with serious structural damage.
Care and Maintenance
Let the board and cover dry completely after heavy steam use before folding them for storage. Trapped moisture can cause odors, mildew, or corrosion. Store the board away from damp floors and keep the cover clear of hot soleplates.
Follow the care needs of the fabric and padding when cleaning. A removable cotton cover can often be hand-washed or machine-washed gently, but heat-resistant inserts may have different instructions. Remove the drawstring if it may tangle, use mild detergent, and avoid high dryer heat. Refit the cover while slightly damp only if all materials permit it, then allow it to dry fully.
Replace the cover when it becomes scorched, permanently stained, excessively thin, or rough. Small cosmetic marks are normal; brittle fabric and exposed padding are not.
What I Learned From a Scrap Fabric Ironing Board Makeover
The most useful lesson from making a patchwork ironing board cover is that practicality should guide the design. My first instinct was to use every tiny scrap in the bin. That produced a cheerful panel, but it also produced enough seam intersections to resemble a relief map. Replacing the busiest central section with larger cotton rectangles created a noticeably smoother pressing surface.
Sorting the scraps before sewing saved more time than expected. I separated tightly woven cotton from stretchy, fuzzy, embellished, and unidentified materials. One shiny scrap looked harmless but curled when tested beneath a pressing cloth. It was probably synthetic, and discovering that before it became part of the cover prevented a messy meeting between plastic fibers and a hot iron.
I also learned not to trust the old cover as a perfect pattern. Years of use had stretched its wide end while heat had tightened the fabric near the nose. Tracing the metal board and adding a consistent 2 1/2-inch allowance produced a better fit. The old cover was still helpful for identifying how much fabric needed to wrap around the frame, but the board itself supplied the reliable dimensions.
For the patchwork, strips between 3 and 6 inches wide offered the best balance. They were large enough to minimize bulk yet small enough to use genuine leftovers. I arranged them in loose color families rather than forcing every print to match. Warm reds and oranges occupied one end, cool blues and greens the other, and a few neutral pieces kept the result from looking like a fabric store had sneezed.
Pressing each seam open was tedious but worthwhile. The finished panel lay flatter, and no seam allowance formed a noticeable ridge. I shortened several bulky intersections by trimming excess thread and grading overlapping allowances. That small bit of housekeeping improved the final surface more than decorative topstitching would have.
The padding required experimentation too. Two lofty layers initially felt luxurious, but they made precise seam pressing frustrating. One dense cotton batting layer over the board’s usable original pad proved firmer and more responsive. The ideal surface had enough cushioning to hide the metal mesh without swallowing the pressure from the iron.
A drawstring was more forgiving than permanently stitched elastic. It allowed the cover to be removed, adjusted, and tightened after the first few uses. I threaded cotton twill tape through a generous casing and added a cord lock beneath the broad end. The cover stayed stable, and the cord remained far from the board’s folding mechanism.
The final testing step was indispensable. I used a damp white cotton towel at medium heat, then increased the temperature gradually. The white towel made dye transfer easy to spot, while the steam revealed whether the padding trapped too much moisture. Everything remained clean, smooth, and odor-free, so the board was ready for normal use.
The makeover did not magically make a basket of wrinkled laundry thrilling. It did, however, turn an unattractive tool into something sturdy, personal, and enjoyable to use. It also cleared a respectable portion of the scrap bin. In sewing-room mathematics, gaining a useful ironing board cover and reclaiming storage space counts as being productive twice.
A Fresh Start for an Overworked Board
A scrap fabric ironing board makeover combines sensible maintenance with creative reuse. By choosing heat-appropriate woven cotton, limiting bulky seams, installing suitable padding, and securing the cover with an adjustable casing, you can create a durable pressing surface tailored to your exact board.
The project is inexpensive, beginner-friendly, and flexible enough to suit nearly any décor. More importantly, it gives forgotten fabric remnants a useful second life. Your ironing pile may not shrink on its own, but at least the board underneath it can look spectacular.












