
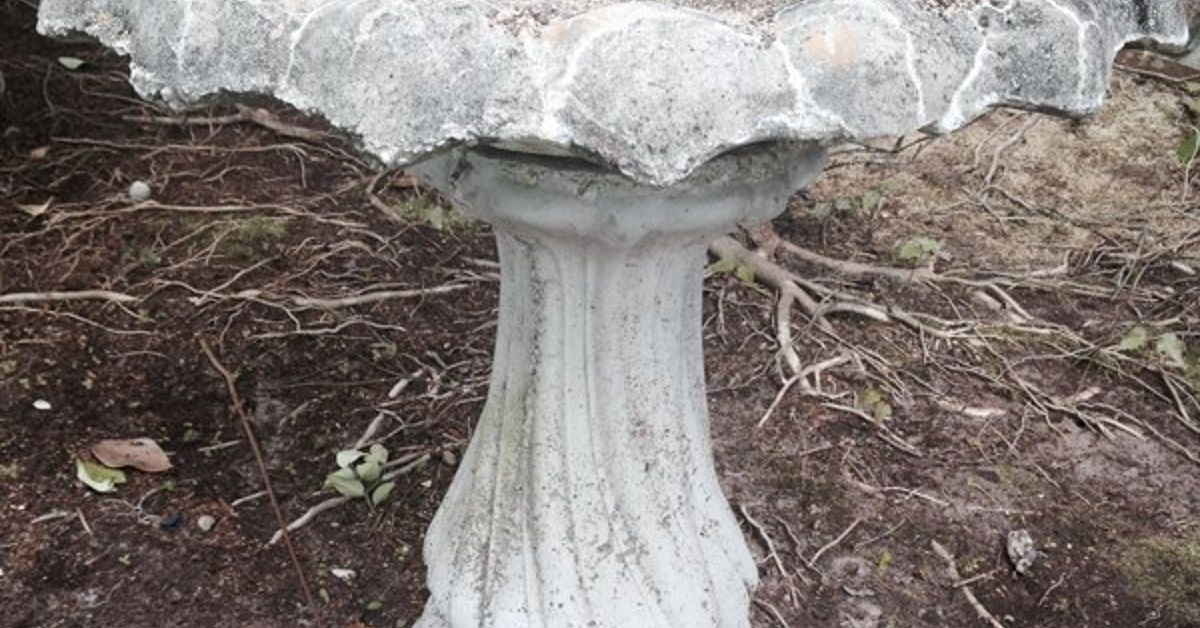
A forgotten bird bath can look a little tragic after a few seasons: chipped rim, faded pedestal, maybe a mysterious green stain that seems to have its own retirement plan. But before you haul it to the curb, give it a second career. Turning a repurposed bird bath to fairy garden is one of the most charming, low-cost, and space-saving ways to create a miniature landscape with personality.
The shape is already perfect. A bird bath has elevation, a shallow basin, and instant focal-point energy. It says, “Look at me,” without requiring a full backyard renovation or a conversation with a contractor named Gary. With the right drainage, potting mix, small-scale plants, and weather-safe accessories, your old bird bath can become a tiny woodland village, a succulent fairy island, a mossy cottage scene, or a whimsical patio centerpiece.
This guide walks through how to clean, prepare, design, plant, and maintain a bird bath fairy garden so it looks magical without becoming a soggy bowl of regret.
Why a Bird Bath Makes a Great Fairy Garden Container
A bird bath works beautifully for a fairy garden because it offers three things miniature landscapes love: height, visibility, and boundaries. Unlike a flat garden bed, a pedestal bird bath raises the scene closer to eye level, which makes tiny details easier to appreciate. Mini doors, pebble paths, fairy benches, acorn “lanterns,” and small plants are not lost in the mulch like garden confetti.
The basin also gives you a natural design frame. You are not staring at an empty yard wondering where the fairy village should begin. The rim says, “Here. This is the kingdom.” That clear boundary makes the project beginner-friendly and ideal for patios, porches, balconies, small gardens, and front-yard corners.
Start with a Clean, Safe Bird Bath
Before planting, clean the bird bath thoroughly. If it has held standing water, it may contain algae, mineral buildup, leaf debris, or old residue. Scrub the basin with a stiff brush and a mild cleaning solution, then rinse well. Avoid harsh chemical cleaners that could linger in porous concrete or stone.
If the bird bath is cracked, inspect it carefully. Hairline cracks can add rustic charm, but structural cracks in the pedestal can make the piece unstable. A fairy garden is adorable; a top-heavy bird bath doing a dramatic sidewalk dive is less adorable. Place the bird bath on level ground before adding soil, stones, and decorations.
Drainage: The Non-Negotiable Magic Spell
The biggest mistake in a bird bath fairy garden is treating the basin like a normal planter when it has no drainage. Most bird baths were designed to hold water, not release it. Plants, however, need oxygen around their roots. When water sits in the soil, roots can rot, leaves yellow, and your fairy garden starts looking like it was cursed by a damp goblin.
Option 1: Drill Drainage Holes
If the material allows it, add drainage holes to the lowest point of the basin. Use the correct drill bit for concrete, ceramic, resin, or metal, and work slowly. Wear eye protection. If you are not comfortable drilling, ask a handy friend or local hardware store professional for advice. A few small holes are often better than one giant crater.
Option 2: Double-Pot the Garden
If drilling is risky, use a shallow plastic nursery tray or several small pots inside the bird bath. The plants grow in containers with drainage, while the bird bath acts as the decorative outer shell. After watering, lift the inner pots if needed and empty any collected water. This method is especially useful for vintage, ceramic, glass, or sentimental bird baths you do not want to alter.
Option 3: Build a Dry Decorative Garden
If your bird bath cannot drain and you do not want to double-pot, create a dry fairy garden using stones, preserved moss, bark, driftwood, miniature furniture, and faux plants. This gives you the look without the plant-care puzzle. No shame. Even fairies appreciate low-maintenance real estate.
Choose the Right Potting Mix
Do not scoop heavy garden soil into the bird bath. Garden soil can compact in containers, slow drainage, and bring along weed seeds or insects. A lightweight potting mix is better for container planting because it holds enough moisture while still allowing air movement around roots.
For a succulent fairy garden, choose a cactus or succulent mix that drains quickly. For mossy or woodland styles, use a moisture-retentive potting mix and choose plants that enjoy partial shade. For mixed miniature plants, use a quality all-purpose potting mix and adjust watering based on the thirstiest plant in the group.
Best Plants for a Repurposed Bird Bath Fairy Garden
Small plants are the stars of the show. The goal is to create the illusion of a full-sized landscape in miniature, so look for plants with tiny leaves, low growth habits, and interesting textures.
Succulents for Sunny Bird Baths
Succulents are excellent for sunny locations because many stay compact and tolerate drier conditions. Try hens and chicks, small sedum varieties, echeveria, crassula, or tiny trailing succulents. Their rosette shapes look like oversized fairy cabbages, which is a sentence that somehow makes perfect sense in this hobby.
Moss and Ferns for Shady Designs
If the bird bath sits in partial shade, create a woodland fairy garden with moss, miniature ferns, baby tears, creeping fig, or small-leaf ivy. These plants can make the scene look older, softer, and more secretive, as if a fairy librarian lives behind the pebble path.
Miniature Ground Covers
Low-growing ground covers help tie the scene together. Brass buttons, creeping thyme, Irish moss, Scotch moss, and small sedums can create the look of lawns, meadows, and tiny hills. Always match the plant to the light and moisture conditions. A drought-loving succulent and a moisture-loving moss can share a bowl only if you enjoy plant drama.
Design Ideas for a Bird Bath Fairy Garden
The best miniature gardens tell a small story. Instead of scattering decorations randomly, imagine who lives there and what they do. Is it a fairy tea garden? A beach retreat? A woodland cottage? A tiny market square? Once you choose a theme, every detail becomes easier.
Woodland Cottage Theme
Use moss, bark, pebbles, a small fairy house, and a twig fence. Add a curved path from the rim to the cottage door. A little bench under a fern frond completes the look. This style works well in shade or morning sun.
Succulent Desert Village
Use cactus mix, pea gravel, small succulents, smooth stones, and a tiny clay pot turned sideways like a fairy cave. Add a miniature ladder or a pebble “campfire.” This design is great for hot, sunny patios.
Storybook Tea Party
Add a tiny table, two chairs, a teacup accent, and flowering mini plants. Use alyssum or small annuals for seasonal color. Just be warned: once you create a fairy tea party, children and adults will both stop to inspect it. Some adults will pretend they are only checking the drainage. They are not.
Beach Fairy Garden
Use sand-colored gravel, shells, small driftwood pieces, blue glass gems, and drought-tolerant plants. Avoid using actual beach sand as the main planting medium because it can compact and drain poorly when mixed improperly. Keep sand as a decorative top layer instead.
Step-by-Step: How to Turn a Bird Bath into a Fairy Garden
Step 1: Place the Bird Bath First
Choose the location before filling the basin. Once soil, stone, and plants are added, the bird bath becomes much heavier. Look for level ground, the right sunlight for your plants, and a place where the garden can be seen and enjoyed.
Step 2: Add Drainage or Inner Pots
Drill drainage holes if appropriate, or arrange small nursery pots inside the basin. If using inner pots, hide the edges later with moss, gravel, stones, or small bark pieces.
Step 3: Fill with Potting Mix
Add enough potting mix to support plant roots while leaving room for decorative top dressing. In a shallow bird bath, every inch matters. Do not overfill the basin or watering will become messy.
Step 4: Arrange Plants Before Planting
Set plants in place while still in their nursery pots. Put taller plants toward the back or center, trailing plants near the rim, and low ground covers around paths and accessories. Turn the bird bath as you work so the design looks good from multiple angles.
Step 5: Add the Fairy Garden Hardscape
Create paths with pea gravel, crushed stone, aquarium gravel, or tiny flat pebbles. Use bark as stepping stones, twigs as fences, and small stones as borders. Hardscape gives structure and prevents the garden from looking like a plant salad with furniture.
Step 6: Add Miniature Accessories
Add the fairy house, chairs, bridge, door, lantern, mushrooms, or tiny sign. Use outdoor-safe accessories whenever possible. If pieces are lightweight, secure them with floral wire, waterproof glue, or small stakes so wind does not relocate the fairy bench to another zip code.
Step 7: Water Gently
Water slowly at the soil level. Avoid blasting the scene with a hose unless you want to recreate a fairy flood documentary. For small gardens, a watering can with a narrow spout, squeeze bottle, or spray bottle gives better control.
Watering and Maintenance Tips
Bird bath fairy gardens dry out differently depending on the basin depth, material, exposure, and plant choices. Concrete and stone can heat up in sun, while shallow soil dries quickly. Check the soil with your finger. If the top inch feels dry, water plants that prefer moderate moisture. For succulents, wait until the mix dries more thoroughly.
Remove dead leaves, trim overgrown plants, and refresh gravel paths after heavy rain. If the garden sits outside year-round, protect delicate accessories from winter weather. In cold climates, freeze-thaw cycles can crack containers that hold water, so drainage and seasonal storage matter.
Common Mistakes to Avoid
Using Too Many Accessories
Miniature garden supplies are dangerously cute. One tiny mailbox becomes three bridges, five gnomes, and a ceramic raccoon playing banjo. Keep the scene edited. Leave open space so the eye can rest and the plants can grow.
Mixing Plants with Opposite Needs
Do not combine sun-loving succulents with shade-loving ferns in the same small basin unless the bird bath has separate pots. Group plants by light and water needs for better long-term success.
Forgetting Scale
Scale makes the magic believable. A fairy door that is taller than the “tree” beside it can look odd unless you are designing for giant fairies, which is a different zoning issue entirely. Use plants and accessories that feel proportionate.
Letting Water Sit
Standing water in a planted bird bath can lead to root problems and mosquitoes. Make sure excess water can escape or be emptied after rain.
Budget-Friendly Fairy Garden Materials
You do not need to buy everything new. A repurposed bird bath already starts the project with a sustainable spirit. Continue that approach by using pebbles from the yard, twigs, pinecones, acorn caps, broken terracotta pieces, shells, small tiles, corks, and old jewelry charms. A chipped teacup can become a fairy café. A broken flowerpot can become a cave. A flat stone can become a patio. Basically, your junk drawer has been waiting for its moment of artistic importance.
For purchased items, prioritize outdoor durability. Resin, sealed ceramic, metal, and stone accessories usually last longer than untreated wood or paper-based decorations. If using painted miniatures, apply a clear outdoor sealant to help protect them from rain and sun.
Experience Notes: What This Project Teaches You Over Time
The first thing you learn when making a repurposed bird bath fairy garden is that shallow containers have opinions. They warm up quickly, dry out faster than expected, and expose every design choice. That is not a flaw; it is part of the charm. A bird bath garden asks you to think like a landscape designer, container gardener, and tiny village mayor all at once.
In practice, the most successful bird bath fairy gardens usually begin with restraint. One small house, one path, three to five plants, and a few natural accents often look better than a crowded scene. When the garden has breathing room, plants can spread naturally and accessories feel discovered rather than dumped. The best compliment is when someone leans closer and says, “Oh, I didn’t notice the little door at first.” That moment of discovery is the whole point.
Drainage also becomes a memorable lesson. Many people try the project once without enough drainage and wonder why the plants fail. The bird bath looks like a planter, but its original job was to hold water. Once you solve that problem with drilled holes, double-potting, or a dry design, the project becomes much easier. The garden stops fighting you and starts behaving like a tiny, well-mannered landscape.
Another experience worth noting is how the bird bath changes the mood of a space. A patio corner that once looked empty suddenly has a focal point. A front garden gains a conversation piece. Children notice it immediately, but adults are often just as delighted. They crouch down, inspect the path, and ask where you found the miniature mushrooms. This is when you know the project has worked: it slows people down.
Maintenance becomes a pleasant ritual rather than a chore. You trim a creeping plant here, replace a pebble path there, move a chair after a storm, and occasionally rescue a fairy from being swallowed by sedum. Seasonal changes make the garden even more fun. In spring, add tiny flowers. In summer, use beachy stones and shells. In fall, tuck in acorn caps and miniature pumpkins. In winter, remove fragile pieces or create a dry evergreen scene with pinecones and small branches.
The biggest surprise is how personal the project becomes. Two people can start with the same old bird bath and create completely different worlds. One becomes a mossy cottage in the woods. Another becomes a desert succulent village. Another turns into a seaside fairy resort where the shells are small but the rent is probably outrageous. That flexibility is why repurposing a bird bath into a fairy garden is more than a craft. It is a small act of imagination, recycling, gardening, and humor balanced on a pedestal.
Conclusion
A repurposed bird bath to fairy garden project is simple, affordable, and wonderfully expressive. It gives new life to an old garden feature while creating a miniature world that can fit almost anywhere. The secret is to prepare the bird bath properly, solve drainage first, use lightweight potting mix, choose plants that match the location, and design with a clear theme.
Whether you create a mossy woodland cottage, a sunny succulent village, or a beachy fairy escape, the finished garden adds charm without demanding much space. It is sustainable, creative, and just a little ridiculous in the best possible way. After all, any project that turns a cracked old bird bath into a magical tiny neighborhood deserves applauseand maybe a very small welcome mat.













