
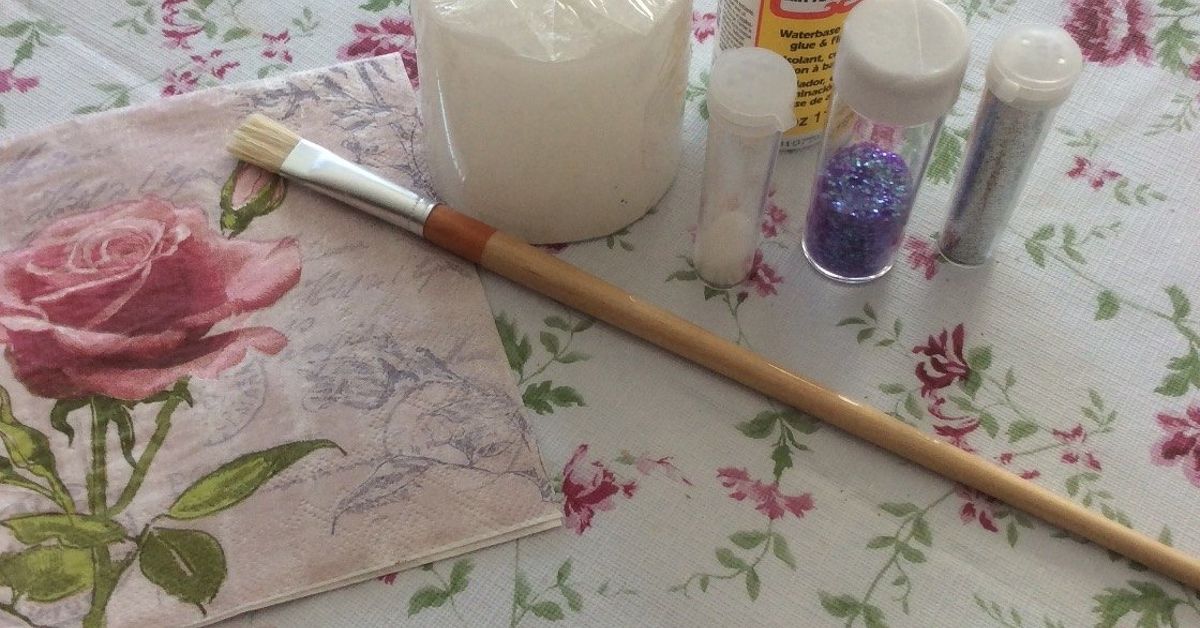
Napkin decoupage on a candle is one of those crafts that looks suspiciously fancy for the amount of effort involved. It gives “boutique gift shop” energy, but the supply list is more “I found this in a drawer and somehow became an artist.” With a plain candle, a pretty paper napkin, a little patience, and careful heat, you can create a decorative candle that looks hand-painted without asking your wrist to become a Renaissance apprentice.
The basic idea is simple: separate the printed top layer of a paper napkin, place it on the candle, and gently warm the surface so the tissue bonds with the outer wax. Some makers use a hair dryer, heat gun, warm spoon, parchment paper, wax paper, or decoupage medium depending on whether the candle is real wax or flameless. The result is soft, seamless, and charmingly custom. Florals, lemons, birds, vintage script, Christmas greenery, coastal shells, moody mushroomsif it exists on a napkin, it can probably become candle décor.
Before we begin, a tiny safety sermon wearing cute shoes: decorated wax candles should be treated as decorative first. Paper is flammable, and a candle is an open flame. If you want the safest everyday option, use flameless LED candles for napkin decoupage. If you decorate a real wax candle, display it carefully, keep it away from heat and flame hazards, and avoid burning into or near the napkin design.
What Is Napkin Decoupage on a Candle?
Decoupage is the craft of applying paper cutouts to a surface and sealing or blending them so they look like part of the object. Napkin decoupage uses the very thin printed layer of a decorative paper napkin. Because the napkin layer is delicate and almost translucent, it can melt visually into the surface of a white or light-colored candle.
On candles, there are two popular approaches. The first is the heat-transfer method, where the napkin is held against a wax candle and gently warmed until a whisper-thin layer of wax softens and grabs the paper. The second is the adhesive method, often used on flameless candles, glass candle holders, or decorative candle sleeves. Both methods create a custom look, but the heat-transfer method is especially loved because it can make the napkin appear embedded rather than glued on top.
Best Candles for Napkin Decoupage
White Pillar Candles
White pillar candles are the classic choice because the napkin design shows clearly against the pale background. A cream candle can also work beautifully, especially with vintage florals, botanical prints, or antique-style patterns. Dark candles are trickier because the thin napkin layer may disappear into the wax color faster than snacks disappear at a craft night.
Flameless LED Candles
Flameless candles are excellent for this project. They offer the cozy candle look without an open flame, making them especially smart for holiday décor, centerpieces, homes with pets, dorm rooms, and anyone who has ever said, “I’ll remember to blow that out,” and then absolutely did not.
Glass Jar Candles
You can decoupage the outside of a glass jar candle instead of the wax itself. This is a good option when you want the candle to remain usable while keeping paper away from the flame. Use a suitable decoupage medium on the glass exterior, keep the design away from the top rim, and never place paper where it could contact heat directly.
Supplies You’ll Need
- Plain pillar candle or flameless LED candle
- Decorative paper napkin
- Sharp scissors or small craft scissors
- Parchment paper or wax paper
- Hair dryer or low-temperature craft heat gun
- Soft cloth or towel to protect your hand
- Optional: Mod Podge or decoupage medium for flameless candles or glass
- Optional: small brush, craft knife, ribbon, dried flowers, or gift tag
The most important supply is the napkin. Choose a napkin with clear motifs and colors that suit your candle. Small repeating patterns are forgiving for beginners. Large flowers and animals look dramatic but require more careful placement. If your napkin has a white background and your candle is white, the edges blend easily. If the napkin background is colored, trim carefully because every edge may show.
How to Do Napkin Decoupage on a Candle
Step 1: Separate the Napkin Layers
Most decorative paper napkins have two or three layers. You only want the printed top layer. Peel it away gently from a corner. If your fingers refuse to cooperate, place a tiny piece of tape on the back layer and another on the printed layer, then pull them apart carefully. This feels weirdly satisfying, like opening a secret craft envelope.
Step 2: Cut or Tear Your Design
Cut out your chosen design with sharp scissors. For a clean, graphic look, cut close to the edge of the image. For a softer vintage effect, gently tear around the design; torn fibers often blend more naturally into wax. If you are covering the entire candle, measure the height and circumference first, then cut the napkin slightly larger so you can trim the overlap neatly.
Step 3: Position the Napkin
Lay the napkin design on the candle exactly where you want it. Smooth it lightly with dry fingers. Do not use water; napkin tissue becomes dramatic when wet, and not in a helpful theater-kid way. If you are wrapping the whole candle, align the edge vertically and keep the top and bottom borders even.
Step 4: Wrap with Parchment or Wax Paper
Wrap parchment paper or wax paper tightly around the candle to hold the napkin in place. Pull it snugly from the back like you are giving the candle a tiny spa wrap. This pressure helps prevent wrinkles and keeps the tissue from blowing around when you apply heat.
Step 5: Apply Gentle Heat
Use a hair dryer or craft heat gun on a low setting. Move constantly over the napkin area. Do not park the heat in one spot, because wax can melt unevenly and create dents. You are looking for a subtle change: the napkin will look slightly darker or more saturated as it bonds with the softened wax beneath it.
If using a heat gun, hold it several inches away and work in short passes. If using a hair dryer, expect the process to take a little longer, which is not a failure; it is simply your candle asking for a slow courtship. Rotate the candle as needed, keeping the wrap tight until the design adheres.
Step 6: Peel and Inspect
Let the candle cool for a minute, then gently peel away the parchment or wax paper. If any areas are loose, rewrap and warm them again. If you see wrinkles, smooth them lightly through the paper while the wax is just warm. Avoid pressing directly on hot wax with bare fingers.
Step 7: Finish the Edges
Trim extra napkin from the top or bottom with small scissors or a craft knife. For a polished look, leave a small undecorated border near the top of a real candle. This helps keep the design away from the flame area and also makes the candle look intentionally styled rather than accidentally wallpapered.
Design Ideas for Napkin Decoupage Candles
Holiday Candles
Christmas napkins with holly, pine branches, berries, snowflakes, or vintage Santas make beautiful mantel decorations. For Thanksgiving, try pumpkins, wheat, leaves, figs, or warm plaid patterns. Easter candles look lovely with bunnies, blue florals, speckled eggs, and soft pastels.
Wedding and Party Candles
Napkin decoupage candles make affordable centerpieces for bridal showers, baby showers, garden parties, birthdays, and dinner tables. Match the napkin pattern to the event theme: lemons for a summer brunch, roses for a romantic shower, blue chinoiserie for a classic table, or tropical leaves for a poolside party.
Vintage Cottage Candles
For a cottagecore look, choose napkins with wildflowers, birds, bees, herbs, mushrooms, handwritten script, or faded botanical illustrations. Pair the finished candle with linen ribbon, twine, or a small kraft-paper gift tag. Suddenly your candle looks like it was found in a tiny countryside shop run by someone named Fern.
Coastal Candles
Shells, coral, watercolor fish, navy stripes, and sea grasses work beautifully on white candles. Display them with driftwood, smooth stones, or glass hurricanes for a beachy look that says, “I vacation in Maine,” even if you are currently standing in a laundry room.
Real Candle vs. Flameless Candle: Which Is Better?
For safety and practicality, flameless candles win. You can cover the surface more freely, use decoupage medium, and enjoy the finished project repeatedly without worrying about the design approaching a flame. Flameless candles are also better for gifts because you cannot control how carefully someone else will use a real candle.
Real wax candles, however, have a traditional beauty. The heat-transfer method creates a soft embedded look that is hard to beat. If you decorate real candles, consider using them mainly as display pieces. Place them in a hurricane glass, on a tray, or as part of a centerpiece where the decorative value matters more than burn time.
Important Safety Tips
Never leave a burning candle unattended. Keep candles away from curtains, paper decorations, greenery, books, table linens, pets, children, and anything else that could burn. Place candles on a stable, heat-resistant surface, away from drafts, fans, and open windows. Trim the wick to about one-quarter inch before lighting to reduce high flames and soot.
For napkin decoupage on real wax candles, the safest rule is simple: do not burn the candle down into the decorated paper area. If you want to light it briefly for a photo or table setting, keep the design low, monitor it constantly, and extinguish the candle long before the flame reaches the paper. When in doubt, choose a flameless candle and let the tiny battery-powered glow do the hard work.
Common Mistakes and How to Avoid Them
Using the Whole Napkin
If you forget to separate the napkin layers, the paper will be too thick and may wrinkle or lift. Always use only the printed top ply. This one step can make the difference between “handcrafted elegance” and “my candle is wearing a napkin sweater.”
Overheating the Wax
Too much heat can melt grooves, dents, or shiny patches into the candle. Use low heat, keep the tool moving, and stop as soon as the design looks bonded. If the wax begins to drip, you have gone too far. Let it cool before continuing.
Choosing a Busy Pattern for a Small Candle
Large patterns can overwhelm narrow candles. For small pillars or tapers, use small motifs, borders, or partial cutouts. Save oversized florals and dramatic scenes for chunky pillar candles or glass jars.
Skipping the Test Candle
Different candles respond differently to heat. Some wax softens quickly, while some barely cooperates unless begged. Practice on an inexpensive candle first before using your best candle or that one perfect napkin you have been saving like a museum artifact.
Can You Use Mod Podge on Candles?
Mod Podge and other decoupage mediums are popular for craft projects, but use them thoughtfully with candles. On flameless candles, glass jars, or decorative holders, they can work well as an adhesive and sealer. On a real candle that may be burned, avoid applying glue or paper near the flame path. A decorated real candle is safest as décor, not as a long-burning candle.
If you want a sealed finish on a flameless candle, brush on a very thin coat of decoupage medium after the napkin is placed. Smooth gently from the center outward and let it dry completely. Thin coats are better than thick coats because heavy glue can wrinkle delicate napkin tissue.
Creative Variations to Try
Full-Wrap Candle
Cover the entire candle with a repeating napkin pattern for a dramatic designer look. This works best on flameless candles or display-only pillars. Align the back seam carefully and trim the top and bottom edges for a clean finish.
Single Motif Candle
Cut out one flower, bird, butterfly, shell, or holiday image and apply it to the front of the candle. This is the easiest beginner version and often the most elegant. Negative space is your friend; let the candle breathe.
Layered Botanical Candle
Apply several small leaf or flower cutouts around the candle at different heights. Slight overlap can create a garden-style effect. Keep the composition balanced by rotating the candle as you work.
Gift Candle Set
Create three candles in coordinating patterns and tie them together with ribbon. Add a handwritten tag with care instructions. This makes a charming hostess gift, teacher gift, holiday favor, or “I made this because buying another mug felt emotionally risky” present.
My Experience With Napkin Decoupage on a Candle
The first time I tried napkin decoupage on a candle, I was convinced it would either look amazing or become a small wax-based crime scene. I started with a plain white pillar candle and a floral napkin that looked like it belonged at a garden party where everyone says “lovely” a lot. I peeled the napkin layers apart, immediately felt like a crafting genius, and then spent five full minutes trying to decide which rose deserved the front-center position. Crafting is glamorous, but it is also tiny floral politics.
My biggest lesson was that patience matters more than fancy tools. A hair dryer worked, but slowly. At first, I kept thinking nothing was happening. Then, little by little, the napkin became slightly more vivid and seemed to sink into the wax. That subtle change is the moment to watch for. If you wait for fireworks, you will overheat the candle. If your candle starts sweating wax like it has been asked to do public speaking, pause immediately.
I also learned that parchment paper is not just a helper; it is the project’s personal assistant. When I wrapped it tightly around the candle, the napkin stayed smooth and flat. When I got lazy and held a smaller piece loosely over one section, the napkin wrinkled. The wrinkle was not catastrophic, but it did give the rose a slightly haunted forehead. From then on, I wrapped firmly and worked in small areas.
Another practical discovery: small motifs are easier than full wraps. A single bird, flower, wreath, or lemon branch gives you more control and fewer seams. Full-wrap candles are beautiful, but the back seam can become the place where your confidence goes to negotiate with reality. If you are new to this craft, start with one cutout on the front of a candle. You will get a pretty result quickly, and your second candle can be more ambitious.
For gifts, flameless candles became my favorite. I could decorate them more freely, add a thin protective coat, and hand them to people without silently worrying whether they would light the candle next to a curtain. A set of flameless decoupage candles in matching napkins looks surprisingly high-end, especially when grouped on a tray with greenery or seasonal ornaments. The battery switch is not romantic, but neither is a fire extinguisher, so we choose our battles.
If I were giving advice to a beginner, I would say this: buy extra napkins, use a test candle, and stop heating sooner than your curiosity wants you to. Keep your first design simple. Work with white or ivory candles. Choose napkins with clear images and pale backgrounds. Most importantly, do not panic over tiny wrinkles. Handmade items should look human. A perfectly smooth candle is lovely, but a slightly imperfect one still has charm, personality, and a better story.
Conclusion
Napkin decoupage on a candle is a beautiful, budget-friendly craft that turns plain candles into custom décor for holidays, parties, gifts, and everyday styling. The technique is simple: use the printed top layer of a decorative napkin, position it carefully, wrap it tightly, and apply gentle heat until the tissue bonds with the wax. For the safest and most versatile version, use flameless candles. For real wax candles, treat the finished piece as decorative and follow candle-safety rules carefully.
The best part is how personal this project can be. One napkin can become a romantic wedding accent, a cheerful Easter candle, a coastal summer centerpiece, or a cozy Christmas mantel decoration. It is inexpensive, beginner-friendly, and forgiving enough that even small imperfections look artistic. In other words, napkin decoupage is the rare craft that delivers maximum charm without requiring a second mortgage, a studio, or the emotional stamina of a competitive cake decorator.












