
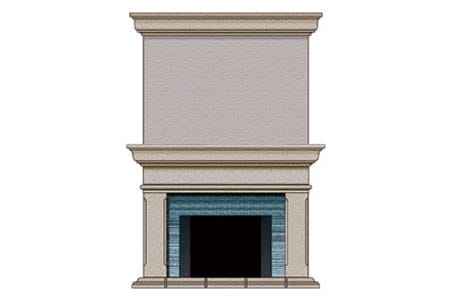
A fireplace without a mantel can feel a little like a face without eyebrows: technically complete, but somehow missing the expression. Installing a new mantel is one of those home improvement projects that can instantly change a room’s personality. A plain brick fireplace can become traditional and stately. A flat wall with an electric fireplace can suddenly look custom-built. A dated surround can stop whispering “1987 basement remodel” every time guests walk in.
But a mantel is not just decoration. It sits near heat, often carries weight, and usually becomes the visual anchor of the living room. That means the job deserves more planning than simply holding a board against the wall and saying, “Yeah, that looks about right.” A safe and beautiful mantel installation depends on proper clearance, sturdy mounting, accurate measurements, smart material choices, and a finish that can survive real lifedust, holiday garlands, framed photos, and that one candle nobody admits leaving too close to the edge.
This guide explains how to install a new mantel in clear, practical steps, with safety reminders, design tips, and real-world lessons that help you avoid wobbly shelves, crooked lines, and panic trips to the hardware store.
Why Installing a New Mantel Is Worth the Effort
A new mantel can do more than make a fireplace look pretty. It can improve the proportions of a room, create a focal point, cover outdated surfaces, and provide a practical display shelf for artwork, mirrors, seasonal décor, or family photos. In open-concept homes, the fireplace mantel often acts like a visual “stop sign,” giving the eye somewhere to land instead of wandering helplessly across a sea of beige walls.
For homeowners planning to sell, a well-installed fireplace mantel can also help a room feel finished and cared for. Buyers may not know the exact species of wood or the difference between a floating mantel and a full surround, but they can absolutely sense when a fireplace looks balanced, sturdy, and intentional.
Before You Begin: Safety Comes First
Before choosing stain colors or debating whether rustic farmhouse is officially retired, start with safety. Fireplaces produce heat, and heat plus combustible material can become a problem quickly. Wood mantels, MDF, trim, and many decorative finishes are combustible. Clearance rules exist for a reason, and “it probably won’t get that hot” is not a building strategy.
Check Local Code and Manufacturer Instructions
Local building codes and fireplace manufacturer manuals should guide your mantel height and placement. For many masonry fireplaces, combustible trim and mantels must stay a minimum distance from the firebox opening, and the allowed projection often changes as the mantel gets deeper. A common rule of thumb is that combustible material should be at least 6 inches from the fireplace opening, with more clearance required as the mantel projects farther from the wall. Many installers use 12 inches above the firebox opening as a practical starting point for wood mantels, but that number is not universal.
If you have a gas fireplace, electric insert, wood-burning insert, or factory-built fireplace, read the product manual. Listed appliances often have very specific mantel clearance charts. Those charts overrule guesswork, internet opinions, and Uncle Dan’s “I’ve been doing it this way for 30 years” speech.
Keep Décor Away From Heat
After the mantel is installed, keep anything flammablepaper decorations, dried garlands, fabric stockings, and random mystery craft projectswell away from the firebox. A mantel is a display area, not a heat endurance test. If you use the fireplace regularly, choose décor carefully and avoid hanging items directly in front of active flames.
Choose the Right Mantel Style
The best mantel for your home depends on the fireplace type, room style, ceiling height, and how much visual weight you want. A massive reclaimed wood beam can look stunning in a lodge-style living room, but it may feel like a railroad tie in a small condo. A sleek floating mantel may be perfect above a modern gas fireplace but look too plain around ornate traditional tile.
Floating Mantel Shelf
A floating mantel shelf is one of the most popular choices for modern homes. It creates a clean horizontal line and works well over brick, stone, tile, drywall, or a fireplace surround. Floating mantels are usually mounted with a cleat, hidden bracket, or heavy-duty hardware. They are ideal when you want a simple upgrade without installing legs, columns, or side trim.
Full Mantel Surround
A full mantel surround includes a shelf plus vertical legs or pilasters on both sides of the firebox. This style can make a fireplace feel more architectural and formal. It is often used in traditional, transitional, cottage, or craftsman interiors. A full surround may require more measuring and fitting, especially if the hearth, wall, or firebox is not perfectly squarewhich, because homes have a sense of humor, they often are not.
Rustic Beam Mantel
A rustic beam mantel adds warmth and texture. Reclaimed wood, hand-hewn beams, and distressed finishes can soften a brick or stone fireplace. However, beam mantels can be heavy, so the mounting method matters. A decorative beam that is not properly anchored can become less “charming farmhouse feature” and more “lawsuit with splinters.”
Painted Mantel
A painted mantel is flexible and easy to coordinate with trim, built-ins, or wall color. White, cream, charcoal, navy, and soft gray are common choices. Painted mantels are especially useful when you are building with poplar, pine, MDF, or stock trim pieces because the paint creates a unified, finished look.
Tools and Materials You May Need
Your exact supplies depend on the mantel type and wall surface, but most mantel installations require a reliable set of basic tools.
- Tape measure
- Stud finder
- Level
- Pencil or painter’s tape
- Drill and driver bits
- Masonry bit if drilling into brick, stone, or concrete
- Wood screws, lag screws, masonry screws, or anchors
- Mounting cleat or bracket system
- Shims
- Construction adhesive if appropriate
- Caulk and wood filler
- Sandpaper
- Paint, stain, or protective finish
- Safety glasses and dust mask
For heavy mantels, do not rely on drywall anchors alone. A mantel should be fastened into wall studs, solid blocking, masonry, or a manufacturer-approved mounting system. Drywall is wonderful for hiding framing; it is not wonderful for holding up a heavy wood beam while gravity waits patiently.
Step 1: Measure the Fireplace and Wall
Start with careful measurements. Measure the firebox opening, the width of the existing surround, the hearth width, ceiling height, and available wall space. Also measure the depth of the mantel shelf you plan to install. A deeper shelf may require greater vertical clearance from the firebox opening, especially if the mantel is combustible.
Use painter’s tape to outline the proposed mantel on the wall. This simple trick helps you see the scale before committing. Stand across the room and look at it from different angles. If the mantel looks too high, too wide, or oddly skinny, adjust before drilling holes. Painter’s tape is cheaper than regret.
Step 2: Determine Mantel Height
Mantel height is a balance between safety, comfort, and design. Many mantels are installed around 54 to 60 inches from the floor, but fireplace size, room proportions, and clearance requirements can change that. The bottom of the mantel must be high enough above the firebox to meet code and manufacturer instructions.
If you plan to mount a TV above the mantel, be careful. Heat and electronics are not close friends. Check the fireplace manual, test wall temperatures when the fireplace runs, and consider whether the TV will sit too high for comfortable viewing. A mantel can help deflect some heat, but it is not a magic force field.
Step 3: Find Studs or Solid Mounting Points
For drywall installations, use a stud finder to locate wall studs. Mark them lightly with pencil or painter’s tape. Mantel brackets, cleats, or screws should hit studs whenever possible. If the fireplace wall has been rebuilt or covered with tile, stone veneer, or paneling, locating framing may take more patience.
For brick or stone fireplaces, you may be mounting into masonry instead of studs. Use the correct masonry bit and fasteners. Some installers prefer drilling into mortar joints because they are easier to repair, while others prefer solid brick or stone for holding power. The right choice depends on the masonry condition, mantel weight, and fastener type. If the surface is fragile, old, cracked, or historically significant, consult a professional before turning it into Swiss cheese.
Step 4: Install the Cleat or Mounting Bracket
Many mantels use a cleat system. A cleat is a board or bracket attached to the wall that supports the mantel from behind or underneath. For a hollow floating mantel, the mantel slides over the cleat and is secured with screws. For a solid beam, a metal rod bracket or heavy-duty French cleat may be used.
Hold the cleat at the marked height and use a level to make sure it is perfectly straight. Drill pilot holes before driving screws, especially in hardwood or masonry. Fasten the cleat securely into studs, blocking, or masonry anchors. Tug gently after installation. The cleat should feel solid, not “optimistic.”
Step 5: Dry-Fit the Mantel
Before adding adhesive or final screws, dry-fit the mantel. Place it on the cleat or bracket and check the level from side to side and front to back. Look for gaps against the wall. Brick and stone surfaces are often uneven, so minor gaps are common. Shims can help correct small issues.
Step back and check the visual alignment. A mantel can be technically level but still look wrong if the fireplace, hearth, or ceiling is out of square. In older homes, you may need to choose between “true level” and “visually pleasing.” Usually, true level winsbut a smart installer considers the whole room.
Step 6: Secure the Mantel
Once everything fits properly, secure the mantel according to its design. This may involve driving screws through the top or bottom into the cleat, fastening hidden set screws, tightening bracket hardware, or attaching a full surround to wall blocking. If using construction adhesive, remember that adhesive is usually a helper, not a substitute for mechanical fasteners on heavy mantels.
Do not overtighten screws, especially in finished wood. Overdriving can split the mantel or leave ugly dents. If screw heads will show, use decorative plugs, wood filler, or matching caps. For painted mantels, fill holes, sand smooth, and touch up with paint after installation.
Step 7: Caulk, Fill, and Finish
Finishing details separate a professional-looking mantel from one that says, “I got tired near the end.” Use paintable caulk where the mantel meets the wall if the gap is small and appropriate. Use wood filler for nail holes, screw holes, and minor imperfections. Sand carefully before painting or staining.
If staining wood, test the stain on a scrap piece or hidden area first. Different woods absorb stain differently. Pine can turn blotchy without conditioner, while oak usually shows stronger grain. For painted mantels, a durable enamel or trim paint is a smart choice because the mantel may collect dust and fingerprints.
Common Mistakes to Avoid
Ignoring Clearance Requirements
The most serious mistake is installing a combustible mantel too close to the firebox. It may look cozy in photos, but safety rules matter. Always verify clearances before installation.
Using the Wrong Fasteners
Drywall screws are not universal problem solvers. Heavy mantels need structural support. Use screws, anchors, brackets, or masonry fasteners rated for the job.
Skipping the Dry Fit
A dry fit reveals problems before they become permanent. It is much easier to adjust a mantel before adhesive, caulk, and final screws enter the chat.
Choosing a Mantel That Is Too Deep
A deep mantel can look luxurious, but it may require extra clearance and can overwhelm a small fireplace. Match the depth to the room, firebox, and safety requirements.
Forgetting About Heat-Sensitive Items
Candles, electronics, artwork, and seasonal decorations may not love fireplace heat. After installation, use the mantel thoughtfully.
Design Tips for a Mantel That Looks Built-In
A mantel should feel connected to the room. If your home has thick baseboards, crown molding, or traditional trim, a more detailed mantel may look natural. If the room has clean lines and minimal decoration, a simple floating shelf may fit better.
Consider the width carefully. A mantel that extends slightly beyond the firebox or surround often looks balanced. Too narrow, and it appears accidental. Too wide, and it can dominate the wall. When in doubt, use painter’s tape and live with the outline for a day.
Color also matters. A white mantel can brighten a dark fireplace. A stained wood mantel can warm up cool tile or painted brick. A black mantel can create strong contrast, especially in modern or moody interiors. The best choice is the one that feels intentional with the flooring, furniture, trim, and wall color.
Installing a Mantel on Brick, Stone, or Tile
Brick, stone, and tile installations require extra care. Masonry surfaces can be uneven, brittle, or difficult to drill. Use a masonry bit, apply steady pressure, and avoid hammer-drilling delicate tile unless the material can handle it. For tile surrounds, drill slowly and use tape over the drilling point to reduce bit wandering.
If the mantel is heavy, use a mounting system designed for masonry. For very heavy stone or cast mantels, professional installation is often the safest choice. Cast stone surrounds may require adhesive, blocking, shims, and careful leveling of multiple pieces. The final result can be beautiful, but the process is less forgiving than hanging a lightweight shelf.
Installing a Mantel on Drywall
Drywall installation is often simpler, but only if you fasten into studs or blocking. If the wall is open during a remodel, add solid blocking between studs where the mantel will go. This gives you strong attachment points and makes installation easier later.
If the wall is already finished, locate studs carefully. A floating mantel bracket should hit multiple studs when possible. For a full surround, the legs and shelf may need separate fastening points. Use shims if the wall is not flat, and avoid pulling the mantel so tightly against an uneven wall that it twists.
When to Hire a Professional
Many handy homeowners can install a basic mantel shelf. However, professional help is wise if you are dealing with a very heavy mantel, damaged masonry, a historic fireplace, an active gas line, unclear clearance rules, or a custom surround that requires precise carpentry. A professional can also help when the fireplace structure needs repair before cosmetic upgrades begin.
Hire a licensed contractor, qualified fireplace technician, mason, or finish carpenter depending on the project. A mantel may look like décor, but it lives in the world of heat, structure, and building codes. That is not the place for heroic guessing.
Maintenance After Installation
Once the mantel is installed, inspect it occasionally. Check for movement, cracks, loose fasteners, finish damage, or signs of heat stress. If you use a wood-burning fireplace, have the chimney inspected and cleaned regularly by a qualified professional. Fireplace safety is not a one-time achievement; it is more like dental care, except with more soot.
Dust the mantel often, especially if it has grooves or decorative trim. Use gentle cleaners appropriate for the finish. Avoid placing wet plants, hot items, or waxy candles directly on unfinished wood. If decorating seasonally, keep lightweight items secure and away from open flames.
Real-Life Experience: What Installing a New Mantel Teaches You
Installing a new mantel looks simple from across the room. It is a shelf, right? A fancy shelf with better posture. But once you begin, the project quickly teaches you that fireplaces are rarely perfect rectangles, walls are not always flat, and “centered” can become a philosophical debate.
One of the most useful lessons is to measure more than once and in more than one place. Many homeowners measure the firebox opening, mark the center, and assume the fireplace is symmetrical. Then they discover the hearth is slightly wider on one side, the brick courses are uneven, or the previous owner installed something just crooked enough to haunt future generations. The best approach is to measure the firebox, the hearth, the surrounding wall, and the room’s visual center. Sometimes the mantel should align with the firebox; other times it should respect the larger wall composition.
Another experience-based tip: do not rush the height decision. Tape the outline on the wall and leave it there for at least a few hours. Walk past it. Sit on the sofa. Look at it from the kitchen. Pretend you are watching TV, having coffee, or explaining to guests why the mantel is seven inches too high. This temporary outline helps you catch awkward proportions before they become permanent.
Hardware choice is another area where experience matters. Lightweight decorative mantels may come with basic mounting hardware, but heavier shelves often need stronger support. If the mantel feels heavy when you lift it, it will feel much heavier when it is hanging above expensive tile and emotional stability. Use fasteners rated for the material and weight. When mounting into studs, longer structural screws or lag screws may be appropriate. When mounting into masonry, use proper anchors and follow the fastener instructions carefully.
Dry-fitting is where many problems reveal themselves. A mantel may rock slightly on uneven brick. A full surround may touch the wall at the top but leave a gap near one leg. A floating shelf may sit level but appear off because the ceiling slopes. These issues are normal, especially in older homes. Shims, careful trimming, and patient adjustment can make the final installation look custom rather than forced.
Finishing also takes more time than expected. Caulk needs clean lines. Wood filler needs sanding. Paint may need two coats. Stain may need conditioner or a protective topcoat. The mantel is at eye level, so tiny flaws become surprisingly visible. Give yourself time for the final details. They are not glamorous, but they are the difference between “nice DIY” and “who did you hire?”
Finally, installing a mantel teaches restraint. It is tempting to decorate the finished shelf immediately with candles, books, greenery, stockings, framed prints, and possibly a small ceramic woodland animal with emotional range. But the fireplace area should stay safe and uncluttered, especially when the fireplace is in use. Start with one anchor piece, such as a mirror or artwork, then add a few balanced accents. Let the mantel breathe. It worked hard to get there.
The most satisfying part of the project is the transformation. A new mantel can make an old fireplace feel deliberate again. It frames the firebox, gives the room structure, and creates a natural place for seasonal style. Even better, every time you notice that it is level, secure, and beautifully finished, you get the quiet joy of knowing you did not simply install a shelfyou upgraded the whole room without moving a single wall.
Conclusion
Installing a new mantel is one of the most rewarding fireplace upgrades because it combines design impact with practical craftsmanship. The key is to treat the project with respect: check safety clearances, choose the right style, mount into solid support, dry-fit carefully, and finish the details with patience. Whether you prefer a sleek floating mantel, a rustic wood beam, or a classic full surround, a well-installed mantel can turn your fireplace into the room’s best feature instead of the thing everyone politely ignores.
A beautiful mantel should look effortless, but the best results come from careful planning. Measure twice, level everything, follow local code, and remember that gravity never takes a day off. Do it right, and your new mantel will be ready for cozy evenings, holiday displays, family photos, and compliments from guests who suddenly think you are “very handy.” Accept the praise. You earned it.












