
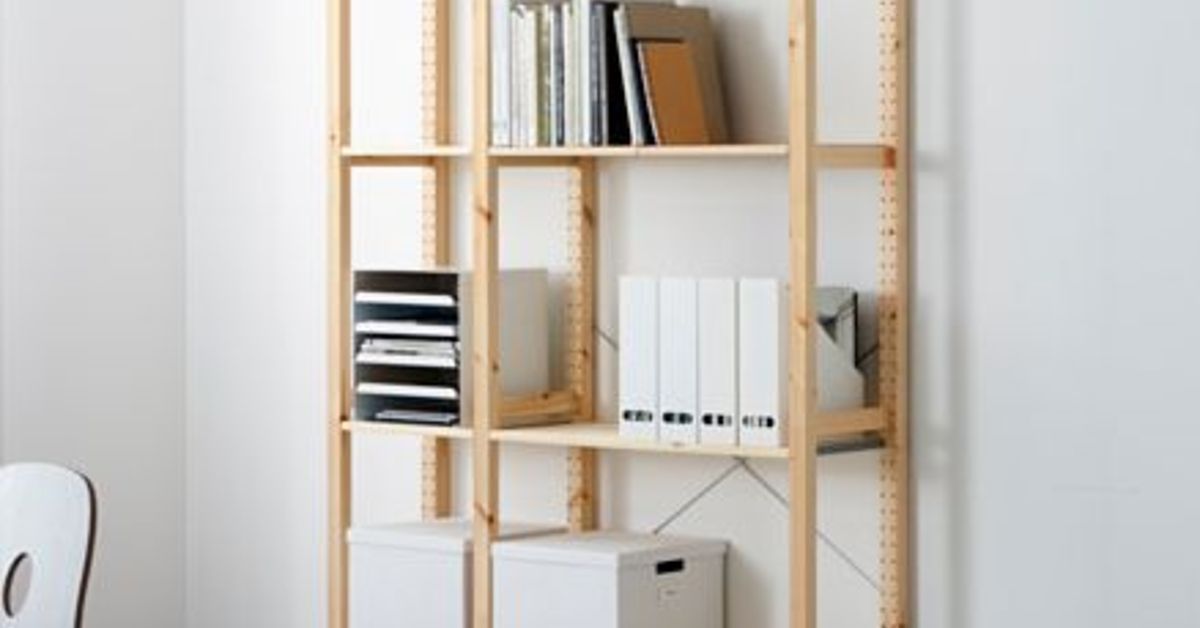
An IKEA shelving unit is a little like a plain bagel: perfectly useful on its own, but far more exciting once you add the good stuff. Whether you start with a KALLAX cube shelf, a BILLY bookcase, an IVAR pine unit, or another budget-friendly IKEA storage piece, the real magic happens when you customize it for your actual lifenot the fantasy life where everyone folds throw blankets like a hotel stylist and never loses the tape measure.
This IKEA hack guide focuses on customizing a shelving unit to add more function, smarter storage, and a more custom look without paying custom-cabinet prices. The goal is simple: take a basic shelf and turn it into a hardworking storage hero for your living room, home office, entryway, craft room, bedroom, playroom, or kitchen. With the right planning, doors, drawers, baskets, trim, paint, legs, lighting, and safety steps, your shelving unit can look built-in, store more, and finally stop acting like a random pile-holder with vertical ambition.
Why IKEA Shelving Units Are Perfect for Storage Hacks
IKEA shelving units are popular for a reason: they are modular, affordable, widely available, and designed with clean lines that make customization easier. KALLAX is especially loved because its cube design works horizontally or vertically, while inserts, drawers, doors, and baskets make it simple to mix open and closed storage. BILLY is another classic choice because it is tall, narrow, and easy to turn into a built-in bookcase with trim and wall-to-wall styling. IVAR is a favorite for DIYers who prefer solid pine and want a surface that is easier to stain, paint, or modify.
The best part? You do not need to be a professional carpenter to make a shelving unit look more expensive. Most upgrades come down to thoughtful measuring, clean finishing, and using the shelf for a specific purpose. A customized IKEA shelf should solve a problem: hiding clutter, organizing toys, creating a home office zone, storing craft supplies, displaying books, building an entryway drop zone, or making a small apartment feel less chaotic.
Start With a Storage Plan Before You Buy Anything
Before grabbing a cart and confidently marching through IKEA like a person who definitely knows where the exits are, pause and make a storage plan. A shelving hack works best when you know what the unit must hold and where it will live.
Measure the Space Carefully
Measure the wall width, ceiling height, baseboard depth, outlets, vents, window trim, door swing, and nearby furniture. If you want a built-in look, leave room for trim, side filler strips, and crown molding. If the shelf will sit in a hallway or entryway, check walking clearance. Nobody wants a gorgeous storage wall that turns every trip to the kitchen into a sideways crab walk.
Sort What You Need to Store
Group your items into categories. Books, bins, toys, board games, pet supplies, shoes, office files, chargers, craft tools, pantry items, and decor all need different storage solutions. Open cubbies are great for attractive items and everyday grab-and-go pieces. Doors and drawers are better for anything visually noisy, oddly shaped, or mysteriously tangled.
Choose the Right IKEA Shelf for the Job
Choose KALLAX for cube storage, playrooms, media consoles, room dividers, and craft stations. Choose BILLY for books, display walls, office storage, or faux built-ins. Choose IVAR for garages, utility spaces, rustic-style projects, or painted/stained wood looks. Choose PAX or BESTA if your project needs more closed storage, wardrobe-style function, or a sleek media-wall effect.
Function-Boosting IKEA Hack Ideas
A shelf becomes more functional when it stops being only a shelf. The best IKEA hacks add zones, hidden storage, mobility, surfaces, or specialty features.
1. Add Doors for Hidden Storage
Doors instantly make a shelving unit feel calmer. KALLAX door inserts are a simple upgrade for hiding toys, cables, cleaning supplies, or office clutter. For a custom look, you can upgrade flat doors with cane webbing, fluted wood trim, beadboard panels, peel-and-stick wallpaper, or fabric-covered inserts. This gives the unit texture and makes it look more like furniture than a storage cube that escaped from a dorm room.
2. Add Drawers for Small Items
Drawers are ideal for items that do not stack neatly: batteries, notebooks, craft supplies, remote controls, charging cords, pet accessories, and school supplies. In a home office, drawer inserts can turn one cube into a mini command center. In a playroom, drawers can separate building blocks, art supplies, and tiny plastic pieces that hurt more than emotional betrayal when stepped on barefoot.
3. Use Baskets and Bins for Flexible Storage
Baskets are the fastest way to make open shelving look organized. Woven baskets add warmth, fabric bins soften the look, and clear bins work well for craft rooms or utility areas where visibility matters. Labeling bins is not just for people with perfect pantries on social media. It helps real households put things back where they belongor at least near where they belong, which is a victory.
4. Add Legs or a Base
Adding legs can make a horizontal KALLAX look like a media console, sideboard, or entryway bench. Short tapered legs create a mid-century modern style, while chunky wooden legs feel more rustic. For a built-in look, skip exposed legs and build a simple platform base that raises the unit above the floor and allows baseboard trim to run across the front.
5. Install a Countertop or Wood Top
A wood top can turn a shelving unit into a bench, console, craft table, or kitchen-adjacent storage station. For example, a horizontal KALLAX with a butcher-block-style top can become an entryway bench with shoe storage below. In a craft room, two low shelving units with a sturdy tabletop can create a large work surface with storage on both sides.
6. Add Pegboard or Side Hooks
The sides of a shelving unit are often wasted space. Add hooks for bags, headphones, dog leashes, hats, or keys. A pegboard panel mounted to the side can hold scissors, tape, rulers, tools, or craft supplies. This is especially useful in small spaces, where every vertical inch should earn its keep like it pays rent.
7. Add Lighting
Battery-powered puck lights, LED strips, or plug-in cabinet lights can make a shelving unit look more polished. Lighting works beautifully on display shelves, bar cabinets, bookcases, and built-in-style units. Warm light helps shelves feel intentional, while cool light works better for task zones like craft areas or workstations.
How to Create a Built-In Look With IKEA Shelves
One of the most popular IKEA shelving hacks is turning basic bookcases into built-ins. This works especially well with BILLY bookcases because they are simple, tall, and easy to repeat across a wall. The secret is not the bookcase itselfit is the finishing work around it.
Step 1: Build a Level Base
A built-in should sit level and secure. Build a platform from lumber or plywood, then place the shelves on top. This gives you room to add baseboard trim and helps the finished project look like it belongs to the house, not like it is temporarily visiting.
Step 2: Secure the Units Together
Line up the bookcases and fasten them to one another where appropriate, following product instructions and using proper hardware. Keep shelves level and square. Small gaps become very visible once trim and paint enter the conversation.
Step 3: Anchor the Shelving to the Wall
Safety is not optional. Tall shelving units, room dividers, and bookcases should be anchored securely to the wall with the correct hardware for your wall type. Use studs whenever possible. If you are unsure which fasteners to use, ask a professional or hardware specialist. A beautiful bookcase is not beautiful if it can tip forward.
Step 4: Add Filler Strips and Trim
Filler strips close gaps between shelves and walls. Crown molding at the top, baseboard trim at the bottom, and vertical trim between units create the illusion of custom cabinetry. Caulk small seams, fill unused shelf holes, and sand patched areas smooth before painting.
Step 5: Paint for a Seamless Finish
Painting IKEA laminate or foil-finished furniture requires preparation. Clean the surface, lightly sand to improve adhesion, apply a bonding primer, and use thin coats of durable paint. For laminate, do not skip primer unless you enjoy watching paint peel like a bad sunburn. A small foam or microfiber roller helps create a smoother finish on flat surfaces.
Room-by-Room IKEA Shelving Hack Ideas
Living Room Media Console
Place a KALLAX horizontally, add legs, install door inserts on selected cubes, and run cords through a discreet opening in the back. Use open cubes for books and decor, closed cubes for game controllers, remotes, cables, and the mysterious collection of HDMI cords no one remembers buying.
Entryway Drop Zone
Use a low shelving unit as a bench with shoe baskets below. Add a cushion on top, hooks above, and labeled bins for each family member. This creates a practical landing area for backpacks, keys, hats, and mail. Add a tray for sunglasses and wallets so they stop disappearing into the domestic Bermuda Triangle.
Home Office Storage Wall
Combine bookcases with lower cabinets or cube storage to create a work zone. Use closed storage for paperwork and supplies, open shelves for books, and a desktop surface between two storage towers. Add cord management clips, drawer dividers, and a small charging station for everyday tech.
Kids’ Room or Playroom Organizer
KALLAX is a playroom favorite because cubes are easy for children to access. Use soft bins for toys, picture labels for young kids, and doors for categories that look messy even when organized. Always anchor units and avoid placing heavy items on high shelves.
Craft Room Worktable
Create a craft island by combining cube shelves with a large tabletop. Store paper, yarn, fabric, tools, and paint in labeled bins. Add casters only if the structure is suitable for mobility and can remain stable; otherwise, keep it fixed. A craft table should inspire creativity, not roll away like it has other plans.
Kitchen or Dining Storage
A horizontal shelving unit can become a coffee station, breakfast bar, or extra dish storage area. Use doors for appliances, baskets for linens, and a sealed wood top for durability. Avoid overloading shelves with heavy cookware unless the unit is designed to handle the weight.
Style Upgrades That Make IKEA Look Custom
Function matters, but style is what makes the finished project feel intentional. A few design upgrades can transform basic flat-pack furniture into a piece that looks collected, designed, and far more expensive.
Add Fluted Trim or Reeded Panels
Fluted wood trim is one of the easiest ways to create a high-end look. Apply it to doors, drawer fronts, or side panels. It adds texture and makes a simple unit feel more architectural.
Use Cane Webbing
Cane webbing adds a light, airy texture and works beautifully on cabinet doors. It is especially useful when you want hidden storage that still feels relaxed and natural.
Swap the Hardware
Knobs and pulls change everything. Brass pulls create warmth, matte black handles feel modern, leather pulls add softness, and wooden knobs keep things casual. Hardware is the jewelry of furniture, and yes, your shelf deserves accessories too.
Try a Two-Tone Finish
Paint the frame one color and the doors another, or leave a wood top natural while painting the base. Two-tone finishes can help the shelf blend with existing furniture while still feeling custom.
Wallpaper the Back Panel
Peel-and-stick wallpaper or painted hardboard on the back of a bookcase adds color and pattern. This works best on display shelves or open bookcases where the back panel remains visible.
Practical Tips for a Stronger, Smarter IKEA Hack
Before you start cutting, painting, and announcing to everyone that you are “basically a carpenter now,” keep these practical tips in mind.
Respect Weight Limits
Every shelving unit has limits. Store heavy items low, distribute weight evenly, and avoid using a shelf in ways it was not designed for. Books, tools, and dishes are heavier than they look. Decorative baskets full of “miscellaneous” can also become surprisingly dense, because miscellaneous is apparently made of lead.
Pre-Drill When Adding Hardware
Pre-drilling helps prevent splitting, cracking, and crooked hardware placement. Use painter’s tape to mark drill depth and a template for consistent handle placement.
Use the Right Adhesive and Fasteners
Construction adhesive, wood glue, brad nails, screws, and brackets each serve different purposes. Match the fastener to the material. Many IKEA pieces use particleboard or fiberboard, so avoid over-tightening screws.
Finish the Back If It Will Be Seen
If your shelving unit will act as a room divider, the back matters. Add a finished panel, paint it, apply wallpaper, or cover it with thin plywood. A room divider should look good from both sides, not like the back of a theater set.
Plan for Cords
If the unit will hold electronics, plan cord holes, cable clips, and outlet access before everything is installed. Future you will not enjoy crawling behind a finished media wall with a flashlight and a vocabulary that frightens the pets.
Common Mistakes to Avoid
The most common mistake is rushing the planning stage. Measure twice, buy once, and remember that walls are not always straight. Another mistake is painting laminate without proper prep. Clean, sand lightly, prime, and let coatings cure. Also avoid overloading shelves, skipping wall anchors, or placing heavy items high up.
For built-ins, do not rely on paint alone to create a custom look. Trim, caulk, filled holes, and consistent reveals make the biggest difference. For cube shelves, avoid using all open storage unless your belongings are naturally beautiful and color-coordinated. Most homes need a mix of open display and closed storage.
My Experience: What Actually Makes an IKEA Shelving Hack Work
The biggest lesson from customizing IKEA shelving is that function should lead and style should follow close behind wearing comfortable shoes. It is tempting to start with the pretty partpaint colors, cane doors, brass pulls, and the kind of baskets that make you briefly believe your life will become organized by Friday. But the projects that work best begin with an honest inventory of what needs to be stored.
For example, a living room shelving unit can look stunning on day one with open shelves full of books, vases, candles, and one dramatic ceramic bowl that serves no purpose except looking expensive. But if the room also needs to hold gaming accessories, pet toys, magazines, blankets, chargers, and children’s art supplies, open shelving alone will quickly become visual soup. A better approach is to reserve the top or center shelves for display and use doors or baskets for the less glamorous items. This creates a realistic balance between “magazine-worthy” and “humans live here.”
Another important experience is that small details make the hack feel custom. A plain KALLAX with bins is useful, but a KALLAX with a wood top, matching baskets, upgraded pulls, and clean side trim looks intentional. A BILLY bookcase pushed against a wall is a bookcase; several BILLY units on a base with crown molding, side filler strips, and paint can feel like a built-in library. The furniture may be budget-friendly, but the finishing work tells the eye a different story.
Paint is also both magical and humbling. IKEA laminate can be painted, but only if you respect the process. Cleaning matters. Light sanding matters. Bonding primer definitely matters. The surface needs something to grip, and the paint needs time to cure. If you rush, the finish may chip around handles, doors, and high-touch edges. If you take your time, the result can be surprisingly durable and polished.
Hardware is another upgrade with major impact. Swapping basic knobs for larger pulls can change the entire personality of a shelving unit. Brass can warm up a white unit, black hardware can modernize a wood-effect finish, and leather pulls can soften a kids’ room or craft space. The trick is to keep hardware consistent with the room’s existing finishes so the piece feels connected instead of randomly dressed for a different party.
One of the smartest functional upgrades is labeling. Labels may not sound exciting, but they turn storage from a one-person system into a household system. When bins are labeled “pet supplies,” “mail,” “art paper,” or “winter hats,” other people have a fighting chance of putting things away correctly. Without labels, every basket eventually becomes a tiny storage swamp.
Finally, the best IKEA hacks leave room for change. A shelving unit in a nursery may later hold toys, then books, then school supplies. A home office unit may shift from paperwork to craft storage or media equipment. Choose inserts, bins, and accessories that can be rearranged. Good storage should adapt as your life changes, because life has a way of bringing home more stuff just when you thought you had conquered clutter.
Conclusion
Customizing an IKEA shelving unit is one of the most practical ways to add function and storage without taking on a full renovation. Whether you want a polished built-in bookcase, a hardworking entryway bench, a craft room table, a media console, or a playroom organizer, the formula is the same: plan your storage needs, choose the right shelving unit, mix open and closed storage, anchor for safety, and finish the piece with details that match your home.
The beauty of an IKEA hack is not just saving money. It is creating a piece that works better for your daily routine. With doors, drawers, baskets, trim, paint, lighting, hardware, and a little patience, a basic shelf can become a custom storage solution that looks good, works hard, and quietly judges the clutter it was born to defeat.
Note: This article is written in standard American English for web publishing and is based on current IKEA product information, furniture safety guidance, and reputable U.S. home-improvement practices.












