
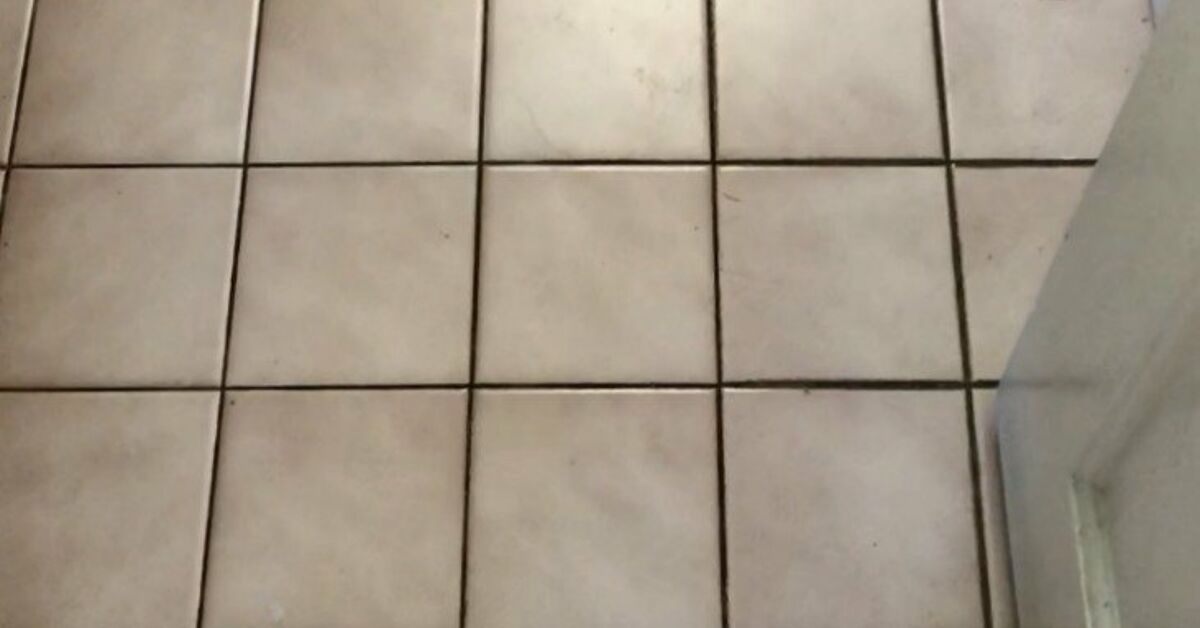
There are two kinds of bathroom floors: the kind you admire, and the kind you apologize for before guests even take off their shoes. If your bathroom floor currently belongs to category two, tile stickers may be the low-cost, low-drama DIY upgrade your home has been quietly begging for. No demolition crew. No cloud of grout dust. No mysterious contractor who says “quick job” and then disappears for three Tuesdays.
Updating a bathroom floor with tile stickers is one of the easiest ways to refresh an outdated space without replacing the entire floor. Also called peel-and-stick floor tiles, vinyl tile stickers, or adhesive floor decals, these budget-friendly squares can cover old ceramic tile, vinyl, linoleum, or other smooth surfaces with a new pattern in a single weekend. The secret is not magic. It is preparation. Very boring, very powerful preparation.
This guide walks through the full DIY process: choosing the right bathroom tile stickers, preparing the floor, planning the layout, cutting around fixtures, sealing edges, and caring for the finished surface. Done well, a peel-and-stick bathroom floor can look surprisingly polished. Done badly, it can curl at the corners like a potato chip with trust issues. Let’s aim for polished.
What Are Bathroom Tile Stickers?
Bathroom tile stickers are thin, adhesive-backed vinyl tiles designed to stick directly over an existing floor surface. Some look like encaustic cement tile, marble, terrazzo, black-and-white checkerboard, slate, wood-look planks, or geometric patterns. Unlike traditional ceramic or porcelain tile, they do not require mortar, grout, wet saws, spacers, or the emotional strength needed to hear “we found water damage” during a renovation.
Most peel-and-stick floor tiles are made from vinyl because it is flexible, affordable, water-resistant, and easy to cut with a utility knife. The tiles usually come in 12-by-12-inch squares, although larger rectangles and specialty patterns are also common. They are especially popular for rentals, powder rooms, guest bathrooms, laundry rooms, small apartments, and quick budget makeovers.
Can You Use Tile Stickers on a Bathroom Floor?
Yes, you can use tile stickers on a bathroom floor, but the bathroom matters. A low-moisture powder room is the dream location. A full bathroom with a shower can still work, but it demands better prep, tighter seams, careful sealing around the tub and toilet, and realistic expectations. Peel-and-stick tile is water-resistant, not a superhero cape. Standing water, constant humidity, loose subfloors, and poor ventilation can shorten its life.
Tile stickers work best on floors that are clean, smooth, dry, level, and firmly attached. If your current floor has cracked tiles, loose vinyl, deep grout lines, peeling adhesive, or mystery bumps from 1987, deal with those problems first. Peel-and-stick tiles are thin, which means imperfections underneath can show through. This is called telegraphing, which sounds like a Victorian hobby but is actually when old grout lines or bumps appear under your new floor.
Best Surfaces for Peel-and-Stick Bathroom Floor Tiles
Tile stickers can often be installed over existing ceramic tile, sheet vinyl, linoleum, sealed concrete, plywood underlayment, or old vinyl tile. The key is stability. If the base floor moves, flakes, crumbles, or flexes, the stickers will not bond well. Think of the existing floor as the foundation of a sandwich. If the bread is soggy, no amount of fancy filling saves lunch.
Good candidates include:
- Smooth ceramic tile with shallow grout lines
- Clean, firmly attached sheet vinyl
- Flat linoleum without peeling edges
- Dry concrete that has been cleaned and primed if needed
- Bathroom floors in powder rooms or lightly used spaces
Problem surfaces include:
- Loose, cracked, or shifting tile
- Deep grout lines that can show through the vinyl
- Textured stone or heavily embossed flooring
- Wet, musty, or unsealed subfloors
- Radiant heated floors unless the product specifically allows it
Tools and Materials You Will Need
You do not need a professional tile saw, but you do need a few dependable tools. A sharp blade is your best friend here. A dull utility knife will chew the tile edges, test your patience, and make you say words your toothbrush did not need to hear.
- Peel-and-stick floor tile stickers
- Measuring tape
- Pencil or washable marker
- Straightedge or metal ruler
- Utility knife with extra blades
- Scissors for light trimming
- Floor cleaner or degreaser
- Vacuum or broom
- Microfiber cloths
- Painter’s tape
- Vinyl floor roller, rolling pin, or clean towel-wrapped block
- Caulk for edges near tubs, toilets, and walls
- Optional primer recommended by your tile brand
Step 1: Choose the Right Tile Stickers
Start with floor-rated peel-and-stick tiles, not wall decals. Wall tile stickers may look cute online, but many are too thin or slick for foot traffic. Bathroom floors need tiles that are water-resistant, washable, and designed to handle shoes, bare feet, bath mats, dropped hairbrushes, and the occasional dramatic toothpaste accident.
Check the product description for thickness, slip resistance, water resistance, installation temperature, compatible surfaces, and removal notes. If you rent, read reviews from other renters and test one tile in a hidden area before committing. Some peel-and-stick floors remove cleanly; others cling like they signed a 30-year mortgage.
For small bathrooms, bold patterns can look fantastic, especially black-and-white motifs, soft terrazzo, or vintage-inspired designs. Large-scale patterns can make a tiny room feel more intentional. However, very busy prints require more careful alignment, so beginners may prefer forgiving patterns such as marble, stone, subtle geometric designs, or checkerboard layouts.
Step 2: Order Extra Tiles
Measure the length and width of the bathroom floor, multiply them to get square footage, and then add at least 10 percent extra for cuts, mistakes, and future repairs. If your bathroom has many corners, a pedestal sink, a toilet, or a pattern that must line up perfectly, consider 15 percent extra.
Buying extra from the same batch matters because colors and prints can vary slightly between production runs. Nothing ruins your proud “look what I did” moment like one replacement tile that is technically gray but spiritually purple.
Step 3: Let the Tiles Acclimate
Before installation, lay the unopened tile packages flat in the bathroom or a nearby room for about 24 to 48 hours, depending on manufacturer instructions. Adhesive tiles respond to temperature. If they are too cold, they may feel stiff and bond poorly. If they are too warm, they can stretch slightly during handling.
A comfortable room temperature helps the tiles relax and makes installation easier. This is also a good time to inspect every tile. Look for bent corners, printing defects, damaged backing, or pattern inconsistencies. Do not install a flawed tile and hope you will stop noticing it. You will notice it every morning while brushing your teeth. Forever.
Step 4: Clean the Bathroom Floor Like You Mean It
Cleaning is the least glamorous step and the most important. Adhesive hates dust, wax, grease, soap film, hair spray residue, and old bathroom grime. Sweep or vacuum first. Then wash the floor with a cleaner that removes residue. In bathrooms, pay special attention around the toilet base, vanity, tub edge, and corners where dust bunnies go to start families.
After washing, rinse with clean water if your cleaner leaves residue. Dry the floor completely. Then wipe it again with a lint-free cloth. If the floor still feels slick or greasy, clean it again. Yes, again. Peel-and-stick tile rewards the person who cleans like a detective.
Step 5: Repair Cracks, Gaps, and Deep Grout Lines
If you are installing tile stickers over existing ceramic tile, inspect the grout lines. Shallow grout lines may not be a problem, but deep or wide grout joints can show through over time. To reduce telegraphing, fill deep grout lines with a suitable floor patch, skim coat, or leveling compound recommended for your surface. Let it cure fully and sand smooth if needed.
Loose tiles should be reset or removed. Cracked vinyl should be patched. Raised bumps should be scraped flat. The goal is a smooth, solid surface. Peel-and-stick tile is not a floor therapist. It will not heal underlying issues; it will simply reveal them later with theatrical timing.
Step 6: Remove Obstacles When Possible
For the cleanest finish, remove small obstacles such as floor registers, thresholds, and quarter-round trim if you can do so safely. In many DIY bathroom makeovers, homeowners also remove baseboards, install the tile underneath, and then reinstall the trim for a professional edge. If removing trim is not practical, you can cut the tiles carefully against the wall and finish with caulk.
Removing the toilet is optional and depends on your comfort level. The most professional look comes from tiling under the toilet base, but many beginners cut carefully around the toilet instead. If you tile around it, use a paper template and seal the edge neatly. The toilet area is not the place for “close enough” energy.
Step 7: Plan the Layout Before You Peel Anything
Dry-fitting is where your bathroom floor goes from “random sticker party” to “intentional design choice.” Lay several tiles on the floor without removing the backing. Test the pattern direction, seam placement, and edge cuts. Ideally, you want balanced cuts along opposite walls and no tiny slivers near the doorway or tub.
Many DIYers start at the center of the room and work outward. Others begin along the most visible straight line, such as the doorway or tub. In a small bathroom, the best starting point is usually the line people see first when they walk in. Use a chalk line, laser level, or pencil guideline to keep the first row straight. Once the first row wanders, the whole floor can start drifting like it has weekend plans.
Step 8: Start With the Most Visible Area
Peel back a small section of the paper backing, align the tile carefully with your guideline, and press it into place. Once aligned, peel the rest of the backing away while smoothing the tile down. Avoid touching the adhesive more than necessary. Skin oils can reduce bond strength.
Press from the center outward to push out air bubbles. Use firm pressure along the edges and corners. Continue laying tiles one at a time, keeping seams tight. Do not stretch the tile to force a pattern match. Vinyl can flex, but stretching creates future gaps when it relaxes.
Step 9: Roll the Tiles for Better Adhesion
After a section is installed, roll it firmly with a floor roller. If you do not own one, use a rolling pin, a clean towel-wrapped block, or your hands with steady pressure. Pay extra attention to corners, seams, and areas near fixtures. Adhesion improves when pressure activates the glue against the floor.
This step is easy to skip because the floor already looks done. Do not skip it. Rolling is the difference between “I renovated my bathroom” and “why is this corner waving at me?”
Step 10: Cut Around Walls, Corners, and Fixtures
For straight cuts, measure the gap, mark the back of the tile, score it with a utility knife, and snap or bend along the cut line. Always double-check direction before cutting patterned tiles. When you flip a tile over, left and right swap places. This is where many DIY projects briefly become geometry class.
For curved cuts around toilets or pedestal sinks, make a paper template. Place paper around the curve, trim until it fits, then transfer the shape to the tile backing. Cut slowly. It is better to shave off a little more than to remove too much at once. Keep extra blades nearby; fresh blades make cleaner edges.
Step 11: Seal the Edges
Bathrooms need edge protection. After the tile stickers are installed and firmly pressed, seal the perimeter near the tub, shower, toilet, vanity, and walls with a flexible waterproof caulk suitable for bathrooms. This helps keep splashes from working under the tile edges.
Caulk does not make a peel-and-stick floor fully waterproof, but it improves performance in splash-prone zones. Smooth the caulk line with a damp finger or caulk tool, wipe away excess, and let it cure according to the label. Avoid soaking or mopping the floor during the cure period.
Step 12: Let the Floor Rest
Once the bathroom floor is finished, give it time. Avoid heavy cleaning, bath mats with rubber backing, puddles, or dragging furniture across it for at least 24 to 48 hours, or longer if the tile brand recommends it. Adhesive continues to strengthen after installation.
If possible, keep the bathroom well ventilated. Run the fan after showers and wipe up standing water quickly. Peel-and-stick tile can handle normal bathroom life, but it does not enjoy being treated like a kiddie pool.
How to Make Tile Stickers Look More Expensive
A peel-and-stick bathroom floor can look high-end when the details are handled carefully. Choose a pattern that suits the scale of the room. Align the pattern consistently. Keep seams tight. Replace messy caulk. Paint old baseboards. Add a fresh bath mat, updated cabinet hardware, or a simple mirror frame. The floor may be the star, but the supporting cast matters.
For a designer look, repeat one color from the floor elsewhere in the room. If your tile stickers have charcoal lines, add matte black hooks or a black-framed mirror. If the floor has warm beige tones, bring in wood shelves or woven baskets. Small connections make the room feel planned instead of “I panic-bought these tiles at midnight.”
Common Mistakes to Avoid
Skipping floor prep
The number one mistake is sticking tiles to a dirty, uneven, or damp floor. Adhesive needs a clean, dry surface. No shortcut beats preparation.
Starting against a crooked wall
Many bathroom walls are not perfectly square. Use layout lines instead of blindly trusting the wall. Walls lie. Tape measures tell uncomfortable truths.
Ignoring moisture
Peel-and-stick tiles are water-resistant, but moisture can still sneak through seams and edges. Seal splash zones and wipe up puddles quickly.
Using wall decals on the floor
Wall stickers are not made for foot traffic. Use products specifically rated for floors.
Not buying enough tiles
Extra tiles are insurance. You will need them for cutting errors, pattern matching, and future repairs.
How Long Do Bathroom Tile Stickers Last?
The lifespan depends on product quality, floor prep, bathroom moisture, traffic, ventilation, and cleaning habits. In a lightly used powder room, peel-and-stick floor tiles can last several years and sometimes longer. In a busy family bathroom with daily showers, wet towels, children, pets, and one person who treats the floor like a laundry basket, the finish may wear faster.
Think of tile stickers as a smart cosmetic upgrade, not a permanent replacement for porcelain tile. They are ideal when you want a stylish refresh before a bigger renovation, need a renter-friendly improvement, or want to make an old floor livable without spending a fortune.
How to Clean and Maintain a Peel-and-Stick Bathroom Floor
Maintenance is simple. Sweep or vacuum regularly to remove grit. Mop with a damp, not soaking wet, microfiber mop. Use gentle cleaners instead of harsh solvents or abrasive powders. Avoid steam mops unless the manufacturer specifically approves them, because heat and moisture can weaken adhesive.
Place a soft bath mat outside the shower or tub, but avoid rubber-backed mats that trap moisture or discolor vinyl. Wipe up puddles quickly. If a corner lifts, clean underneath, dry thoroughly, and press it back down with appropriate adhesive or replace the tile if needed.
When Tile Stickers Are Not the Best Choice
Tile stickers are not ideal for every bathroom. If the subfloor is damaged, the room has chronic moisture problems, the existing floor is loose, or you want a 20-year luxury renovation, traditional tile, luxury vinyl plank, or sheet vinyl may be a better investment. Peel-and-stick tile is best for quick transformations, small budgets, temporary style changes, and spaces where you can control moisture.
That said, not every home improvement project needs to be a lifetime commitment. Sometimes the goal is simply to stop hating the floor every time you reach for the toothpaste. That is a valid design goal.
Budget Breakdown for a DIY Bathroom Floor Update
A small bathroom or powder room can often be updated with tile stickers for a modest budget. Costs vary by brand and quality, but many peel-and-stick floor tiles are far cheaper than ceramic tile installation. Your main expenses are the tiles, cleaning supplies, a utility knife, extra blades, caulk, and possibly primer or patching compound.
For example, a 35-square-foot bathroom may require about 40 square feet of tile after adding extra for waste. If the tiles cost $1.50 to $4.00 per square foot, the floor material may land between $60 and $160. Add basic supplies, and the project may still cost far less than a full floor replacement. The tradeoff is durability: you save money and effort, but you accept that this is a practical refresh rather than a forever floor.
of Real-World DIY Experience: What Actually Matters
The biggest lesson from updating a bathroom floor with tile stickers is that the project feels easy only after you have respected the boring steps. The sticking part is fun. You peel, press, and suddenly the bathroom looks like it has a personality other than “landlord beige.” But the success of the project is decided before the first tile touches the floor.
In a small bathroom, I would spend more time planning than installing. Dry-fit the tiles in several directions and take photos before choosing the final layout. Patterns can look different when viewed from the doorway than they do while you are kneeling on the floor with a pencil behind your ear. If the tile has a strong geometric print, align it with the most visible sightline. If the walls are crooked, do not let the crooked wall boss you around. Create your own straight guide and follow that instead.
Cutting around the toilet is usually the part that makes beginners nervous. The best trick is to make templates from scrap paper or cardboard. Cut the template until it hugs the curve, then transfer the shape onto the tile. It may feel slow, but it is faster than ruining three tiles and questioning your entire identity. For tight curves, make small relief cuts rather than forcing one dramatic slice. A clean fit around the toilet makes the whole project look more professional.
Another practical lesson: do not rush the cleaning. Bathroom floors collect invisible residue from soaps, lotions, cleaning sprays, dust, and humidity. Even if the floor looks clean, clean it again. Then let it dry longer than you think necessary. Adhesive and moisture are not friends. They are coworkers who communicate only through problems.
Tile stickers also teach patience with seams. Press every edge. Roll every tile. Check corners as you go. If a tile lands crooked, lift it immediately and reset it before the adhesive grabs too hard. Waiting until the whole row is done usually makes the correction harder. Work slowly enough that each tile is right, but not so slowly that dust settles back onto the floor.
Finally, treat the finished floor kindly for the first couple of days. Do not soak it, scrub it, or drag a laundry hamper across it like you are training for a furniture-moving competition. Give the adhesive time to bond. Add fresh caulk where water might sneak in. Use the bathroom fan after showers. These small habits help the floor stay flat and attractive.
The best part of this DIY project is the emotional payoff. A bathroom floor update with tile stickers can take a space from tired to charming in a weekend. It is affordable, approachable, and surprisingly satisfying. No, it is not the same as a professional porcelain tile installation. But for renters, beginners, budget remodelers, and anyone who wants a quick bathroom makeover without demolition, it is a clever solution that delivers a lot of style for the effort.
Conclusion
Updating a bathroom floor with tile stickers is one of the most beginner-friendly ways to transform a dated bathroom without tearing out old flooring. The project is affordable, fast, and realistic for a weekend DIY, but it depends on careful surface preparation, accurate layout planning, clean cuts, firm pressure, and smart moisture control. Choose floor-rated vinyl tile stickers, clean the existing floor thoroughly, fill deep grout lines, dry-fit the pattern, seal the edges, and maintain the surface with gentle cleaning.
For powder rooms and low-moisture bathrooms, peel-and-stick floor tiles can be a stylish and practical upgrade. For full bathrooms, they can still work well when you manage water carefully and understand their limits. The final result can look fresh, modern, and much more expensive than it is, which is exactly the kind of home improvement magic we like: affordable, doable, and not requiring a second mortgage.
Note: This article is based on current practical guidance from major U.S. home improvement retailers, flooring manufacturers, design publications, and DIY renovation resources. Always follow the specific installation instructions provided by the tile sticker manufacturer you choose.













