
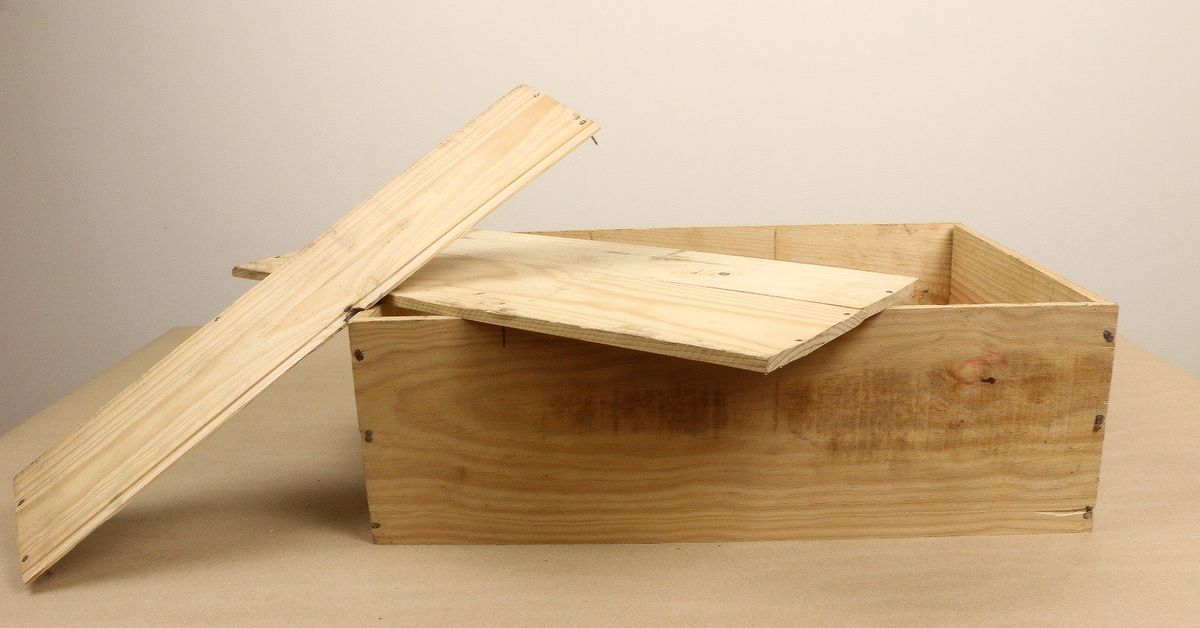
An old wine box has a strange talent: it can sit in a garage for three years looking like “future clutter,” then suddenly become the star of your dining room wall. With its stamped lettering, warm wood grain, scuffed corners, and built-in vintage attitude, a wooden wine box is practically begging to be turned into rustic farmhouse wall art. It already has character. It has history. It has survived shipping, stacking, storage, and possibly one uncle who thought it was a toolbox.
This project is perfect for anyone who loves farmhouse decor, reclaimed wood wall art, DIY home accents, and budget-friendly decorating ideas. Instead of buying a mass-produced sign that says “Gather” for the 11,000th time, you can create something personal, textured, and charming from a box that might otherwise be tossed out. The result can look like a boutique piece from a cozy country shop, only with fewer zeroes on the price tag.
In this guide, you will learn how to turn an empty wooden wine box into rustic farmhouse wall art using simple tools, thoughtful design choices, and a finish that says “collected over time,” not “attacked by a craft tornado.” We will cover cleaning, sanding, painting, staining, distressing, decorating, sealing, and hanging. We will also look at practical design ideas, from kitchen wall art to entryway signs and small gallery-wall pieces.
Why a Wine Box Works So Well for Farmhouse Wall Art
Farmhouse style is built around warmth, simplicity, natural texture, and useful objects that feel like they have lived a little. A wooden wine box fits that mood beautifully because it is not too perfect. The grain may be uneven. The corners may be dented. The branding may be slightly faded. That is not a flaw; that is the charm clock ticking loudly.
Rustic farmhouse wall art often uses reclaimed wood, weathered finishes, vintage typography, antique-style hardware, natural fibers, and muted colors. A wine box gives you several of those elements from the beginning. The panels are usually lightweight enough to hang, sturdy enough to hold decorative details, and interesting enough to stand alone with very little fuss.
There is also a sustainability bonus. Reusing an old box keeps a usable material in circulation and reduces the need to buy something new. For home decorators, that means less waste, less spending, and more originality. For the wall, it means texture. For your conscience, it means a tiny standing ovation.
Materials and Tools You Will Need
You do not need a professional workshop to make this project. A kitchen table, a drop cloth, and a little patience will do. Just make sure you work in a ventilated area, protect nearby surfaces, and ask an adult for help with cutting, drilling, or hanging if needed.
Basic Materials
- One empty wooden wine box or wine crate panel
- Fine-grit and medium-grit sandpaper
- Lint-free cloth or tack cloth
- Wood stain, whitewash, chalk-style paint, or latex paint
- Small paintbrushes or foam brushes
- Clear water-based polyurethane, wax, or matte sealer
- Sawtooth hanger, D-rings, picture wire, or a French cleat
- Wall anchors or screws suitable for the wall and project weight
Optional Decorative Add-Ons
- Stencils for letters, numbers, herbs, grapes, flowers, or farmhouse patterns
- Small hooks for keys, mugs, or lightweight kitchen items
- Twine, burlap ribbon, dried flowers, or faux greenery
- Vintage-style drawer pulls or knobs
- Mini clothespins for photos or recipe cards
- Transfer paper for custom lettering
If the wine box still has nails, staples, splinters, or rough edges, deal with those first. Nothing ruins a cute DIY moment faster than a splinter that enters the chat like a villain with a tiny wooden sword.
Step 1: Choose the Best Part of the Wine Box
Not every side of the box has to become art. Look at all panels before you decide what to feature. The lid may have the best branded stamp. The side panel may have a better shape. The bottom may be plain but perfect for painting a custom quote or farmhouse motif.
For a simple wall sign, use one flat panel. For a shadow-box style piece, keep the box partly intact and use the interior depth to hold small decorative items. For a more sculptural look, remove several panels and arrange them like reclaimed wood planks.
A good rule is to preserve anything that already looks interesting. If the box has a vineyard stamp, burned-in logo, lot number, or old shipping marks, let them shine. Authentic details make rustic farmhouse wall art feel collected rather than manufactured.
Step 2: Clean the Wood Without Erasing Its Character
Before painting or staining, wipe the box with a dry cloth to remove dust. If it is grimy, use a slightly damp cloth with mild soap, then let the wood dry fully. Avoid soaking the wood because thin crate panels can warp. Also avoid harsh cleaners if you want to keep the printed graphics intact.
If the box has a musty smell, place it in a dry, airy spot for a day or two. A little fresh air can do wonders. If needed, lightly sprinkle baking soda inside the box, let it sit, then vacuum it away. Do not trap moisture under paint or sealer. That is how a simple craft becomes a science experiment with regrets.
Step 3: Sand Smooth, But Do Not Overdo It
Sanding prepares the surface and makes the final piece safer to handle. Start with medium-grit sandpaper if the wood is rough, then finish with fine-grit sandpaper. Focus on edges, corners, and any spots that might snag fabric or fingers.
The goal is not to make the wood look brand new. Farmhouse charm likes a few wrinkles. Keep the dents, softened corners, faded printing, and small imperfections that give the piece personality. Sand just enough so the surface accepts paint or stain and feels pleasant to touch.
Step 4: Decide on a Rustic Farmhouse Design
Before you open a paint can, decide what role the piece will play in the room. Is it a focal point above a bar cart? A cozy kitchen accent? A narrow sign for an entryway? A small piece in a gallery wall? The design should fit the space instead of shouting at it from across the room.
Design Idea 1: Keep the Original Wine Branding
If the box has attractive branding, use it as the main artwork. Add a light stain around the edges, seal the surface, and hang it as-is. This works well in dining rooms, breakfast nooks, kitchens, and farmhouse-style bar areas.
Design Idea 2: Add a Whitewashed Finish
Whitewashing softens the wood and gives it that airy, weathered farmhouse look. Mix white latex paint with water, brush it along the grain, and wipe away the excess with a cloth. The wood grain should peek through. If the result looks too pale, add a second thin coat. If it looks too painted, sand lightly after it dries.
Design Idea 3: Create a Mini Farmhouse Sign
Paint the panel in a warm neutral color such as creamy white, greige, soft sage, charcoal, or weathered gray. Add lettering with a stencil or transfer method. Phrases like “Homegrown,” “Market Fresh,” “The Kitchen,” or “Gather Here” work well, but keep it personal. A family name, favorite recipe title, or local town name will feel more original than a generic phrase everyone’s cousin has above the sink.
Design Idea 4: Turn It Into Functional Wall Art
Add hooks to the bottom of the box panel for keys, aprons, lightweight mugs, or small baskets. A wine box lid can become a rustic entryway organizer. A deeper crate can become a small display shelf for tiny jars, dried flowers, recipe cards, or seasonal decor.
Step 5: Add Color, Stain, or Patina
The finish is where the old wine box becomes wall art instead of “wood rectangle of uncertain destiny.” For a traditional rustic look, use a medium brown stain, walnut stain, or weathered gray stain. For modern farmhouse style, pair warm wood with soft white, muted green, dusty blue, or matte black accents.
Apply stain with a cloth or brush, following the grain. Wipe away extra stain so the wood does not become blotchy. Let it dry fully before adding paint or sealer. If using paint, apply thin coats rather than one thick coat. Thin layers look more natural and are easier to distress.
For a chippy or aged effect, paint the wood, let it dry, then lightly sand the edges and raised areas. Focus on places that would naturally wear over time: corners, handles, edges, and any raised lettering. Random sanding all over the center can look fake. Real age is lazy and practical; it wears where hands touch.
Step 6: Distress the Wood the Smart Way
Distressing should be subtle. A few small dings, softened corners, and sanded edges can make the piece look vintage. Too much distressing can make it look like it lost a fight with a garden rake.
Use fine sandpaper, a sanding block, or a wire brush to reveal hints of wood under paint. If the surface looks too new, tap gently with keys or a small chain to create small marks. Vary the shapes and spacing so the distressing does not look patterned. For a deeper aged look, rub a little dark stain or antiquing wax into corners and wipe most of it away.
The secret is restraint. You can always add more wear, but you cannot easily convince a wildly distressed sign to calm down and make better life choices.
Step 7: Add Decorative Details
Once the finish is dry, add the details that make the piece feel complete. If the wine branding is still visible, frame it with thin strips of scrap wood. If the surface is plain, stencil a simple graphic: olive branches, herbs, grapes, wheat, chickens, a farmhouse market label, or a vintage-style number.
For kitchen wall art, attach small hooks and hang measuring spoons, a mini wreath, or a dried herb bundle. For entryway decor, add hooks for keys and a small label holder. For dining room decor, keep it more elegant with a thin black border, subtle whitewash, and one piece of antique brass hardware.
Burlap, twine, and greenery can work, but use them sparingly. A little texture says “farmhouse.” Too much says “the craft aisle sneezed.”
Step 8: Seal the Finished Piece
Sealing protects the wood, paint, stain, and lettering. Choose a matte or satin clear coat for a natural farmhouse look. Glossy finishes can work in some spaces, but they may make rustic wood look too shiny and new.
Use a water-based polyurethane for durability, especially if the piece will hang in a kitchen or entryway where it may collect dust or fingerprints. Apply a thin coat, let it dry according to the product directions, and add another coat if needed. Wax can also give a soft, hand-rubbed finish, but it may need occasional maintenance.
Step 9: Add the Right Hanging Hardware
Before hanging, weigh the piece and choose hardware that can support it. A flat panel may only need a sawtooth hanger. A deeper box or shelf-style piece may need D-rings, picture wire, or a French cleat. If the piece will hold anything, choose stronger hardware than you think you need.
Whenever possible, screw into a wall stud. If a stud is not available, use a wall anchor rated for the weight of the piece. Do not guess. Drywall is not magic, and gravity has never lost a case in court.
Hold the art against the wall and test the height before making holes. For most rooms, art looks best when centered near eye level or visually connected to the furniture below it. Above a console, bar cart, or dining buffet, leave enough breathing room so the piece feels intentional, not like it is trying to escape the furniture.
Where to Display Your Rustic Wine Box Wall Art
A finished wine box wall art piece works in more rooms than you might expect. In a kitchen, it can add warmth above open shelving, a coffee station, or a breakfast nook. In a dining room, it can bring vineyard-inspired texture without making the room feel like a themed restaurant. In an entryway, it can become a small organizer with hooks. In a living room, it can join a gallery wall with family photos, botanical prints, vintage plates, and small mirrors.
For a modern farmhouse look, mix the wood with clean lines and simple colors. Pair the piece with black metal accents, woven baskets, linen curtains, stoneware, or aged brass. For a more cottage-style look, add soft florals, pale paint, and natural greenery. For industrial farmhouse style, combine the wine box with dark hardware and a slightly deeper stain.
Common Mistakes to Avoid
Using Too Many Farmhouse Cliches
Rustic does not require every sign to mention chickens, biscuits, or being blessed beyond measure. Choose details that match your home and personality. A simple wood panel with great texture can be stronger than a crowded design.
Skipping Surface Prep
Dust, wax, grease, and rough patches can cause paint or stain to behave badly. Clean and sand first. Your future self will thank you while not muttering under their breath.
Over-Distressing
Distressing should look like time did the work, not like a raccoon with a sanding block. Focus on edges and high-contact areas.
Hanging It Too High
Wall art that floats too close to the ceiling can feel disconnected. Keep it visually related to the furniture or wall grouping around it.
Ignoring Weight
If you keep the box intact or add hooks and objects, treat it like a small shelf. Use secure hardware and anchors.
Budget-Friendly Variations
If you do not have a wine box, the same idea works with a cigar box lid, small produce crate, reclaimed drawer front, wooden packing crate, or scrap plywood. The goal is not to worship the wine box. The goal is to reuse wood with character.
You can also combine several box panels to make a larger statement piece. Arrange them in a vertical stack, a grid, or a staggered plank pattern. Use different stains for a patchwork effect, or paint them all in one color for a cleaner look. Add one stencil across the combined panels for a custom sign that feels handmade in the best possible way.
Conclusion: Small Box, Big Farmhouse Energy
Turning an old wine box into rustic farmhouse wall art is one of those satisfying DIY projects that proves style does not have to be expensive. With basic prep, a smart finish, a few decorative details, and safe hanging hardware, a forgotten wooden box can become a warm, personal piece of home decor.
The best part is that no two projects will look exactly alike. One box may become a weathered kitchen sign. Another may become a tiny entryway organizer. Another may stay almost untouched, letting its original stamp and natural grain do all the talking. That is the beauty of reclaimed wood wall art: it brings a story with it, even before you add your own.
Real-World Experience: What This Project Teaches You
The first thing you learn when turning an old wine box into rustic farmhouse wall art is that the wood makes more decisions than you expected. You may begin with a perfect plan involving crisp white lettering, a balanced stencil, and a finish worthy of a magazine photo. Then you notice one side of the box has a gorgeous old stamp, another side has better grain, and one corner looks beautifully worn in a way no store-bought sign can fake. Suddenly, the project changes, and that is usually a good thing.
In practice, the most successful pieces are often the ones that respect the original box. If the branding is interesting, do not bury it under heavy paint. If the wood grain is warm, use a thin wash instead of an opaque coat. If the corners are dented, let them stay dented. Those little marks help the final piece feel authentic. A rustic farmhouse project should not look as if it just came out of a plastic wrapper. It should look like it has been around, behaved mostly well, and collected a few stories.
Another lesson is that simple designs age better. It is tempting to add a stencil, hooks, twine, greenery, a bow, a mini wreath, and maybe a tiny rooster because the craft drawer is open and confidence is dangerous. But restraint usually wins. A wine box panel with a soft whitewash, one line of lettering, and a matte sealer can look more expensive than a crowded design. Farmhouse style works best when it feels relaxed, not over-decorated.
Testing finishes on the back of the box is also worth the extra few minutes. Some wine boxes are made from thin, thirsty wood that grabs stain quickly. Others have printed logos that can smear if rubbed too aggressively. A tiny test patch can save the front of the project from becoming a “learning experience” in the dramatic sense.
Hanging is the step people underestimate most. A wine box panel feels light in your hand, but once you add hooks, hardware, and decorative items, it may need stronger support. Use the right hanger, measure twice, and check that the piece sits level. Crooked rustic wall art is still crooked. Calling it “farmhouse casual” only works for about six minutes.
The best experience comes when you place the finished piece on the wall and realize it does more than fill space. It warms up the room. It adds texture. It gives guests something to notice. It also gives you the quiet satisfaction of knowing you made something useful and beautiful from an object that could have been thrown away. That is the real charm of this project: it is affordable, creative, personal, and just imperfect enough to feel like home.












