
Note: This article is written as original, web-ready content and synthesizes practical chainsaw maintenance guidance from major manufacturers, safety resources, and U.S. home-improvement references.
A sharp chainsaw is a beautiful thing. It bites cleanly, throws big wood chips, keeps the motor from screaming like it has been asked to file taxes, and makes cutting safer, faster, and far less exhausting. A dull chainsaw, on the other hand, is basically an angry butter knife with a gas engine. It smokes, drifts sideways, produces powdery sawdust, overheats the bar, and turns a simple firewood job into a full-body argument.
Learning how to sharpen a chainsaw is one of the most useful skills any homeowner, landowner, farmer, or weekend woodcutter can learn. You do not need to be a professional logger. You do not need a mysterious workshop full of sparks and old coffee cans. With the correct round file, a file guide, a flat file, a depth gauge tool, gloves, and a little patience, you can restore a tired chain to clean-cutting condition in less time than it takes to wonder why your saw suddenly hates you.
This guide explains how to sharpen a chainsaw chain by hand, how to know when sharpening is needed, how to file cutters evenly, how to adjust the depth gauges, and when it is smarter to replace the chain instead of trying to rescue it. Let’s give that chain its bite back.
Why a Sharp Chainsaw Chain Matters
A chainsaw chain works by using many small cutters to shave chips from wood. Each cutter has a top plate, side plate, cutting corner, gullet, and a depth gauge, often called a raker. When the cutting edges are sharp and the rakers are correctly set, the saw feeds itself into the wood with steady pressure. You guide it; you do not wrestle it.
When the chain becomes dull, everything changes. The saw may require heavy pushing, the cut may curve, the bar and chain may run hotter, and the motor may work harder than it should. Instead of large, clean chips, a dull chain often produces fine sawdust. That is your chainsaw’s way of waving a tiny white flag.
Sharpening improves cutting speed, reduces wear on the guide bar and sprocket, saves fuel or battery power, and helps maintain control. It also reduces the temptation to force the saw through the cut, which is never a great plan. Chainsaws already come with enough drama; they do not need encouragement.
Signs Your Chainsaw Needs Sharpening
The easiest clue is the chip size. A sharp chainsaw throws chips that look like small flakes or curls. A dull chainsaw produces dust or powder. If your cut looks like someone sprinkled tan flour around the log, it is time to sharpen.
Common Warning Signs
- The saw no longer pulls itself into the wood.
- You have to push hard to make progress.
- The chain makes smoke even when chain oil is present.
- The cut wanders to one side.
- The saw chatters, bounces, or feels grabby.
- The cutters look rounded, shiny, chipped, or damaged.
- The chain hit dirt, sand, rocks, metal, or frozen mud.
One accidental kiss with soil can dull a chain shockingly fast. Dirt contains grit, and grit is basically sandpaper with bad intentions. If you are cutting fallen limbs, keep the bar out of the ground and roll logs when possible before finishing the cut.
Tools You Need to Sharpen a Chainsaw
Before sharpening, gather the right tools. Chainsaw sharpening is not difficult, but using the wrong file size or guessing the angle can turn a decent chain into modern art. The file must match the chain pitch and cutter style. Check your chainsaw manual, chain packaging, bar stamp, or chain manufacturer’s chart for the correct file diameter.
Basic Chainsaw Sharpening Tools
- Round file: Used to sharpen the curved cutting edge of each tooth.
- File guide: Helps hold the round file at the correct height and angle.
- Flat file: Used to lower depth gauges when needed.
- Depth gauge tool: Shows whether the rakers are too high.
- Marker or lumber crayon: Marks the first cutter so you know where you started.
- Gloves: Protect your hands from sharp cutters.
- Bench vise or stump vise: Holds the bar steady while filing.
- Scrench: Adjusts chain tension and bar nuts.
A 2-in-1 filing guide can be especially helpful for beginners because it sharpens the cutter and addresses the depth gauge in one guided motion. It is not magic, but it is close enough to feel suspiciously convenient.
Understand the Parts of the Chain
Before you start filing, it helps to know what you are looking at. Each cutting tooth alternates direction: one cutter faces left, the next faces right. That is why you sharpen one side of the chain first, then turn the saw or reposition yourself and sharpen the other side.
The cutter is the sharp tooth that slices wood. The depth gauge, or raker, sits just in front of the cutter and controls how much wood the cutter removes. If the raker is too high, the cutter takes too small a bite and the saw cuts slowly. If the raker is too low, the cutter takes too aggressive a bite, increasing vibration, rough cutting, and kickback risk.
The goal is balance: sharp cutters, equal cutter length, correct angle, and proper raker height. Chainsaw sharpening is less about brute force and more about consistency. Think of it as dental care for a tiny metal alligator.
Step-by-Step: How to Sharpen a Chainsaw by Hand
Step 1: Turn Off and Secure the Saw
For a gas chainsaw, turn the engine off and let it cool. For a battery chainsaw, remove the battery. For a corded electric chainsaw, unplug it. This sounds obvious, but “obvious” is exactly the category where bad accidents like to hide.
Engage the chain brake while setting up, then clamp the guide bar in a vise. The chain should still be able to move when you release the brake for repositioning, but the bar itself should not wiggle. A steady bar makes cleaner, safer filing possible.
Step 2: Clean and Inspect the Chain
Brush away sawdust, sap, oil sludge, and dirt. Look for cracked drive links, missing cutters, bent tie straps, damaged rivets, or severe heat discoloration. If the chain is badly damaged, stretched beyond adjustment, missing teeth, or has been sharpened down near its service marks, replace it. Sharpening is maintenance, not resurrection.
Step 3: Tighten the Chain Properly
A loose chain moves around while you file, which makes accurate sharpening difficult. Adjust the chain so it sits snugly against the underside of the guide bar but still moves by hand with gloves on. Do not overtighten it. You want stable, not strangled.
Step 4: Find and Mark the Starting Cutter
Find the shortest or most damaged cutter. Many people use this as the “master cutter” and file the rest to match it. Mark that cutter with a felt-tip marker or lumber crayon. This prevents the classic beginner mistake: filing around the chain twice and wondering why your afternoon disappeared.
Step 5: Position the Round File Correctly
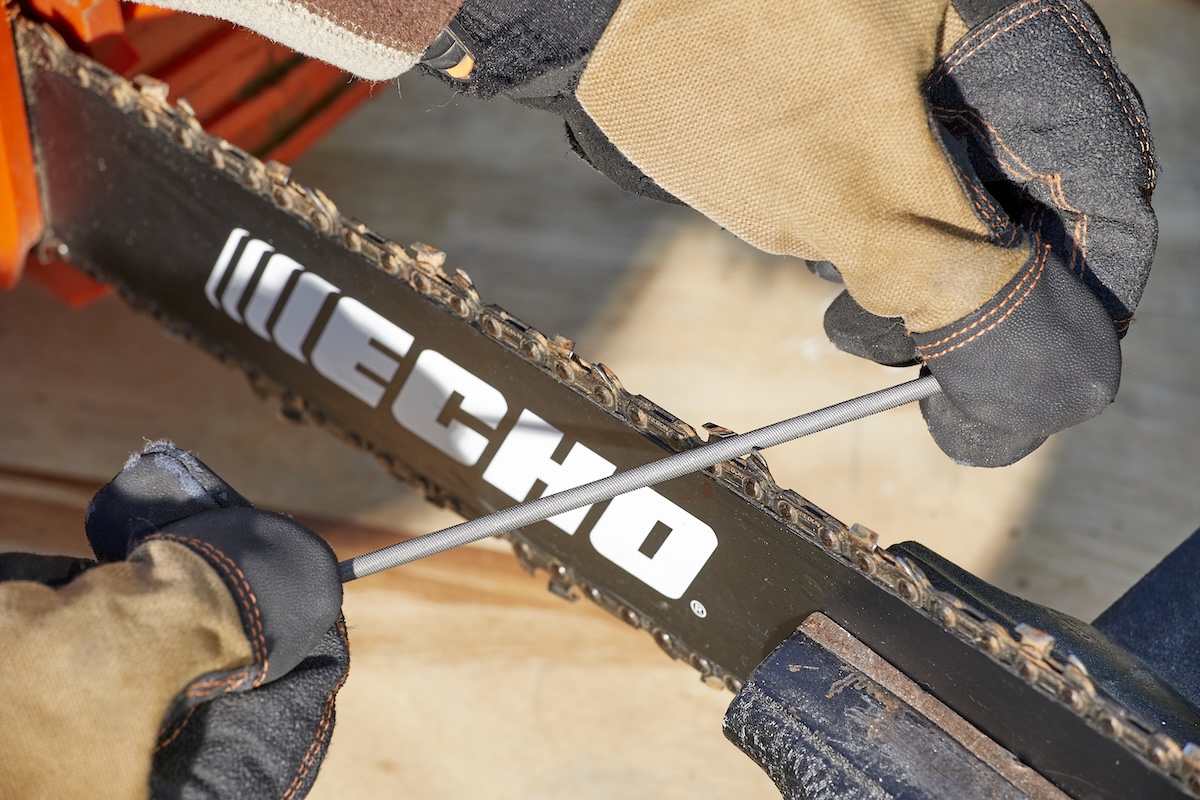
Place the round file into the cutter’s gullet, the curved area just below the top plate. If you are using a file guide, rest it on the cutter according to the guide markings. Most common crosscut chains use a sharpening angle around 25 to 35 degrees, with 30 degrees being common, but always follow the chain manufacturer’s specification.
Hold the file level and maintain the correct angle. A portion of the file should sit above the cutter’s top plate rather than being buried too low in the gullet. If the file sits too low, it can create a hooked, aggressive cutter. If it sits too high, the edge may become blunt and ineffective.
Step 6: File From the Inside Out
Push the file through the cutter from the inside toward the outside. Use smooth, firm strokes in one direction only. Do not saw the file back and forth. Files cut on the forward stroke; dragging backward with pressure only wears the file and adds nothing except mild disappointment.
Use the same number of strokes on each cutter unless a damaged cutter needs extra work. For light touch-ups, two or three strokes may be enough. For a dull chain, five to ten strokes may be needed. The cutting edge should look clean and sharp, with no shiny rounded reflection along the edge.
Step 7: Sharpen Every Other Cutter
Because cutters alternate direction, sharpen all cutters facing one way first. Release the chain brake as needed, rotate the chain forward, re-engage the brake, and continue. Keep your file angle consistent. When you return to the marked cutter, you have completed one side.
Step 8: Turn the Saw and Sharpen the Opposite Cutters
Rotate the saw in the vise or move to the other side of the bar. Sharpen the cutters facing the opposite direction using the same angle, pressure, and stroke count. Try to keep all cutters the same length. Uneven cutters can make the saw pull to one side, cut roughly, or vibrate more than normal.
Step 9: Check the Depth Gauges
After sharpening the cutters, place the depth gauge tool over the chain. If a raker protrudes above the tool, file it down with a flat file until it is flush. Then lightly round the front edge of the raker to preserve smooth cutting behavior. Be careful not to touch the freshly sharpened cutter with the flat file.
You usually do not need to lower the rakers every single time you touch up the cutters, but you should check them regularly. As cutters get shorter from repeated sharpening, the raker relationship changes. Ignoring rakers is like tuning a guitar and leaving one string in a different zip code.
Step 10: Lubricate, Recheck Tension, and Test Cut
Brush off filings, make sure the chain is oiled, and check chain tension again. A few careful test cuts in clean wood will tell you a lot. A properly sharpened chainsaw should feed smoothly and produce chips, not dust. If it pulls sideways, one side may be sharper, longer, or filed at a different angle than the other.
Common Chainsaw Sharpening Mistakes
Using the Wrong File Size
The file diameter matters. A file that is too small can create an overly hooked cutter. A file that is too large may not sharpen the working edge correctly. Match the file to the chain pitch and cutter type.
Changing the Factory Angle
Most chains have a recommended top-plate filing angle. Follow it. Guessing may still produce a sharp-looking tooth, but the chain may cut poorly, dull quickly, or become too aggressive.
Filing Cutters Unevenly
If one side receives more strokes than the other, the saw may curve through the cut. Equal cutter length matters almost as much as sharpness.
Forgetting the Depth Gauges
High rakers make a sharp chain act dull. Low rakers can make the saw grabby and increase kickback risk. Check them with a proper gauge.
Sharpening a Dirty Chain
Sap, grit, and oily sawdust clog files and hide damage. Clean first, sharpen second, brag later.
Hand File vs. Electric Chainsaw Sharpener
A hand file is inexpensive, portable, quiet, and ideal for quick touch-ups in the field. It removes less metal than a grinder and helps extend chain life when used correctly. For most homeowners, a round file and guide are enough.
An electric bench grinder or chain sharpener is faster and useful for restoring very dull chains or maintaining multiple chains. However, grinders remove metal quickly and can overheat cutters if used carelessly. If you grind away too much tooth, the chain’s service life shrinks. The grinder is a good servant but a terrible show-off.
A practical approach is to hand-file frequently and use a grinder only when the chain is badly rocked, uneven, or neglected. Many serious woodcutters keep two or three chains on hand: one on the saw, one sharp backup, and one waiting for maintenance.
How Often Should You Sharpen a Chainsaw?
There is no single schedule because cutting conditions vary. Clean green wood is gentle compared with dirty storm debris, bark packed with grit, roots, or frozen logs. A good habit is to give the chain a light touch-up every time you refuel a gas saw or swap batteries on a cordless saw, especially during heavy cutting sessions.
Frequent light filing is better than waiting until the chain is painfully dull. A few strokes on a slightly dull cutter are easier than major surgery on a chain that has been chewing dirt all afternoon.
When to Replace the Chain Instead of Sharpening
Replace the chain if cutters are worn down to the service marks, if several teeth are missing or badly broken, if the chain has stiff links that cleaning cannot fix, or if the chain has stretched so much it cannot be tensioned properly. Also replace it if you see cracks, damaged rivets, or serious heat damage.
Chains are wear items. Keeping a worn-out chain alive forever is not thrift; it is mechanical denial. A fresh chain can make an old saw feel young again.
Chainsaw Sharpening Safety Tips
Wear gloves whenever handling the chain. Even a dull cutter can slice skin. Use eye protection when filing or grinding because metal filings and abrasive dust are not friendly to eyeballs. Keep the saw stable, keep your hands clear of sharp edges, and never sharpen a powered or connected saw.
After sharpening, confirm that the chain brake works, the chain is properly tensioned, the bar nuts are secure, and the oiler is functioning. A sharp chain is only one part of safe chainsaw use. You still need proper stance, two-handed control, awareness of kickback zones, and protective gear such as eye protection, hearing protection, boots, gloves, and chainsaw chaps when cutting.
Practical Experience: What Sharpening a Chainsaw Teaches You
The first time you sharpen a chainsaw, it may feel oddly fussy. There are angles, file sizes, rakers, cutter lengths, and enough tiny metal geometry to make you wonder whether you accidentally enrolled in engineering night school. But after a few sessions, the process becomes surprisingly satisfying. You start to hear and feel the difference between a chain that is merely spinning and a chain that is actually cutting.
One of the biggest lessons is that sharpening early saves time. Many beginners keep cutting long after the chain has gone dull because stopping feels inconvenient. In reality, five minutes with a file can save half an hour of pushing, smoking, overheating, and muttering creative phrases at a log. A sharp chain makes the saw feel calmer. The motor does not strain as much. The bar does not bind as easily. The chips look healthier. Even your shoulders notice.
Another lesson is that consistency beats aggression. New sharpeners often press too hard, take too many strokes, or try to “improve” the factory angle. That usually creates uneven cutters. The better method is boring in the best possible way: same angle, same pressure, same stroke count, same rhythm. Mark the first tooth, file one side, turn the saw, file the other side, check the rakers, and move on. Chainsaw sharpening rewards patience, not heroic arm strength.
Experience also teaches you to respect dirt. A chain can cut clean hardwood for a long time and then lose its edge in seconds after touching soil. Cutting firewood on the ground is where many chains go to retire early. Put logs on a support when possible, cut most of the way through, roll the log, and finish from the other side. This one habit can dramatically reduce sharpening time.
Keeping a small sharpening kit with the saw is another real-world trick. A round file, guide, flat file, depth gauge tool, marker, gloves, and scrench can fit in a small pouch. When the saw starts throwing dust, you do not have to quit the job or keep abusing the chain. You can touch it up right there. It feels a bit old-school, but in the best way, like knowing how to change a tire or make coffee without a machine that has Bluetooth.
Finally, sharpening teaches you when not to sharpen. Some chains are too damaged, too short, or too uneven to be worth saving by hand. That is not failure. That is good judgment. A replacement chain is cheaper than a ruined bar, a burned-out motor, or an unsafe cutting session. The goal is not to win a lifetime achievement award for metal conservation. The goal is clean cutting, safe handling, and a saw that works the way it should.
Conclusion
Knowing how to sharpen a chainsaw is a practical skill that pays off every time you cut. A sharp chain works faster, runs cooler, creates cleaner chips, reduces strain on the saw, and gives you better control. The process is straightforward: secure the saw, clean and inspect the chain, choose the correct file, follow the original filing angle, sharpen cutters evenly, check the depth gauges, and test the result in clean wood.
You do not need perfection on your first try. You need the right tools, a steady setup, and a willingness to slow down long enough to be consistent. Once you learn the feel of a sharp chain, you will never want to go back to forcing a dull one through a log. Your saw will thank you, your arms will thank you, and the wood pile will have no idea what hit it.











