
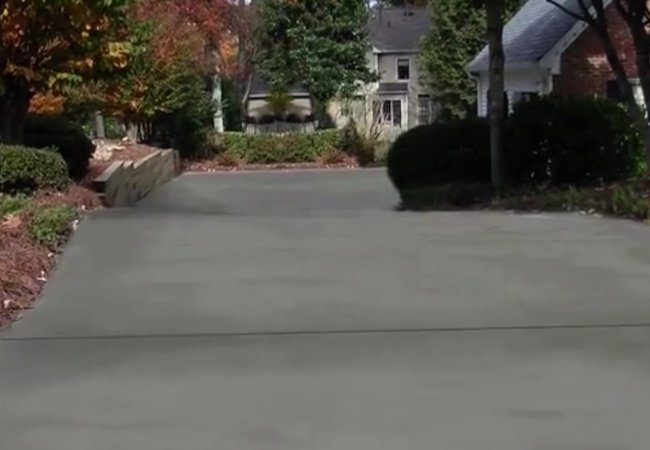
A tired concrete driveway can make a perfectly nice house look like it forgot to put on shoes. The good news? If the slab is structurally sound, you may not need a full replacement. Learning how to resurface a concrete driveway can help you cover shallow wear, minor spalling, discoloration, and rough patches with a fresh, durable layer of concrete resurfacer. Think of it as giving your driveway a clean shave, a haircut, and a strong cup of coffee.
This guide walks through the practical, Bob Vila-style approach: inspect first, prep like a perfectionist, mix carefully, apply quickly, and cure patiently. Concrete resurfacing is not magic in a bag, but when done correctly, it can dramatically improve curb appeal and extend the life of an existing driveway.
What Does It Mean to Resurface a Concrete Driveway?
Concrete driveway resurfacing is the process of applying a thin, cement-based overlay over an existing concrete slab. Most resurfacing products are polymer-modified, which means they are designed to bond better, resist wear, and spread more smoothly than ordinary concrete mix. Unlike pouring a new driveway, resurfacing does not replace the slab underneath. Instead, it restores the top surface.
This makes resurfacing ideal for concrete that looks worn but is still stable. Surface scaling, light spalling, shallow pitting, cosmetic cracks, and weathered gray concrete are all common reasons homeowners choose this project. A driveway that looks like it has survived three winters, two oil leaks, and one teenager learning to park may still be a good candidate.
However, resurfacing is not the right fix for every driveway. If the concrete is sinking, heaving, badly cracked, moving, or broken into loose sections, the problem is deeper than the surface. In that case, resurfacing is like putting a tuxedo on a raccoon: technically possible, but not a long-term solution.
Resurface, Repair, or Replace: How to Decide
Before buying concrete resurfacer, inspect the driveway carefully. Walk the entire surface and look for cracks, hollow areas, uneven slabs, drainage problems, loose chunks, and deep deterioration. A resurfacer needs a clean, solid base to bond to. If the base is weak, the new layer may peel, crack, or flake off.
Resurface when:
- The slab is structurally sound.
- Damage is mostly cosmetic or shallow.
- Cracks are narrow and not actively shifting.
- The surface is worn, pitted, stained, or lightly spalled.
- You want better curb appeal without replacing the whole driveway.
Repair first when:
- There are cracks wider than hairline cracks.
- Small holes or spalled areas need patching.
- Oil, grease, paint, or sealers may block bonding.
- Control joints are packed with dirt or weeds.
Replace or call a pro when:
- Slabs are sunken, tilted, or lifted by roots or frost.
- Cracks are wide, spreading, or uneven from one side to the other.
- Large sections are crumbling.
- Water drains toward the house or pools in deep depressions.
- The driveway has structural problems beneath the concrete.
Cost is another factor. Professional concrete driveway resurfacing often costs less than replacement, while DIY resurfacing can be even cheaper if the driveway is small and the prep work is manageable. Still, the cheapest project is the one you only have to do once. If the slab is failing, replacement may save money over time.
Tools and Materials You Will Need
Concrete resurfacing moves quickly once the mix hits the driveway, so gather everything before you start. This is not the moment to discover your drill battery is dead or your squeegee has gone on vacation.
Basic tools
- Pressure washer
- Stiff broom or push broom
- Long-handled squeegee
- Concrete finishing broom
- 5-gallon buckets
- Heavy-duty drill with paddle mixer
- Trowel or margin trowel
- Caulk gun, if using concrete crack sealant
- Measuring container for water
- Painter’s tape and plastic sheeting
Materials
- Concrete resurfacer
- Concrete crack filler or repair mortar
- Concrete degreaser
- Backer rod for wider joints or cracks
- Concrete bonding agent or primer, if required by the product
- Concrete sealer, optional but recommended after curing
Safety gear
- Safety glasses
- Waterproof gloves
- Dust mask or respirator when handling powder or grinding concrete
- Knee pads
- Long sleeves and work pants
- Hearing protection when pressure washing or grinding
Concrete products are alkaline and can irritate skin. Dry cement dust is also not something your lungs will thank you for. Work carefully, avoid breathing dust, and follow the manufacturer’s safety instructions.
Step-by-Step: How to Resurface a Concrete Driveway
Step 1: Pick the Right Weather Window
Weather can make or break a resurfacing job. Most concrete resurfacing products perform best when the air and surface temperature are above 50 degrees Fahrenheit and below extreme heat. Avoid windy days, blazing sun, rain, freezing nights, or conditions where the surface dries too fast.
A cloudy, mild day is your friend. Early morning can work well in warm climates, but avoid applying resurfacer to concrete that is hot enough to fry breakfast. If the surface is too hot, the mix may flash-dry before it bonds properly.
Step 2: Clean the Driveway Thoroughly
Surface preparation is the most important part of concrete driveway resurfacing. The new layer must bond to the old concrete, and it cannot bond through dirt, moss, oil, loose cement, tire residue, or mystery stains from 2009.
Start by sweeping away leaves, grit, and debris. Use a degreaser on oil spots, scrubbing until the stain is as clean as possible. Then pressure wash the entire driveway. Hold the wand at a consistent angle and work methodically from one side to the other. Pay close attention to cracks, edges, corners, and low spots where dirt collects.
If old paint, sealers, or coatings are present, check the resurfacer label. Some coatings must be removed by grinding or mechanical abrasion before resurfacing. A resurfacer needs direct contact with clean concrete, not a flaky old film pretending to be helpful.
Step 3: Remove Loose Concrete
Any loose or crumbling material must go. Use a chisel, scraper, grinder, or wire brush to remove weak edges around spalled areas and cracks. Vacuum, sweep, or rinse away the dust. If the surface sounds hollow when tapped, investigate further. Loose concrete under a new overlay will eventually fail.
Step 4: Repair Cracks, Holes, and Spalling
Concrete resurfacer is designed to create a new surface, not fill deep holes like a superhero with a cape. Patch cracks, chips, and deeper spalled areas before applying the resurfacer coat. For narrow cracks, use a concrete crack filler or repair caulk rated for driveways. For deeper damage, use repair mortar or the resurfacing product mixed to a thicker consistency if the manufacturer allows it.
Wider cracks may need backer rod before sealant so the repair material does not sink endlessly into the gap. Smooth patched areas flush with the surrounding concrete and let them cure as directed. Do not rush this step. If repairs are still soft or damp when you resurface, the final finish may show lines, bumps, or weak spots.
Step 5: Protect Edges, Doors, Walls, and Landscaping
Mask garage doors, siding, brick, pavers, expansion joints, and nearby landscaping with tape and plastic. Resurfacer is easier to keep off things than to remove later. Also plan where you will start and stop. Work from the garage or highest point toward the street or lowest exit so you do not trap yourself on a wet driveway like a sitcom character.
Step 6: Dampen the Concrete
Many resurfacing products require the old concrete to be damp but not puddled. This is often called a saturated surface dry condition. The idea is simple: dry concrete can suck moisture out of the resurfacer too quickly, while standing water can weaken the bond.
Lightly mist the surface with water, then use a broom or squeegee to remove puddles. The driveway should look darkened from moisture, not shiny with water.
Step 7: Mix the Concrete Resurfacer
Read the product label twice. Then read it once more, because concrete has a sense of humor and it likes to set while you are guessing. Add the recommended amount of clean water to a 5-gallon bucket, then slowly add the dry resurfacer while mixing with a drill and paddle. Mix until the material reaches a smooth, pourable consistency.
Do not add extra water to make the mix easier to spread unless the manufacturer allows it. Too much water can weaken the resurfacer, cause color variation, and reduce durability. Mix only what you can apply within the working time. In warm weather, that may be a surprisingly short window.
Step 8: Apply the Resurfacer
Pour a strip of resurfacer onto the damp driveway and spread it with a long-handled squeegee. Push and pull the material firmly so it fills pores and bonds to the surface. Keep the layer even and avoid leaving ridges or thick puddles. Many products are applied in a thin coat, often around 1/16 to 1/8 inch, although some allow thicker applications in certain conditions.
Work in manageable sections. Large driveways should be divided using control joints as natural stopping points. Maintain a wet edge as you move from one section to the next so the finish looks continuous.
Step 9: Add a Broom Finish
A smooth driveway may look fancy, but it can become slippery when wet. For traction, drag a clean, damp broom across the surface after the resurfacer has started to firm up but before it hardens. Pull the broom in one consistent direction using long, steady strokes.
Timing matters. If you broom too early, the lines may close up. If you broom too late, the broom may skip and chatter. The goal is a uniform, lightly textured finish that gives tires and shoes something to grip.
Step 10: Cure and Protect the New Surface
Once the resurfacer is applied, protect it from foot traffic, pets, rain, leaves, sprinklers, and curious neighbors. Follow the manufacturer’s cure times before walking or driving on the surface. Some products allow foot traffic within hours, but vehicle traffic usually requires longer.
During hot, dry, or windy weather, light misting may be recommended to prevent rapid drying. After the surface has cured fully, consider applying a concrete sealer. A sealer helps protect against moisture, stains, freeze-thaw stress, and the kind of driveway grime that seems to arrive by invitation.
Common Concrete Resurfacing Mistakes to Avoid
Skipping the Pressure Washing
A quick rinse with a garden hose is not enough for most driveways. Dust, algae, and fine debris can weaken the bond between old concrete and new resurfacer. Pressure washing is one of the best ways to prepare the surface.
Ignoring Oil Stains
Oil is a bond breaker. If oil remains in the concrete, resurfacer may peel or discolor. Use a concrete degreaser and scrub thoroughly. For severe stains, repeated cleaning or professional advice may be needed.
Applying Too Thick
More is not always better. A thick resurfacer coat can crack, cure unevenly, or look lumpy. Follow the recommended thickness for the product you choose.
Working in Direct Hot Sun
Heat can shorten working time and cause the resurfacer to dry before it bonds. Shade the area if possible or work during cooler parts of the day.
Forgetting Control Joints
Do not fill working control joints with resurfacer unless the product instructions specifically allow it. Joints exist so concrete can move without cracking randomly. Keep them open or re-cut them after resurfacing if needed.
How Long Does a Resurfaced Concrete Driveway Last?
A properly resurfaced concrete driveway can last for years, especially when the slab underneath is stable and the surface is sealed and maintained. Longevity depends on climate, drainage, traffic, product quality, surface preparation, and whether the driveway faces freeze-thaw cycles, road salt, heavy vehicles, or frequent oil leaks.
Maintenance is simple but important. Sweep regularly, rinse off dirt, remove oil quickly, avoid harsh deicing chemicals when possible, and reseal as recommended. Also keep gutters and landscaping from dumping water onto the driveway. Concrete is tough, but it does not enjoy being treated like a swamp.
Can You Resurface a Concrete Driveway Yourself?
Yes, many homeowners can resurface a concrete driveway as a DIY project, especially if the driveway is small to medium-sized and the damage is mostly cosmetic. The job is physically demanding but not overly complicated. The challenge is timing. Once mixed, resurfacer starts setting quickly, and you need to move with confidence.
For large driveways, decorative overlays, severe cracking, drainage issues, or uncertain slab conditions, hiring a concrete professional is smarter. A pro can evaluate whether resurfacing is appropriate, grind the surface if needed, repair structural concerns, and apply the material evenly over a larger area.
If you choose the DIY route, recruit a helper. One person can mix while the other spreads. This simple teamwork can turn a stressful race against the bucket into a manageable project. Also, do a small test area first if you are new to concrete work.
Practical Experience: Lessons From Real Driveway Resurfacing Projects
The biggest lesson from concrete driveway resurfacing is that the visible work is only half the job. The part that looks impressive on videothe smooth pour, the squeegee glide, the satisfying broom finishis the dessert. The main course is cleaning, patching, and planning. Homeowners who get great results usually spend more time preparing the slab than applying the resurfacer.
One common experience is underestimating how dirty a driveway really is. A driveway may look reasonably clean until a pressure washer starts peeling up years of dust, tire film, pollen, mildew, and old leaf stains. The surface often changes color after a proper wash. That is a good sign. It means the resurfacer will bond to concrete instead of a museum-quality collection of driveway gunk.
Another practical tip is to stage water carefully. Too little water in the old slab can cause the resurfacer to stiffen almost immediately. Too much water can create weak, milky spots. The sweet spot is damp concrete with no puddles. Many DIYers find it helpful to mist one section at a time, then squeegee away standing water just before applying the resurfacer.
Mixing is where beginners often panic. The material may look too dry at first, then suddenly become creamy as the paddle mixer does its work. Resist the urge to dump in extra water too soon. Measure water according to the bag instructions and give the mix enough time to blend. If the product calls for a rest period or remixing, follow it. Concrete products are not pancake batter; guessing can lead to weak results.
Working in sections is also more important than it sounds. On a two-car driveway, trying to resurface the entire slab in one heroic pass can turn into a comedy of footprints, dry edges, and frantic broom marks. Use control joints as natural borders. Finish one section cleanly, then move to the next. If a helper keeps mixing fresh batches, the workflow becomes much smoother.
The broom finish deserves patience. A good broom texture should look intentional, not like a raccoon dragged a rake through wet cement. Practice the motion on a small area or scrap board first. Pull the broom straight, keep pressure consistent, and avoid stopping halfway across a section. If the broom gets loaded with material, rinse it before continuing.
Finally, curing is not the time to celebrate with a test drive. Many resurfaced driveways look ready before they are ready. Keep cars, bikes, trash cans, delivery carts, and enthusiastic children off the surface until the product has cured according to the label. The driveway has waited years for a makeover; it can wait a little longer before hosting the family SUV.
In short, the best resurfacing experience comes from treating the project like a system: clean concrete, sound repairs, correct weather, measured mixing, steady application, proper texture, and patient curing. Do those things well, and your driveway can go from “haunted parking slab” to “fresh curb appeal” in a weekend.
Conclusion
Knowing how to resurface a concrete driveway can save money, improve curb appeal, and give worn concrete a second life. The key is honesty. If your driveway is structurally sound, resurfacing can be a smart DIY-friendly project. If it is sinking, shifting, or badly broken, resurfacing will only hide the problem temporarily.
Start with a careful inspection, clean the surface thoroughly, repair cracks and spalls, choose the right weather, mix exactly as directed, apply in manageable sections, finish with a broom texture, and allow proper curing time. Concrete may be hard, but it rewards patience. Do the prep well, and your driveway will look less like a neglected landing strip and more like a polished welcome mat for your home.












