
Note: This article is written for web publishing and synthesizes real-world furniture painting guidance, General Finishes product recommendations, and professional DIY best practices into original, copy-ready content.
Introduction: The Furniture Glow-Up Your Dresser Has Been Waiting For
If you have an old dresser, nightstand, coffee table, cabinet, or thrift-store “what was I thinking?” piece sitting in the garage, General Finishes Milk Paint may be the little can of courage you need. It is one of the most popular paints for DIY furniture makeovers because it creates a smooth, durable, low-luster finish without requiring a professional spray booth, a woodworking degree, or a dramatic montage where you stare at sandpaper for three hours.
Despite the name, General Finishes Milk Paint is not the traditional powdered milk paint that you mix with water and hope behaves itself. It is a ready-to-use, water-based furniture and cabinet paint designed for excellent adhesion, strong coverage, and a refined satin-like look. That makes it especially useful for painting wood furniture, cabinets, vanities, bookcases, chairs, and accent pieces that need to look polished but still feel handmade.
This guide walks you through how to paint furniture with General Finishes Milk Paint DIY style, from cleaning and sanding to brushing, rolling, topcoating, curing, and fixing common mistakes. We will keep things practical, honest, and only mildly obsessed with prep work. Because yes, prep is where beautiful furniture finishes are born. The painting part gets all the applause, but prep is backstage running the whole show.
What Makes General Finishes Milk Paint Good for Furniture?
General Finishes Milk Paint is loved by furniture painters because it offers a balance between beauty and durability. It dries to a low-luster finish that looks softer than glossy enamel but cleaner and more refined than a heavily chalky paint. It can be brushed, rolled, or sprayed, and it works well on many properly prepared surfaces, including raw wood, previously finished wood, and some composite furniture materials.
Another reason DIYers like it is that it is self-sealing for many moderate-use furniture projects. In plain English, that means a topcoat is not always required for a decorative side table, dresser, bookshelf, or low-traffic accent piece. However, if you are painting a kitchen table, bathroom vanity, cabinet doors, desk, or any surface that will face cups, keys, fingerprints, homework, snacks, or general household chaos, adding a clear topcoat is smart.
The paint is also available in classic furniture-friendly colors, from clean whites and soft grays to deep blues, greens, blacks, and warm neutrals. You can mix colors together for a custom shade, which is dangerous knowledge if you enjoy saying, “I’ll just paint one thing,” and then suddenly your entire house has a color palette.
Supplies You Will Need
Before opening the paint, gather everything you need. A smooth project starts with fewer emergency trips to the hardware store while wearing paint-speckled sweatpants.
- General Finishes Milk Paint in your chosen color
- Cleaner or degreaser suitable for furniture prep
- Clean lint-free rags
- 150-, 180-, 220-, or 320-grit sandpaper or sanding pads
- Painter’s tape
- Drop cloth or protective paper
- Screwdriver for removing hardware
- Wood filler for dents, holes, or missing veneer spots
- High-quality synthetic brush
- Small foam or microfiber roller
- Optional: bonding primer or stain-blocking primer
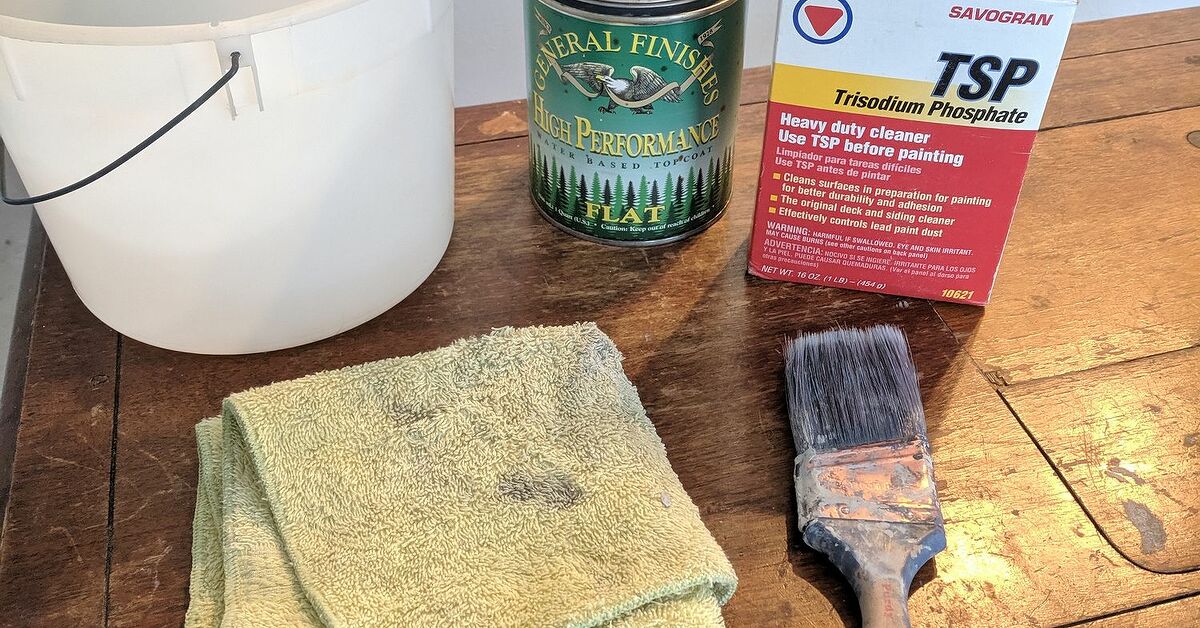
- Optional: General Finishes High Performance Topcoat
- Optional: paint sprayer for a very smooth finish
- Disposable gloves and a dust mask
Step 1: Choose the Right Furniture Piece
General Finishes Milk Paint can transform many furniture pieces, but not every project is equally beginner-friendly. If this is your first time, start with a small dresser, nightstand, bench, chair, or side table. Avoid beginning with a full kitchen cabinet set unless you enjoy learning under pressure while surrounded by cabinet doors labeled with sticky notes.
Solid wood furniture is usually the easiest to paint because it can be cleaned, sanded, repaired, and refinished predictably. Veneered furniture can also be painted, but you need to sand gently so you do not burn through the thin top layer. Laminate furniture requires extra prep and often benefits from a bonding primer. Glossy factory finishes, oily woods, and pieces with unknown finishes may also need more testing before you commit.
Best beginner projects
Good first projects include nightstands, small dressers, entry tables, wooden chairs, floating shelves, and bathroom storage cabinets. These pieces are manageable, easy to move, and forgiving if your first coat looks a little dramatic. Spoiler: first coats often look unimpressive. Do not panic. First coats are the awkward middle school photos of furniture painting.
Step 2: Remove Hardware, Drawers, Doors, and Loose Parts
Remove knobs, pulls, hinges, drawers, removable shelves, and cabinet doors before painting. This keeps paint from pooling around hardware and prevents the classic DIY tragedy known as “accidentally painting the drawer shut.” Place screws and hardware in a labeled bag so you are not crawling around later asking the floor where it hid the hinge screws.
If you are painting a dresser, number the drawers with painter’s tape on the back or underside. Older furniture is not always perfectly square, and drawers may fit best in their original locations. The same rule applies to cabinet doors. Label them before removing them, especially if you value your future peace.
Step 3: Clean the Furniture Like You Mean It
Cleaning is the step many beginners want to skip, and it is also the step that can make or break the finish. Furniture collects furniture polish, cooking grease, hand oils, dust, candle soot, pet hair, and mysterious life residue. Paint does not bond well to grime. It simply sits on top of it like a fancy hat on a raccoon.
Use a furniture-safe cleaner or degreaser and wipe every painted surface thoroughly. Pay special attention to drawer fronts, table edges, cabinet doors, chair arms, and areas near handles. After cleaning, wipe the piece with a damp rag to remove residue, then let it dry fully.
For especially greasy kitchen furniture or cabinets, clean twice. If your rag comes away brown, gray, sticky, or suspiciously shiny, keep cleaning. The goal is a dull, clean surface that feels ready to accept paint instead of rejecting it like a bad first date.
Step 4: Sand for Adhesion, Not Punishment
You do not always need to sand furniture down to bare wood before using General Finishes Milk Paint. In most cases, you are sanding to scuff the surface so the paint has something to grip. Think of it as giving the furniture tiny invisible teeth. Weird image, useful concept.
For previously finished wood, sand lightly with a fine sanding pad or 220-grit sandpaper. If the finish is very glossy, start with 150- or 180-grit and then smooth with 220-grit. For raw wood, sand evenly up to about 220 grit. Avoid sanding too smooth, because an overly polished surface can reduce adhesion.
After sanding, remove dust with a vacuum, tack cloth, or slightly damp lint-free rag. Dust left behind can create bumps, streaks, and texture in the paint. If you want a smooth furniture finish, dust is the tiny villain you must defeat early.
Do you have to sand before General Finishes Milk Paint?
For the best results, yes, light sanding is strongly recommended on most finished furniture. Some pieces may accept paint after cleaning and deglossing, but sanding remains one of the most reliable ways to improve adhesion. If you are painting laminate, slick factory finishes, or heavily worn surfaces, sanding plus primer is usually the safer path.
Step 5: Decide Whether You Need Primer
General Finishes Milk Paint often does not require primer, especially on clean, sanded wood furniture in good condition. However, primer becomes important in specific situations. If you are painting a light color over dark wood, covering red-toned wood, painting pine, mahogany, cherry, oak, or dealing with stains, tannins, knots, or water marks, a stain-blocking primer can prevent ugly bleed-through.
Bleed-through looks like yellow, brown, pink, or grayish stains rising through your fresh paint. It is rude, persistent, and usually appears right when you start feeling proud. White and light colors are especially vulnerable. If you are painting a piece white, cream, pale gray, or soft blue, do not underestimate stain blocking.
Use two thin coats of a stain-blocking primer when needed, allowing proper drying time between coats. For slick laminate or glossy factory finishes, use a bonding primer made for difficult surfaces. Always test a hidden area first if you are unsure how the surface will behave.
Step 6: Apply the First Coat of General Finishes Milk Paint
Stir the paint thoroughly before using it. Do not shake the can aggressively unless you enjoy bubbles and regret. Pour a small amount into a separate container so you do not contaminate the main can with dust or brush debris.
Apply the first coat in thin, even layers using a quality synthetic brush, foam roller, microfiber roller, or sprayer. Thin coats are the secret to a smooth finish. Thick coats may feel efficient, but they can create brush marks, drips, ridges, slow drying, and an overall look best described as “frosting a dresser.”
Brush with the grain when painting wood. On flat surfaces, a small roller can help you cover quickly, then you can lightly tip off the paint with a brush to smooth the texture. On detailed areas, use a brush and avoid overworking the paint. Once it starts to set, leave it alone. Going back repeatedly can create drag marks.
What the first coat should look like
The first coat may look streaky, uneven, or slightly transparent, especially if you are painting a light color over a darker piece. That is normal. Do not try to force full coverage in one coat. Your furniture is not failing you; it is simply in its “trust the process” era.
Step 7: Sand Lightly Between Coats
After the first coat dries, inspect the surface. If it feels rough, dusty, or raised, lightly sand with a fine sanding pad or 320-grit paper. The goal is not to remove the paint. The goal is to smooth small imperfections so the next coat goes on beautifully.
Wipe away all sanding dust before applying the next coat. If you skip dust removal, the second coat may feel gritty. And once grit gets trapped under paint or topcoat, it becomes a permanent guest at the furniture party.
For most furniture projects, two coats of General Finishes Milk Paint provide good coverage. Some colors, surfaces, or dramatic color changes may need three coats. Whites and very light shades often require more patience than deep colors.
Step 8: Add a Topcoat When Durability Matters
General Finishes Milk Paint is durable on its own for many furniture projects, but a clear topcoat adds protection for high-use surfaces. Consider topcoating tabletops, desks, kitchen cabinets, bathroom vanities, coffee tables, dining chairs, kids’ furniture, and anything that will be wiped frequently.
General Finishes High Performance Topcoat is a popular companion because it is water-based, clear-drying, and available in multiple sheens. Apply thin coats using a synthetic brush, applicator pad, or sprayer. Avoid heavy application, overbrushing, and working in direct hot sunlight. Two coats may be enough for moderate use, while three coats are better for heavy-use surfaces.
Be careful when applying clear topcoat over bright white or very pale paint. Any clear finish can slightly alter the look of white, especially if applied too thickly or under less-than-ideal conditions. Always test on a hidden area or sample board before coating the entire piece.
Step 9: Let the Finish Cure Before Heavy Use
Dry time and cure time are not the same thing. Paint can feel dry to the touch long before it reaches maximum hardness. General Finishes water-based products typically need about three weeks to cure under good conditions. During that time, treat the furniture gently.
You can usually move and lightly use a painted piece after several days, but avoid placing heavy objects, hot mugs, wet items, table lamps with rubber feet, or decorative objects that may stick to the surface. If you painted a tabletop, use coasters and placemats during the curing period. Yes, it is annoying. Yes, it is worth it.
Brush, Roller, or Sprayer: Which Method Is Best?
Each application method has advantages. A brush is affordable, simple, and great for detailed furniture. A roller is helpful for large flat surfaces such as dresser tops, cabinet sides, and table aprons. A sprayer creates the smoothest finish but requires more setup, masking, ventilation, and cleanup.
If you are a beginner, use a high-quality synthetic brush and a small smooth roller. This combination gives you control and good coverage without needing spray equipment. If you are painting cabinets or several matching pieces, spraying may be worth learning because it creates an even factory-like finish when done properly.
Tips for fewer brush marks
- Use thin coats instead of one heavy coat.
- Use a good brush made for water-based finishes.
- Paint in the direction of the wood grain.
- Keep a wet edge and avoid overworking drying paint.
- Sand lightly between coats when needed.
- Work in moderate temperature and humidity.
Common Mistakes to Avoid
The most common mistake is poor prep. Paint can only perform as well as the surface underneath it. If the furniture is dirty, glossy, waxy, or dusty, adhesion problems may appear later as chips, scratches, peeling, or uneven coverage.
Another mistake is applying paint too thickly. Thick coats may seem like a shortcut, but they often dry unevenly and leave texture. Thin coats build a stronger, smoother finish. It is slower, but so is fixing a lumpy tabletop after pretending patience was optional.
Skipping primer on bleed-prone wood is another classic problem. If you see yellow or brown stains coming through your paint, stop and address the issue with stain-blocking primer before continuing. Painting more coats over bleed-through rarely solves the problem permanently.
Finally, avoid rushing the cure time. A freshly painted piece may look finished, but the coating is still hardening. Give it time before heavy use, cleaning, or styling with heavy decor.
Color Ideas for General Finishes Milk Paint Furniture
For a classic farmhouse look, try warm white, antique white, soft gray, or muted blue. For a modern furniture makeover, deep navy, charcoal, black, or forest green can make old furniture look expensive and intentional. For a cottage or vintage feel, consider layered colors with light distressing around edges, corners, and raised details.
If you want a two-tone look, paint the body of a dresser in a soft neutral and stain or seal the wood top. This works especially well on older dressers with pretty wood grain hiding under a tired finish. Another option is painting the outside dark and the drawer interiors a surprise color. It is like giving your furniture a secret personality, which frankly, most old furniture already has.
How to Distress General Finishes Milk Paint
General Finishes Milk Paint can be lightly distressed after it dries. Use fine sandpaper or a sanding sponge on edges, corners, drawer fronts, carved details, and areas that would naturally wear over time. Keep distressing subtle if you want an authentic aged look. Randomly attacking every surface with sandpaper can make the piece look less “vintage charm” and more “furniture survived a raccoon incident.”
For layered distressing, apply one color as a base coat, let it dry, then apply a second color over it. Sand gently through the top color in selected areas to reveal the shade underneath. Seal distressed pieces with topcoat if they will get frequent handling.
Cleaning and Maintaining Painted Furniture
After the finish cures, clean painted furniture with a soft damp cloth and mild soap when needed. Avoid harsh cleaners, abrasive scrub pads, ammonia-heavy products, and soaking the surface with water. Painted furniture is durable, but it is not a cutting board, a science lab, or a place to test every cleaning product under the sink.
Use felt pads under lamps, trays, and decor. Use coasters on tables. Lift objects instead of dragging them. These small habits help your painted furniture stay fresh for years.
Real DIY Experience: What You Learn After Painting Furniture With General Finishes Milk Paint
The first thing you learn when painting furniture with General Finishes Milk Paint is that the paint is easy, but the furniture has opinions. Every piece behaves a little differently. A raw pine nightstand may soak up paint quickly, while a glossy cherry dresser may act like it has signed a legal document refusing cooperation. That is why testing, cleaning, sanding, and priming matter so much.
One of the best experiences with this paint is how quickly a sad piece can start looking intentional. A scratched brown dresser from a thrift store can become a clean, modern bedroom piece with two or three coats of deep blue or charcoal. A dated orange-toned sideboard can turn into a soft white dining room storage cabinet. The transformation feels almost suspiciously satisfying, like the furniture had been waiting years for someone to stop apologizing for it and give it a proper outfit.
Another lesson is that lighting changes everything. A color that looks creamy in the garage may look bright white in a sunny room or slightly gray under cool bulbs. Always paint a sample board or test patch if the final color matters. This is especially important with whites, grays, greens, and blues, which can shift dramatically depending on the room. The paint color is not being difficult; it is simply responding to the lighting like a tiny interior designer.
You also learn that the first coat is not emotionally supportive. It may look streaky, thin, or uneven. Beginners often panic at this stage and start brushing harder, adding more paint, or questioning every life choice that led to the project. Do not do that. Let the first coat dry, sand lightly if needed, and apply the second coat. General Finishes Milk Paint usually looks much better after the second coat, and the third coat can create a rich, professional finish when needed.
Hardware makes a bigger difference than expected. Painting the furniture is only part of the makeover. Replacing dated knobs, cleaning original brass pulls, or switching to matte black handles can make the whole piece feel custom. Sometimes the best result comes from combining old and new: original vintage hardware on a freshly painted body, or modern pulls on a traditional dresser.
Topcoat decisions also come from experience. For a bedroom dresser, the paint alone may hold up beautifully. For a desk, vanity, coffee table, or kitchen cabinet, topcoat is worth the extra effort. The added protection helps prevent wear, especially around handles and surfaces that get touched daily. The trick is applying topcoat thinly and evenly. Heavy topcoat can create streaks or change the sheen, while thin coats build protection more gracefully.
The final lesson is patience. A painted piece can look finished long before it is ready for real life. Letting the finish cure properly is the difference between a makeover that lasts and one that chips because someone put a laundry basket on it two days later. Give the piece gentle treatment for the first few weeks. Your future self will be grateful, and your furniture will not silently judge you from across the room.
Conclusion
Painting furniture with General Finishes Milk Paint is one of the most rewarding DIY projects because it delivers a smooth, durable, high-end look without requiring advanced skills. The key is not magic. It is preparation, thin coats, light sanding, smart primer use, and patience during curing. Clean the piece well, scuff the surface, choose the right primer when needed, apply two or three thin coats, and protect high-use surfaces with a quality topcoat.
Whether you are rescuing a thrift-store dresser, updating a bathroom vanity, refreshing cabinets, or giving an old table a second life, General Finishes Milk Paint is a reliable choice for DIY furniture painting. Take your time, respect the prep work, and remember: every beautiful painted piece starts with one slightly scary first coat.











