
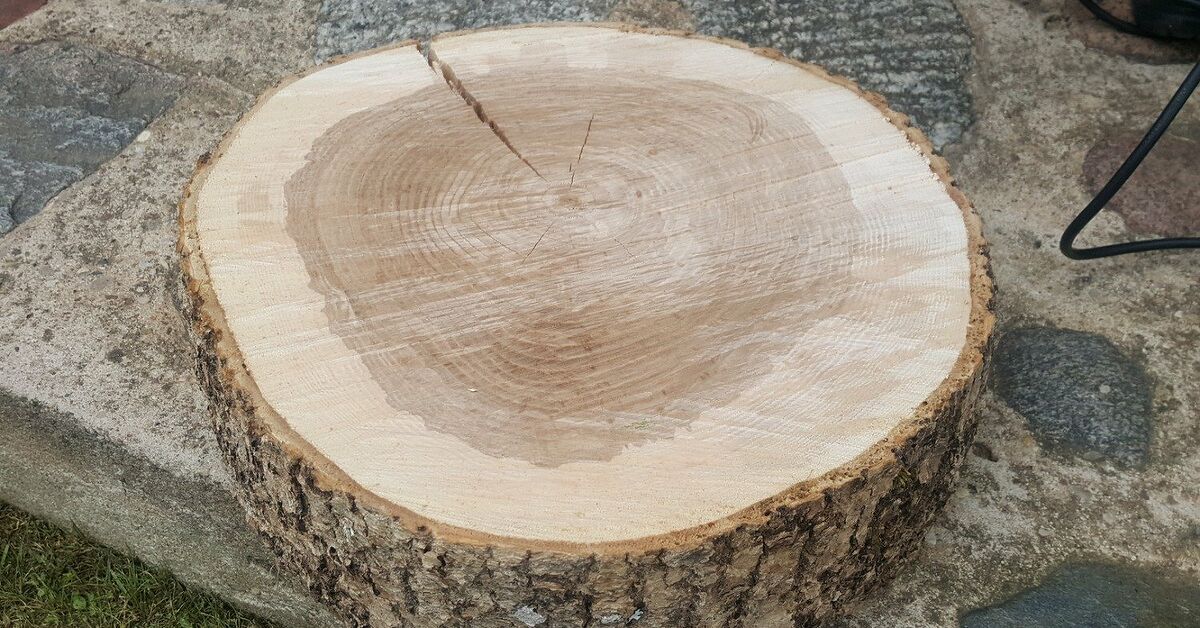
A wood slice side table is one of those rare DIY projects that looks expensive without requiring twelve drawers, a cabinetmaker’s apprenticeship, or an emotional relationship with dovetail joints. The tabletop already brings the design: growth rings, knots, color shifts, and a natural outline that no mass-produced surface can copy exactly.
The project is flexible, too. A pale maple round with black hairpin legs feels modern; a thick cedar slice on tapered wooden legs looks rustic. The secret is not fancy hardware. It is choosing dry, sound wood, preparing it carefully, and attaching the legs to a flat, stable surface.
This guide explains how to select, flatten, sand, repair, finish, and assemble a wood round into a sturdy side table that can hold a lamp, a mug, and your current stack of “I will definitely read these soon” books.
Choose the Right Wood Slice
Size and Condition
For most bedrooms and living rooms, choose a round about 14 to 22 inches across and roughly 1 1/2 to 3 inches thick. That range usually provides enough room for a lamp or drink while leaving sufficient depth for leg fasteners. Inspect both faces for soft rot, severe cupping, deep loose bark pockets, and cracks that nearly divide the slice. Small checks are common in cross-cut wood; a split that moves under pressure is a structural problem.
Dryness Matters More Than Appearance
A freshly cut round contains substantial moisture. As it dries, it shrinks and may check, cup, or twist. Woodworking guidance recommends using a moisture meter and allowing dried wood to acclimate in conditions similar to its final room rather than assuming it is ready because it has sat for a few weeks.
The easiest choice is a kiln-dried or professionally air-dried slice from a sawmill, lumber dealer, or woodworking supplier. Let it acclimate indoors before machining. If you cut a fresh slice yourself, seal the end grain promptly, store it with airflow around both faces, and expect a long drying period plus some cracking.
Tools and Materials
Materials
- One dry wood slice
- Three hairpin legs or four furniture legs with mounting plates
- Appropriately sized wood screws or threaded inserts and bolts
- Optional wood filler or two-part epoxy
- Optional stain or furniture oil
- Clear protective finish
- Felt pads or adjustable feet
Tools
- Random-orbit sander with 80-, 120-, 180-, and optional 220-grit discs
- Drill/driver and drill bits
- Straightedge, level, tape measure, and pencil
- Chisel, scraper, or drawknife for bark removal
- Shop vacuum and lint-free cloths
- Safety glasses, hearing protection, and suitable respiratory protection
Sanding end grain creates fine dust quickly. Use dust collection or good ventilation and a NIOSH-approved particulate respirator. A dust-only respirator does not protect against finishing vapors, so follow the coating manufacturer’s ventilation and protective-equipment instructions.
How to Make a Side Table From Wood Slice
Step 1: Pick the Top Face and Inspect the Wood
Set the slice on a flat bench and compare both sides. The most dramatic face is not automatically the best top; a slightly plainer but flatter face can save hours of work. Mark cracks, soft areas, insect holes, and high spots. Vacuum dirt from crevices and probe suspicious areas with an awl. Fresh powder or active insects should be professionally evaluated before the wood enters your home.
Step 2: Remove Loose Bark
Tightly attached bark can be retained for a rustic look, but it may loosen later because bark and wood move differently. For a cleaner, more reliable edge, remove it with a drawknife, chisel, putty knife, or scraper. Follow the natural contour rather than carving the slice into a perfect circle.
After debarking, brush away fibers and sand rough or sharp areas. Woodcraft’s slab guidance similarly recommends removing unstable bark, cleaning the exposed edge, and smoothing it without erasing the natural profile.
Step 3: Flatten Both Mounting Surfaces
Lay a straightedge across the top in several directions. For minor unevenness, draw loose pencil lines over the face and sand with 60- or 80-grit paper until the marks disappear evenly. Keep the sander moving so you do not create shallow bowls.
For serious cupping or twist, use a router sled, drum sander, or professional flattening service. A router sled moves the router over level rails and removes high areas from slabs that are too wide for a normal planer.
The underside does not need to be beautiful, but all leg plates must sit on the same plane. If one plate rests on a hump, the finished table may wobble even when every leg is the same length.
Step 4: Stabilize Cracks and Voids
Tight, stable checks can remain visible. Small cosmetic holes can be filled with stainable filler, while deeper voids may be filled with clear or tinted two-part epoxy. Remove dust, rotten fibers, and loose bark before pouring. Tape the underside of through-cracks and use a resin designed for the intended pour depth. Clean, sound surfaces are essential for reliable adhesion.
After the filler cures, scrape it flush and sand it level. Do not assume epoxy can rescue every damaged round. A slice that is nearly split in half may need a bow-tie key, hidden reinforcement, or retirement from table duty.
Step 5: Sand Progressively
A practical sequence is 80, 120, and 180 grit, followed by 220 grit when the finish manufacturer recommends it. Vacuum between grits and inspect the top under low-angle light. Do not leap from coarse to very fine paper; the finer grit may polish the surface while leaving deep scratches behind.
Ease the upper and lower edges lightly by hand so they are comfortable and less prone to splintering. Common finishing guidance places final surface preparation between roughly 120 and 220 grit, depending on the wood and coating.
Step 6: Test the Color
Test stain, oil, or clear finish on the underside first. End grain can absorb pigment unevenly and often appears darker than long grain. A clear satin finish is a safe choice when the growth rings already provide plenty of character. Stain can unify the color, but blotch-prone woods may need conditioner or a different finishing system.
Step 7: Apply a Protective Finish
Finish the top, underside, and edge. A coating will not stop seasonal wood movement, but it slows moisture exchange and protects the surface from dirt and spills. Apply thin coats, maintain a wet edge, and follow the grain where it is visible.
For brush-on polyurethane or similar film finishes, let each coat dry as directed, sand lightly with fine paper, remove every trace of dust, and then recoat. Thin layers are less likely to sag, wrinkle, trap bubbles, or remain soft than one heroic puddle masquerading as a finish coat. Manufacturer and retailer instructions consistently recommend light sanding and dust removal between coats, although exact grit and timing vary by product.
Allow the final coat to cure fully before installing hardware or placing objects on the table. Dry-to-touch, recoat, light-use, and full-cure times are not the same thing. The label on the can outranks optimism.
Step 8: Lay Out the Legs
Turn the finished slice upside down on a padded surface. For three hairpin legs, space the plates evenly at about 120-degree intervals. Three legs naturally contact the floor without rocking, which makes them useful for irregular rounds. Four legs offer a traditional appearance but require more precise leveling.
Start with the plates roughly 1 1/2 to 2 inches inside the edge, then adjust for the shape of the slice and the angle of the legs. Temporarily tape or clamp them in place, turn the table upright with help, and inspect the footprint. The feet should spread wide enough to resist tipping without becoming ankle traps.
Step 9: Predrill and Fasten the Legs
Mark every screw hole. Choose screws shorter than the combined mounting-plate and tabletop depth, leaving a safe margin beneath the top face. Predrill pilot holes, particularly in hardwood or near cracks, and drive each screw snugly without stripping the hole.
If the legs will be removed repeatedly, install threaded inserts and use machine bolts. Threaded inserts create a stronger reusable connection and reduce wear on the surrounding wood.
Step 10: Level and Test the Table
Set the table upright on a level floor. Press gently near several edges and check for rocking or tipping. Confirm that every plate is seated flat, then add adjustable feet, thin shims, or felt pads if needed. Correct major geometry problems at the mounting plates rather than building a tiny tower of felt under one foot.
Useful Design Variations
For a modern table, pair a light-colored round with black hairpin legs and a clear satin finish. For a rustic version, use a thicker oak or cedar slice, short wooden legs, and a low-sheen oil. You can also paint the underside and legs while leaving the top natural, or fill stable cracks with clear, black, or smoky resin. Keep decorative treatments restrainedthe growth rings should remain the main event.
Common Mistakes to Avoid
- Using green wood: It may warp, crack, and loosen around fasteners as it dries.
- Leaving unstable bark: It can detach later and scatter debris indoors.
- Skipping underside flattening: Leg plates mounted on different planes create wobble.
- Using long screws: A screw point through the tabletop is unforgettable for the wrong reason.
- Applying thick finish coats: Heavy coats are more likely to run, wrinkle, or cure unevenly.
- Rushing cure time: A finish may feel dry while remaining vulnerable to dents and rings.
Experience Notes: Lessons From Building Wood Slice Side Tables
The first lesson is that the most beautiful slice is not always the best slice. A dramatic round with a deep center split can look irresistible at the lumber yard, especially when surrounded by other slabs that seem to whisper, “You are absolutely skilled enough for this.” On the bench, that same split may demand extensive flattening, resin work, and reinforcement. A quieter but drier and flatter slice often produces the better table.
I also learned to plan the leg layout before applying the final coat. On an early build, two mounting plates overlapped shallow cracks on the underside. Moving the legs solved that problem, but the new footprint became narrow and made the table easier to tip. Now I position the legs temporarily, turn the unfinished table upright, and test it with a lamp-sized weight near several edges. This rehearsal reveals unstable proportions, awkward leg angles, and feet that project too far before any permanent holes are drilled.
Bark deserves similar skepticism. Tight bark can look fantastic, but its long-term behavior is unpredictable. On one table, a section loosened several months later, leaving a rough groove and a trail of crumbs on the floor. Since then, I usually remove the bark unless it is unusually secure and the piece is mostly decorative. The pale sapwood contour underneath often looks cleaner anyway, especially after gentle brushing and sanding.
Another practical discovery is that sanding takes longer than assembly. Attaching three hairpin legs may require only a few minutes; preparing the round can take hours. Cross-cut surfaces expose dense end grain, and deep saw marks do not disappear through positive thinking. Starting with a genuinely coarse grit, marking the face with pencil, and changing worn discs frequently saves time. Pressing harder does not. Excess pressure slows the pad, creates heat, and may leave pigtail scratches that become visible only after finish is appliedwoodworking’s version of receiving an unpleasant email after office hours.
Finishing taught me patience in a more expensive way. A coating can feel dry while remaining soft underneath. Placing a lamp on it too soon may leave a ring or permanent foot marks. I now finish the underside first, complete the visible surfaces in thin coats, and allow extra curing time after the final application. The table may look finished, but chemistry still has paperwork to complete.
Hardware taught me one more lesson: removable legs are worth planning for. Ordinary wood screws are fine for a table that will stay assembled, but repeated removal gradually wears the holes. On pieces likely to move between apartments or travel to craft shows, threaded inserts and machine bolts make reassembly cleaner and more dependable. I also keep every screw at least a comfortable distance from major checks. A perfectly centered leg is less important than a fastener biting into solid wood.
Finally, small irregularities are not failures. A faint check, subtle color shift, or gently uneven natural edge is part of what makes a wood slice table worth building. The goal is not to make the round resemble manufactured veneer. Control the defects that affect strength, stability, comfort, and durability, then allow the tree’s history to remain visible.
Conclusion
Learning how to make a side table from wood slice comes down to a sensible sequence: begin with dry wood, remove unstable material, flatten the mounting areas, sand patiently, apply a durable finish, and give the legs a broad, balanced footprint. None of the steps is mysterious, but skipping one usually creates a problem that appears later.
Test irreversible choices on the underside and respect the finish’s curing time. The result will be a useful piece of furniture with a grain pattern, outline, and history that cannot be duplicated exactlyand a very good reason to point proudly when guests ask where you bought it.












