
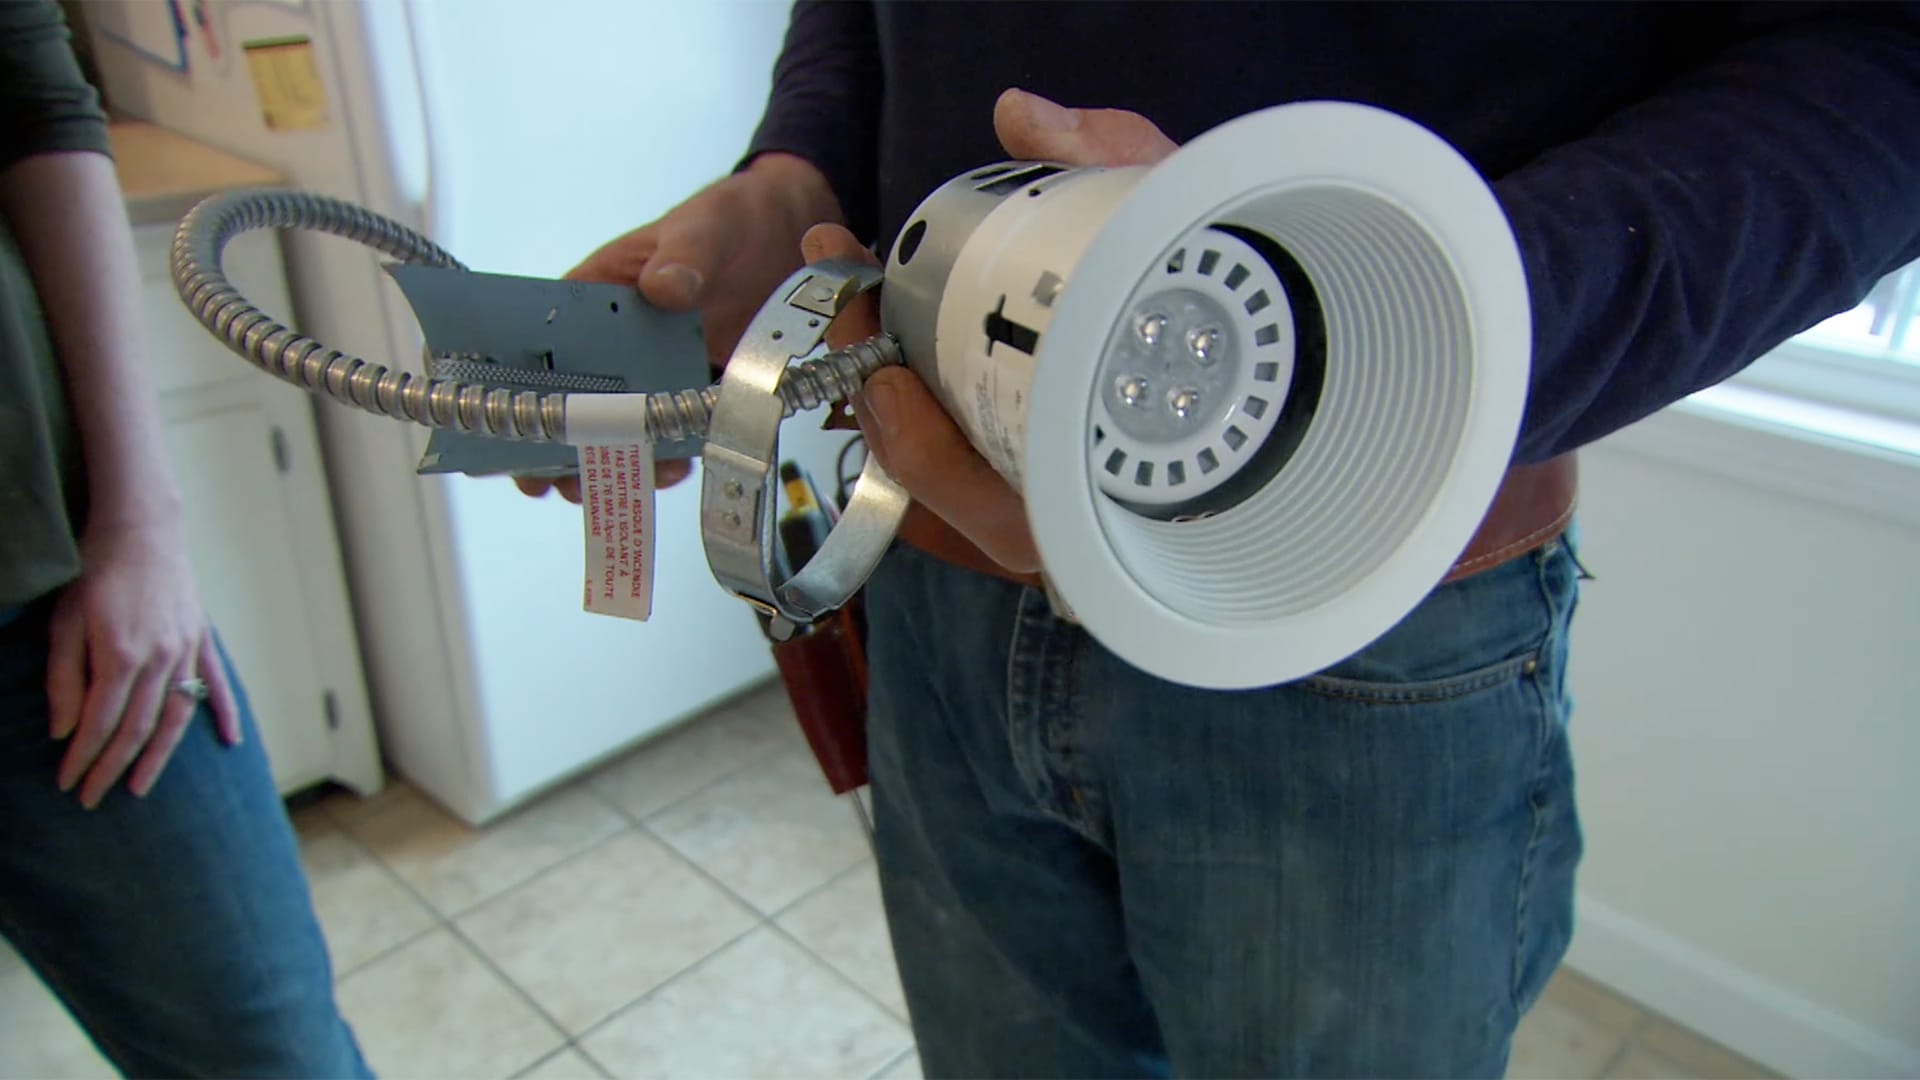
Installing recessed lighting in a kitchen is one of those home upgrades that feels small until you flip the switch. Suddenly, the room looks cleaner, brighter, more modern, and less like a cave where leftovers go to retire. Recessed lights, also called can lights, pot lights, or LED downlights, tuck into the ceiling and spread light evenly across counters, walkways, islands, sinks, and cooking zones.
The good news: a careful homeowner can plan the project, choose the right fixtures, and understand the installation process. The serious news: recessed lighting involves electrical work, cutting into ceilings, checking joists, and following local code. If your project requires new wiring, a new switch leg, panel work, aluminum wiring repairs, or anything that makes your inner alarm bell ring, hire a licensed electrician. Electricity is useful. Electricity is also extremely uninterested in your confidence.
This guide walks you through how to install recessed lighting in a kitchen, how to plan the layout, what tools and materials you need, how to avoid common mistakes, and how to get a polished result without turning your ceiling into Swiss cheese.
Why Recessed Lighting Works So Well in a Kitchen
A kitchen needs more than one lonely ceiling fixture doing its best impression of the sun. Good kitchen lighting uses layers: general lighting for the room, task lighting for counters, accent lighting for design features, and sometimes decorative lighting over an island or breakfast nook. Recessed kitchen lighting is excellent for the general layer because it spreads light without taking up visual space.
Unlike bulky ceiling fixtures, recessed lights sit flush with the ceiling. That makes the kitchen feel taller, cleaner, and more open. They also work well with modern LED trims, dimmer switches, under-cabinet lighting, pendants, and smart home controls. In other words, they play nicely with others, which is more than we can say for some kitchen drawers.
Before You Begin: Safety, Codes, and Reality Checks
Before grabbing a hole saw like a heroic weekend warrior, slow down. Recessed lighting is not just a design project; it is an electrical project. Local electrical codes may require permits, inspections, specific wire types, junction box access, AFCI protection, or other safety measures. Rules can vary by city, county, and state, so check your local building department before starting.
Always turn off power at the circuit breaker before working on any electrical circuit. Then test the wires with a non-contact voltage tester or multimeter. Do not trust a wall switch alone. A switch can be off while wires in the box are still energized. That is not a surprise you want during a kitchen remodel.
When to Call a Licensed Electrician
Call a licensed electrician if you need to add a new circuit, replace a breaker, work inside the electrical panel, connect to old knob-and-tube wiring, troubleshoot flickering lights, or run cable through difficult framing. Also call a pro if your ceiling contains spray foam insulation, complicated HVAC runs, plumbing, or mystery wires that look like they were installed by someone named “Uncle Dave” in 1978.
Tools and Materials You May Need
The exact list depends on whether you use traditional recessed cans, remodel housings, or ultra-thin wafer LED lights. Most kitchen retrofit projects use remodel-rated recessed lights or canless LED downlights because they are easier to install in an existing ceiling.
Common Tools
- Stud finder or joist finder
- Non-contact voltage tester
- Tape measure and pencil
- Painter’s tape
- Drywall saw or hole saw
- Drill and drill bits
- Fish tape or glow rods
- Wire stripper
- Screwdrivers
- Ladder
- Safety glasses and dust mask
Common Materials
- Recessed LED light kits or canless downlights
- IC-rated housings or fixtures, where required
- Appropriate NM-B cable, often 14/2 or 12/2 depending on circuit rating
- Wire connectors approved for the wire type
- Electrical boxes or integrated junction boxes
- Dimmer switch rated for LED fixtures
- Drywall patching materials, if needed
Match the wire gauge to the circuit breaker. A 15-amp circuit commonly uses 14-gauge copper wire, while a 20-amp circuit commonly uses 12-gauge copper wire. Do not guess. If you are unsure, stop and verify before proceeding.
Step 1: Choose the Right Recessed Lights
The best recessed lights for a kitchen are usually LED, dimmable, energy-efficient, and rated for the ceiling conditions. Many modern fixtures are canless, meaning they use a slim LED panel and a separate junction box rather than a large metal housing. These are popular because they fit into tight ceilings and are easier to retrofit.
IC-Rated vs. Non-IC Fixtures
If insulation may touch the fixture, choose IC-rated recessed lighting. IC-rated fixtures are designed for use where insulation contact is possible. Non-IC fixtures require clearance from insulation, and ignoring that requirement can create a fire hazard. In a kitchen ceiling below an attic, IC-rated fixtures are often the safer and more practical choice.
Color Temperature
For kitchens, 3000K is a popular color temperature because it feels warm but still bright enough for cooking. A 2700K light feels softer and cozier, while 4000K can look crisp and clean but may feel too clinical in some homes. If your kitchen has warm wood cabinets or creamy walls, 2700K to 3000K usually looks pleasant. If your kitchen has white cabinets, quartz counters, and stainless steel appliances, 3000K to 3500K may feel balanced.
Brightness and Beam Spread
Look at lumens, not just watts. LED fixtures use much less energy than older incandescent bulbs, so wattage alone does not tell the full story. For general kitchen lighting, many homeowners choose recessed lights in the range of 600 to 900 lumens each. Beam spread matters too. A wider beam spreads light gently; a narrow beam creates more focused pools of light.
Step 2: Plan the Kitchen Lighting Layout
Planning is where the project succeeds or becomes a ceiling repair hobby. Start by drawing a simple sketch of your kitchen. Mark cabinets, counters, sink, stove, refrigerator, island, walkways, and existing fixtures. Then mark ceiling joists if you know where they are.
A common rule of thumb is to space recessed lights about half the ceiling height apart. For an 8-foot ceiling, that often means lights roughly 4 feet apart. For a 10-foot ceiling, spacing may increase to about 5 feet. This is only a starting point. Kitchen layout, fixture brightness, beam angle, cabinet shadows, and personal preference all matter.
Where to Place Recessed Lights in a Kitchen
Place lights where people actually work. A row of lights down the exact center of the kitchen may look symmetrical on paper, but it can cast shadows on the counters because your body blocks the light while you chop vegetables. Position recessed lights near the front edge of countertops or slightly out from upper cabinets so the light lands on the work surface instead of behind your head.
For islands, recessed lights can provide general brightness, but pendants may still be useful for style and task lighting. Over the sink, one recessed light centered above the basin can make dishwashing feel less like a punishment. Around the stove, avoid placing lights where range hood shadows will dominate the work area.
Use Painter’s Tape Before Cutting
Mark proposed light locations with painter’s tape on the ceiling. Then live with the layout for a day. Stand at the sink. Pretend to cook. Open cabinet doors. Walk around the island. If a light lands directly on a joist, over a duct, or in a visually awkward place, move the tape now. Tape is cheap. Drywall repair is not.
Step 3: Locate Joists, Wires, Pipes, and Ducts
Use a stud finder to locate ceiling joists. Recessed lights must fit between framing members unless you are working during new construction and can plan around framing before drywall goes up. In an existing kitchen, you also need to think about what may be hiding above the ceiling: plumbing, HVAC ducts, electrical cables, blocking, and insulation.
If you have attic access above the kitchen, inspect the area before cutting. This can save you from accidentally drilling into something expensive, noisy, or wet. If there is no attic access, cut small inspection holes or use a flexible inspection camera. The ceiling is not a piñata; do not swing blindly.
Step 4: Turn Off Power and Verify the Circuit
Turn off power at the breaker that controls the existing kitchen light or the circuit you will use. Place a note on the panel so nobody turns it back on while you are working. If other people are home, announce the project clearly. “Please do not touch the breaker” is more effective than yelling from a ladder after the lights come back on.
Remove the existing fixture or switch cover only after testing for voltage. Use a tester on all wires in the box. If you detect voltage, stop and identify the correct breaker. Some boxes contain more than one circuit, especially in older or remodeled homes.
Step 5: Cut the Ceiling Openings
Most recessed light kits include a paper template or specify a hole size. Trace the template at each marked location. Cut carefully with a drywall saw or hole saw. Keep the saw level and avoid forcing it. If dust starts raining down like the ceiling is seasoning you, congratulations: you are remodeling.
After cutting each hole, reach in carefully and confirm there is enough space for the fixture. For canless lights, make sure the LED panel and junction box can both fit. For remodel cans, check the housing depth and clip clearance. If something blocks the opening, adjust before cutting the remaining holes.
Step 6: Run Cable Between Fixtures
Running cable is often the hardest part of installing recessed lighting in an existing kitchen. The basic idea is to bring power from the switch or source to the first light, then run cable from light to light. The wiring path must be legal, protected, and accessible where required by code.
If joists run in the same direction as your planned light row, fishing cable may be straightforward. If joists run across the path, you may need to drill through joists from attic access or cut small access openings in the ceiling. Follow code rules for drilling through framing, including proper hole placement and protection plates where needed.
Do not run loose cable across sharp metal edges, HVAC ducts, or areas where it can be damaged. Do not bury junction boxes behind drywall unless the fixture’s listed design allows the connection box to remain accessible through the light opening. Every connection must remain accessible in a code-compliant way.
Step 7: Wire the Recessed Lights
Follow the manufacturer’s wiring diagram exactly. Most LED recessed lighting kits include a junction box with push-in connectors or wire nuts. Typically, black connects to black, white connects to white, and bare or green ground connects to ground. However, switch loops, multi-wire circuits, and older wiring can complicate this pattern, so do not rely on color alone if the wiring looks unusual.
Strip only the amount of insulation recommended by the connector. Tug gently on each connection to confirm it is secure. Close the junction box cover after the connections are made. If the fixture includes a ground wire or grounding screw, connect it properly.
Adding a Dimmer Switch
A dimmer is one of the best upgrades for recessed kitchen lighting. Bright light is great for slicing onions; softer light is better when you are eating pizza at 10 p.m. and pretending it is a balanced dinner. Choose an LED-compatible dimmer and confirm it works with your fixture model. Not all dimmers and LEDs get along, and incompatible pairings can cause flickering, buzzing, or limited dimming range.
Step 8: Install the Fixtures
For canless LED lights, connect the LED panel to its junction box, fold the spring clips upward, and push the light into the ceiling opening until it sits flush. For remodel can lights, insert the housing into the hole, secure the clips, attach the trim, and install the bulb if required.
Make sure each fixture sits flat against the ceiling. If the hole is too large, the trim may not cover the gap. If the hole is too small, forcing the fixture can damage the drywall or the light. This is why careful measuring matters. Recessed lights are stylish; ragged ceiling holes are more “haunted rental property.”
Step 9: Restore Power and Test the Lights
Once all fixtures are installed and junction boxes are closed, restore power at the breaker. Turn on the switch and test every light. If one fixture does not work, turn the power off again before inspecting connections. Check the dimmer range, listen for buzzing, and watch for flickering.
If the breaker trips, a light flickers heavily, a wire smells hot, or anything feels wrong, turn the circuit off and call an electrician. Electrical problems rarely improve through optimism.
Step 10: Patch, Clean, and Fine-Tune
After the lights work properly, patch any access holes, touch up paint, and clean dust from counters and cabinets. Adjust trims if your fixtures allow aiming. Set the dimmer low in the evening and bright during food prep. A good recessed lighting installation should feel flexible, not like an interrogation room for tomatoes.
Common Mistakes to Avoid
Installing Too Many Lights
More lights do not always mean better lighting. Too many recessed lights can create glare, ceiling clutter, and a showroom effect. Use enough fixtures to light the room evenly, but leave space for under-cabinet lights, pendants, and natural light.
Putting Lights in the Wrong Place
Centering lights in walkways instead of over work areas is a common kitchen lighting mistake. Think about where the light falls, not just where the fixture looks good on the ceiling.
Ignoring Insulation Ratings
If insulation is present, fixture rating matters. IC-rated recessed lights are designed for contact with insulation. Non-IC fixtures require proper clearance. Never cover a non-IC fixture with insulation.
Mixing Color Temperatures
A kitchen with 2700K recessed lights, 5000K under-cabinet strips, and a random blue-white range hood bulb can look like three rooms arguing. Keep color temperature consistent for a polished look.
Skipping the Dimmer
Kitchen lighting should adapt. Bright for cooking, softer for dining, gentle for late-night snacks. A compatible dimmer gives you control and makes recessed lighting much more pleasant.
Example Kitchen Layout
Imagine a 12-by-14-foot kitchen with 8-foot ceilings, cabinets along two walls, a sink under a window, and a 3-by-6-foot island. A practical recessed lighting layout might include four to six LED downlights spaced about 4 feet apart, with lights positioned to wash the counters and walkways evenly. One light may be centered near the sink, while two lights support the island along with decorative pendants.
If the kitchen has dark cabinets, matte finishes, or limited natural light, you may need slightly brighter fixtures or additional task lighting. If the kitchen has glossy white surfaces, large windows, and reflective countertops, fewer fixtures may be enough. Lighting is part math, part design, and part standing in the room saying, “Hmm,” like a professional.
Real-World Experience: What Homeowners Learn During Kitchen Recessed Lighting Projects
One of the biggest lessons from installing recessed lighting in a kitchen is that the ceiling always has an opinion. On paper, the perfect layout looks clean and symmetrical. In real life, a joist appears exactly where the best light should go, a duct blocks the second location, and the old ceiling box is not centered with anything except perhaps the previous owner’s sense of adventure.
That is why experienced DIYers mark everything first. They use painter’s tape, check the attic if possible, scan for joists, and cut small test openings before committing to full-size holes. This slower approach saves time because it prevents the classic mistake of cutting six beautiful circles and then discovering that two of them are unusable. Drywall patches are not the end of the world, but nobody starts a lighting project hoping to become emotionally closer to joint compound.
Another practical lesson is that kitchen lighting should be designed around tasks, not just ceiling symmetry. A light centered in the room may look good from the doorway, but it can cast a shadow when someone stands at the counter. Many homeowners discover that moving recessed lights closer to the countertop edge creates better working light. The goal is to light the cutting board, not the back of your head.
Dimmer switches also tend to become the surprise favorite part of the project. At full brightness, recessed lights make cleaning, cooking, and reading recipes easier. At half brightness, the kitchen feels relaxed enough for dinner. At low brightness, it becomes perfect for early mornings when nobody wants to be personally attacked by 900 lumens before coffee.
Homeowners also learn that fixture quality matters. Cheap lights may flicker, buzz, dim poorly, or create uneven color from one fixture to the next. Choosing reputable LED recessed lights with good color rendering, consistent color temperature, and dimmer compatibility makes the finished kitchen look intentional. Good lighting does not call attention to itself; it makes cabinets, counters, food, and people look better.
The final experience-based tip is to respect the electrical side of the job. Installing the fixture may look simple, especially with modern canless LED kits, but safe wiring is the real project. Connections must be tight, boxes must be accessible, circuits must not be overloaded, and local code must be followed. A clean installation is not only about a flush trim ring and a pretty glow. It is also about knowing that everything above the ceiling is safe, secure, and ready to work for years.
Conclusion
Learning how to install recessed lighting in a kitchen starts with a good plan. Choose the right IC-rated or canless LED fixtures, map the layout around real kitchen tasks, check joists and hidden obstacles, shut off and verify power, cut carefully, wire safely, and test everything before patching. When done well, recessed kitchen lighting can make the entire room feel brighter, cleaner, and more functional without adding visual clutter.
The secret is not rushing. Measure twice, cut once, test before touching wires, and call a licensed electrician when the job moves beyond your comfort level. Your kitchen deserves lighting that makes chopping, cooking, cleaning, and midnight cereal feel easier. And your ceiling deserves fewer accidental holes.












