
Some holiday decorations are elegant. Some are sentimental. And some are tiny bottled blizzards that let you shake winter on command. That, of course, is the magic of a DIY holiday snow globe. It is festive, personal, surprisingly easy to make, and just dramatic enough to make people say, “Wait, you made that?” while you casually pretend this level of charm is normal for you.
If you want a Christmas craft that looks expensive but is actually built from a jar, a little glitter, and a dash of patience, a homemade snow globe is a strong choice. It works as holiday decor, a handmade gift, a family craft, or a keepsake that comes out every year like a glittery little time capsule. Best of all, you do not need a workshop, a craft degree, or the patience of a saint. You just need the right materials, a simple process, and a few smart tips so your globe looks magical instead of murky.
This guide walks you through exactly how to make a DIY holiday snow globe, what supplies work best, which mistakes to avoid, and how to customize your globe so it feels one-of-a-kind. Whether you want a classic Mason jar snow globe with bottlebrush trees or a photo snow globe starring your family dog in a tiny winter wonderland, you are in the right place.
Why a DIY Holiday Snow Globe Is Such a Great Christmas Craft
A holiday snow globe checks a lot of boxes without being fussy. It is nostalgic, affordable, and endlessly customizable. You can make one for your mantel, one for your office desk, one for your kid’s teacher, and one for that relative who claims they “do not need anything” but somehow still loves handmade gifts.
It is also a fantastic beginner craft. Unlike some holiday DIY projects that quietly require advanced engineering and the steady hands of a watchmaker, a snow globe is forgiving. If your tree leans a little to the left, congratulations, you have created a charming winter scene with “personality.” If your glitter swirls dramatically, even better. That is the whole point.
Another big advantage is flexibility. You can make a traditional Christmas snow globe, a winter village scene, a rustic farmhouse version, a kid-friendly ornament style, or a sentimental family photo globe. The basic method stays simple, but the final look can range from cozy and classic to playful and whimsical.
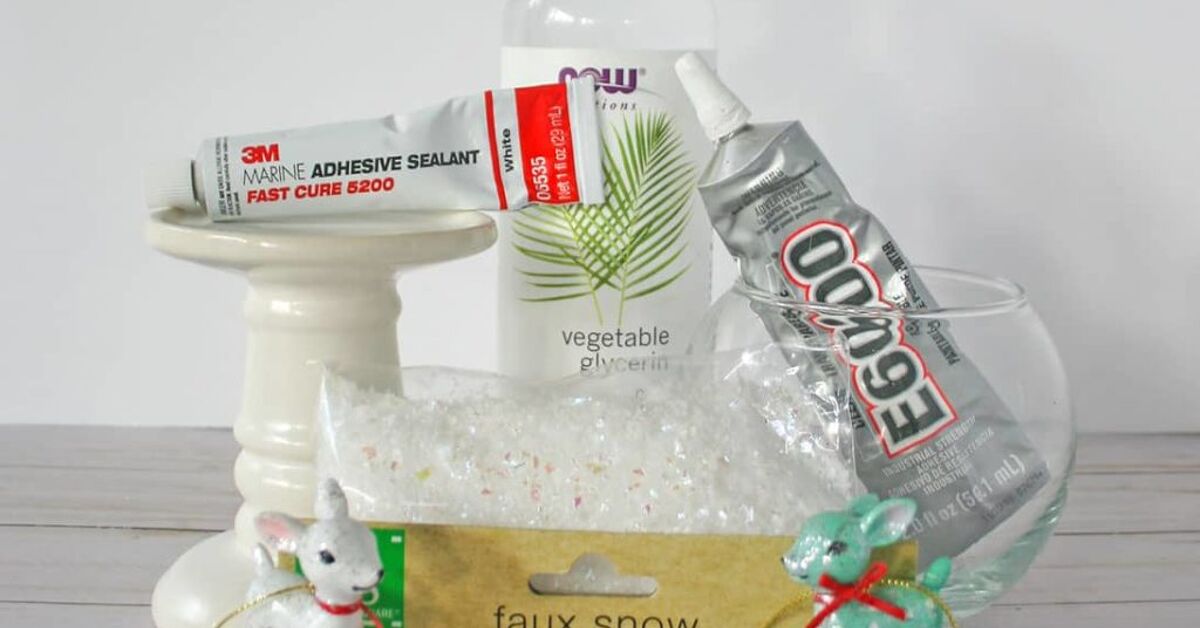
What You Need to Make a Homemade Snow Globe
Main Supplies
- 1 clean glass jar or Mason jar with a tight-fitting lid
- Mini waterproof figurines, bottlebrush trees, or small holiday decorations
- Waterproof adhesive, clear-drying epoxy, or strong craft glue
- Distilled water
- Glitter or faux snow
- Glycerin or a small amount of clear glue
- Optional foam base, painted lid, ribbon, twine, or decorative trim
Optional Add-Ons
- Laminated family photos for a personalized snow globe
- Mini pinecones, faux berries, or tiny woodland accents
- Spray paint or glitter paint for the lid
- Artificial snow, sequins, or chunky glitter for a more dramatic flurry
- Holiday tag if you are gifting it
The jar matters more than people think. Use a clear jar with a lid that seals tightly. Wide-mouth jars are often easier to work with because they give you more room to build your scene. Clean the jar thoroughly before you start so the water stays clear and your snow globe does not look like a weather system trapped in a dusty attic.
The decorations also matter. Pick items that are waterproof or water-resistant. Plastic, ceramic, and sealed miniatures tend to work well. If you want to use paper photos or printed designs, laminate them first. Plain paper and water are not exactly best friends.
How to Easily Make a DIY Holiday Snow Globe
Step 1: Plan Your Winter Scene
Before gluing anything down, arrange your mini decorations on the lid and test the fit by lowering the jar over them. This step is simple but important. A snow globe is adorable. A snow globe where Santa gets decapitated by the jar rim is less adorable.
Try to keep your scene balanced. One tree and one figurine often look cleaner than cramming in every tiny decoration you own. Small-scale scenes usually look more polished, and they leave enough room for the glitter to move.
Step 2: Attach the Decorations to the Lid
Glue your figurines, trees, or laminated photo to the inside of the lid. If you want to elevate your scene, glue a trimmed foam piece or small base to the lid first, then attach the decorations on top. This creates dimension and helps your design stand out inside the jar.
Use waterproof adhesive or clear-drying epoxy for the strongest hold. Hot glue can work for certain versions, especially quick decorative projects, but a more durable waterproof adhesive is usually better for a water-filled snow globe that you want to keep.
After gluing, let the scene dry completely. Overnight is ideal if you want to play it safe. Rushing this step is how you end up with a floating reindeer situation, and nobody needs that kind of holiday plot twist.
Step 3: Fill the Jar with Liquid
Pour distilled water into the jar, leaving about half an inch of space at the top. That little gap matters because the decorations will displace some of the water once the lid is screwed on.
Then add a few drops of glycerin. Glycerin slightly thickens the water, which helps the glitter fall more slowly and gives you that classic swirling snow effect. If you do not have glycerin, a small amount of clear glue can create a similar slower-fall effect in some DIY versions. Do not overdo it, though. You want a graceful snowfall, not a glitter traffic jam.
Step 4: Add Glitter or Faux Snow
Add glitter, faux snow, or a mix of both into the water. Fine glitter gives a sparkly blizzard look, while chunkier glitter or flakes can resemble snow more closely. Many crafters like to mix sizes for a more realistic effect.
Start small. You can always add more, but dumping in half the container usually turns your lovely winter scene into a festive snowstorm with zero visibility. A tablespoon or two is often plenty for an average Mason jar.
Step 5: Seal the Snow Globe
Apply adhesive around the rim of the jar or the inside of the lid, then carefully screw the lid on tightly. Make sure the seal is secure. Turn the jar upside down only after the lid is fully tightened.
Place the snow globe upside down while it dries so you can catch leaks early. Some crafters let it sit for about an hour, while others prefer overnight drying for extra peace of mind. Either way, do not skip the leak check unless you enjoy surprise glitter puddles.
Step 6: Flip, Shake, and Admire Your Work
Once the adhesive is dry and the seal looks tight, turn the globe right side up, give it a gentle shake, and watch the snow fall. That first swirl is deeply satisfying. It is part craft, part decor, part tiny weather channel.
Best Tips for a Snow Globe That Looks Beautiful, Not Cloudy
Use Distilled Water
Distilled water is the best choice because it helps keep the liquid clearer over time. Tap water can contain minerals that make the globe look cloudy later.
Choose Waterproof Decorations
Plastic and ceramic figures tend to hold up well. Unsealed wood, paper, or metal pieces can bleed color, warp, or rust. If you are unsure, test the item in water first.
Laminate Photos for Personalized Globes
A photo snow globe is a sentimental favorite, especially for family gifts. Laminate the photo and leave a sealed edge around it before cutting. That extra border helps keep moisture out.
Do Not Overload the Jar
Less is often more. Too many decorations make the scene look crowded and limit glitter movement. Give your tiny winter world a little breathing room.
Pick the Right Glitter
If you want a classic snow effect, try white glitter, iridescent flakes, or larger glitter pieces. Super-fine glitter is pretty, but it can sometimes make the water look murkier if you go overboard.
Creative DIY Holiday Snow Globe Ideas
Classic Christmas Tree Snow Globe
Use one or two bottlebrush trees, a dusting of glitter, and a metallic painted lid. This style is timeless and looks elegant on a mantel or bookshelf.
Family Photo Snow Globe
Laminate a favorite family photo and pair it with tiny faux snow and winter greenery. It makes a sweet keepsake gift for grandparents, parents, or newlyweds.
Rustic Farmhouse Snow Globe
Use a Mason jar, mini evergreen trees, twine around the lid, and muted colors. This version works especially well with neutral holiday decor.
Kid-Friendly Ornament Snow Globe
Use clear plastic globe ornaments instead of jars, then fill them with lightweight snow, confetti, or glitter. These are easier for kids to help assemble and fun for decorating a tree.
Natural Winter Scene
Take inspiration from nature with faux greenery, tiny pinecones, berries, and woodland-inspired details. The result feels cozy, classic, and less commercial than a store-bought globe.
Common DIY Snow Globe Mistakes to Avoid
Using Decorations That Are Too Big
Always test the fit before gluing. Your jar should close easily without pressing against the figurines.
Skipping Dry Time
If the adhesive is not fully cured, pieces may loosen when submerged. Let the scene dry well before filling and sealing.
Adding Too Much Glycerin or Glue
A little goes a long way. Too much can make the liquid cloudy or overly thick.
Forgetting the Leak Test
After sealing, let the globe sit upside down and inspect the rim. A small leak now is much easier to fix than a glittery disaster later.
Using Tap Water
Cloudiness is one of the quickest ways to make a snow globe look less polished. Distilled water is worth the tiny extra effort.
How to Style and Gift Your Homemade Snow Globe
A DIY holiday snow globe looks charming on a mantel, entry table, bookshelf, coffee table tray, or holiday centerpiece. Group several together in different heights for a collected look. You can also pair one with candles, greenery, or wrapped gifts to make it feel even more festive.
If you are gifting it, finish the jar with ribbon, twine, a handwritten tag, or a tiny label with the year. That little detail turns a fun craft into a meaningful keepsake. Snow globes are especially great as teacher gifts, neighbor gifts, hostess gifts, and personalized family presents.
For holiday entertaining, make mini versions as place settings or party favors. A small snow globe at each plate feels thoughtful and whimsical without looking overdone. It says, “Welcome to dinner,” but in a much sparkly-er dialect.
Why This Christmas Craft Keeps Coming Back Every Year
There is something wonderfully old-fashioned about a snow globe. It captures a tiny scene, freezes a mood, and turns a simple jar into a memory. That is why this DIY keeps showing up in holiday craft collections year after year. It is easy enough for beginners, creative enough for seasoned crafters, and sentimental enough to become part of your annual traditions.
And unlike some trendy crafts that disappear by next season, a holiday snow globe has staying power. It feels nostalgic, but not outdated. Personal, but not overly precious. Festive, but still tasteful. In other words, it is the craft equivalent of a classic Christmas song: familiar, cheerful, and impossible to resist when the season rolls around.
Extra Holiday Snow Globe Experiences to Make the Project More Meaningful
Making a DIY holiday snow globe is not just about the finished decoration. The real fun often lives in the experience of making it. That is part of why this project sticks with people. It is one of those crafts that can be simple enough for a quiet solo evening, but special enough to become a family tradition. The mood changes depending on who is around, what music is playing, and whether someone is stealing the glitter for a side project across the table.
If you make a snow globe by yourself, the process can feel surprisingly calming. There is something satisfying about arranging tiny trees, adjusting a miniature deer by half an inch, and deciding whether your winter scene says “cozy cabin getaway” or “holiday drama in a jar.” It is creative without being overwhelming. You do not need a complicated plan. You just build a tiny world, seal it up, and enjoy the payoff every time you shake it.
If you make snow globes with kids, the experience becomes delightfully unpredictable. Children tend to approach the project with the confidence of holiday movie set designers. One may want Santa, a dinosaur, and a penguin in the same globe. Another may believe that more glitter is always the answer. They are not entirely wrong. Kid-made snow globes often end up being the most charming because they are less worried about perfection and more focused on joy.
Snow globes also work beautifully for memory-based crafting. You can create one after a family trip, a baby’s first Christmas, a new home purchase, or a milestone year. A laminated photo inside the jar instantly changes the project from cute decoration to personal keepsake. Add the date to the bottom, and suddenly you have something that comes back out every December and means a little more each time.
They are also wonderful for gifting because they feel thoughtful without feeling generic. A store-bought gift can be lovely, but a handmade holiday snow globe says you spent time creating something just for that person. A globe with a dog figurine for a pet lover, a tiny red truck for someone who loves rustic decor, or a family photo for grandparents feels personal in a way that many gifts do not.
Another great experience is turning snow globe making into a holiday gathering. Set out jars, decorations, ribbons, laminated photos, and bowls of glitter, then let everyone design their own. It works for kids, adults, and mixed-age groups. People tend to get surprisingly invested in tiny winter scenes. Someone will absolutely become overly competitive about tree placement. Let them. It is the holidays.
By the end of the project, you do not just have decor. You have a small moment from the season captured in glass: the conversation, the laughter, the little mess, the shared creativity, and the memory of making something by hand. That is the real reason DIY holiday snow globes last. They are not only pretty. They carry the feeling of the season inside them.
Conclusion
If you have been looking for an easy Christmas craft that is festive, affordable, and genuinely fun to make, a DIY holiday snow globe is hard to beat. With a clean jar, a secure lid, a few waterproof miniatures, distilled water, glitter, and a careful seal, you can create a homemade holiday decoration that feels both classic and personal. Keep the design simple, choose materials that hold up well, and let the glitter do its thing. The result is a cheerful little winter world you can display, gift, and bring back year after year.











