
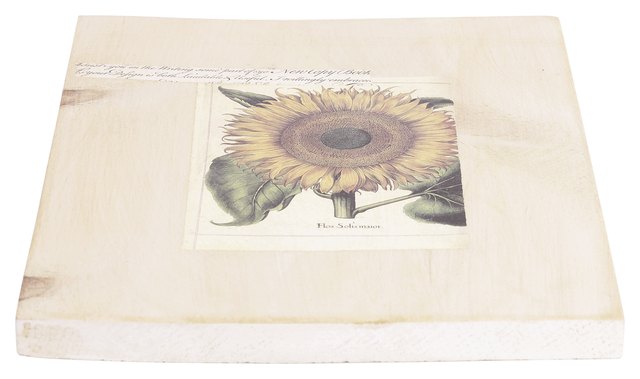
If you have ever looked at a plain wooden plaque and thought, “You know what this needs? My dog’s face,” congratulationsyou already understand the appeal of this project. Learning how to decoupage a photo on wood is one of those crafty skills that feels impressively artistic while still being very doable for beginners. It is sentimental without being sappy, creative without requiring a fine-arts degree, and customizable enough to turn a simple block of wood into meaningful home décor, a thoughtful gift, or a keepsake that does not live forgotten in your phone gallery.
The basic idea is simple: you attach a printed photo to wood using a decoupage medium, smooth it carefully, and seal it so it looks polished and lasts. That is the classic decoupage method. There is also a related technique called photo transfer, where the image is transferred into the finish so the wood grain shows through more dramatically. Both are beautiful, but if your goal is a crisp, full-color image with fewer variables, decoupaging a photo directly onto wood is usually the easiest place to start.
In this guide, you will learn exactly how to decoupage a photo on wood, what supplies to use, how to avoid bubbles and wrinkles, when to sand, how to seal the finished piece, and what to do when your project starts acting a little dramatic. Because yes, paper can absolutely throw a tiny tantrum.
What Does It Mean to Decoupage a Photo on Wood?
Decoupage is the process of applying paper to a surface with a glue-and-sealer medium, then sealing it under protective coats for a finished look. When you decoupage a photo on wood, you are usually placing the image right side up onto a sanded wooden surface, then brushing additional coats of medium on top. This is different from a photo transfer, where the image is placed face down and the paper backing is later rubbed away.
That distinction matters because it helps you pick the right result. If you want a photo that looks more like a printed image mounted on a rustic base, choose classic decoupage. If you want a vintage, weathered, wood-grain-through-the-image effect, choose photo transfer. Since the title of this article is How to Decoupage a Photo on Wood, we are focusing on the classic method first, with a quick note on transfers later.
Why This DIY Project Is So Popular
There are plenty of reasons crafters love photo decoupage on wood. It is affordable, beginner-friendly, and incredibly personal. A wedding snapshot becomes a farmhouse-style display piece. A black-and-white family portrait suddenly looks gallery-worthy on a whitewashed plank. A child’s drawing or a favorite vacation photo can be turned into wall art without ordering expensive custom printing.
Wood also gives the project warmth that a plain frame sometimes lacks. It brings in texture, natural grain, and a handmade feel that works with rustic, modern farmhouse, cottage, vintage, and even minimalist décor. In other words, wood is the jeans jacket of craft surfaces: it gets along with almost everything.
Supplies You Need
- A smooth wood surface such as a plaque, sign blank, wood slice, or small board
- A printed copy of your photo
- Decoupage medium or Mod Podge
- Fine-grit sandpaper
- A foam brush or soft paintbrush
- A brayer, plastic scraper, or old gift card for smoothing
- Scissors or craft knife
- A soft cloth
- Optional paint or stain for the wood base
- Optional clear topcoat for extra durability
For the easiest results, use a smooth wood surface rather than rough reclaimed lumber. Rustic wood looks charming in photos, but deep grooves can make it harder for paper to adhere evenly. If you love the distressed look, you can always create that vibe later with paint, stain, or edge sanding.
Choosing the Right Photo
Not every image behaves the same way on wood. High-contrast photos tend to work best because the details stay readable after sealing. Family portraits, pet photos, travel scenes, botanical images, and simple typography all do well. If the picture contains text, make sure you print it the way you want it to appear in the final piece. Since classic decoupage places the image face up, there is no need to mirror it. Mirroring is mainly important for photo transfer methods.
You can use regular printer paper, but many crafters prefer thinner paper because it blends better and leaves less noticeable edge buildup. If you are using an inkjet print, let it dry completely before handling it. A test print is always smart, especially if the image is precious or the wood blank is your last one. Every crafter knows the heartbreak of loving a project exactly one minute before the glue hits the wrong corner.
How to Decoupage a Photo on Wood: Step by Step
1. Prep the Wood Properly
Start by sanding the wood until it feels smooth to the touch. Focus especially on rough patches, corners, and splinter-prone areas. After sanding, remove all dust with a vacuum attachment, tack cloth, or slightly damp cloth. Do not skip this step. Dust trapped under your photo can create bumps, poor adhesion, and a finish that looks rough instead of intentional.
If you want to paint or stain the wood, do it now. A white or light neutral paint can make colors in the photo stand out more, while a stained surface creates a warmer, moodier look. Let any paint or stain dry fully before moving on.
2. Trim and Test the Photo
Cut the photo to fit your wood piece. You can trim it exactly to the edges or leave a visible wood border around it like a built-in frame. Before gluing anything, place the photo on the wood and make sure the size and composition look right. This takes about ten seconds and can save you from a lot of muttering later.
If the photo paper feels thick, some crafters lightly coat the front with a sealer before decoupaging, especially with home-printed images. Just make sure it is completely dry before the next step.
3. Apply the Decoupage Medium
Brush a thin, even layer of decoupage medium onto the wood surface where the photo will sit. You do not want puddles, but you do want full coverage. Uneven application can lead to lifting, bubbles, or dry spots where the paper does not adhere well.
Some crafters also brush a light coat on the back of the photo, especially for larger images. That can help improve adhesion, but keep it smooth and controlled. Too much medium can oversaturate the paper and make it wrinkle more than necessary.
4. Place the Photo and Smooth It Out
Carefully place the photo right side up onto the glued surface. Start at one edge and lower it gradually if possible rather than dropping it all at once. Then use a brayer, scraper, or old card to smooth from the center outward. This helps push out trapped air and excess medium.
Be gentle but thorough. The goal is to flatten the paper without stretching or tearing it. If a little glue squeezes out at the edges, wipe it away with a damp cloth. This is the stage where patience matters most. Rush it, and bubbles appear. Go slowly, and the project starts looking like something you would absolutely brag about online.
5. Let It Dry Completely
Dry time is where many projects win or lose. Let the piece dry fully before adding top coats. Depending on humidity and how much medium you used, this may take several hours. Overnight is even better. Half-dry decoupage has a sneaky way of looking ready when it absolutely is not.
If the edges lift slightly while drying, press them back down gently while the medium is still workable. Once it fully hardens, fixing lifted corners becomes much more annoying.
6. Seal the Top
Once the photo is dry, brush a thin coat of decoupage medium over the top of the image. Use long, even strokes and avoid overworking the surface. Let that coat dry, then add another. Two to three thin coats usually give a nice finish and better durability than one heavy coat.
If you want an extra-protected surface for signs, trays, or decorative pieces that may get more handling, you can finish with an appropriate clear protective coat after the decoupage layers are fully cured. Matte gives a soft handcrafted look, satin feels versatile, and gloss brings out color and contrast.
7. Finish the Edges
After everything is dry, inspect the edges. If any paper hangs over, trim it carefully with a craft knife or gently sand it flush with fine-grit sandpaper. You can leave the piece clean and crisp or lightly distress the edges for a vintage feel. A little distressing works especially well on black-and-white photos, old family images, or shabby-chic décor.
How to Avoid Wrinkles, Bubbles, and Cloudy Finishes
The biggest issues with photo decoupage on wood are almost always the same: wrinkles, bubbles, edge lift, and a cloudy finish. The good news is that they are usually preventable.
First, keep the wood smooth and dust-free. Second, apply medium in thin, even coats. Third, smooth the paper from the center outward instead of randomly pressing wherever your hand lands. Fourth, let each layer dry before adding another. And finally, do not panic if the decoupage medium looks slightly milky when wet. Many formulas dry clear.
If you find a small bubble after the topcoat dries, you may be able to prick it with a fine pin and smooth it gently. Tiny flaws are often less visible once the whole project is finished. In fact, on rustic wood décor, a little imperfection can look like character rather than a mistake. That is one of the rare times in life when being slightly uneven is actually stylish.
Best Wood Types for This Project
If you are wondering what wood works best, look for surfaces that are flat, clean, and not heavily textured. Basswood plaques, unfinished craft boards, birch plywood panels, pine signs, and pre-made wood rounds are all solid choices. Thick wood slices can look gorgeous too, though they may need more sanding if the surface is rough.
For a polished gift, try a smooth rectangular plaque with softly rounded edges. For rustic seasonal décor, a wood round or distressed board works beautifully. For memorial pieces or sentimental displays, a stained pine board with a black-and-white photo can look especially timeless.
Classic Decoupage vs. Photo Transfer on Wood
Since many people search for both techniques, here is the quick version. Classic decoupage glues the photo onto the wood and seals it. It gives fuller color, clearer detail, and a more straightforward process. Photo transfer usually involves a toner or photocopy image, a special transfer medium, face-down placement, drying, and then rubbing away the paper backing. The result is more integrated with the wood and often more rustic.
If you are making your first DIY photo wood craft, classic decoupage is the friendlier option. If you already know your way around Mod Podge and enjoy a slightly more experimental process, try photo transfer next. That way, you are learning skills instead of collecting avoidable frustration.
Creative Project Ideas
Once you know how to decoupage a photo on wood, the project possibilities multiply fast. Make a wedding photo plaque for an anniversary gift. Turn pet portraits into ornaments on wood slices. Create a family name sign with a favorite house photo. Use baby pictures for nursery décor. Make vacation memory blocks for a bookshelf. Or decoupage recipe cards, handwritten notes, or scanned children’s artwork onto wood for a keepsake that feels far more special than another digital folder called “important stuff for later.”
One of the smartest ideas is to create a set. Three small wood plaques with matching travel photos can become a mini gallery wall. A set of four botanical prints can brighten a kitchen corner. Handmade gifts feel especially thoughtful when they look coordinated instead of random.
What the Experience Is Really Like: The Little Things Nobody Tells You
The experience of decoupaging a photo on wood is part craft project, part tiny emotional roller coaster. At first, it feels deceptively easy. You sand the wood, trim the picture, brush on the medium, and think, “I have absolutely mastered this.” Then the paper lands one millimeter crooked, and suddenly you are negotiating with a rectangle like it owes you money. That is normal.
One of the first things people notice is how much patience affects the final result. If you hurry the smoothing step, the piece will usually remind you later with bubbles. If you add a topcoat before the base layer is fully dry, the surface may look streaky or tacky for longer than you expected. But if you slow down just a little, the process becomes oddly relaxing. There is something satisfying about brushing on a clean coat, pressing the paper flat, and watching a plain board turn into something personal.
There is also a surprising amount of decision-making in a project that seems simple. You start out thinking you are just putting a photo on wood. Then suddenly you are choosing between matte and gloss, whitewashed versus stained, full-bleed image versus framed border, crisp modern finish versus distressed vintage edge. That is part of the fun. This project leaves room for your taste to show up.
Many crafters also discover that the most meaningful projects are not always the most technically perfect ones. A slightly imperfect pet portrait can still be adorable. A softly wrinkled old family photo can still feel moving and beautiful. A handmade anniversary gift with one tiny edge flaw still means more than something generic bought five minutes before dinner. Wood photo crafts have a warmth that polished factory décor often lacks.
Another real experience is that every printer, paper type, and wood surface behaves a little differently. That is why experienced crafters love test pieces. A small trial run can teach you more in fifteen minutes than ten tutorials can. You learn how quickly your medium spreads, how much pressure your paper can handle, how your chosen topcoat looks when dry, and whether your image needs more contrast. It is not wasted effort. It is the shortcut to better results.
And then there is the best part: the reveal after everything dries. When you pick up the finished piece and realize it actually looks like décor instead of a science experiment, the project becomes addictive in the best way. Suddenly you are looking around your house thinking, “Could this be a photo on wood? Could that be a photo on wood?” That is usually how one project becomes five.
In the end, decoupaging a photo on wood is not just about glue and paper. It is about turning ordinary memories into something tactile, display-worthy, and lasting. It is simple enough for beginners, flexible enough for experienced crafters, and personal enough to feel special every single time.
Conclusion
If you want a DIY project that is affordable, sentimental, and genuinely useful, learning how to decoupage a photo on wood is a smart place to begin. Prep the wood well, choose a good image, apply thin coats, smooth carefully, and let each layer dry completely. Those five habits do most of the heavy lifting. From there, you can experiment with painted backgrounds, distressed edges, layered designs, and even photo transfer techniques once you are comfortable.
The beauty of this craft is that it turns memories into décor without making them feel overly precious or untouchable. It is approachable, creative, and surprisingly satisfying. Also, it gives your favorite photos a second life beyond living between screenshots and takeout receipts in your camera roll, which feels like a win for everyone involved.













