
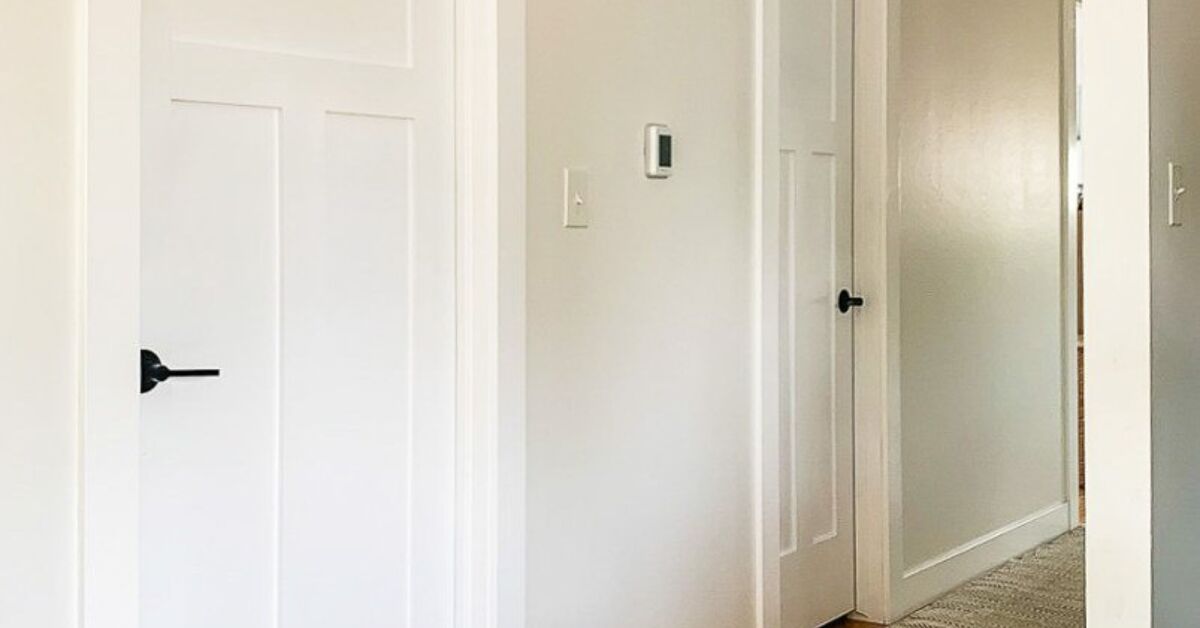
Plain builder-grade door casing has a job, but it rarely has much personality. Craftsman-style door trim changes that. With flat boards, square corners, and a substantial header, it gives an ordinary doorway the quiet confidence of a house that owns at least one good toolbox.
The best part is that this project is more forgiving than traditional mitered casing. Instead of persuading two 45-degree cuts to behave like lifelong friends, you can use straight, square cuts and layer simple boards into a clean architectural detail. The result feels timeless, works in bungalows and newer homes alike, and can make a hallway look far more intentional than it did five minutes ago.
This guide explains how to create Craftsman-style door trim from scratch, choose materials, plan proportions, install the casing neatly, and finish it so it looks built-in rather than “assembled during a spirited Saturday afternoon.”
What Makes Door Trim Look Craftsman-Style?
Craftsman trim is rooted in the Arts and Crafts movement, which favored honest materials, sturdy proportions, and straightforward workmanship over elaborate ornament. In practical terms, Craftsman-style door casing typically uses flat stock instead of curvy profile molding.
The signature look usually includes:
- Wide, flat vertical side casings
- A horizontal head casing that sits across the top of the side boards
- Square butt joints instead of angled miters
- A slightly wider or thicker cap board above the header
- Strong horizontal lines and simple, balanced proportions
A basic design might use 1×4 boards for the sides, a 1×6 board for the header, and a narrow 1×2 cap strip at the top. You can make the design more detailed with a backband or decorative ledge, but restraint is part of the charm. Craftsman style is not trying to win a beauty pageant against a Victorian staircase. It is trying to look solid, useful, and very sure of itself.
Plan the Design Before Buying Lumber
Before making a single cut, decide how substantial you want the doorway to look. A narrow hallway with standard eight-foot ceilings may look best with 1×4 side casing and a modest 1×6 header. A taller room can handle wider boards, a deeper cap, or a layered header treatment.
Use Proportion, Not Guesswork
The trim should relate to the rest of the room. If your baseboards are 3 inches tall, an enormous 8-inch header can feel like it wandered in from a courthouse. On the other hand, wide trim can look excellent next to tall baseboards, wainscoting, or other Arts and Crafts details.
For a simple interior doorway, consider this starting layout:
- Side casing: 1×4 boards, which are about 3 1/2 inches wide
- Header: 1×6 board, about 5 1/2 inches wide
- Cap strip: 1×2 or 1×3 board installed above the header
- Header overhang: about 3/4 inch to 1 inch beyond each outer side edge
- Jamb reveal: about 3/16 inch around the inside edge of the casing
These dimensions are a flexible recipe, not a federal law. Build a small mockup from scrap wood, hold it against the door, and step back several feet. Your eyes will tell you more than a spreadsheet ever will.
Materials for Craftsman-Style Door Casing
Choose trim material based on the room, your budget, and whether you plan to paint or stain. For most painted interior Craftsman trim projects, primed pine, finger-jointed pine, poplar, or MDF are practical choices.
Wood vs. MDF for Door Trim
Poplar is smooth, stable, and excellent for painted trim. It costs more than basic pine but sands nicely and holds crisp edges.
Finger-jointed pine is widely available and usually less expensive than clear solid wood. It is a good option for painted trim, especially when you inspect each board for straightness before buying.
MDF creates a very smooth painted finish and is easy to cut cleanly. However, it does not like moisture. Avoid using it near exterior doors with water exposure, wet basements, or bathrooms with chronic humidity unless the product is specifically rated for those conditions.
Solid wood is a strong choice when you want a natural stained finish. Oak, maple, and fir can all work, though staining makes every cut, filler spot, and grain difference more visible. In other words, stained trim is beautiful, but it does not hide a bad decision with the generosity of paint.
Basic Supply List
- Flat stock boards for side casings, header, and cap
- Measuring tape and combination square
- Pencil or marking knife
- Miter saw or circular saw with a straightedge guide
- Stud finder
- Finish nailer or hammer and finish nails
- Wood glue for layered trim pieces
- Paintable caulk
- Wood filler
- Sandpaper, primer, and trim paint
- Safety glasses and hearing protection
Step 1: Remove Existing Door Trim Carefully
Score the paint or caulk line around the old casing with a utility knife. This simple step reduces the chance of pulling drywall paper away with the trim. Slip a thin pry bar behind the casing and use a wide putty knife or scrap wood against the wall to spread the pressure.
Work slowly. The goal is to remove the old trim without turning the surrounding drywall into a geography lesson. Pull the old nails from the back of the casing whenever possible instead of hammering them through the face.
Once the trim is off, inspect the jamb and wall. Scrape off old caulk, drive or remove protruding nails, and fill major wall damage before installing the new boards.
Step 2: Mark a Consistent Reveal
The reveal is the small strip of door jamb left visible between the casing and the inside edge of the door opening. A 3/16-inch reveal is a common choice because it looks intentional while allowing the casing to cover small gaps between the jamb and drywall.
Use a combination square to mark the reveal on both side jambs and across the top jamb. Keep these lines crisp and consistent. A fuzzy pencil line is the woodworking equivalent of a vague text message: it creates unnecessary confusion later.
Do not assume the floor is level or the jamb is perfectly square. Older homes have personality, and that personality often includes a floor that slopes just enough to annoy you at the finish line.
Step 3: Cut and Dry-Fit the Side Casings
Measure each side separately. Even if the doorway looks symmetrical, measure both sides. Cut the bottom ends square and position each board with its inner edge aligned to the reveal line.
In a typical Craftsman arrangement, the side casings run from the finished floor up to the underside of the head casing. Hold each board in place, mark it directly, then cut. Direct marking is usually more reliable than trying to transfer several tape-measure numbers while balancing a board, a pencil, and your confidence.
Dry-fit both side pieces before fastening anything. Check that they are plumb, that their inside edges follow the reveal lines, and that their outer edges sit evenly against the wall.
Step 4: Build the Header Assembly
The header is what gives Craftsman door trim its recognizable top-heavy character. Start with a flat horizontal board, commonly a 1×6. The header should sit across the tops of the two side casings, creating square butt joints.
Measure the Header the Smart Way
Set the two side casings in place without permanently fastening them. Hold the header board across the top and mark its length directly. Allow the header to extend beyond the outer edges of the side casing by the same amount on both sides.
For example, if you want a 3/4-inch overhang on each side, mark that overhang while the board is held in position. This method avoids the classic trim mistake of trusting math more than the actual house. The house always gets the final vote.
For a more layered Craftsman look, add a cap strip above the header. A 1×2 board can sit horizontally along the top of the head casing, extending slightly beyond the header ends. Glue the cap strip to the header, clamp it if needed, and add a few pin nails or finish nails to hold it securely.
Another option is to install a narrow backband behind the header. This creates extra depth, but keep the layers simple. A Craftsman doorway should look thoughtfully built, not like it is wearing every accessory it owns.
Step 5: Install the Side Casings
Position the first side casing with its inside edge on the reveal line. Start with one or two nails near the top so you can make small adjustments before committing. Check for plumb, then fasten the board along both edges.
Drive nails through the inner portion of the casing into the jamb and through the outer portion into framing behind the drywall whenever possible. A finish nailer makes this much easier, but a hammer and finish nails can work with patience and a nail set.
Use enough fasteners to keep the board tight to the wall without turning the trim into a pin cushion. Spacing nails roughly every 8 to 12 inches is usually sufficient for standard interior casing, with extra attention near the ends and where the wall bows slightly.
Install the second side casing the same way. Before moving on, place a level across the tops of both vertical boards. If the floor is uneven, the casings may not end at identical heights from the floor, but their relationship to the jamb and header must still look correct.
Step 6: Fasten the Header and Cap
Set the header across the two side casings and align its lower edge with the top reveal line. Check that the overhang is even on both sides. Nail the header into framing where possible, then secure it to the side casings with small amounts of wood glue at the butt joints.
If you built a cap strip separately, install it after the main header is secure. Keep it level and centered. The cap is a small detail, but it casts a shadow line that makes the trim look more substantial and finished.
Stand back and inspect the doorway from several angles. Look for uneven reveals, a header that appears off-center, or a cap that leans slightly. Fixing a small issue now takes minutes. Discovering it after paint dries takes emotional resilience.
Step 7: Fill, Caulk, Sand, and Paint
Fill nail holes with a paintable wood filler. Let it dry, sand it smooth, and repeat if the filler shrinks. Use paintable caulk only where trim meets the wall or jamb. Do not caulk joints that need to move freely, and do not use caulk as a substitute for a bad cut.
Prime bare wood, cut ends, and any patched areas. Then apply a durable trim paint, usually in satin, semi-gloss, or gloss. Semi-gloss is popular because it is easier to clean and gives the flat boards enough light reflection to show their shape.
For the cleanest finish, paint the trim after installation but before putting the room back together. If you paint boards before installation, expect to touch up nail holes, joints, and the occasional mysterious scuff that appears when no one is looking.
Common Craftsman Door Trim Mistakes to Avoid
Using Boards That Are Too Narrow
Craftsman casing needs enough width to read as an architectural element. Skinny boards can make the doorway look more like standard colonial trim wearing a fake mustache.
Ignoring the Rest of the Room
Match the scale of your door trim to nearby window casing, baseboards, and built-ins. The trim does not have to be identical everywhere, but it should look like the rooms belong to the same house.
Measuring Only Once
Door jambs and floors are often slightly out of square. Measure both sides, dry-fit every piece, and mark boards directly whenever possible.
Relying on Caulk to Hide Large Gaps
A thin caulk line can make a professional installation look seamless. A thick rope of caulk announces that the trim and wall are in a complicated relationship.
Using MDF in a Damp Location
MDF can be excellent for dry, painted interiors, but moisture can cause swelling and damaged edges. Choose moisture-resistant materials around exterior entries, laundry areas, or bathrooms with poor ventilation.
How to Adapt Craftsman Trim for Different Doorways
For closet doors, pantry doors, and short openings, use the same basic layout but reduce the header size slightly so the trim does not overpower the opening. For French doors or wide cased openings, increase the width of the head casing and use a deeper cap to maintain visual balance.
For an open doorway with no door slab, Craftsman trim works beautifully as a cased opening. Use matching trim on both sides, and make sure the side casings line up neatly through the opening. For a wider pass-through, consider a built-up header with a wider central board and a small projecting cap.
If your home has stained woodwork, select a species that matches existing trim as closely as possible. If matching perfectly is impossible, choose a deliberate contrast instead of an almost-match. “Close enough” wood tones can look strangely accidental.
Conclusion: A Small Upgrade With Big Architectural Payoff
Creating Craftsman-style door trim is one of the most effective ways to add character without rebuilding an entire room. The design relies on straight cuts, flat boards, and careful proportions, so it is approachable for a motivated DIYer with basic tools.
Take your time with the reveal lines, dry-fit every piece, and let the doorway guide your measurements. Once painted, the finished casing can make a plain interior door feel more substantial, polished, and surprisingly expensive-looking. Not bad for a few boards and a weekend that did not involve assembling furniture with an Allen wrench.
Real-World Experiences and Lessons From Installing Craftsman-Style Door Trim
One of the first lessons people learn when creating Craftsman-style door trim is that the simplest-looking design can demand the most disciplined layout. Flat boards do not have ornate profiles to distract the eye. Every uneven reveal, crooked cap, and wandering caulk line becomes visible immediately. This is not bad news; it simply means preparation matters more than fancy woodworking tricks.
Many DIYers find that dry-fitting the complete assembly before driving the first nail saves a surprising amount of frustration. Lay out both side casings, place the header on top, and add the cap strip while everything is still loose. This gives you a chance to check the proportions from across the room. A design that looks perfect on a workbench can feel too bulky once it is installed beside a narrow baseboard or a low ceiling.
Another common experience is discovering that walls are not as flat as they appear. A casing board may sit tightly against the wall at the top and bottom but leave a small gap in the middle. Do not immediately force the board tight with a dozen nails. First, determine whether the wall is bowed, the board is warped, or the jamb is proud of the drywall. Sometimes a small shim behind the casing or a slight adjustment in nail placement creates a better result than brute force.
People also tend to underestimate the importance of lighting. Trim that looks flawless during the day can reveal tiny flaws when a hallway light casts a shadow along the cap board. Before filling and painting, shine a work light across the trim from the side. This low-angle light makes proud nail heads, uneven joints, and rough filler spots easy to find. It is much better to discover them before the final coat of paint turns them into permanent roommates.
Painting brings another practical lesson: trim paint is not merely wall paint wearing a slightly shinier outfit. Door casing gets bumped by bags, vacuum cleaners, pets, furniture, and people who somehow cannot walk through a doorway without touching both sides. A durable trim enamel in satin or semi-gloss usually holds up better and is easier to clean than flat wall paint.
Homeowners who tackle several doors often report that the first doorway takes the longest by far. The second goes faster because the cuts become familiar, the design decisions are already made, and you finally understand where the nailer likes to leave its tiny dents. By the third doorway, you may begin looking around the house for more trim projects. This is the moment to put the measuring tape down, make a cup of coffee, and remember that every room does not need a renovation just because you now own a miter saw.
Finally, the most satisfying experience is seeing how much a modest trim project changes the mood of a space. A hallway, bedroom, or closet entry can suddenly feel more complete because the doorway has a clear visual frame. Craftsman-style trim does not scream for attention. It simply makes the room look as though someone cared about the details from the beginning.
Note: This guide is intended for interior door trim. For exterior doors, use moisture-resistant materials, appropriate flashing, and installation methods suited to your local climate and building requirements.












