
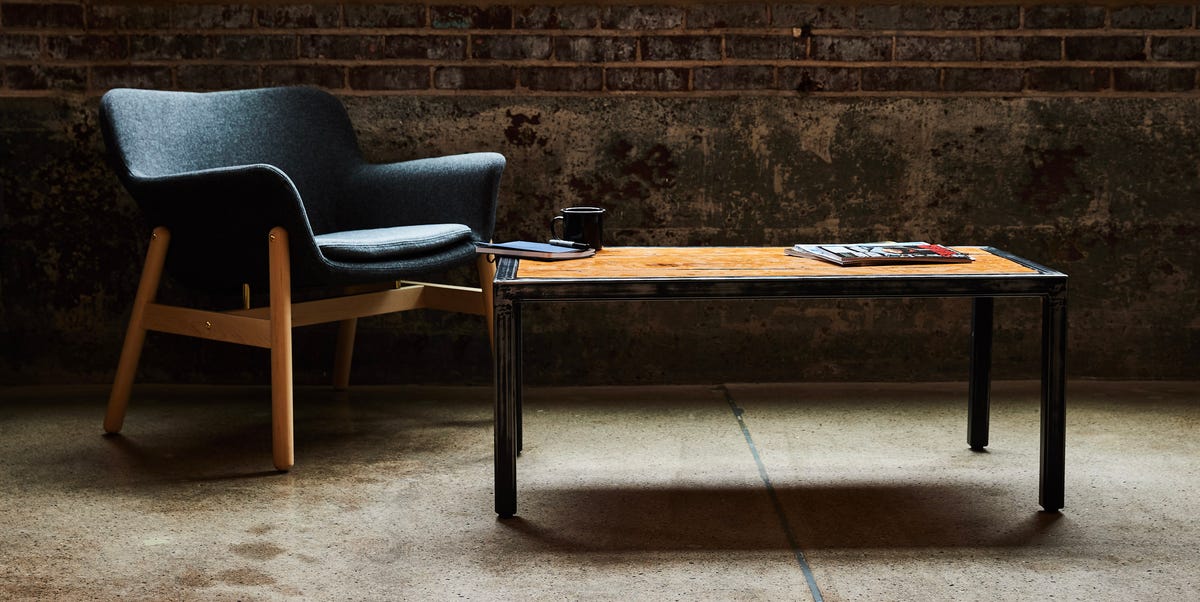
Some furniture is merely furniture. Other furniture quietly announces, “Yes, I own a drill, and I know what a flange is.” This DIY industrial coffee table belongs firmly in the second category.
With a chunky wood plank top, black steel pipe legs, and a sturdy hidden subframe, this project delivers the warehouse-loft look without requiring a warehouse, a loft, or a suspiciously large beard. It is practical, customizable, and realistic for a determined beginner with basic tools.
This guide walks through the full build of a durable 48-by-22-inch industrial coffee table, from selecting lumber to finishing the top so it can handle mugs, remotes, snack bowls, and the occasional “I will definitely use a coaster next time” incident.
Why Build a DIY Industrial Coffee Table?
An industrial coffee table works because it combines two materials that look better together than they have any right to: warm wood and dark metal. The wood keeps the design from feeling cold, while the steel pipe adds weight, structure, and a bit of workshop attitude.
Building your own coffee table also gives you control over the details that store-bought furniture often gets wrong. You can choose the exact size, stain color, wood grain, leg finish, shelf options, and level of rustic character. That last one matters. “Rustic” should mean intentional texture, not “I dropped it down the stairs before staining it.”
For most living rooms, a coffee table around 17 to 19 inches high works comfortably with standard sofas. A 48-inch-long table is a useful size for a medium sofa, while the 22-inch depth provides enough space for books and trays without turning the room into an obstacle course.
DIY Industrial Coffee Table Project Overview
Finished Table Dimensions
- Length: 48 inches
- Width: 22 inches
- Finished height: approximately 17 to 18 inches
- Style: industrial, rustic, modern farmhouse, or loft-inspired
- Skill level: beginner to intermediate
- Estimated build time: one full day, plus drying time for stain and finish
This design uses four 2-by-6 boards for the tabletop, a simple wood subframe for stability, and black steel pipe legs for the industrial effect. The wood frame is important because it gives the pipe flanges a secure mounting surface while allowing the tabletop to be attached properly.
Materials for an Industrial Pipe Coffee Table
For the Wood Tabletop
- Four straight 2-by-6 boards, each at least 48 inches long
- Wood glue
- 2 1/2-inch pocket-hole screws, if using pocket-hole joinery
- Wood filler, preferably stainable
For the Hidden Wood Subframe
- Two 2-by-4 boards cut to 42 inches long
- Two 2-by-4 boards cut to 12 inches long
- One 2-by-4 board cut to 12 inches long for the center brace
- 2 1/2-inch pocket-hole screws
- Wood glue
- Figure-eight tabletop fasteners or tabletop clips
For the Industrial Pipe Legs
- Four 3/4-inch black steel pipe nipples, approximately 14 inches long
- Eight 3/4-inch black pipe floor flanges
- Short wood screws for attaching the upper flanges to the subframe
- Felt pads or furniture glides for the bottom flanges
For the Finish
- Wood stain, optional
- Clear polyurethane, polycrylic, hardwax oil, or another furniture-grade protective topcoat
- 120-, 150-, 180-, and 220-grit sandpaper
- Clean rags, foam brushes, or high-quality bristle brushes
Tools You Will Need
- Miter saw, circular saw with a guide, or handsaw
- Drill and drill bits
- Impact driver or screwdriver
- Pocket-hole jig, optional but helpful
- Clamps
- Orbital sander or sanding block
- Tape measure
- Combination square
- Pencil
- Safety glasses, hearing protection, and a dust mask or respirator suitable for sanding dust
Before starting, inspect your lumber. Put each board on a flat surface and look for obvious twists, bows, deep splits, or dramatic curves. A slightly imperfect board can be charming. A board shaped like a potato chip is a future argument with your clamps.
Step 1: Build the Plank Coffee Table Top
Cut the four 2-by-6 boards to 48 inches. Arrange them side by side, then flip and rotate the boards until the grain pattern looks balanced. This is the moment when a pile of lumber starts acting like furniture.
Mark the underside of each board so you can keep the arrangement intact. Then join the boards edge to edge with wood glue. You can use biscuits, dowels, or pocket-hole screws, but pocket holes are one of the easiest options for a first-time furniture builder because the fasteners remain hidden underneath the tabletop.
Apply a thin, even line of wood glue to each edge. Clamp the boards together, making sure the top surface remains as flush as possible. Use pocket-hole screws from the underside only after the boards are aligned. Wipe away excess glue with a damp rag before it dries.
Allow the glued tabletop to cure according to the glue manufacturer’s instructions. Do not rush this stage. A coffee table is supposed to hold coffee, not develop dramatic separation anxiety after the first week.
Step 2: Flatten, Sand, and Ease the Edges
Once the tabletop is dry, remove the clamps and inspect the joints. Fill small gaps or knots with stainable wood filler if desired. Sand the entire surface beginning with 120-grit sandpaper, then move through 150 and 180 grit.
Use a sanding block or orbital sander, keeping the tool moving so you do not create dips in the wood. Sand with the grain on final passes. The goal is not to erase every saw mark from history. The goal is to make the surface comfortable to touch and safe for hands, elbows, and unsuspecting bare feet.
Lightly round over the sharp edges with 180-grit sandpaper. A subtle softened edge makes the table feel more finished and prevents the top from looking like it was assembled from a stack of construction lumber during a lunch break.
Step 3: Build the Concealed Wood Subframe
The subframe creates a rigid support structure under the table while keeping the industrial pipe legs neatly organized. It also helps prevent the table from racking when someone inevitably uses it as an emergency footrest.
Lay out the two 42-inch 2-by-4 boards as the long sides of a rectangle. Place the two 12-inch boards between them to form the end rails. Add the remaining 12-inch board in the center as a brace.
Drill pocket holes into the ends of the 12-inch boards. Apply a small amount of wood glue, clamp the frame square, and drive 2 1/2-inch pocket-hole screws into the long rails. Check for square by measuring corner to corner in both directions. When both diagonal measurements match, the frame is square.
Keep this frame flat on the work surface. A twisted base can make even perfectly cut pipe legs look uneven, which is not “industrial character.” It is just annoying.
Step 4: Attach the Tabletop to the Subframe Correctly
Place the tabletop upside down on a protected work surface. Center the subframe on the underside, leaving roughly 3 inches of overhang at both ends and about 1 1/2 inches along the long sides.
Do not permanently glue the solid wood tabletop directly to the entire subframe. Wood naturally expands and contracts across its grain as humidity changes. A rigid, fully glued connection can encourage splitting or warping over time.
Instead, use figure-eight tabletop fasteners, tabletop clips, or screws installed through elongated holes in the subframe. These methods hold the top securely while giving the wood a little room to move. Install several fasteners along the long rails and end rails, spacing them evenly.
This small detail is the difference between a table that looks handmade in a good way and a table that begins protesting seasonal weather changes with cracks and mystery gaps.
Step 5: Install the Black Steel Pipe Legs
Attach one floor flange near each corner on the underside of the wood subframe. Position the flanges so the pipe legs sit inside the footprint of the tabletop rather than directly at the edges. This creates a sturdier stance and reduces the chance of catching a shin on the metal.
Use screws that are long enough to grip the 2-by-4 frame securely but short enough that they do not poke through the top. Pre-drill pilot holes to reduce the risk of splitting.
Thread one 14-inch black steel pipe nipple into each upper flange. Then thread a second flange onto the bottom of each leg. Tighten the pipes by hand until the legs are snug and evenly oriented. Add felt pads or furniture glides under the bottom flanges to protect flooring.
Turn the table upright on a level floor and test it for wobble. If one leg sits high, loosen that leg slightly, adjust the pipe, and test again. Pipe fittings are surprisingly forgiving, which is nice because furniture building sometimes feels like a long negotiation between physics and optimism.
Step 6: Stain and Finish the Coffee Table
Before applying stain, remove all sanding dust with a vacuum and a clean cloth. Test the stain on an offcut from the same lumber. Pine, spruce, and other softwoods can absorb stain unevenly, so consider using a pre-stain conditioner if you want a more controlled color.
For a classic industrial coffee table, dark walnut, weathered oak, espresso, charcoal brown, and gray-brown stains work especially well with black pipe. For a lighter modern-industrial look, skip dark stain and use a clear finish that lets the natural grain do the talking.
Apply stain in the direction of the wood grain, then wipe away excess according to the product directions. Let the stain dry completely before applying the protective topcoat.
For a high-use coffee table, apply at least two coats of a durable clear finish. Lightly sand between coats with fine sandpaper, remove dust, and keep coats thin. Thin, patient coats usually look better than one thick coat that dries with brush marks, bubbles, and the emotional energy of a melted candle.
How to Style an Industrial Coffee Table
Your finished DIY coffee table should feel useful, not like a tiny museum display. Start with a tray to contain remotes, candles, or coasters. Add one stack of books, one small plant, and one personal object with a story. The goal is visual balance, not building a decorative obstacle course.
Industrial tables pair well with leather sofas, linen upholstery, exposed brick, dark metal lighting, woven baskets, concrete accents, and warm neutral rugs. They also work in more traditional rooms because the wood softens the metal and prevents the style from becoming too garage-forward.
Common DIY Coffee Table Mistakes to Avoid
Making the Table Too Tall
A coffee table should sit near sofa-seat height or slightly below it. A table that is too tall feels awkward when you reach for drinks, and a table that is too low can become inconvenient for everyday use.
Using Weak Screws or Skipping Pilot Holes
Pipe flanges and heavy tops place real stress on joints. Use appropriate wood screws, pre-drill pilot holes, and avoid relying on tiny hardware-store screws that look brave but have the structural confidence of a paperclip.
Forgetting About Wood Movement
Solid wood is not frozen in time. It responds to humidity, especially across the grain. Use tabletop fasteners or slotted mounting holes rather than gluing the entire top permanently to the base.
Skipping the Protective Finish
A coffee table sees daily use. Drinks, snacks, kids, pets, game nights, and impromptu laptop sessions all happen there. A durable protective finish makes cleaning easier and helps preserve the wood.
Buying Pipe Before Finalizing the Design
Measure your finished tabletop and subframe first. Pipe fittings add size, and a leg assembly that looked perfect in your imagination can become unexpectedly tall, wide, or expensive when hardware enters the chat.
Hands-On Experience: What Building a DIY Industrial Coffee Table Teaches You
Building an industrial coffee table looks simple from across the room. It is a wood top, some pipe, and a few screws, right? Technically, yes. Emotionally, it is a small course in patience, measuring, sanding, remeasuring, and questioning whether one board is actually straight or merely pretending.
The first lesson is that lumber selection matters more than most beginners expect. Two boards can look almost identical in the store, yet one may be noticeably twisted once it reaches your garage. Taking an extra five minutes to sight down each board, inspect the edges, and reject the truly wild pieces saves an hour of clamping frustration later. Choose boards with a grain pattern you enjoy because this table will put that grain front and center.
The second lesson is that square is not a suggestion. When assembling the subframe, it is tempting to assume that boards cut to the correct length will automatically form a neat rectangle. Wood does not always cooperate with that assumption. Measuring the frame diagonally from corner to corner is a simple habit that prevents the finished table from looking slightly off even when no one can explain why.
Sanding is another experience that changes your expectations. At first, sanding feels like the least exciting part of furniture building. Then the rough boards slowly become smooth, the edges soften, and the tabletop starts looking like an actual piece of furniture instead of a future garden planter. The difference between “unfinished lumber” and “custom coffee table” is often nothing more glamorous than careful sanding and enough patience to work through the grits.
Pipe legs also have personality. They are durable, heavy, and wonderfully forgiving because they can be threaded tighter or looser to make small adjustments. However, they are not perfectly polite. Black steel pipe can arrive with oil residue, rough threads, or factory marks. Wipe the pipe down before assembly, wear gloves if needed, and accept that a few scratches often add to the industrial look rather than ruin it.
The finishing stage may be the most satisfying part of the entire project. A dark stain can make ordinary construction lumber look warm and dramatic, while a clear coat can highlight the natural grain and knots. The trick is resisting the urge to rush. Let stain dry fully. Apply thin topcoats. Sand lightly between coats. A finish rewards patience in a very obvious way.
Finally, the best part of building your own industrial coffee table is that it becomes more than décor. You remember which board tried to bow, where you almost drilled in the wrong spot, and how much better the table looked once the black pipe legs were installed. It is useful furniture with a small history built into it. Years later, when someone compliments it, you get to say, “Thanks, I made it,” and casually pretend the project went exactly as planned.
Final Thoughts
A DIY industrial coffee table is a practical weekend project with a big visual payoff. The combination of a solid wood top, hidden support frame, and black steel pipe legs creates a table that feels custom, sturdy, and right at home in everything from a modern apartment to a relaxed family room.
Take your time with lumber selection, keep the subframe square, give the tabletop room to move, and apply a durable finish. The result is not just a place to set down coffee. It is a handcrafted centerpiece that can handle real life without looking like it belongs in a furniture showroom where nobody is allowed to sit down.











