
Assembling a saxophone looks dramatic the first time you open the case. There is the shiny curved body, a mysterious neck, a mouthpiece, a reed thin enough to make you nervous, and a ligature that seems designed by someone who enjoys tiny screws. The good news: putting a saxophone together is not difficult once you know the order. The even better news: doing it correctly can help your instrument play more easily, sound better, and avoid unnecessary damage.
This guide walks you through how to assemble a saxophone in 11 clear steps, from opening the case to checking your first setup position. Whether you play alto saxophone, tenor saxophone, soprano, or baritone, the basic process is similar: protect the keys, handle the reed carefully, align the mouthpiece, connect the neck, attach the strap, and make final comfort adjustments before playing. Think of it as building a tiny brass spaceship that runs on breath, patience, and the occasional squeak.
Before You Begin: Know the Main Saxophone Parts
Before assembling your saxophone, take a quick inventory. Most beginner saxophones include the main body, neck, mouthpiece, ligature, mouthpiece cap, reed, neck strap, cork grease, and cleaning supplies such as a swab or polishing cloth. The body is the largest section, with the bell at the bottom and keys running along the front and sides. The neck is the curved tube that connects the body to the mouthpiece. The mouthpiece is where you place your mouth, and the reed is the thin piece of cane or synthetic material that vibrates to create sound.
Many new players make the mistake of grabbing the saxophone by the keys. Please do not. Saxophone keys are delicate, and bending one can turn your beautiful horn into an expensive puzzle. Handle the body by the bell or sturdy areas of the frame, and always assemble it over a safe surface, such as your lap, a table, or a padded chair.
How to Assemble a Saxophone in 11 Steps
Step 1: Place the Case on a Stable Surface
Set your saxophone case on a flat, secure surface before opening it. Make sure the latches face up. This sounds obvious until someone opens the case upside down and discovers gravity has strong opinions about musical instruments. Open the case slowly and check that every part is in its proper slot. If this is a school rental or a new instrument, look for shipping wedges, protective corks, or small pieces of packing material under the keys. Remove them gently before assembly.
Step 2: Put on the Neck Strap First
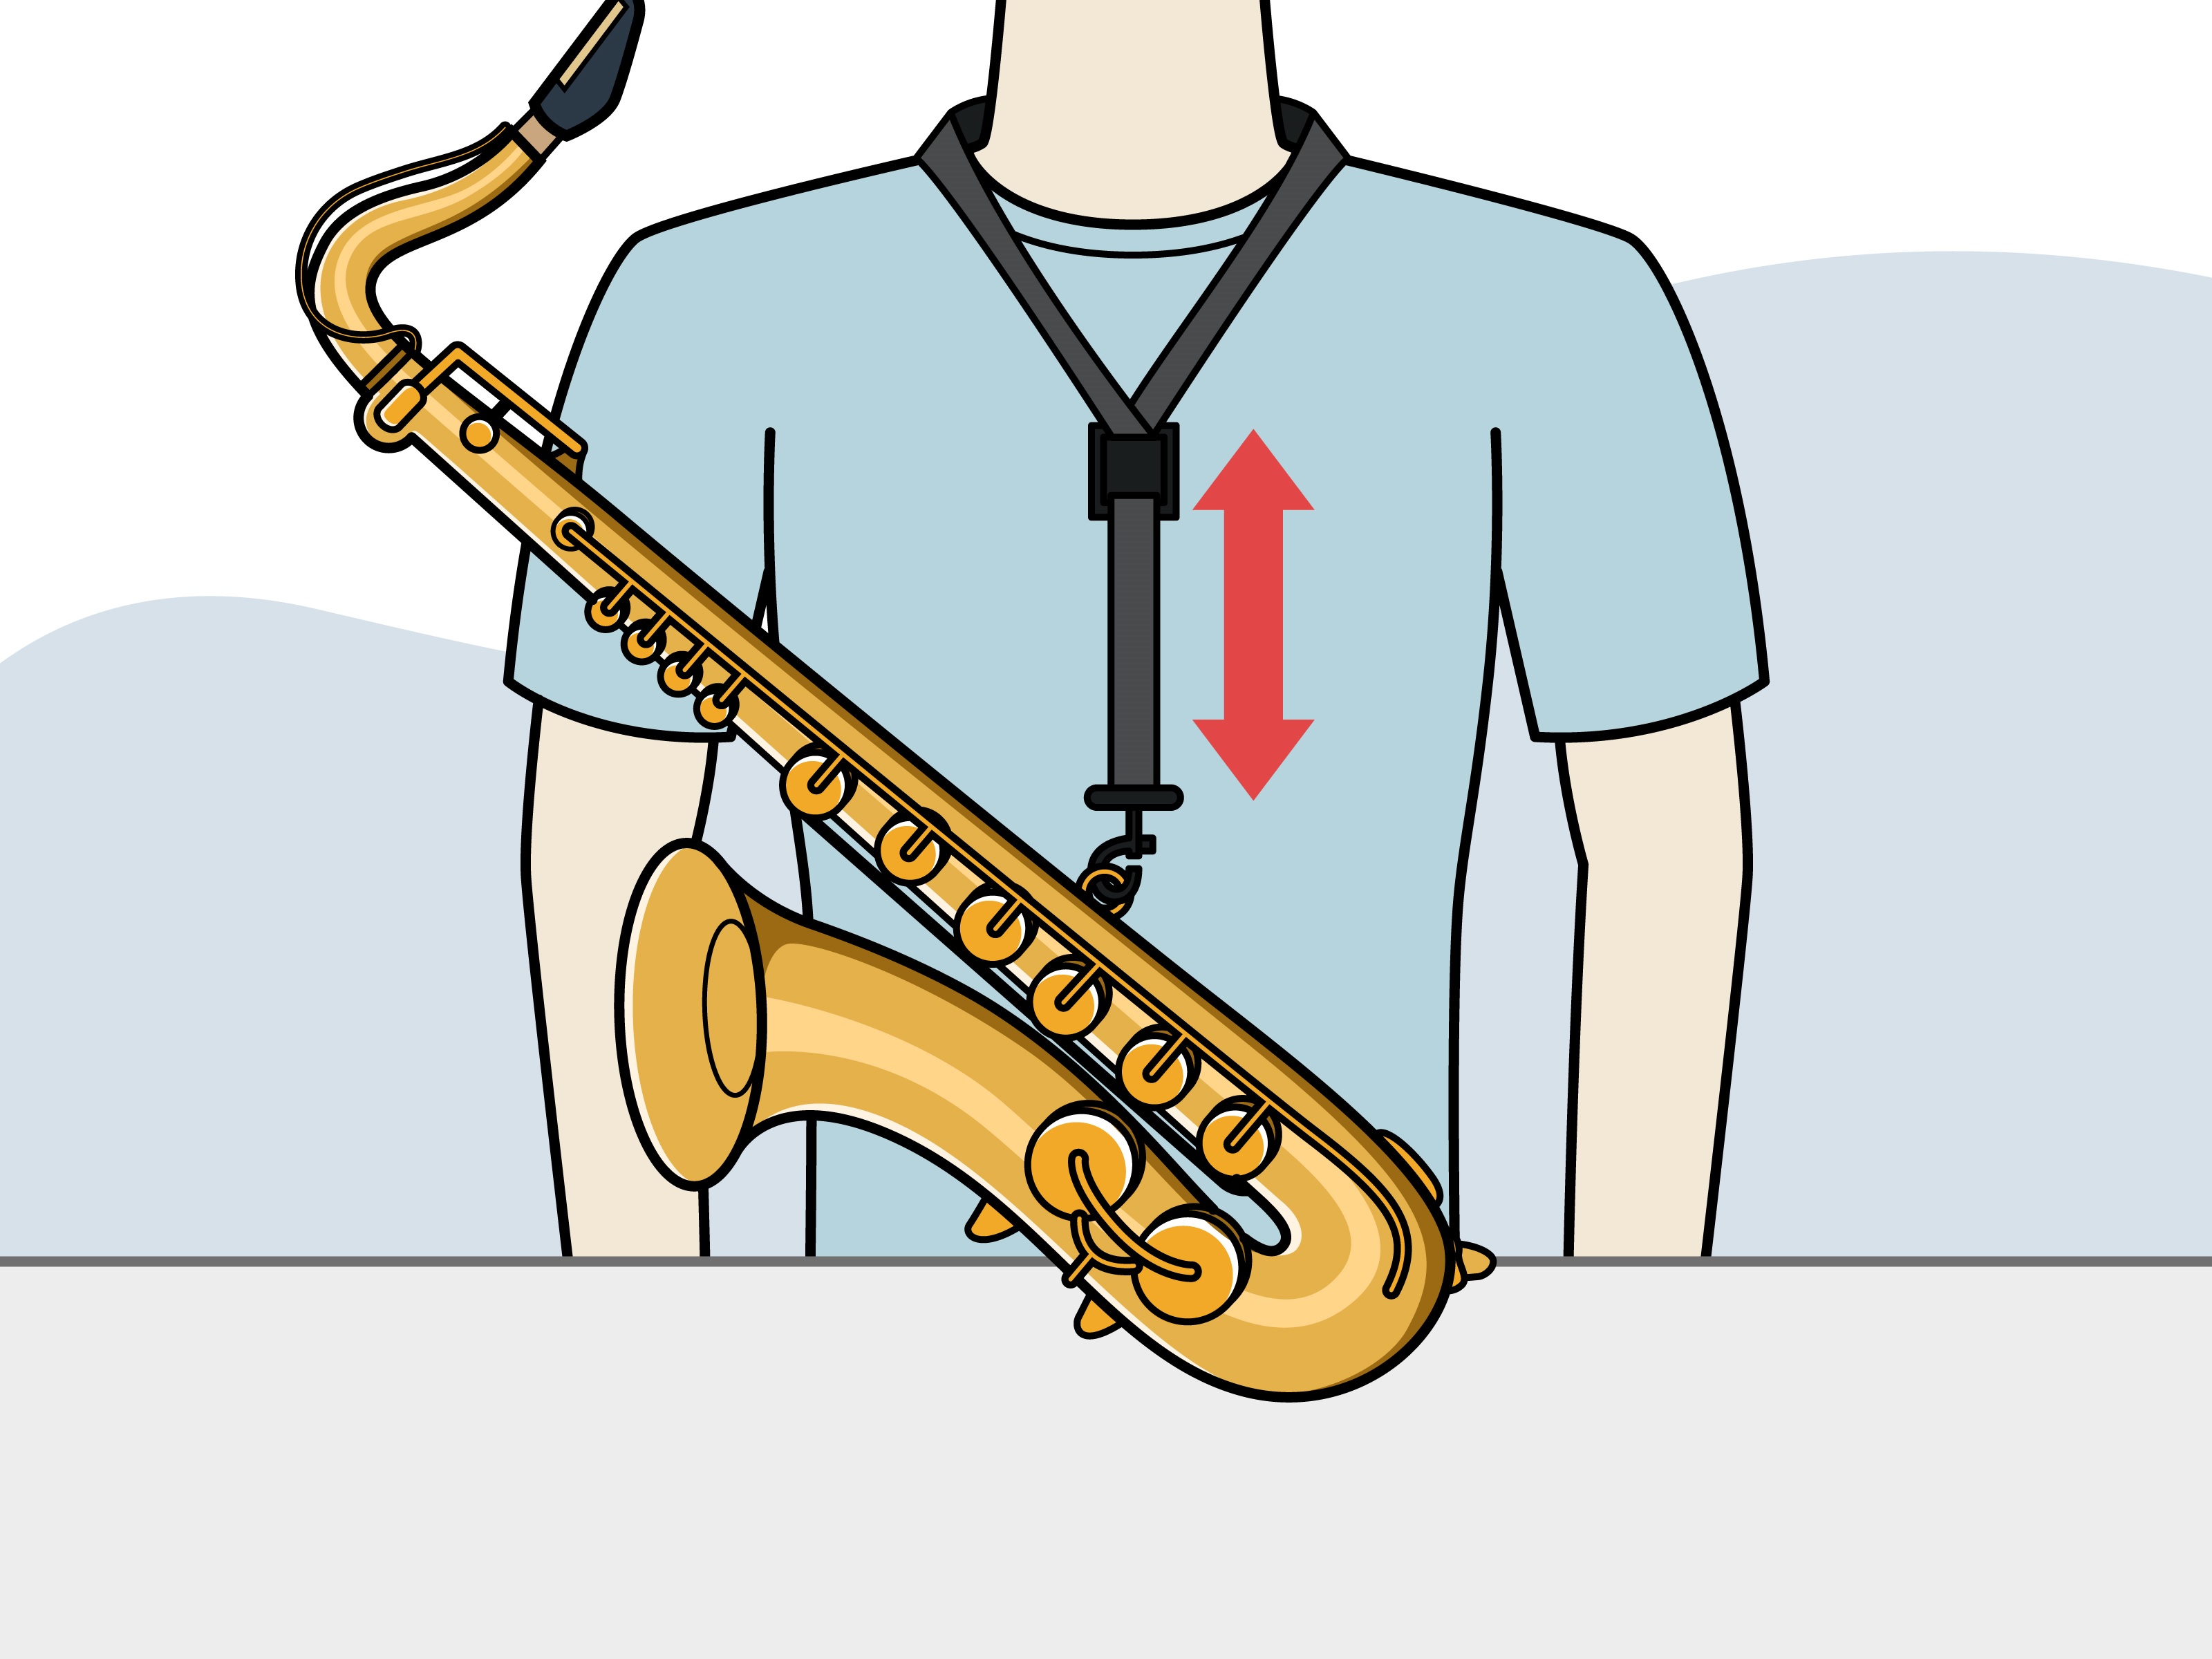
Before picking up the saxophone body, put the neck strap around your neck. Adjust it roughly so the hook hangs near the center of your chest. The strap supports much of the saxophone’s weight, especially on alto, tenor, and baritone saxophones. A properly adjusted strap also helps you bring the mouthpiece to your mouth instead of bending your head down like you are apologizing to the instrument.
For younger players or anyone who feels neck strain, a saxophone harness can be more comfortable than a standard neck strap. The goal is simple: the instrument should come to you, not the other way around.
Step 3: Take Out the Saxophone Body Carefully
Lift the saxophone body from the case by holding the bell or other solid areas, not the key rods. Keep your fingers away from the long keys along the side. Clip the neck strap hook to the strap ring on the back of the saxophone body. Once it is clipped in, gently let the strap take some weight while you keep one hand on the instrument. Check that the hook is fully closed and secure.
This is one of the most important beginner habits. A saxophone can survive many things, but “oops, I forgot to clip the strap” is not usually one of them.
Step 4: Loosen the Neck Screw
At the top of the saxophone body, you will see the neck receiver, a round opening where the neck fits. There is usually a small screw beside it. Loosen this neck screw just enough so the neck can slide in smoothly. Do not remove the screw completely. It is small, easy to drop, and surprisingly talented at disappearing into carpet.
Check the receiver opening for dust or debris. If needed, wipe the outside of the neck tenon and the receiver area with a soft cloth. A clean connection helps the neck fit properly and prevents unnecessary friction.
Step 5: Insert the Neck into the Body
Hold the neck near its base and gently insert it into the receiver. Use a slow twisting motion rather than forcing it straight down. Line up the octave key mechanism on the neck with the octave key post on the saxophone body. These small parts must meet correctly so the octave key works when you play higher notes.
Once the neck is seated, tighten the neck screw until the neck stays in place. It should be snug, not crushed into submission. If the neck still rotates too easily, tighten a little more. If you feel resistance while inserting the neck, stop and check alignment instead of forcing it.
Step 6: Apply Cork Grease to the Neck Cork
The cork at the narrow end of the neck helps the mouthpiece fit securely and form an airtight seal. If the mouthpiece is difficult to twist on, apply a small amount of cork grease to the cork. Use only a light coating. Too much cork grease can make the mouthpiece slide around like it is trying to escape.
Spread the grease evenly with your finger, then wipe away any excess. You do not need to grease the cork every single time. Use it when the mouthpiece feels tight or when the cork looks dry. Avoid putting cork grease on metal neck joints unless your instrument’s manufacturer specifically recommends it.
Step 7: Attach the Mouthpiece to the Neck
Hold the neck firmly with one hand and the mouthpiece with the other. Twist the mouthpiece gently onto the cork. The flat side of the mouthpiece, also called the table, should face downward when the saxophone is in playing position. For many beginner setups, the mouthpiece is pushed on until a comfortable amount of cork remains visible, but the exact position affects tuning and may need adjustment later.
Do not jam the mouthpiece on too far. If it will not move, add a small amount of cork grease and try again. The motion should be smooth and controlled. The saxophone is not a jar of pickles; brute force is not the secret technique.
Step 8: Moisten the Reed
Take one reed from its case and handle it by the thicker end, also called the heel. Avoid touching the thin tip because it chips easily. Moisten the reed by placing it in your mouth for a short time or soaking it briefly in clean water. A damp reed vibrates more freely and seals better against the mouthpiece.
Check the reed before using it. If the tip is cracked, wavy, chipped, or badly warped, it may squeak, feel stuffy, or refuse to cooperate. Beginners often blame themselves when the real problem is a damaged reed. Reeds have personalities, and some wake up choosing chaos.
Step 9: Place the Reed on the Mouthpiece
Lay the flat side of the reed against the flat side of the mouthpiece. Center it carefully so the reed lines up evenly with both rails of the mouthpiece. The tip of the reed should be level with, or just slightly below, the tip of the mouthpiece. If the reed extends too far beyond the mouthpiece tip, it can feel uncomfortable and respond poorly. If it sits too low, the sound may be weak or resistant.
Make small adjustments by touching the thicker part of the reed, not the fragile tip. Good reed alignment is one of the biggest secrets to an easier first sound. A reed that is crooked by even a small amount can create squeaks, airy notes, and the famous beginner expression known as “Why does my saxophone sound like a duck with Wi-Fi problems?”
Step 10: Slide on the Ligature and Tighten It
The ligature holds the reed against the mouthpiece. Loosen the ligature screws enough so it slides over the mouthpiece and reed without scraping the reed tip. Most standard ligatures are positioned with the screws on the player’s right side when the mouthpiece is in playing position, though some inverted ligatures are designed differently.
Place the ligature over the reed and mouthpiece, usually below the cut or vamp of the reed where the thicker bark section begins. Tighten the screws until the reed stays in place. Do not overtighten. The reed must be secure, but it also needs to vibrate. If the ligature is clamped down like a medieval torture device, your tone may feel stiff and unresponsive.
Step 11: Adjust the Playing Position and Do a Final Check
Bring the saxophone up using the neck strap. Adjust the strap so the mouthpiece comes naturally to your mouth while you sit or stand tall. Your head should stay level, shoulders relaxed, and hands curved comfortably over the keys. The right thumb rests under the thumb hook, while the left thumb sits near the thumb rest and octave key.
Before playing, check five things: the neck screw is snug, the strap is clipped securely, the reed is centered, the ligature is firm but not too tight, and the mouthpiece cap has been removed. Yes, people try to play with the cap on. No judgment. The saxophone simply refuses to participate.
Common Saxophone Assembly Mistakes to Avoid
Forcing the Neck or Mouthpiece
If something does not fit, forcing it can bend keys, damage cork, or misalign the neck. Saxophone assembly should feel controlled. When in doubt, pause, check the angle, and try again gently.
Touching the Reed Tip
The reed tip is thin and fragile. Even a tiny chip can make the instrument harder to play. Handle reeds from the heel or sides, and store them in a reed case after use.
Overtightening Screws
The neck screw and ligature screws should be snug, not locked down with superhero strength. Overtightening can damage screws, restrict reed vibration, or make future adjustments harder.
Skipping the Neck Strap
Always attach the strap before letting the saxophone hang freely. Even experienced players use straps because saxophones are heavier than they look, and repair bills are not known for their charm.
How to Know Your Saxophone Is Assembled Correctly
A properly assembled saxophone should feel balanced and secure. The neck should not wobble. The mouthpiece should sit firmly on the cork. The reed should be straight, centered, and held evenly by the ligature. When you bring the instrument to your mouth, you should not need to lean forward or twist awkwardly. If your posture looks like you are negotiating with a folding chair, adjust the strap.
Your first notes may still squeak, and that is normal. Squeaks can come from reed placement, too much bite pressure, not enough air support, or a reed that is too hard for your current level. Beginners often do best with a comfortable student mouthpiece and a moderate reed strength recommended by a teacher. If the setup looks right but everything feels difficult, ask a band director, private teacher, or repair technician to check the instrument.
After Playing: Disassemble and Store It Properly
Once you are finished playing, remove the reed from the mouthpiece and dry it gently. Store it in a reed case so it can dry flat. Swab the inside of the saxophone body and neck if you have the proper cleaning swabs. Wipe fingerprints from the outside with a soft cloth. Remove the mouthpiece from the neck, remove the neck from the body, and return each part to its case.
Never leave the assembled saxophone on a chair, bed, or floor. Chairs are not saxophone stands. Beds are not saxophone stands. The floor is definitely not a saxophone stand; it is where saxophones go to meet danger. Use a proper stand if you need to set the instrument down during practice.
Real-World Experience: What Beginners Learn While Assembling a Saxophone
The first few times you assemble a saxophone, it may feel like a ceremony. Open the case. Locate the neck. Find the reed. Turn the ligature the wrong way. Turn it back. Drop the mouthpiece cap. Wonder why the reed suddenly looks thinner than a potato chip with anxiety. This is normal. Every saxophonist, from school band beginners to professional jazz players, has gone through the awkward setup stage.
One of the most useful experiences is learning how much gentle pressure is enough. Beginners often swing between two extremes: either they barely tighten anything and the reed slides around, or they tighten every screw as if preparing the instrument for space travel. Over time, you learn the sweet spot. The neck screw should hold the neck still. The ligature should keep the reed secure. The mouthpiece should twist onto the cork without a wrestling match. When everything is properly fitted, the saxophone feels stable but not strained.
Another big lesson is that reed placement matters more than most beginners expect. A reed that is slightly off-center can make the saxophone harder to play. A reed that is too high may feel sharp against the tongue. A reed that is too low may block vibration and create a dull, stuffy sound. Many new players improve almost instantly when a teacher simply adjusts the reed by a millimeter. That tiny movement can feel like someone removed a traffic cone from the airway.
Players also learn that comfort affects sound. If the neck strap is too low, the player bends the head down, pinches the throat, and often bites the mouthpiece too hard. If the strap is too high, the mouthpiece may push awkwardly into the mouth. The best setup lets the player sit or stand naturally, breathe deeply, and bring the saxophone to the mouth without tension. Good posture is not just for looking professional in concert photos. It helps air move freely.
Another practical experience: keep your assembly area organized. Reeds vanish. Mouthpiece caps roll. Ligature screws loosen at the least convenient moment. A small routine prevents chaos. Put the case on a flat surface, place loose items in one safe spot, and assemble the instrument in the same order every time. After a week or two, the process becomes automatic. Your hands will know what to do before your brain finishes saying, “Where did I put the reed?”
Finally, beginners discover that careful assembly builds confidence. When the saxophone is put together correctly, the first sound is easier, practice feels less frustrating, and the instrument seems less intimidating. Instead of fighting the equipment, you can focus on tone, rhythm, notes, and expression. That is the real point of learning how to assemble a saxophone: not just to connect parts, but to prepare yourself to make music. The setup is the handshake before the conversation. Do it well, and the saxophone is much more likely to answer back beautifully.
Conclusion
Learning how to assemble a saxophone is a foundational skill for every beginner. The process is simple when you follow the right order: set the case safely, put on the neck strap, handle the body carefully, attach the neck, prepare the mouthpiece and reed, secure the ligature, and adjust your playing position. Each step protects the instrument and makes playing easier.
The most important rule is to be gentle. Saxophones are strong enough to fill a room with sound but delicate enough to dislike rough handling. Avoid forcing parts, protect the reed tip, keep the ligature snug but not too tight, and always use the neck strap. With practice, assembling your saxophone will become quick, natural, and almost boringin the best possible way. Then you can save the drama for your solos.











