
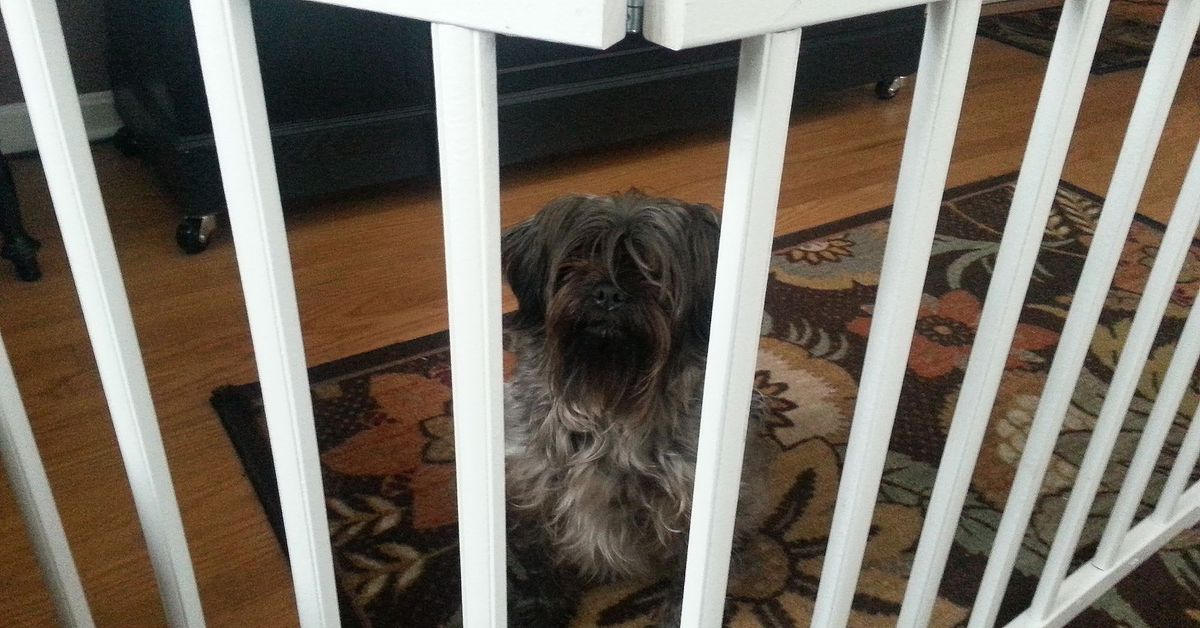
Note: This DIY project is intended for supervised dog management in doorways or room openings. It is not a certified child-safety gate, not a stair-top safety device, and not a replacement for professional pet containment if your dog jumps, chews, pushes, or panics.
Introduction: From Nursery Leftover to Paw-Saving Genius
Somewhere in the garage, basement, attic, or “I swear I’m going to organize this someday” corner of the house, there may be a set of old crib rails quietly waiting for a second act. Maybe the crib is no longer safe for infant sleep. Maybe your child has outgrown it. Maybe you inherited it, stored it, moved it twice, and now stare at it like it owes you rent. Good news: those unwanted crib rails can become a charming, practical, budget-friendly DIY doggie gate.
A crib rail is almost suspiciously perfect for this project. It already has vertical slats, a sturdy frame, a familiar home-friendly look, and enough height to discourage many small and medium dogs from wandering into forbidden zones. With a few hinges, screws, a latch, optional feet, and a little sanding or paint, you can turn old crib parts into a repurposed crib rail dog gate that keeps muddy paws out of the living room, curious noses away from the trash can, and snack thieves at a respectful distance from the kitchen.
This guide covers how to plan, build, finish, and use a crib rail dog gate safely. We will also talk about when this project is a brilliant idea and when you should politely back away from the power drill. Because DIY should be fun, not a dramatic reenactment of “My Dog Outsmarted Me in 11 Seconds.”
Why Crib Rails Make Such a Clever Dog Gate
A good dog gate for doorway use needs three things: enough height, enough strength, and enough common sense. Crib rails often check those boxes for calm dogs, especially small breeds, senior dogs, puppies in training, or dogs that simply need a visual boundary. The vertical slats allow airflow and visibility, so your dog can still see the family instead of feeling banished to another zip code.
Unlike many plastic gates, a wood crib rail can blend into home decor. Painted white, it looks clean and cottage-like. Stained darker, it can feel rustic or farmhouse. Left natural and sealed, it says, “I upcycle, but I also own coasters.” For homeowners who love DIY pet projects, a crib rail gate offers the satisfying double win of saving money and reducing waste.
Best Uses for a Crib Rail Doggie Gate
This project works especially well for blocking a laundry room, kitchen entrance, hallway, home office, mudroom, dining room, or pet feeding zone. It is also helpful when guests arrive, contractors are working, floors are drying, or one dog needs to eat without another dog hovering like a furry tax auditor.
It can be made as a hinged swing gate, a folding freestanding gate, or a semi-fixed doorway gate. The right design depends on your doorway width, your dog’s size, and whether you want the gate to stay in place or fold away when not needed.
Before You Build: Important Safety Checks
Before turning unwanted crib rails into a doggie gate, inspect every inch. A rail that is cracked, warped, splintered, loose, chewed, or wobbly should not be used. Remove old crib hardware, check for sharp edges, and tighten or replace weak joints. If the crib is very old, painted, or unknown in origin, be cautious about lead paint and old finishes. Avoid sanding suspicious old paint unless you know it is lead-free; disturbing old coatings can create unsafe dust.
Crib safety guidance often mentions slat spacing because gaps that are too wide can trap little heads. For a dog gate, the same idea matters in a different way. Measure the gaps between slats and make sure your dog’s head, shoulders, or paws cannot get stuck. Tiny dogs, puppies, and toy breeds may need additional mesh or clear acrylic backing to make the gate safer.
Also remember: this project is for dogs, not children. A repurposed crib rail may look like a baby gate, but once you cut, hinge, repaint, or modify it, it is no longer a tested child-safety product. Do not use it at the top of stairs, around fireplaces, or anywhere a child’s safety depends on it.
Tools and Materials You May Need
The exact supply list depends on your design, but most DIY pet gate from crib rails projects use basic hardware and common household tools.
Basic Materials
- One or two unwanted crib rails
- Measuring tape and pencil
- Sandpaper or sanding block
- Wood screws
- Two or three hinges for a swing gate
- Strap hinges for a folding gate
- Gate latch, hook-and-eye latch, or magnetic catch
- Wall mounting board, if attaching to drywall or trim
- Non-toxic, pet-safe paint or sealant
- Felt pads, rubber feet, or furniture glides
Helpful Tools
- Drill and drill bits
- Screwdriver
- Miter saw, jigsaw, or hand saw if cutting is needed
- Clamps
- Level
- Stud finder for wall-mounted designs
- Safety glasses
If you are allergic to measuring twice and cutting once, take a deep breath. This is a forgiving project, but doors and dogs both have a way of exposing lazy math.
Step-by-Step: How to Turn Crib Rails Into a Doggie Gate
Step 1: Choose the Gate Location
Start by deciding where the gate will live. A standard doorway is easiest. Measure the width at the top, middle, and bottom because older homes sometimes have doorways with the geometry of a funhouse mirror. If the opening is wider than one crib rail, you may need two panels hinged together or a folding accordion-style setup.
For narrow spaces, one crib end or side rail may work as a swing gate. For wide openings, two long crib rails can be joined with hinges to create a folding gate. For temporary use, freestanding panels may be enough for a calm small dog, but determined dogs may push them aside.
Step 2: Inspect and Prep the Rails
Remove old hardware, brackets, mattress supports, loose screws, and anything that sticks out. Run your hand carefully over the wood to find rough spots. Sand sharp corners and splinters. If the rail has decorative cutouts, check whether paws or collars could catch. Smooth is the goal; “rustic but pointy” is not a design style dogs appreciate.
Step 3: Decide on Your Design
There are three popular ways to build a crib rail dog gate:
Option A: Hinged Doorway Gate
This design swings open like a small door. Attach one side of the crib rail to a door frame or wall-mounted board with hinges. Add a latch on the opposite side. This is the most convenient option for daily use because humans can walk through without performing an awkward Olympic hurdle.
Option B: Folding Freestanding Gate
Cut or divide crib rails into two, three, or four panels, then connect them with hinges so the gate folds like a screen. This is flexible and stores easily. It is best for polite dogs who understand barriers and do not treat them as personal challenges.
Option C: Removable Tension-Style Gate
This design uses side blocks, brackets, or adjustable pressure points to hold the gate in a doorway. It avoids permanent holes, but it must be secure. Do not rely on a loose pressure fit for strong dogs, stairs, or any place where failure could cause injury.
Step 4: Cut to Fit, If Needed
If the crib rail is too wide, mark your cut lines carefully. Try to preserve balanced spacing so the finished gate does not look like it lost an argument with a saw. Cut slowly, then sand the new edges. If cutting exposes hollow areas or weak joints, reinforce them with wood blocks or trim pieces.
Step 5: Add Hinges
For a swing gate, use sturdy hinges rated for the weight of your panel. Pre-drill pilot holes to prevent splitting. Install the hinges on a solid door frame or, even better, on a mounting board screwed into studs. A wall board spreads the force and protects trim from repeated use.
For a folding gate, use strap hinges or butt hinges between panels. Alternate hinge direction if you want the gate to fold compactly. Leave a small gap between panels so they can move without scraping.
Step 6: Install the Latch
A latch is not just decoration. Dogs are surprisingly good at learning door mechanics, especially if cheese, socks, or forbidden couch cushions are on the other side. Use a latch that your dog cannot nose open. A hook-and-eye latch may work for light-duty use, while a sliding bolt, gate latch, or magnetic latch may be better for daily traffic.
Place the latch high enough that your dog cannot paw it easily. If children are in the home, do not rely on this DIY gate as a childproof barrier.
Step 7: Paint or Seal the Gate
Choose a non-toxic, water-based paint or sealant and allow it to cure fully before use. Dogs explore with noses and mouths, so avoid strong solvents, flaking finishes, or paints not intended for household surfaces. If your dog chews furniture, this project may not be the best fit unless you add chew-resistant edging or choose a metal commercial pet gate instead.
Step 8: Test Before Trusting
Before declaring victory, test the gate like a suspicious dog with a schedule. Push gently, then firmly. Open and close it several times. Check that screws stay tight, hinges do not flex, and the latch holds. Watch your dog interact with the gate while supervised. If your dog jumps, climbs, rams, chews, or wedges a nose through the slats, adjust the design or stop using it.
Design Ideas That Make the Gate Look Less “Garage Project”
A repurposed crib rail dog gate can be genuinely cute. Add a painted finish that matches your trim. Use black hardware for a modern farmhouse look. Add a small nameplate with your dog’s name, because apparently dogs need personalized security systems now. For a cottage style, use soft white paint and rounded brass hinges. For a rustic look, lightly distress the edges and seal the wood.
If the gate sits in a main living area, consider adding furniture pads to protect floors and walls. You can also attach a small command hook nearby for a leash, towel, or treat pouch. Just avoid hanging anything that encourages your dog to climb or chew.
Who Should Use This DIY Dog Gate?
This project is ideal for calm dogs, senior dogs, puppies being gently trained, small breeds, and medium dogs that respect boundaries. It is also great for homes where you need a temporary visual barrier rather than heavy-duty containment.
It is not ideal for high-jumping dogs, large athletic breeds, anxious dogs that panic when separated, heavy chewers, or dogs with a history of breaking through gates. If your dog has the determination of a raccoon in a snack factory, choose a commercial steel pet gate designed for strength and height.
Common Mistakes to Avoid
Using Weak or Damaged Rails
If the rail wiggles before the project begins, it will not become magically strong after paint. Reinforce it or choose a better piece.
Skipping the Slat Check
Measure spacing with your specific dog in mind. Puppies grow, tiny dogs squeeze, and curious paws can get caught.
Mounting Into Drywall Only
Drywall anchors may not hold up to repeated pushing or swinging. Mount into studs, trim backed by framing, or a secured board whenever possible.
Using It for Children
This is a dog management project. It should not be advertised, sold, or trusted as a child-safety gate.
Forgetting the Human Factor
If the gate is annoying to open, people will step over it. Then someone will trip, blame the dog, and the dog will look deeply innocent. Build a gate that works for the humans too.
Cleaning and Maintenance
Pet gates live hard lives. They collect nose prints, paw dust, hair, and mysterious smudges that no one wants to investigate too closely. Wipe the gate weekly with a damp cloth and mild soap. Check screws monthly. Tighten hinges and latches as needed. Touch up paint if chips appear, especially if your dog likes to mouth the rails.
If the gate gets wet from muddy paws or a nearby water bowl, dry it quickly. Wood can swell or warp if moisture becomes a regular guest. Add clear sealant if the gate is in a mudroom, laundry room, or other splash-prone area.
Real-Life Experience: What It Is Like to Use a Crib Rail Doggie Gate
The best thing about a crib rail doggie gate is how quickly it becomes part of the household routine. At first, everyone notices it. People say things like, “Wait, is that from a crib?” Then the dog sniffs it, circles it, gives it a suspicious side-eye, and eventually accepts that the kitchen is no longer an all-access buffet. After a few days, the gate feels less like a project and more like a tiny household employee whose only job is to say, “Not today, buddy.”
One of the most useful times to have this kind of gate is during mealtime. If you have one slow eater and one furry vacuum cleaner, separate feeding zones can save a lot of stress. The slow eater can nibble in peace, while the fast eater stands behind the gate wearing the tragic expression of a dog who has never been fed once in his entire dramatic life. Because the slats allow visibility, the separated dog can still see what is happening, which often feels calmer than being shut behind a solid door.
A crib rail gate also shines when the weather is awful. Rainy days and muddy paws have a special talent for finding clean rugs. Placing the gate between the mudroom and living area creates a pause zone where towels, wipes, and human patience can do their work. It gives you a chance to intercept the dog before your floor becomes a paw-print art installation.
Another practical use is during repairs or deliveries. When a plumber, electrician, appliance installer, or furniture delivery crew arrives, the gate gives your dog a safe boundary without completely isolating them. Many dogs are calmer when they can observe from a distance. They can monitor the suspicious stranger carrying tools while not actively assisting by placing their nose in the toolbox.
The folding version is especially handy for flexible homes. You can move it from the kitchen to the hallway, from the hallway to the office, or from the office to the guest room. It folds flat enough to tuck behind a cabinet or beside the refrigerator. That portability makes it more useful than a permanently mounted gate if your needs change throughout the day.
There are a few lessons people learn quickly. First, felt pads are worth it. They protect floors and reduce scraping noises. Second, latch placement matters. Put it where adults can reach it easily but dogs cannot nose it open. Third, do not assume your dog respects the gate just because they respected it once. Test it under real-life temptation: food on the other side, guests at the door, another pet walking by, or a favorite toy rolling into the restricted zone.
Most importantly, a DIY crib rail doggie gate works best when paired with training. Teach your dog to wait, settle, and respect boundaries. Reward calm behavior near the gate. Do not use the gate as punishment. When your dog sees it as a normal household boundary instead of dog jail, life gets easier for everyone.
Conclusion: A Smart Upcycle for Pet-Friendly Homes
Turning unwanted crib rails into a doggie gate is one of those DIY ideas that feels almost too sensible. You take something that may no longer be appropriate for nursery use and give it a practical second life as a homemade dog gate. It saves money, reduces waste, adds character to your home, and helps manage your dog’s movement in a kinder, more attractive way.
The key is building with safety first. Inspect the crib rails, avoid questionable finishes, measure slat spacing, choose sturdy hardware, mount the gate securely, and test it with your actual dog. A calm terrier and a determined Labrador are not the same engineering problem. Build for the pet you have, not the imaginary dog who reads instruction manuals and respects boundaries.
When done well, this upcycled crib rail dog gate can become a hardworking part of daily life. It can protect clean floors, separate food bowls, manage guests, and keep curious paws away from trouble. Best of all, it lets those old crib rails retire from baby duty and start a new career in canine crowd control. Not bad for something that was collecting dust last week.












