
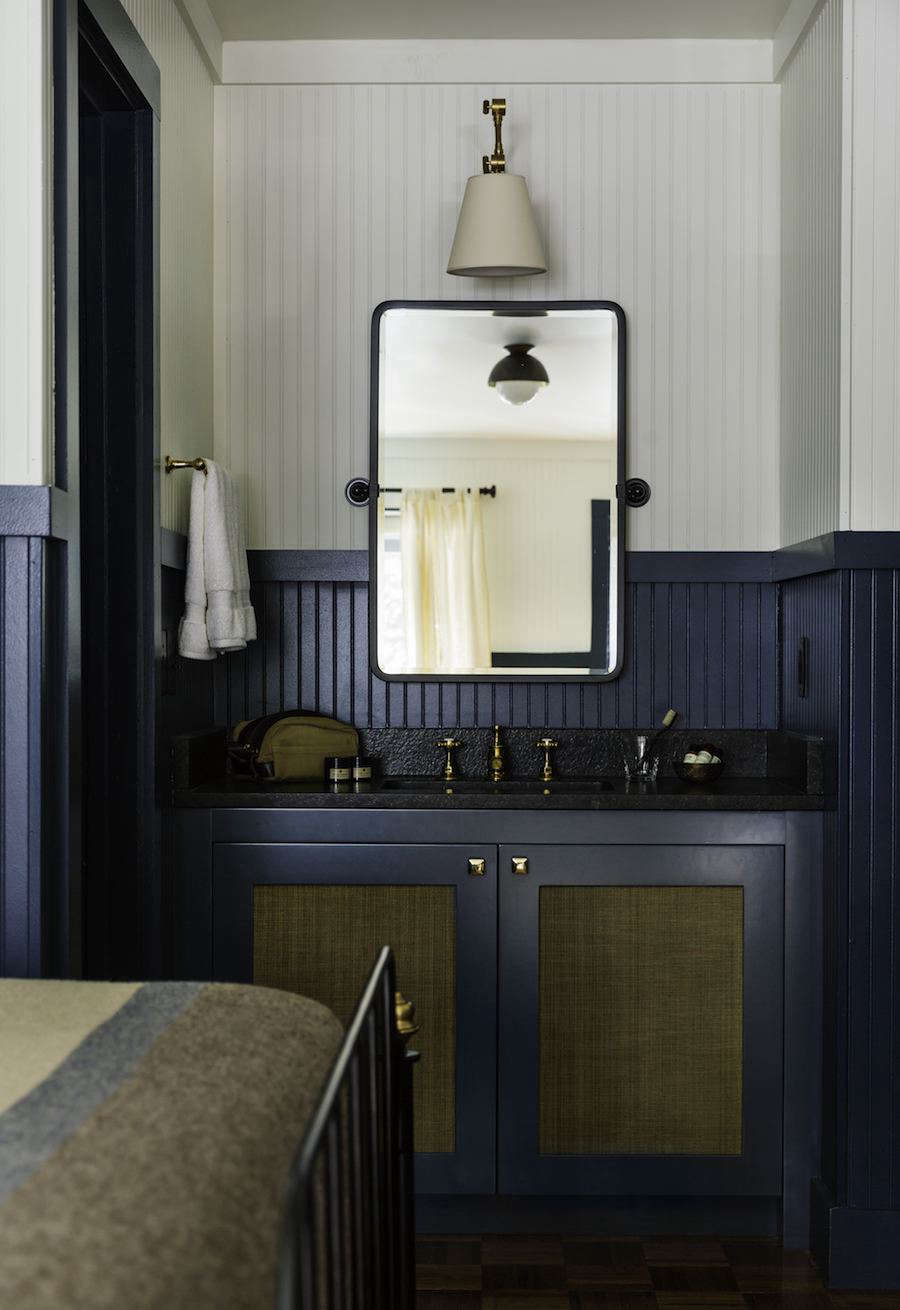
Low ceilings can make a pleasant room feel as though it is wearing a hat two sizes too small. Fortunately, you do not need to raise the roof or renegotiate with gravity. Thoughtfully designed wood paneling can create a convincing sense of height by controlling the direction, scale, contrast, and rhythm of the walls.
The key is thoughtfully. Wood paneling does not automatically make a room taller. Wide horizontal planks, heavy crown molding, dark upper walls, or a chair rail placed at an awkward height may visually compress the space. The right arrangement leads the eye upward, softens the wall-to-ceiling boundary, and adds architecture without turning the room into a 1970s basement rec room.
Why Vertical Wood Paneling Creates Loftiness
Our eyes follow strong lines. Vertical grooves, battens, slats, and narrow boards encourage the gaze to travel from the floor toward the ceiling. This movement creates a perception of height even though the room’s dimensions have not changed. It is the same principle behind tall mirrors, floor-to-ceiling curtains, and vertically striped wallpaper.
Paneling also creates shadow lines. Repeated grooves add depth and rhythm, while full-height boards make the wall read as one long, continuous surface. When the design is not interrupted by unnecessary horizontal bands, the ceiling appears farther away and the entire room feels more open.
Choose a Paneling Style That Points Upward
Vertical Tongue-and-Groove or Shiplap
Vertical tongue-and-groove boards are a dependable choice for low-ceiling rooms. Their seams create clean upward lines, and the interlocking construction gives the wall a tailored finish. Vertical shiplap offers a similar effect with more visible gaps between boards. Both work well in bedrooms, dining rooms, hallways, kitchens, and compact living spaces.
For the strongest illusion, run the boards from baseboard to ceiling. Stopping several inches below the ceiling creates a horizontal break that can shorten the wall. When full-height coverage is not practical, tall partial paneling that reaches about two-thirds of the wall often looks more graceful than a low chair-rail treatment.
Board and Batten
Board-and-batten paneling uses flat wall sections divided by narrow vertical strips. To emphasize height, design tall rectangles and minimize crosspieces. Narrow spacing creates more upward movement; wider spacing feels calmer and more contemporary. Align battens with fireplaces, windows, doors, built-ins, or the centerline of a bed so the pattern looks intentional.
Fluted and Slatted Panels
Fluted panels and individual slats provide finer vertical texture. They are effective behind a bed, dining banquette, entry bench, or media console. Closely spaced slats add movement, while a dark backing behind light wood creates depth. In a small room, one uninterrupted slatted wall is usually more expansive than four highly textured walls competing for attention.
Traditional Flat or Raised Panels
Classic molding can also create loftiness when the panels are narrow and vertical. Long rectangular frames painted in one continuous color add architectural detail without requiring a rustic look. Avoid squat boxes or grids dominated by horizontal rails; they divide the wall into short bands instead of extending it.
Use Orientation to Solve the Room’s Main Problem
Vertical paneling is the simplest way to make a ceiling appear higher. Horizontal boards pull the eye across the room, which can make a narrow space feel wider but may lower the apparent ceiling. Choose the direction according to the room’s greatest weakness.
For example, a small bedroom that feels both short and narrow may benefit from full-height vertical paneling only behind the bed, with the other walls kept quiet. In a tunnel-like hallway, use vertical paneling on the end wall rather than covering every surface. The goal is controlled lift, not the visual equivalent of shouting “up!” from all four sides.
Use Color, Grain, and Sheen to Extend the Wall
Light and Low-Contrast Finishes
Light woods such as white oak, ash, maple, birch, and pale pine reflect more light than heavily stained paneling. Painted paneling in warm white, soft greige, pale sage, misty blue, or another light neutral can also make a room feel airier. A lighter ceiling strengthens the effect by visually receding.
For maximum continuity, paint paneling, trim, doors, and crown molding in the same color or closely related shades. Reducing sharp contrast keeps the eye from stopping at each piece of trim. The wall reads as one tall surface rather than several stacked layers.
How to Use Dark Paneling Without Shrinking the Room
Dark walnut, charcoal, forest green, and deep navy can still work when the design maintains strong vertical lines and adequate light. Use dark paneling on one focal wall, keep the ceiling lighter, and pair it with restrained furniture. A satin or low-sheen finish usually reveals the grain without creating distracting glare.
Control the Grain
Choose boards whose grain generally runs lengthwise and install them vertically. Dramatic knots and strong color changes can interrupt the upward reading, so sort natural boards before installation and distribute the busiest pieces evenly. Mixing boards from several cartons helps variation look organic rather than patchy.
Scale the Pattern to the Wall
Panel width should suit the room. Very wide boards can make a short wall feel heavy, while extremely narrow slats may create visual static. In an average eight-foot room, moderately narrow boards or battens usually provide enough repetition to guide the eye upward without resembling prison bars designed by a luxury millworker.
Mock up the design with painter’s tape before cutting material. Mark outlets, switches, windows, doors, sconces, furniture, and trim. Center the layout on the room’s focal point rather than starting blindly in a corner. Behind a bed, relate the pattern to the mattress or headboard. Around a fireplace, balance both sides. Small alignment decisions are what make affordable trim look custom.
Handle the Wall-to-Ceiling Transition Carefully
Heavy crown molding in a contrasting color creates a strong horizontal stop and can push the ceiling visually downward. In a short room, use slim crown, simple square trim, or no crown when the joint is clean. Another option is to paint the crown and ceiling the same light shade so the molding blends upward.
Ceiling-mounted curtains, tall mirrors, vertically stacked artwork, slim sconces, and high bookcases can reinforce the paneling’s direction. Keep these elements aligned with the pattern so the whole composition supports the illusion of height.
Choose a Wall With a Clear Purpose
The best feature walls already contain a focal point: a fireplace, bed, banquette, built-in cabinet, console, or large window. Paneling a random wall may make the room feel unbalanced. In an open-plan home, vertical slats can define a dining or work zone without adding a solid divider. Wrapping the treatment a short distance around a corner often makes it feel integrated rather than pasted on.
Installation Details That Protect the Design
Acclimate Real Wood
Wood expands and contracts as indoor temperature and humidity change. Store boards flat in the installation room for the period recommended by the manufacturercommonly at least a couple of dayswith air circulating around them. Skipping this step can lead to gaps, cupping, or buckling after the triumphant “after” photos.
Establish a Plumb Reference Line
Floors and ceilings are often slightly out of level, especially in older homes. Use a laser or long spirit level to establish a true vertical starting line. If the first board leans, every following board repeats the error until the last one appears to be escaping through the corner.
Plan for Movement, Trim, and Wiring
Follow product instructions for expansion gaps, adhesives, fasteners, and moisture limits. Remove or carefully work around baseboards, crown, outlet covers, and window trim. When paneling increases wall thickness, electrical boxes may require approved extensions. Consult a licensed electrician when needed rather than improvising behind a decorative wall.
Fix the Wall First
Paneling cannot cure dampness, loose plaster, or major irregularities. Repair moisture sources, secure unstable surfaces, locate studs, and confirm the wall is clean and dry. For open-joint slat systems, paint the backing wall before installation because every gap will reveal it.
Common Mistakes That Make a Room Feel Shorter
- Using wide horizontal boards everywhere: They may broaden the room while lowering its apparent ceiling.
- Adding a high-contrast chair rail: A bold horizontal stripe divides the wall and compresses the upper section.
- Choosing oversized crown molding: Heavy, dark trim can visually push the ceiling down.
- Stopping at an arbitrary height: Align transitions with windows, doors, shelves, or another architectural feature.
- Mixing several strong wood tones: Competing grains make the room busier and less expansive.
- Ignoring lighting: Dark paneling without layered illumination may absorb light and flatten the texture.
- Skipping a full-scale mockup: A sample shows color; painter’s tape reveals proportion.
Room-by-Room Design Examples
Low-Ceiling Living Room
Use full-height painted board and batten on the fireplace wall with tall, narrow divisions. Paint the surround and paneling the same warm white, keep the mantel visually light, use a slightly lighter ceiling, and mount curtains close to the ceiling.
Compact Bedroom
Install vertical tongue-and-groove behind the bed in pale oak or desaturated green. Let the paneling replace a bulky headboard, mount slim sconces between the grooves, and keep the remaining walls simple.
Narrow Dining Nook
Run slim vertical slats from a built-in banquette to the ceiling. A light stain, open-backed chairs, and a simple pendant preserve floor space while the repeated lines add height.
Small Powder Room
Use moisture-rated vertical paneling from baseboard to ceiling and paint it in one enveloping color. Add a tall mirror and upward-oriented sconces. In a small room, precise caulking and clean trim transitions matter more than elaborate detailing.
Experience-Based Lessons: What Successful Paneling Projects Teach
The most useful lesson from real renovation case studies is that paneling should be designed around the room, not selected as a product first and justified later. Homeowners often fall in love with a sample wall online, order the same slats, and discover that the pattern behaves differently beside their windows, trim, and furniture. The better process begins with photographs, measurements, and a taped layout.
Consider an illustrative eight-foot bedroom with one small window and a queen bed centered on the longest wall. A first plan might use wide, dark horizontal planks because the inspiration photo looks warm and luxurious. Once mocked up, however, the boards make the wall appear broader and the ceiling lower. Rotating the same idea vertically, reducing the plank width, and choosing a midtone stain preserves the warmth while giving the wall a much stronger upward pull. Nothing structural changes, yet the room feels noticeably less compressed.
Another recurring experience involves partial paneling. A homeowner may assume that traditional one-third-height wainscoting is always the safest option. In a low-ceiling dining room, that proportion can produce a short lower box with a large plain area above it. Raising the paneling to approximately two-thirds of the wall and using narrow vertical rectangles often creates a more graceful result. The exact height should respond to windowsills, artwork, chair backs, and door casings rather than an inflexible formula.
Color testing is equally important. Pale oak can look creamy in a sunny south-facing room, gray in cool northern light, and unexpectedly orange under warm evening bulbs. Painted samples also shift throughout the day. Successful projects test a large sample vertically on the intended wall and observe it in daylight and artificial light before committing. A four-inch chip cannot explain how an entire textured wall will behave.
Installers frequently report that the beginning and end of the wall demand more planning than the middle. A perfectly regular spacing can leave a thin, awkward strip at one corner. Professionals therefore calculate the full layout, adjust the module slightly, and balance the first and last sections. They also open several cartons of natural wood and mix boards during installation so color variation appears intentional instead of forming obvious patches.
Lighting can rescue or ruin the final effect. Grazing light from a nearby window or concealed LED strip emphasizes grooves and makes the surface feel dimensional. A single harsh ceiling fixture may flatten the texture or create distracting shadows. Layering ambient, task, and accent lighting allows the paneling to remain visible without becoming theatrical.
Finally, restraint repeatedly proves its value. The paneling, floor, ceiling beams, cabinets, and furniture do not all need to feature different grains. When one wood treatment is the star and the surrounding materials are quieter, the vertical pattern reads clearly. The room feels taller because the eye knows where to travel. Good paneling adds architecture; great paneling makes that architecture look as though it has always belonged there.
Conclusion
Wood paneling adds loftiness when direction, proportion, finish, and placement work together. Start with vertical lines, choose a pattern scaled to the wall, reduce strong contrast near the ceiling, and connect the treatment to a real focal point. Light finishes make the effect easier, but dark wood can succeed when balanced with vertical continuity and thoughtful lighting.
The smartest investment is careful planning. Mock up the spacing, test the finish under real light, acclimate the material, and resolve outlets and trim before installation. Done well, wood paneling does more than decorate a wallit persuades the entire room to stand a little taller.











