
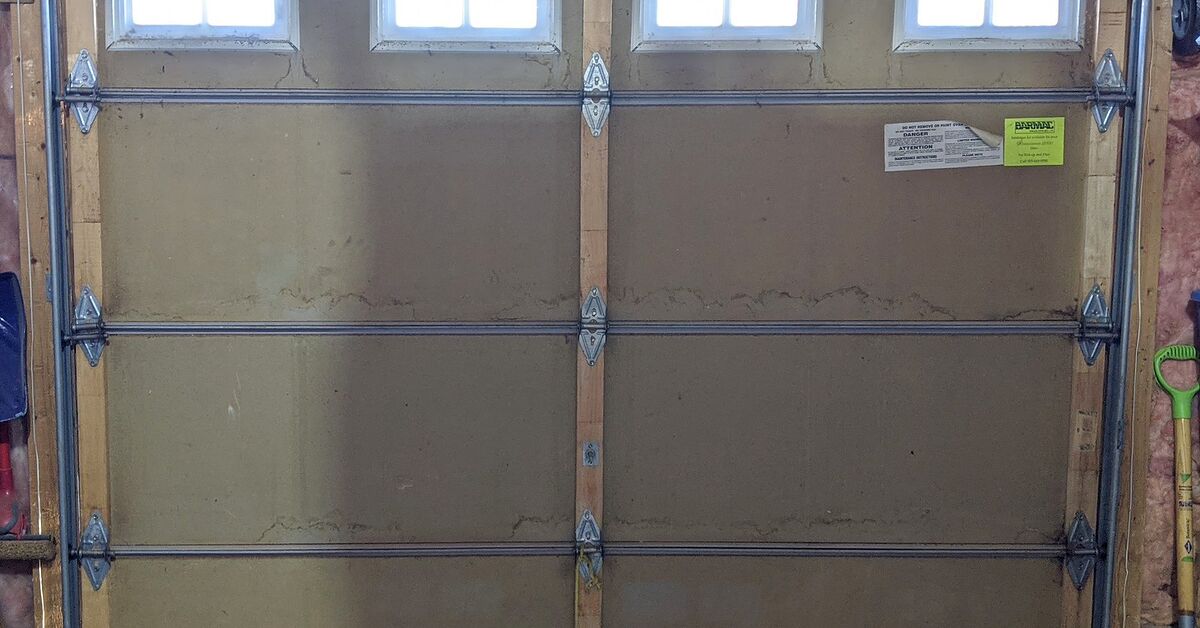
My garage door used to have the thermal performance of a potato chip. It rattled in the wind, leaked cold air along the sides, and let in enough daylight at the bottom to qualify as a sunrise viewing platform. The garage was not just cold; it was dramatic. Every time I opened the interior door from the house, a frosty breeze walked in like it owned the place.
So I decided to winterize my cheap garage door without replacing it, refinancing my house, or pretending I suddenly knew the sacred language of professional garage installers. The goal was simple: improve comfort, reduce drafts, protect the garage from winter moisture, and make the space less miserable during cold months. This energy efficient DIY project turned out to be one of the most satisfying small home upgrades I have ever done.
Winterizing a garage door is not glamorous. Nobody throws a party because you installed a new bottom seal. But if your garage is attached to your home, used as a workshop, laundry space, gym, storage zone, or “temporary” place for boxes from 2017, sealing and insulating the door can make a noticeable difference. The best part? You can do a lot with basic tools, affordable materials, and a willingness to crawl around on concrete while questioning your life choices.
Why Winterizing a Garage Door Matters
A cheap, uninsulated garage door is often made from thin metal panels with little resistance to heat transfer. In plain English, outdoor cold passes through it easily. Add gaps around the top, sides, and bottom, and the garage becomes a draft delivery system.
For detached garages, this may only affect the garage itself. For attached garages, the problem can spread. Cold air in the garage can chill shared walls, floors above the garage, plumbing lines, and the interior door leading into the house. If you have a bedroom over the garage that feels like a walk-in freezer, the garage door may not be the only villain, but it is definitely in the suspect lineup.
Winterizing the garage door helps in several practical ways:
- It reduces drafts around the door.
- It helps stabilize the garage temperature.
- It can reduce moisture, dirt, leaves, and pest entry.
- It makes the garage more comfortable for projects.
- It may reduce strain on nearby conditioned spaces.
- It can make the door quieter and less rattly.
The key is to think in layers. Insulation slows heat transfer through the door panels. Weatherstripping blocks air movement around the door. Caulk and foam seal cracks in nearby walls and trim. Maintenance keeps the door moving safely. Together, those small improvements can turn a sad winter garage into a space that is still a garage, but no longer feels like a punishment chamber for bicycles.
Step One: I Inspected the Garage Door Like a Draft Detective
Before buying anything, I inspected the door on a cold, windy day. This is important because drafts love to hide when the weather is mild. I closed the garage door, turned off the lights, and looked for daylight around the bottom, sides, top, and between panels.
The results were not encouraging. Light was visible under one corner of the bottom seal. The side weatherstripping had hardened and curled away from the door. The top seal had a gap large enough to make a spider feel welcomed. In several places, the door panels flexed when the wind hit them.
My Simple Garage Door Winterization Checklist
- Check for daylight under the door.
- Feel for drafts along the sides and top.
- Inspect the bottom rubber or vinyl seal for cracks.
- Look for gaps between garage door panels.
- Inspect trim, jambs, and frame edges.
- Check whether the door opens smoothly after any added weight.
- Inspect the interior door between garage and house.
- Look for wall cracks, pipe penetrations, and window gaps.
This inspection helped me avoid the classic DIY mistake: buying random insulation first and hoping vibes would solve physics. Insulation helps, but air leaks are usually the low-hanging fruit. A beautifully insulated door with gaps around the edges is like wearing a down jacket with no zipper.
Step Two: I Replaced the Garage Door Bottom Seal
The bottom seal was my first target because it was visibly failing. The old seal was flat, brittle, and slightly chewed-looking, though I prefer not to know by whom. A garage door bottom seal is the rubber or vinyl strip that compresses against the concrete floor when the door closes. When it works, it blocks cold air, rain, dirt, and tiny unwanted guests with too many legs.
Many metal garage doors use a U-shaped or T-style rubber gasket that slides into a metal channel at the bottom of the door. Older wooden doors may use a nailed-on strip-style seal. Before buying a replacement, I measured the width of my door, checked the shape of the existing seal, and looked at the bottom retainer track.
What I Used
- Replacement garage door bottom seal
- Flathead screwdriver
- Pliers
- Utility knife
- Dish soap and water
- Work gloves
Removing the old seal took more effort than expected. It had been living in that track for years and was emotionally attached. I pulled it out section by section, cleaned the track, and used a little soapy water to help slide the new seal into place. Once installed, I trimmed the excess with a utility knife.
The difference was immediate. The visible daylight under the door nearly disappeared, and the door closed with a softer, more complete contact against the floor. It did not make the garage tropical, but it stopped the cold air from rolling in like a fog machine at a budget haunted house.
Step Three: I Added Side and Top Weatherstripping
Next came the side and top seals, also called garage door stop molding or perimeter weatherstripping. This is the flexible vinyl or rubber flap attached to the trim around the door opening. When the door closes, the flap presses lightly against the door surface and blocks wind-driven air.
My old weatherstripping had lost its flexibility. That is a polite way of saying it had the texture of stale licorice. I replaced it with vinyl garage door weatherseal molding, cutting each piece to fit the side jambs and header.
Installation Tips That Saved Me Trouble
- I cleaned the door frame before installing anything.
- I measured twice and cut once, because garage trim enjoys humiliating confident people.
- I positioned the flexible flap so it touched the closed door without pushing too hard.
- I used exterior-rated fasteners.
- I checked the door operation after installation.
The trick is not to jam the weatherstripping aggressively into the door. It should make contact and compress slightly, not force the opener to fight for its life. A tight seal is good; a door that groans like an old pirate ship is not.
Once the side and top weatherstripping were installed, the garage felt calmer. Less wind noise came through the door, and I could no longer feel sharp cold air near the side tracks. This was the first moment when the project felt genuinely worth it.
Step Four: I Chose Budget Garage Door Insulation
After sealing the obvious air leaks, I moved on to insulation. Garage door insulation is designed to slow heat transfer through the panels. The most common DIY options are rigid foam board, fiberglass batt kits, and reflective insulation kits. Each has pros and cons.
Rigid Foam Board
Rigid foam board is a popular choice for cheap garage door winterization because it is lightweight, easy to cut, and offers decent insulating value for its thickness. Foam board panels can be cut to fit inside the recessed sections of a metal garage door. They also add a cleaner look than some loose or floppy insulation options.
Fiberglass Garage Door Insulation Kits
Fiberglass kits can offer good thermal resistance, but they require careful handling. Gloves, long sleeves, and a dust mask are smart because fiberglass is not exactly a spa treatment for your skin. Fiberglass also needs to be secured properly so it does not sag or fall when the door opens.
Reflective Insulation
Reflective insulation can help in certain situations, especially where radiant heat is a bigger issue. For winter garage door insulation, I preferred foam board because I wanted a simple, firm material that fit neatly into the door panels.
I chose lightweight rigid foam board panels because my door was cheap, thin, and not built to carry much extra weight. This matters. Adding heavy materials to a garage door can affect balance, strain the opener, and create a safety issue. Garage doors are counterbalanced systems, and the springs are not decorative metal noodles. They are under serious tension.
Step Five: I Measured and Cut the Insulation Panels
My garage door had rectangular recessed panels. I measured each panel separately because, naturally, several were slightly different sizes. This is where patience pays off. A sloppy cut leaves gaps. A too-tight cut bows the insulation. A perfect cut makes you feel like a minor wizard.
Tools I Used
- Tape measure
- Straightedge
- Utility knife
- Marker
- Foam board panels
- Foil HVAC tape
- Retainer clips or compatible adhesive, depending on panel type
I cut each foam panel slightly smaller than the opening so it could fit without bending. Then I pressed the panels into the door channels. Some panels stayed in place by friction; others needed retainer clips and a small amount of compatible adhesive. I avoided using random glue because some adhesives can damage foam insulation. The garage door may be cheap, but it did not deserve a chemical meltdown.
After installing the panels, I checked that the door opened and closed smoothly. Then I disconnected the opener and carefully tested the door balance by lifting it manually. A properly balanced door should not slam down or shoot up. If the door becomes hard to lift, feels unstable, or will not stay partially open, that is a sign to stop and call a trained garage door technician.
Step Six: I Sealed Small Gaps Around the Garage
Winterizing the garage door helped, but the door was not the only source of cold air. Garages often have gaps around window frames, wall penetrations, sill plates, electrical boxes, hose bibs, and the trim around the interior entry door.
I used exterior-grade caulk for small stationary cracks and low-expansion spray foam for larger gaps where appropriate. Caulk is best for cracks between fixed materials. Weatherstripping is best for moving parts. Spray foam is useful for bigger gaps, but it should be used carefully because it expands and can make a mess faster than a toddler with pancake syrup.
Places I Checked
- Around the interior door from the garage to the house
- Around garage windows
- Where pipes or wires entered the wall
- Along the sill plate near the floor
- Cracks in trim and framing
- Gaps around old utility penetrations
The interior door between the house and garage deserved special attention. If your garage is attached, that door should seal well for comfort and safety. I added fresh weatherstripping and checked the door sweep. This helped keep garage air from sneaking into the house, which is especially important because garages may contain fumes from vehicles, paint, gasoline, solvents, and other stored chemicals.
Step Seven: I Paid Attention to Safety
Garage doors are heavier and more complicated than they look. The panels, tracks, springs, cables, rollers, hinges, and opener all work together. Winterizing does not mean ignoring safety just because you have a utility knife and confidence.
I did not adjust the torsion spring. I did not loosen cables. I did not modify the track system. Those jobs belong to trained professionals. My work stayed focused on weather seals, insulation panels, caulking, and basic cleaning.
Important Winter Safety Reminders
- Do not operate the garage door if the bottom seal is frozen to the floor.
- Keep ice and packed snow away from the bottom of the door.
- Do not add heavy insulation without checking door balance.
- Do not adjust garage door springs yourself.
- Test the auto-reverse feature on the opener.
- Keep insulation away from moving hinges and rollers.
- Use materials that fit your door type.
One of the most overlooked winter problems is a frozen bottom seal. If water collects under the seal and freezes, the door can stick to the concrete. Forcing the opener to lift a frozen door can damage the seal, opener, panels, or hardware. I now clear snow and ice from the threshold area before it turns into a garage-door popsicle.
How Much Did My Cheap Garage Door Winterization Cost?
Costs vary depending on the size of the door, the condition of existing seals, and the materials chosen. My project stayed budget-friendly because I did not replace the door. I focused on the most useful upgrades first: bottom seal, perimeter weatherstripping, foam board insulation, caulk, and small gap sealing.
Sample Budget Breakdown
- Garage door bottom seal: affordable to moderate, depending on type and length
- Side and top weatherstripping: usually budget-friendly
- Rigid foam board or insulation kit: moderate cost
- Foil tape, caulk, and small supplies: low cost
- Professional adjustment if needed: worth budgeting for if the door balance changes
The most important lesson is that you do not have to do everything at once. If the budget is tight, start with sealing visible gaps. Replacing failed weatherstripping often gives the biggest comfort improvement for the least money. Insulation comes next. Fancy upgrades can wait until your garage stops impersonating a meat locker.
What Worked Best?
The biggest improvement came from the bottom seal and side weatherstripping. That surprised me. I expected insulation to be the star of the show, walking in with sunglasses and dramatic music. But air sealing delivered the most obvious difference first.
The foam board insulation helped reduce the cold radiating from the metal panels. It also made the door feel less flimsy and slightly quieter. On windy nights, the door no longer sounded like a loose cymbal in a marching band.
Caulking and sealing the interior garage entry door also helped. A garage door can be winterized nicely, but if the door into the house leaks, cold air can still invade your living space. Think of the whole garage as a system, not just one big metal rectangle.
What I Would Do Differently Next Time
If I repeated the project, I would start earlier in fall. Installing seals in cold weather is doable, but some materials are easier to work with when they are not stiff from freezing temperatures. I would also buy a few extra fasteners and blades. Foam board dulls a utility knife faster than expected, and a dull blade makes ugly cuts.
I would also label each insulation panel as I cut it. Several panels looked similar but were not identical. Without labels, I created a brief but intense puzzle game called “Why Does This Rectangle Hate Me?” A marker would have saved time.
Finally, I would take before-and-after temperature readings. I could feel the difference, but actual numbers would have been satisfying. A basic indoor thermometer in the garage before and after the project can help you judge whether the upgrade is worth expanding.
Extra Experience: Living With a Winterized Cheap Garage Door
After finishing the project, I paid close attention for several weeks. The garage did not become warm in the way a heated room is warm. That is an important expectation to set. Insulating and sealing a cheap garage door does not create heat; it helps slow heat loss and reduce cold air infiltration. If the garage is unheated and it is freezing outside, the garage will still be cold. It will simply be less brutally cold.
The first thing I noticed was that the interior door from the house no longer felt like a portal to another climate zone. Before the project, opening that door released a blast of cold air into the hallway. After the upgrades, the temperature difference was still there, but it was less sharp. The garage felt more stable, especially on windy days.
The second improvement was comfort while working. I use the garage for small repairs, storage, and occasional projects that require a workbench. Before winterizing the door, I would last about fifteen minutes before my fingers began filing a formal complaint. After sealing and insulating, I could work longer with a jacket and a safe, supervised heat source when needed.
The third improvement was cleanliness. This was unexpected. The old bottom seal let in leaves, dust, and mystery debris that appeared with no explanation. Once the new seal compressed properly against the floor, less dirt blew under the door. The garage floor stayed cleaner, which made the whole space feel less neglected.
The fourth benefit was noise reduction. The foam panels and tighter seals reduced rattling during wind. It was not soundproofing, but the door sounded more solid. Cheap metal garage doors often behave like giant percussion instruments, and mine finally stopped auditioning for a garage band.
There were also a few lessons. First, a perfectly sealed garage is not always the goal. Garages need reasonable ventilation, especially if you store chemicals or park vehicles inside. I focused on stopping obvious drafts, not turning the garage into a sealed laboratory. Second, moisture matters. If water regularly flows toward your garage door, a bottom seal alone may not solve the problem. You may need a threshold seal, drainage improvement, or concrete repair.
Third, the added insulation changed the feel of the door slightly. It still opened fine, but I was glad I checked the balance. Any DIY garage door insulation project should include that step. If the opener strains after insulation is added, do not ignore it. A struggling opener is not “building character.” It is warning you.
Fourth, cheap materials can work if installed carefully. The most expensive insulation kit will not perform well if there are gaps everywhere. A modest foam board job with careful cutting, good perimeter seals, and a fresh bottom gasket can outperform a sloppy premium installation. DIY success is often less about buying the fanciest product and more about respecting the boring details.
My favorite part of the project was how approachable it felt. Winterizing a garage door sounds like something that requires a contractor, a clipboard, and a mysterious invoice. In reality, much of it is measuring, cleaning, cutting, sealing, and checking your work. The only hard boundary is safety: do not mess with springs, cables, or serious door adjustments unless you are trained.
By the end, my cheap garage door was still cheap. It did not magically transform into a high-end insulated carriage-style door with magazine-cover confidence. But it became quieter, tighter, cleaner, and more energy efficient. For a weekend project, that felt like a win. Not a glamorous win, perhaps, but the kind that makes winter mornings less annoying. And honestly, that is the kind of home improvement I trust most.
Conclusion
Winterizing a cheap garage door is one of those energy efficient DIY projects that proves small upgrades can make a real difference. You do not always need a brand-new insulated garage door to improve comfort. Start by inspecting for daylight and drafts. Replace the bottom seal if it is cracked or flattened. Add side and top weatherstripping. Seal nearby gaps with caulk or foam. Then consider lightweight garage door insulation that fits your climate, budget, and door type.
The best approach is practical, layered, and safe. Air sealing comes first because drafts can defeat insulation. Insulation comes next because it slows heat transfer through thin door panels. Maintenance and safety checks keep the door working properly through winter. When done carefully, this project can make an attached garage more comfortable, reduce cold air movement into nearby rooms, and make the space more useful during chilly months.
My cheap garage door is still not fancy. It has no designer hardware, no dramatic windows, and no reason to appear in an architectural magazine. But it no longer leaks cold air like it is being paid by the breeze. That is enough for me.












