
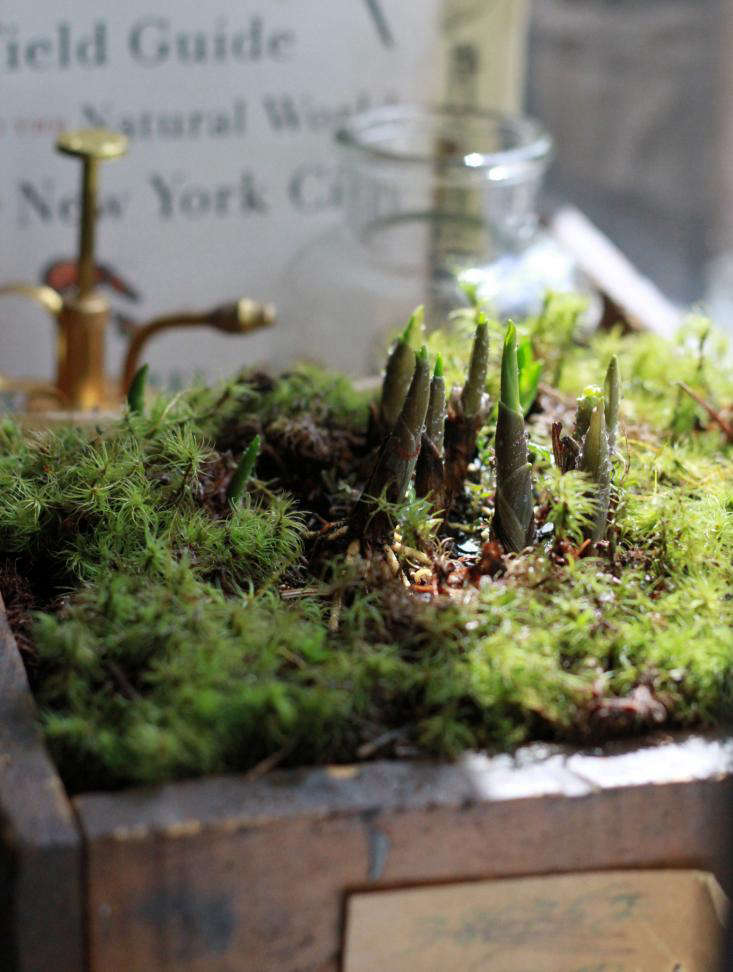
Lily of the valley may look like it belongs in an enchanted woodland, but you do not need a mossy forestor a resident fairyto enjoy its fragrant white bells. With healthy pips, a draining container, and a cool windowsill, you can encourage Convallaria majalis to flower indoors while the outdoor garden is still wearing its winter pajamas.
The process is called forcing: giving a dormant plant the cold period it expects, then moving it into conditions that imitate spring. It requires more planning than growing an ordinary houseplant, but the reward is a compact display of arching stems, fresh green leaves, and famously sweet fragrance.
What Is Lily of the Valley?
Lily of the valley is a low-growing, rhizomatous perennial in the asparagus family. It is not a true lily, despite its common name. Mature outdoor plants usually stand about 6 to 12 inches tall and produce nodding, bell-shaped flowers in spring.
Underground, the plant spreads through slender rhizomes. The growing points attached to those rhizomes are commonly called pips. A plump, pointed pip may contain a developing flower bud, while a thinner one may produce only leaves. This is why large, mature pips sold specifically for indoor forcing offer the most reliable results.
Lily of the valley naturally prefers cool conditions, partial to full shade, and moist but well-drained soil. Those preferences translate surprisingly well to a bright, cool windowsillas long as the plant is protected from harsh direct sun and soggy soil.
Choose the Right Pips for Indoor Forcing
The easiest route is to purchase pre-chilled or prepared lily of the valley pips from a reputable nursery. These have already received some or all of the cold treatment needed to trigger flowering. Look for firm, substantial pips with healthy roots and no mold, mushy areas, or sour odor.
If the package says “prepared for forcing,” follow the seller’s instructions because its chilling schedule may differ from that of untreated plants. Avoid assuming that ordinary garden divisions will flower immediately indoors. Small or immature pips frequently produce an enthusiastic crop of leaves and precisely zero bellsa fine performance, but not the one on the poster.
Can Garden Pips Be Used?
Yes. Dormant pips can be lifted from an established clump in fall, but only where the plant is legally grown and with the property owner’s permission. Select thick flowering-size crowns with attached roots. Do not harvest plants from parks, public land, or natural areas.
Because European lily of the valley can spread aggressively and is considered invasive in parts of the northern United States, check state and local recommendations before obtaining or later transplanting it outdoors.
Supplies You Will Need
- Five to eight mature lily of the valley pips for a small display
- A clean pot approximately 5 to 6 inches wide
- A drainage hole and a waterproof saucer
- Fresh, well-draining indoor potting mix
- Clean scissors or pruners
- Gardening gloves
- A plant label and planting date
- Optional decorative moss to add after planting
A broad, relatively shallow pot suits the plant’s compact growth, but it still needs enough depth for its roots. Decorative bowls without drainage are risky because excess water has nowhere to go. If you love a hole-free ceramic container, use it as an outer cachepot and keep the plant in a draining nursery pot inside it.
How to Grow Lily of the Valley on a Windowsill
Step 1: Provide the Necessary Cold Period
Untreated lily of the valley generally needs about 14 to 15 weeks of chilling to simulate winter. Maintain a dark environment at roughly 35°F to 45°F. A refrigerator, protected cold frame, or suitably cool garage may work, provided the pips do not freeze solid or become warm enough to grow prematurely.
Keep refrigerated pips away from ripening fruit, especially apples. Fruit releases ethylene gas, which can interfere with flower development. Check stored material periodically so it remains barely moist rather than dried out or dripping wet.
Skip this stage if the nursery confirms that the pips are fully pre-chilled and ready to force. When in doubt, read the label before introducing your new botanical roommates to the refrigerator.
Step 2: Inspect and Prepare the Pips
Put on gloves and unpack the dormant pips. Healthy crowns should feel firm, and their roots may look wiry or tangled. Remove packaging material and trim only broken, dead, or excessively long roots. Do not cut into the crown or pointed growing tip.
If the roots seem dry, soak the root portion in lukewarm water for a few hours before planting. Keep the crown from sitting underwater for an extended period. The goal is gentle rehydration, not a day at the pip spa.
Step 3: Prepare the Container
Wash the container and confirm that water can move freely through its drainage hole. Add fresh potting mix, leaving enough space to arrange the roots without folding them into a solid knot.
A commercial indoor potting mix usually provides the useful combination of moisture retention and air space. Do not use dense garden soil in a windowsill pot; it may compact, drain slowly, and bring insects or disease organisms indoors.
Step 4: Plant the Pips Close Together
Arrange the pips upright in a close group, spreading the roots downward and outward. Crowded planting creates a fuller display, but the crowns do not need to touch. Add potting mix around the roots and firm it gently to eliminate large air pockets.
Position the pointed tips at or just above the soil surface. Burying the crowns deeply can encourage rot and make emergence more difficult. Leave roughly half an inch of space below the pot rim so watering does not send soil on a sightseeing tour across the windowsill.
Step 5: Water Thoroughly
Water until moisture drains from the bottom, then empty the saucer. During active growth, keep the mix evenly moist but never waterlogged. Test the surface with a finger; when it begins to feel slightly dry, water again.
Do not follow a rigid calendar. A sunny room, dry heating system, small container, or clay pot can increase water use. Cool temperatures and plastic containers slow it down. The soil is a better witness than Tuesday.
Step 6: Begin in a Cool Location
After planting, place the pot in a cool area with subdued light while roots and shoots become active. Once green growth is visible, move it to a bright windowsill with indirect light.
An east-facing window with gentle morning light often works well. A north-facing window may also be suitable if it is bright. At a south- or west-facing window, use a sheer curtain or move the pot back from the glass to prevent hot afternoon sun from scorching the leaves.
Step 7: Manage Temperature for Better Flowers
Lily of the valley performs best in cool indoor conditions. Temperatures around 50°F to 60°F during early growth help encourage compact development. Normal room temperatures can be tolerated later, but excessive heat accelerates flowering and shortens the display.
Keep the pot away from heating vents, radiators, fireplaces, and warm appliances. Also protect it from freezing drafts and leaves touching icy glass. A cool windowsill is helpful; an arctic windowsill is simply rude.
Step 8: Rotate and Observe
Turn the pot a quarter turn every few days so stems do not lean strongly toward the window. Depending on the condition of the pips and the room, prepared plants may flower approximately three to four weeks after potting. Untreated material must complete its full chilling period first.
Flowering dates are approximate. Temperature, pip maturity, storage history, and light all influence the schedule. If you need blooms for a particular occasion, start more than one pot and bring them into growth several days apart.
Windowsill Care at a Glance
| Care Factor | Best Approach | Common Mistake |
|---|---|---|
| Light | Bright, indirect light | Hot midday or afternoon sun |
| Temperature | Cool, preferably around 50°F to 65°F | Placing the pot beside a heater |
| Water | Even moisture with complete drainage | Leaving water in the saucer |
| Soil | Fresh, loose, well-draining potting mix | Using compact outdoor garden soil |
| Fertilizer | Usually unnecessary during forcing | Feeding heavily to “make” flowers appear |
| Placement | Secure, stable, and inaccessible to children and pets | Treating a low windowsill as safe storage |
Do You Need to Fertilize Lily of the Valley Indoors?
Fertilizer is generally unnecessary during a single forcing cycle. Mature pips store the energy needed to produce their initial leaves and flowers. Extra fertilizer cannot transform an immature vegetative pip into a flower-ready one, and excessive salts may damage roots.
If you plan to retain the plant after flowering, a lightly diluted, balanced fertilizer can be considered once healthy leaves are actively growing. Avoid feeding a stressed, rotting, or dormant plant.
How to Keep the Flowers Fresh Longer
Once the bells open, move the container to the coolest bright location available. Continue providing indirect light and steady moisture. Warm rooms, intense sunlight, and dry soil cause flowers to fade faster.
Remove individual flower stems when they finish blooming, but leave healthy foliage attached. The leaves continue photosynthesizing and replenishing the rhizomes. Cutting them off immediately is like dismissing the kitchen staff halfway through dinner.
The fragrance can be powerful in a small room. If it becomes overwhelming or causes discomfort, move the plant to a larger, ventilated space while keeping it protected from cold drafts.
Troubleshooting Common Problems
Leaves Appear but There Are No Flowers
The pips may have been immature, too small, or insufficiently chilled. Excessive warmth during early growth can also lead to weak results. Use mature, flowering-size pips and record the cold-treatment dates for your next attempt.
The Shoots Are Pale and Floppy
Pale, elongated growth commonly indicates too little light or too much warmth. Move the pot gradually into brighter indirect light and a cooler location. Rotate it regularly for more even growth.
Leaves Have Brown or Crispy Edges
Direct sun, dry soil, low humidity, or heat from a vent may be responsible. Check soil moisture before adding water, because damaged roots from waterlogging can also leave foliage unable to hydrate properly.
Leaves Turn Yellow and the Soil Smells Sour
These are warning signs of poor drainage or root and crown rot. Stop leaving water in the saucer and inspect the drainage hole. Severely soft, discolored crowns should be discarded safely while wearing gloves.
Spots or Fuzzy Growth Develop
Lily of the valley can develop leaf spots, blotches, anthracnose, or stem rot, particularly when foliage remains wet and air circulation is poor. Remove badly affected material, avoid splashing the leaves, and separate the pot from other plants. Aphids and spider mites are occasional pests, so inspect both sides of the leaves.
What to Do After Lily of the Valley Blooms
Indoor forcing consumes a substantial amount of stored energy, so a plant may not produce another strong display immediately. After flowering, remove spent flower stalks but retain the foliage. Continue watering while the leaves remain green.
If local guidance permits outdoor planting, the rhizomes may be transplanted into a contained, shaded garden location after the danger of hard frost has passed. They may need one or more growing seasons to recover before flowering well again.
Do not plant lily of the valley near wild areas or dump unwanted pips outdoors. Its rhizomes can form dense colonies and displace other vegetation. Where the species is restricted, invasive, or unsuitable for the climate, keep it securely container-grown or dispose of it according to local recommendations.
Windowsill Experience: What a First Forcing Project Really Feels Like
The first surprise is how unimpressive dormant pips look. They arrive as a bundle of beige roots and pointed buds, more “forgotten pantry ingredient” than future floral centerpiece. That makes labeling the pot unexpectedly important. Without a label, a well-meaning household member may assume the container holds expired onions and initiate an unauthorized cleanup.
During the first several days after planting, visible progress can be minimal. The temptation is to water repeatedly because nothing appears to be happening. In reality, roots may be developing below the surface. A better routine is to feel the potting mix every day or two and water only when the surface begins to lose moisture. This simple check prevents the most common beginner error: confusing attention with irrigation.
Once growth begins, it can seem remarkably fast. Pale points push upward, unfold into green leaves, and start leaning toward the window. Rotating the container becomes part of the morning routinecoffee for the gardener, quarter turn for the pips. If the stems stretch dramatically within a few days, the room is probably warmer or darker than ideal.
A cool east-facing window often produces sturdier growth than a warm table several feet from the glass. However, the exact position may require experimentation. One end of a sill can sit over a radiator while the other catches a draft. A small room thermometer helps reveal these invisible differences and removes some of the guesswork.
The appearance of a flower stem is the project’s best moment. It is usually slimmer than the leaves and carries a neat row of developing buds. Not every pip necessarily flowers, even in a successful pot. A mixed display of flowers and foliage is normal, particularly when the pips vary in size.
The fragrance is another lesson. Photographs cannot prepare a grower for how much scent can emerge from a modest cluster of tiny bells. In an office or bedroom, one pot may perfume the entire space. That is delightful for many people, but anyone sensitive to strong scents may prefer displaying it in an airy living room.
Watering becomes slightly more frequent as the foliage expands, yet the drainage rule never changes. A saucer is a catcher, not a swimming pool. Emptying it after watering keeps roots supplied with air and protects the windowsill from moisture damage.
When the flowers fade, beginners often assume the entire project has failed or finished. It has not. The leaves still have work to do, and keeping them healthy gives the rhizomes a chance to rebuild their reserves. The display becomes less glamorous, but gardening occasionally asks us to appreciate the maintenance crew after the star has left the stage.
The most useful record is a short grow log noting the chilling dates, potting date, first shoot, first visible bud, and first open flower. Add observations about room temperature and window direction. That tiny record turns the next attempt from a hopeful guess into a repeatable indoor-gardening project.
Above all, the experience teaches that growing lily of the valley on a windowsill is a partnership with the plant’s natural cycle. You cannot bully it into flowering with extra fertilizer or heroic watering. Give it winter, offer it a gentle spring, and let the pips handle the theatrical portion.
Conclusion
To grow lily of the valley on a windowsill successfully, begin with mature pips, satisfy their chilling requirement, use a draining pot, and provide cool temperatures with bright indirect light. Keep the soil consistently moist without creating a swamp, rotate the container for balanced growth, and move flowering plants away from heat to extend the show.
The technique is simple once its timing is understood, but safety and containment are essential. Keep every part of the plant away from children and pets, and check local recommendations before moving rhizomes outdoors. With those precautions in place, a humble bundle of dormant pips can become a wonderfully fragrant patch of indoor spring.












