
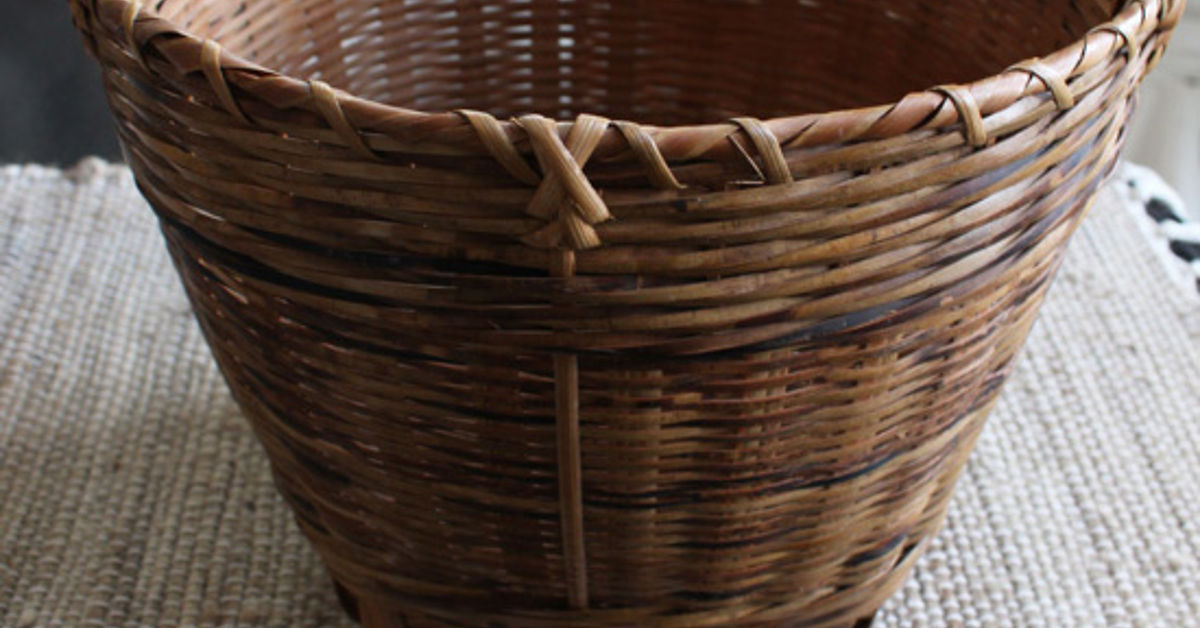
Bathrooms are tiny rooms with big personalities. One minute they are calm, spa-like sanctuaries. The next, they are holding three half-empty shampoo bottles, a rogue toothpaste cap, towels doing interpretive dance on the floor, and a basket of mystery products you definitely bought during a “new me” phase. The good news? You do not need a full renovation, a designer budget, or a bathroom the size of a boutique hotel to fix the chaos. A simple DIY basket upcycle for your bathroom can turn clutter into charm while giving old baskets a second life.
Upcycling baskets is one of the easiest bathroom organization projects because it checks every practical box: it is affordable, customizable, beginner-friendly, and surprisingly stylish. Whether you have a thrifted wicker basket, an old wire bin, a neglected seagrass basket, or a cotton rope basket that has seen better days, you can transform it into bathroom storage for towels, toilet paper, toiletries, hair tools, cleaning supplies, or guest essentials.
Even better, this project supports a more sustainable home. Instead of buying another plastic organizer that may not fit your space, you reuse what you already own, tailor it to your bathroom’s style, and create storage that looks intentional. In other words, your bathroom gets organized, your wallet stays calm, and your old basket gets to retire from “random closet object” duty with dignity.
Why Upcycle a Basket for Bathroom Storage?
Bathrooms need organization more than almost any other room because they are small, high-traffic, and filled with oddly shaped items. Bottles, jars, towels, brushes, razors, bath toys, cotton swabs, skincare, and cleaning products all compete for limited real estate. Without a storage system, everything migrates to the counter like it is attending a very crowded conference.
A basket creates a visual boundary. Instead of twelve products scattered around a shelf, you see one neat container. That one change makes the bathroom look cleaner instantly. Baskets also make routines easier because similar items can be grouped together: morning skincare in one basket, hair products in another, guest towels in a third, and backup toilet paper in a fourth. The result is not just prettier storage; it is a faster, smoother daily routine.
Upcycling adds another layer of value. You can paint, line, label, seal, or mount an old basket to match your space. A basket that looked tired in the laundry room might become a charming rolled-towel holder beside the tub. A wire basket can become modern under-sink storage. A shallow tray-style basket can corral perfume, hand lotion, and soap near the sink. With a little creativity, “old basket” becomes “custom bathroom organizer.” That is the kind of makeover we like: low drama, high reward.
Best Types of Baskets to Upcycle for the Bathroom
Not every basket is equally suited for a humid bathroom, so choose the right material before you begin. Bathrooms deal with moisture, condensation, splashes, and steam. A decorative basket can work beautifully, but it should be cleaned, dried, and protected properly.
Wicker and Rattan Baskets
Wicker and rattan baskets bring warmth and texture to bathrooms, especially spaces with white tile, neutral walls, or natural wood accents. They are ideal for storing rolled hand towels, washcloths, toilet paper, bath salts, and guest supplies. Because natural fibers can absorb moisture, avoid placing them directly inside the shower area or on a damp floor. Use them on shelves, counters, toilet tanks, or inside dry cabinets.
Seagrass and Water Hyacinth Baskets
Seagrass and water hyacinth baskets have a relaxed, coastal look that works well in spa-inspired bathrooms. They are sturdy and attractive, but like wicker, they should stay in dry zones. These baskets are excellent for open shelving because they hide clutter while adding texture.
Wire Baskets
Wire baskets are practical for under-sink storage, wall-mounted storage, and towel display. They let air circulate, which is helpful in a bathroom. If the basket has rust, sand it lightly and use a rust-resistant spray paint before bringing it back into service. A matte black, brushed brass, white, or soft sage finish can make a wire basket look brand new.
Plastic Baskets
Plastic baskets are not always the most glamorous, but they are moisture-friendly and easy to clean. They work well under the sink, inside cabinets, or for kids’ bath supplies. To make a plastic basket feel less basic, add a label, wrap the handle with jute cord, or use matching baskets in a coordinated color.
Cotton Rope Baskets
Cotton rope baskets look soft and cozy, making them great for towels, toilet paper, and laundry. However, they can hold moisture, so keep them away from wet floors. If the basket has lost its shape, steam it lightly, stuff it with towels, and let it dry in form before using it.
Supplies You May Need
The beauty of a bathroom basket upcycle is that you can keep it simple or turn it into a full craft afternoon. Start with the basket you already have and choose upgrades based on its condition and purpose.
- Old basket, bin, crate, or tray
- Mild soap, vinegar solution, or gentle cleaner
- Soft brush, microfiber cloth, or old toothbrush
- Fine-grit sandpaper for rough spots or metal rust
- Spray paint or craft paint suitable for the material
- Clear protective sealer for moisture resistance
- Fabric liner, tea towel, or washable cloth
- Hot glue, fabric glue, or needle and thread
- Labels, tags, chalkboard stickers, or wooden plaques
- Hooks, screws, wall anchors, or zip ties for mounting
You do not need every item on this list. For a quick project, cleaning and labeling may be enough. For a bigger transformation, paint and a liner can completely change the look.
Step-by-Step DIY Basket Upcycle for your Bathroom
Step 1: Decide What the Basket Will Store
Before you touch paint, glue, or a single roll of jute twine, decide what the basket needs to do. Storage should solve a real problem, not simply become another cute container full of chaos. Ask yourself: Will this basket hold towels, toiletries, toilet paper, makeup, cleaning supplies, hair tools, bath toys, or guest items?
The basket’s job determines its size, shape, and finish. A shallow basket is perfect for a vanity tray. A deep basket works for rolled towels. A narrow rectangular basket fits well on a shelf. A lidded basket is great for hiding backup products. A wall-mounted basket should be lightweight and not too deep, unless you enjoy bumping into your own décor before coffee.
Step 2: Clean the Basket Thoroughly
Old baskets often collect dust, lint, and tiny crumbs from a past life we do not need to investigate. For wicker, rattan, or seagrass, use a dry brush first to remove debris from the weave. Then wipe with a slightly damp cloth and mild soap. Avoid soaking natural fibers because too much water can warp or weaken them.
For plastic or metal baskets, wash with warm soapy water and dry completely. If the basket will hold toiletries or towels, cleanliness matters. Let the basket dry in a ventilated area before painting, sealing, or lining it. Moisture trapped under paint or fabric is not “rustic charm.” It is a future science project.
Step 3: Repair Loose Weaving or Bent Areas
If the basket has loose reeds, broken handles, or bent wire, repair those areas before decorating. A small amount of hot glue can secure loose wicker ends. Bent wire can often be gently reshaped with pliers. If the handle is damaged beyond repair, remove it and turn the basket into a shelf bin instead.
For a frayed rope basket, trim loose threads and reinforce weak spots with matching thread. If the bottom is sagging, place a thin piece of cardboard, acrylic, or sealed wood inside the base and cover it with fabric. This gives the basket more structure and helps it hold bathroom essentials without slouching like it just heard bad news.
Step 4: Paint or Stain for a Fresh Look
Paint is the fastest way to make an old basket look custom. For wicker or rattan, spray paint usually works well because it reaches into the woven texture. Apply several light coats instead of one heavy coat. Heavy paint can drip, clog the weave, and turn your charming basket into a crunchy modern sculpture.
For a classic bathroom look, try warm white, soft gray, matte black, muted blue, sage green, or natural beige. For a playful powder room, use coral, mustard, navy, or even a two-tone dipped effect. If you love the natural texture but want a cleaner finish, dry-brush paint lightly over the raised areas or use a watered-down stain effect.
Metal baskets can be sprayed with rust-resistant paint. Plastic baskets need paint designed for plastic surfaces. Always paint in a well-ventilated area and follow product drying instructions. A bathroom may be small, but paint fumes have big ambitions.
Step 5: Add a Protective Sealer
Because bathrooms are humid, a clear sealer helps protect painted finishes and natural fibers. Choose a water-resistant clear spray or brush-on sealer appropriate for the basket material. A satin or matte finish usually looks more natural than a high-gloss finish, unless your design goal is “basket wearing lip gloss.”
Seal the outside, inside, and bottom if possible. Let the basket cure fully before filling it with towels or toiletries. Dry-to-the-touch does not always mean fully cured, so give it time. This step is especially useful if the basket will sit near a sink, under open shelving, or close to a tub.
Step 6: Line the Basket
A liner makes the basket cleaner, softer, and more practical. It also protects towels from snagging on rough wicker. You can use a cut-up tea towel, scrap fabric, pillowcase, or washable cotton cloth. For a no-sew liner, fold the fabric over the rim and secure it discreetly with fabric glue or small clips. For a polished look, sew a simple fitted liner with ties at the corners.
Choose washable fabric, especially if the basket will hold makeup, hair products, or kids’ bath supplies. White fabric looks crisp but may show stains. Stripes, gingham, ticking, or small floral prints can add personality without overwhelming the bathroom.
Step 7: Label It Like a Pro
Labels are not just cute; they are tiny household managers. They tell everyone where things belong, including family members who claim they “didn’t know where the towels go” while standing beside the towel basket.
Use wooden tags, leather labels, chalkboard stickers, metal label holders, or simple cardstock tied with twine. Label baskets by category: “Hand Towels,” “Skincare,” “Hair Tools,” “Guests,” “Toilet Paper,” “Bath Toys,” or “Backstock.” Keep labels short and easy to read. A beautiful basket labeled “Miscellaneous Bathroom Lifestyle Overflow” may be accurate, but it is not helping.
Smart Bathroom Basket Upcycle Ideas
1. Rolled Towel Basket
Place a large wicker or seagrass basket beside the tub, under a floating vanity, or on a lower shelf. Roll bath towels tightly and stand them upright or stack them horizontally. Rolled towels look spa-like and make it easy to grab one without disturbing the entire pile.
2. Toilet Paper Basket
A tall basket can hold extra toilet paper rolls while keeping them visible and accessible. This is especially helpful in guest bathrooms because nobody wants to perform a cabinet search mission during an emergency. Add a liner if the basket is rough, and choose a spot away from direct splashes.
3. Vanity Tray Basket
Use a shallow basket as a countertop tray for hand soap, lotion, perfume, and a small jar of cotton swabs. This keeps daily items grouped and prevents the counter from looking cluttered. For easy cleaning, choose a basket with a flat base or add a washable liner.
4. Under-Sink Basket System
Under the sink is where products often go to disappear. Use upcycled baskets to create zones: cleaning supplies, backup toiletries, hair products, and feminine care. Measure the cabinet before choosing baskets, and leave room around plumbing. If the cabinet is deep, use handles or labels so you can pull baskets forward easily.
5. Wall-Mounted Basket Shelves
Square or rectangular baskets can be mounted on the wall as open storage. Use sturdy screws and anchors, and only store lightweight items such as washcloths, rolled hand towels, or small toiletries. This idea is perfect for tiny bathrooms with limited counter space.
6. Guest Bathroom Welcome Basket
Create a guest basket with travel-size shampoo, conditioner, lotion, toothpaste, floss, cotton rounds, washcloths, and a small candle. Add a tag that says “Help Yourself.” It feels thoughtful, looks beautiful, and prevents guests from awkwardly asking where you keep the extra soap.
7. Hair Tool Basket
A wire basket or heat-safe metal bin can store hair tools once they are completely cool. Add smaller cups or dividers for brushes, clips, and hair ties. Avoid placing hot tools directly into natural fiber baskets unless you enjoy learning about fire safety the dramatic way.
8. Kids’ Bath Basket
Use a plastic basket with drainage holes for bath toys. It can be rinsed easily and dried between uses. Add a cheerful label or waterproof vinyl decal. Keep it simple, because children will not gently curate bath toys by category. They are busy running a rubber-duck navy.
Bathroom Styling Tips for Upcycled Baskets
To make your DIY basket look intentional, repeat colors and textures in the room. If your bathroom has black fixtures, paint a wire basket matte black. If your space has warm wood, choose natural wicker or add leather handles. If the bathroom is mostly white, use woven baskets to add warmth and prevent the room from feeling too sterile.
Use odd numbers when styling open shelves. For example, place two baskets on one shelf and a plant or jar on another. Mix closed storage with decorative accents so the bathroom feels organized but not like a supply closet. Keep everyday products in easy reach and store extras higher or lower.
Also, leave breathing room. A basket stuffed beyond capacity does not look organized; it looks like it is begging for a vacation. Edit what you store, toss expired products, and avoid keeping humidity-sensitive items in the bathroom if they are better stored elsewhere.
Moisture Matters: How to Keep Bathroom Baskets Fresh
The biggest challenge with bathroom basket storage is humidity. Steam and splashes can affect natural fibers, fabric liners, metal finishes, and even labels. To keep your basket upcycle looking good, place natural baskets in dry zones, run the exhaust fan during and after showers, and let damp towels dry before tossing them into a closed basket.
If you notice a musty smell, empty the basket immediately, clean it, and let it dry completely in sunlight or a ventilated space. Wash fabric liners regularly. For wire baskets, check for rust and touch up paint when needed. For wicker, dust between the weave and avoid overloading the basket, which can stretch or crack the fibers over time.
Bathroom storage should make life easier, not create more cleaning work. The best system is one you can maintain with minimal effort. If a basket is hard to clean or always damp, move it to a different location or use it for dry items only.
Budget-Friendly Design Variations
Farmhouse Bathroom Basket
Use a whitewashed wicker basket, gingham liner, and small wooden tag. Store rolled towels or extra toilet paper. Add a sprig of faux eucalyptus if you enjoy the “organized but casually perfect” look.
Modern Minimalist Basket
Choose a black wire basket or paint an old basket matte white. Add a clean printed label and keep contents simple. This works well with floating shelves, black faucets, and neutral tile.
Coastal Spa Basket
Use seagrass, rope, or light rattan. Pair it with white towels, amber glass bottles, and soft blue accents. This style says, “I drink cucumber water now,” even if your real beverage is coffee reheated three times.
Colorful Family Bathroom Basket
Paint baskets in different colors for each family member. Use them for toothbrushes, hair products, or daily care items. Color coding is especially useful for kids and shared bathrooms.
Common Mistakes to Avoid
The first mistake is choosing a basket before measuring the space. Always measure shelf depth, cabinet height, and wall clearance. A basket that is half an inch too tall will spend its life annoying you.
The second mistake is using absorbent baskets in wet zones. Natural baskets are beautiful, but they are not shower caddies. Keep wicker and seagrass away from direct moisture.
The third mistake is skipping the cleaning step. Paint and sealer do not stick well to dust, soap residue, or mystery grime. Clean first, decorate second.
The fourth mistake is over-organizing. You do not need a basket for every single cotton swab category. Group items in ways that match your real routine. A system that looks good but does not function will fall apart quickly.
The final mistake is forgetting maintenance. Every few weeks, empty the basket, wipe the surface underneath, remove expired products, and wash the liner. This five-minute reset keeps your bathroom looking fresh without a weekend cleaning marathon.
Conclusion: Give That Basket a Bathroom Promotion
A DIY basket upcycle for your bathroom is proof that small projects can make a big difference. With a little cleaning, paint, lining, labeling, and smart placement, an old basket can become a custom storage solution that improves both style and function. It can hide clutter, simplify routines, warm up a sterile bathroom, and help every item find a proper home.
The best part is that this project does not require perfection. A slightly imperfect basket often has more character than something brand new from a store shelf. The goal is not to create a showroom bathroom where nobody is allowed to breathe. The goal is to make your real bathroom easier to use, easier to clean, and nicer to look at every day.
So before you buy another organizer, shop your own home. Check the closet, laundry room, garage, or thrift pile. That forgotten basket may be one coat of paint and one cute label away from becoming the hardest-working piece in your bathroom.
Real-Life Experience: What I Learned from Upcycling Bathroom Baskets
The first time I tried a bathroom basket upcycle, I thought it would be a quick “wipe it, paint it, done” project. Famous last words. The basket was an old wicker one that had lived in a hallway closet for years, holding scarves, batteries, a dog leash, and one lonely mitten nobody was willing to throw away. It was sturdy but dusty, and the color had faded into a shade best described as “forgotten oatmeal.” Still, the size was perfect for a guest bathroom shelf, so I decided to give it a new job.
The biggest lesson came immediately: cleaning matters more than expected. Wicker hides dust in every little groove, and if you skip that step, paint will highlight the texture in all the wrong ways. I used a soft brush, a barely damp cloth, and patience. Not glamorous, but very effective. After it dried, I sprayed it with several light coats of warm white paint. The first coat looked patchy, and for a moment I questioned every life decision that had led me to painting a basket in the driveway. But by the third light coat, it looked fresh, bright, and expensive enough to start acting superior.
I added a simple striped fabric liner using an old tea towel. That liner made the basket feel finished, but it also made it practical. Guests could grab washcloths without snagging them on the wicker, and the fabric could be removed and washed. Then I tied on a small kraft-paper tag labeled “Guest Towels.” It was a tiny detail, but it changed the whole look. Suddenly, the basket was not just storage. It was hospitality with handles.
Another experience involved an under-sink cabinet, which was less charming and more “enter at your own risk.” I used three mismatched baskets: one for cleaning supplies, one for backup toiletries, and one for hair products. Instead of painting them all the same color, I added matching labels and placed them in a row. That taught me an important design trick: baskets do not have to match perfectly if they coordinate in purpose, color tone, or labeling. A little consistency can make mismatched pieces look collected instead of chaotic.
I also learned what not to do. Do not put a natural wicker basket directly on the bathroom floor near a tub if your family treats bath time like a water park. Do not store damp towels in a closed basket and expect freshness. Do not use a deep basket for tiny skincare bottles unless you enjoy digging for serum like an archaeologist. And definitely do not skip measuring. One basket I loved was too deep for the shelf by less than an inch, which is the kind of tiny inconvenience that somehow feels personal.
The most successful basket upcycles were the ones designed around actual habits. A pretty basket for extra toilet paper worked because everyone needed it. A small tray basket by the sink worked because it corralled daily items without hiding them. A guest basket worked because it solved a real problem. The less successful ones were purely decorative and ended up holding random objects. Function first, cute second. Luckily, with baskets, cute usually catches up quickly.
What I enjoy most about this project is how forgiving it is. If the paint is imperfect, the texture hides it. If the liner is not sewn perfectly, it still looks cozy. If the label changes, you can swap it out. Upcycling baskets is not about creating a flawless magazine bathroom. It is about making a normal bathroom feel calmer, warmer, and more organized using something you already had. That is practical, sustainable, and just fancy enough to make you feel like you have your life together before 9 a.m.
Note: For best results, keep natural baskets away from direct splashes, let paint and sealer cure fully before use, ventilate the bathroom well, and choose washable liners for baskets that hold towels, toiletries, or daily-use products.











