
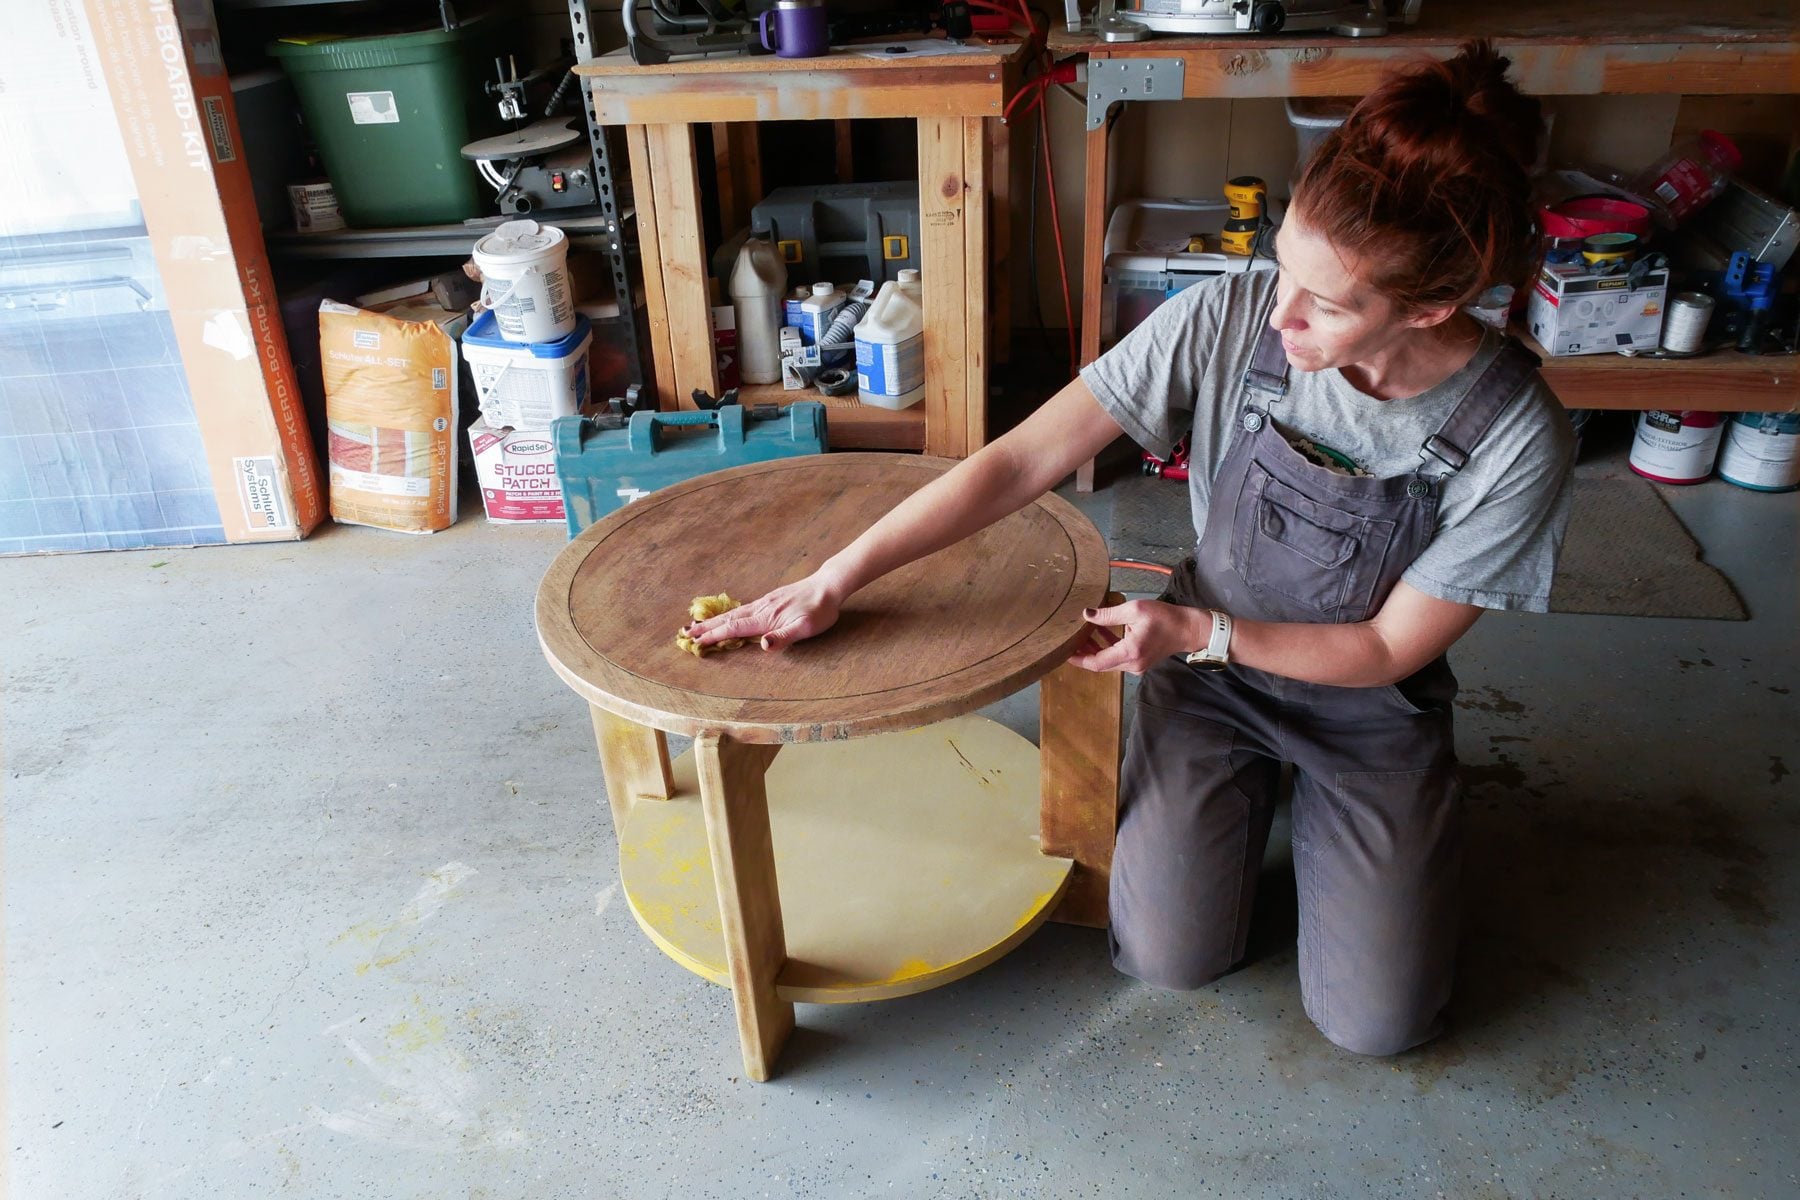
Learning how to stain furniture is one of those DIY skills that feels intimidating until you actually do it. Then, somewhere between wiping on the first coat and realizing the wood grain suddenly looks like it has been upgraded to first class, you understand why people get hooked. Staining furniture can turn a tired thrift-store dresser, a scratched coffee table, or an unfinished pine bookcase into a piece that looks warmer, richer, and far more expensive than it really was.
The trick is not magic. It is preparation, patience, and not pretending that “close enough” sanding will somehow disappear under stain. Spoiler: it will not. Stain is brutally honest. Paint covers mistakes like a polite houseguest; stain points at every scratch, swirl mark, glue smear, and dusty corner like a detective in the final scene of a mystery movie.
This guide walks you through the full process of staining furniture, from choosing the right stain to sanding, conditioning, applying color, sealing, and fixing common problems. Whether you are refinishing wood furniture for the first time or trying to rescue a family table with emotional value and questionable varnish, this step-by-step tutorial will help you get a smooth, durable, beautiful finish.
What Does Staining Furniture Actually Do?
Wood stain is not the same as paint. Paint sits on the surface and covers the wood. Stain soaks into the wood and changes its color while still allowing the grain pattern to show. That is why a stained oak table still looks like oak, a walnut dresser still has depth, and a pine shelf still looks charmingly rustic instead of flat and plastic.
Staining furniture can help you darken light wood, refresh faded pieces, match new furniture to older items, or give unfinished wood a polished appearance. It can also highlight beautiful grain patterns that were hiding under dust, old finish, or years of being used as a landing pad for coffee mugs, mail, and emotional baggage.
Best Types of Stain for Furniture
Before you open a can and start brushing with confidence that may or may not be deserved, choose the right kind of stain. Furniture projects usually work best with one of these options.
Oil-Based Stain
Oil-based stain is a classic choice for wood furniture. It usually penetrates deeply, gives rich color, and allows a longer working time before it dries. That extra time makes it easier to wipe off excess stain and even out the color. The downside is odor, longer drying time, and cleanup with mineral spirits. Use it in a well-ventilated area and treat oily rags with serious respect.
Water-Based Stain
Water-based stain dries faster, has lower odor, and cleans up with soap and water. It is a great option for indoor furniture, especially when you want a quicker project or a wider range of modern colors. Because water-based products can raise the wood grain, many DIYers lightly dampen the wood first, let it dry, and sand smooth before staining.
Gel Stain
Gel stain is thicker than traditional stain. It sits more on the surface, which makes it useful for vertical pieces, detailed furniture, and woods that tend to blotch. Gel stain is often a good choice for cabinets, chair legs, and furniture with carved trim because it is less runny and easier to control.
Stain-and-Polyurethane Products
Combination stain-and-finish products can save time on some projects, especially when refreshing already-finished furniture. However, they require careful application. Heavy coats can look streaky or muddy. If you are a beginner, separate stain and topcoat often give you more control.
Tools and Supplies You Will Need
A successful furniture staining project starts with the right supplies. You do not need a professional workshop, but you do need more than one lonely brush and a dream.
- Drop cloth or plastic sheeting
- Screwdriver for removing hardware
- Painter’s tape, if needed
- Wood cleaner or mild dish soap solution
- Sandpaper in several grits, such as 80, 120, 180, and 220
- Sanding block or orbital sander
- Clean lint-free rags
- Vacuum or shop vac
- Tack cloth or microfiber cloth
- Wood filler, if repairing dents or holes
- Pre-stain wood conditioner
- Wood stain
- Foam brush, natural-bristle brush, or staining pad
- Protective gloves and eye protection
- Respirator or dust mask for sanding
- Polyurethane, varnish, lacquer, shellac, or furniture wax for sealing
Step-by-Step Guide: How To Stain Furniture
Step 1: Choose the Right Furniture Piece
Not every piece is a good candidate for staining. Solid wood furniture is ideal because you can sand it without worrying about cutting through a thin decorative layer. Veneer furniture can also be stained, but it requires a gentle touch because veneer is thin. Sand too aggressively and you may discover the plywood underneath, which is not the kind of surprise anyone enjoys.
If the furniture is laminate, plastic, or MDF with a fake wood print, traditional stain will not absorb properly. In that case, consider paint, gel stain designed for nonporous surfaces, or a specialty refinishing product.
Step 2: Remove Hardware and Clean the Surface
Take off knobs, pulls, hinges, and removable parts. Put the hardware in a labeled bag unless you enjoy crawling around later asking, “Was this tiny screw important?”
Clean the furniture thoroughly before sanding. Dust, furniture polish, wax, cooking grease, and hand oils can interfere with stain absorption. For most pieces, a mild dish soap solution and a barely damp cloth work well. Do not soak the wood. Wipe it clean, then let it dry completely.
Step 3: Strip the Old Finish If Necessary
If your furniture has paint, thick varnish, or a damaged glossy finish, you may need to strip it before staining. Chemical stripper can soften old coatings so they can be scraped away. Always follow the product label, work in a ventilated area, wear gloves and eye protection, and protect surrounding surfaces.
If the existing finish is thin and you are staining darker, you may be able to sand instead of stripping completely. However, stain must reach exposed or properly prepared wood to look even. Trying to stain over a sealed surface usually leads to disappointment, streaks, and a strong desire to blame the furniture.
Step 4: Repair Dents, Cracks, and Holes
Use stainable wood filler for nail holes, dents, or deep scratches. Let it dry fully, then sand it smooth. Keep in mind that filler may absorb stain differently than surrounding wood. For visible areas, test your filler and stain combination on scrap wood or a hidden spot first.
For large repairs, another option is to stain the furniture first, seal it with one coat of topcoat, and then use a colored putty that matches the finished stain color. This can help repairs blend better on highly visible surfaces.
Step 5: Sand the Furniture Properly
Sanding is the most important step in staining wood furniture. It removes old finish, smooths imperfections, opens the grain, and prepares the surface to accept stain evenly. Poor sanding will show up later, usually right after you have told yourself, “This is going great.”
Start with a medium grit if the piece has an old finish or rough areas. For many furniture projects, 120-grit sandpaper is a practical starting point. For unfinished rough wood, you may start with 80-grit, then move to 120, 180, and finally 220. Always sand with the grain whenever possible.
Do not jump from coarse sandpaper straight to fine. Each grit removes scratches left by the previous grit. Skipping steps can leave marks that stain will darken. On flat surfaces, an orbital sander can save time. On edges, corners, carvings, and veneer, hand sanding gives more control.
Step 6: Remove Every Bit of Dust
After sanding, remove dust with a vacuum, then wipe with a tack cloth or clean microfiber cloth. Dust left behind can create a gritty finish and prevent stain from absorbing evenly. If you use a damp cloth, let the wood dry completely before applying stain.
This is also the moment to inspect the furniture under good light. Look for scratches, shiny spots, glue residue, or areas where the old finish remains. If you see them now, fix them now. Once stain goes on, those tiny problems become dramatic little celebrities.
Step 7: Apply Pre-Stain Wood Conditioner
Pre-stain wood conditioner helps reduce blotchiness, especially on softwoods and unevenly porous woods. Pine, birch, maple, alder, and cherry can absorb stain unevenly, creating dark patches and pale areas. Conditioner partially seals the wood so stain penetrates more consistently.
Apply conditioner according to the label instructions, usually with a brush or cloth. Let it penetrate, wipe off excess, and stain within the recommended time window. This small step can make the difference between “custom furniture” and “zebra table, but not on purpose.”
Step 8: Test the Stain Color
Never trust the color on the can completely. Stain looks different depending on wood species, sanding grit, number of coats, application method, and lighting. Test the stain on the underside of the furniture, inside a drawer, or on a scrap piece of the same wood.
If the color is too light, try a second coat after the first dries. If it is too dark, wipe it off sooner or choose a lighter shade. If it looks blotchy, use conditioner or consider gel stain. Testing may feel like an extra step, but it is much faster than refinishing the entire piece twice.
Step 9: Apply the Stain
Stir the stain well, but do not shake it unless the label specifically says to. Shaking can create bubbles. Apply stain with a cloth, foam brush, bristle brush, or staining pad, working in the direction of the grain. Cover one manageable section at a time.
Let the stain sit for the recommended time, often a few minutes, then wipe off the excess with a clean lint-free rag. The longer stain sits before wiping, the darker the color usually becomes. Do not leave puddles or sticky patches. Excess stain that is not wiped away can dry unevenly and cause a tacky surface.
Step 10: Let the Stain Dry
Drying time depends on the product, temperature, humidity, airflow, and how much stain was applied. Water-based stains often dry faster than oil-based stains, but every product is different. Read the label and resist the urge to rush.
If the surface feels tacky, it is not ready for a topcoat. Give it more time. A finish applied over stain that has not dried properly can trap solvents, cause cloudiness, or create adhesion problems.
Step 11: Add a Second Coat If Needed
If you want a deeper color, apply a second coat once the first coat is dry enough according to the manufacturer’s instructions. Apply it the same way: brush or wipe on, let it sit briefly, then wipe off excess. Avoid piling on too many coats. More stain is not always better; sometimes it is just stickier.
Step 12: Seal the Stained Furniture
Stain adds color, but it does not provide enough protection by itself. Furniture needs a clear topcoat to resist moisture, scratches, fingerprints, and daily use. For a tabletop, desk, dresser top, or dining chair, polyurethane is a durable choice. Water-based polyurethane dries clear and has lower odor. Oil-based polyurethane adds warmth and amber tone.
Apply thin coats with the grain. Let each coat dry, then lightly sand between coats with fine sandpaper or a sanding sponge, usually around 220 to 400 grit depending on the product instructions. Remove dust before applying the next coat. Two coats may be enough for low-use furniture, while tabletops often benefit from three coats.
Common Mistakes When Staining Furniture
Mistake 1: Not Sanding Enough
If there is one shortcut that causes the most trouble, it is lazy sanding. Stain emphasizes scratches, swirl marks, and uneven surfaces. Take your time. Future you, the one admiring the finished dresser, will be grateful.
Mistake 2: Forgetting to Wipe Off Excess Stain
Stain is meant to penetrate wood, not sit on top in gummy puddles. Always wipe off the excess. If the surface feels sticky hours later, too much stain may have been left behind.
Mistake 3: Skipping Wood Conditioner
Soft and blotch-prone woods often need conditioner. Without it, pine can look patchy, maple can look uneven, and cherry can surprise you with dark blotches in places you did not invite them.
Mistake 4: Staining in Bad Conditions
Very humid, cold, or dusty conditions can affect drying and finish quality. Stain in a clean, ventilated area with moderate temperature. Avoid direct sunlight, which can dry stain too quickly and make blending harder.
Mistake 5: Ignoring Safety
Sanding creates wood dust, and refinishing products can release fumes. Wear eye protection, gloves, and an appropriate mask or respirator. If the furniture is old and may contain lead-based paint, do not sand or strip it casually. Test first and follow lead-safe practices.
Oil-based stain and finish rags can also be a fire hazard. Lay used rags flat outdoors to dry according to product directions, or place them in a sealed metal container filled with water and detergent until proper disposal. Never toss oily rags in a pile. That is not “cleaning up”; that is writing the opening scene of a fire department safety video.
How To Stain Different Types of Furniture
How To Stain a Table
Tables need extra durability because they face cups, plates, laptops, elbows, and occasionally someone using them as a step stool even though everyone knows better. Sand the top carefully, stain evenly, and use at least two to three coats of protective topcoat. Let the finish cure fully before heavy use.
How To Stain a Dresser
Remove drawers and hardware first. Stain drawer fronts separately so you can work flat and avoid drips. Pay attention to corners and edges, where stain can collect. Replace hardware only after the topcoat has dried.
How To Stain Chairs
Chairs have spindles, legs, curves, and tight joints that require patience. Gel stain can be helpful because it clings to vertical surfaces. Use small brushes or cloth pieces to reach detailed areas, then wipe carefully to avoid dark buildup.
How To Stain Veneer Furniture
Veneer can look beautiful after staining, but it is thin. Sand gently with fine grits and avoid staying in one place too long with a power sander. If you sand through the veneer, repair becomes much harder. When in doubt, hand sand.
Choosing the Right Stain Color
Furniture stain color affects the mood of a room. Light oak and natural finishes feel casual, airy, and modern. Walnut, espresso, and dark mahogany feel dramatic and formal. Gray and weathered stains create a farmhouse or coastal look. Warm brown stains are versatile and forgiving, which is probably why they are the jeans of the furniture world.
When choosing a color, consider the wood species, flooring, nearby furniture, wall color, and natural light. A dark stain can look elegant in a bright room but heavy in a small space. A pale stain can make a piece feel fresh but may not hide imperfections as well.
How Long Should Stained Furniture Dry Before Use?
Stain may feel dry to the touch before it is ready for a topcoat, and topcoat may feel dry before it is fully cured. Drying means the surface is no longer wet. Curing means the finish has hardened enough for regular use. This can take several days or longer depending on the product.
For tabletops and high-use furniture, avoid placing heavy objects, hot dishes, or decorative items on the surface too soon. Let the finish cure according to the product label. Waiting is not glamorous, but neither is peeling a coaster out of soft polyurethane.
How To Maintain Stained Furniture
Once your furniture is stained and sealed, care for it gently. Dust with a soft cloth. Clean spills quickly. Use coasters, pads, or placemats on tabletops. Avoid harsh cleaners, ammonia, and abrasive scrubbers. For deeper cleaning, use a product suitable for the type of topcoat you applied.
If the furniture starts looking dull years later, you may be able to clean it, lightly scuff the surface, and add a fresh coat of finish. A well-stained piece can last for decades when treated with reasonable care and not used as a cutting board, skateboard ramp, or science experiment.
Real-World Experience: Lessons From Staining Furniture
The first big lesson about staining furniture is that the project starts long before the stain touches the wood. Most beginners imagine the dramatic part: wiping on rich walnut color and watching the grain appear. That part is fun. It is the movie trailer. The actual movie includes cleaning, sanding, vacuuming, inspecting, sanding again, wondering whether one corner is still shiny, and then discovering dust in a place dust had no business being.
One common experience is underestimating how different woods behave. Pine, for example, can look innocent and friendly sitting there in the garage. Then stain hits it, and suddenly it has dark patches like it was colored by a moody raccoon. That is where pre-stain conditioner proves its worth. On blotch-prone woods, conditioner can make the result look intentional instead of accidental.
Another practical lesson is that the underside of furniture is your best testing laboratory. Before staining a visible top, test the full process underneath: sanding grit, conditioner, stain, drying time, and topcoat. The stain color on the label is only a suggestion. Wood species, age, grain, and prep work all change the final appearance. A color called “Early American” may look warm and classic on oak but unexpectedly orange on pine. Testing saves heartbreak, and heartbreak is already available for free in plenty of other areas of life.
Working in sections also matters. On a large tabletop, applying stain across the whole surface before wiping can lead to uneven color because one side absorbs longer than the other. A better method is to stain a manageable area, wipe it back, and keep a wet edge as you move. For chair legs, carvings, and trim, use smaller brushes and rags. Stain loves to hide in corners and then emerge later as a dark drip, usually after you have already cleaned up.
Dry time is another area where patience pays. A surface can feel almost dry but still be holding solvents underneath. If you apply polyurethane too soon, the finish may not bond well or may stay soft. When conditions are humid, cold, or still, add extra drying time. A fan can help air movement, but do not aim dusty air directly at your wet finish unless you want a textured surface that says “artisan sandstorm.”
Topcoat choice changes the final feel of the piece. A satin polyurethane gives a soft, practical finish that hides minor imperfections better than gloss. Gloss can look beautiful but reveals dust and brush marks more easily. Matte finishes feel modern but may need careful application to avoid cloudy buildup. For furniture that gets touched daily, durability should matter as much as appearance.
The most satisfying part of staining furniture is seeing an overlooked piece become useful again. An old dresser can turn into a bedroom centerpiece. A worn coffee table can look custom. A plain unfinished bookcase can suddenly match the rest of the room. The process is not difficult, but it rewards attention. Clean well, sand with care, test first, wipe off excess stain, seal properly, and give the finish time to cure. Do those things, and your furniture will not just look stained; it will look finished, loved, and ready for its second life.
Conclusion
Staining furniture is one of the most rewarding DIY home improvement projects because it combines creativity with practical value. You can refresh old wood furniture, customize unfinished pieces, and create a finish that fits your home perfectly. The best results come from careful prep: clean the surface, sand properly, remove dust, condition blotch-prone wood, test your color, apply stain evenly, wipe away excess, and protect everything with a durable topcoat.
The process takes time, but it is not complicated. Think of it as giving your furniture a very thorough spa day, except with sandpaper, stain, and fewer cucumber slices. With patience and the right technique, you can turn scratched, faded, or plain wood into a piece that looks warm, polished, and proudly handmade.











