
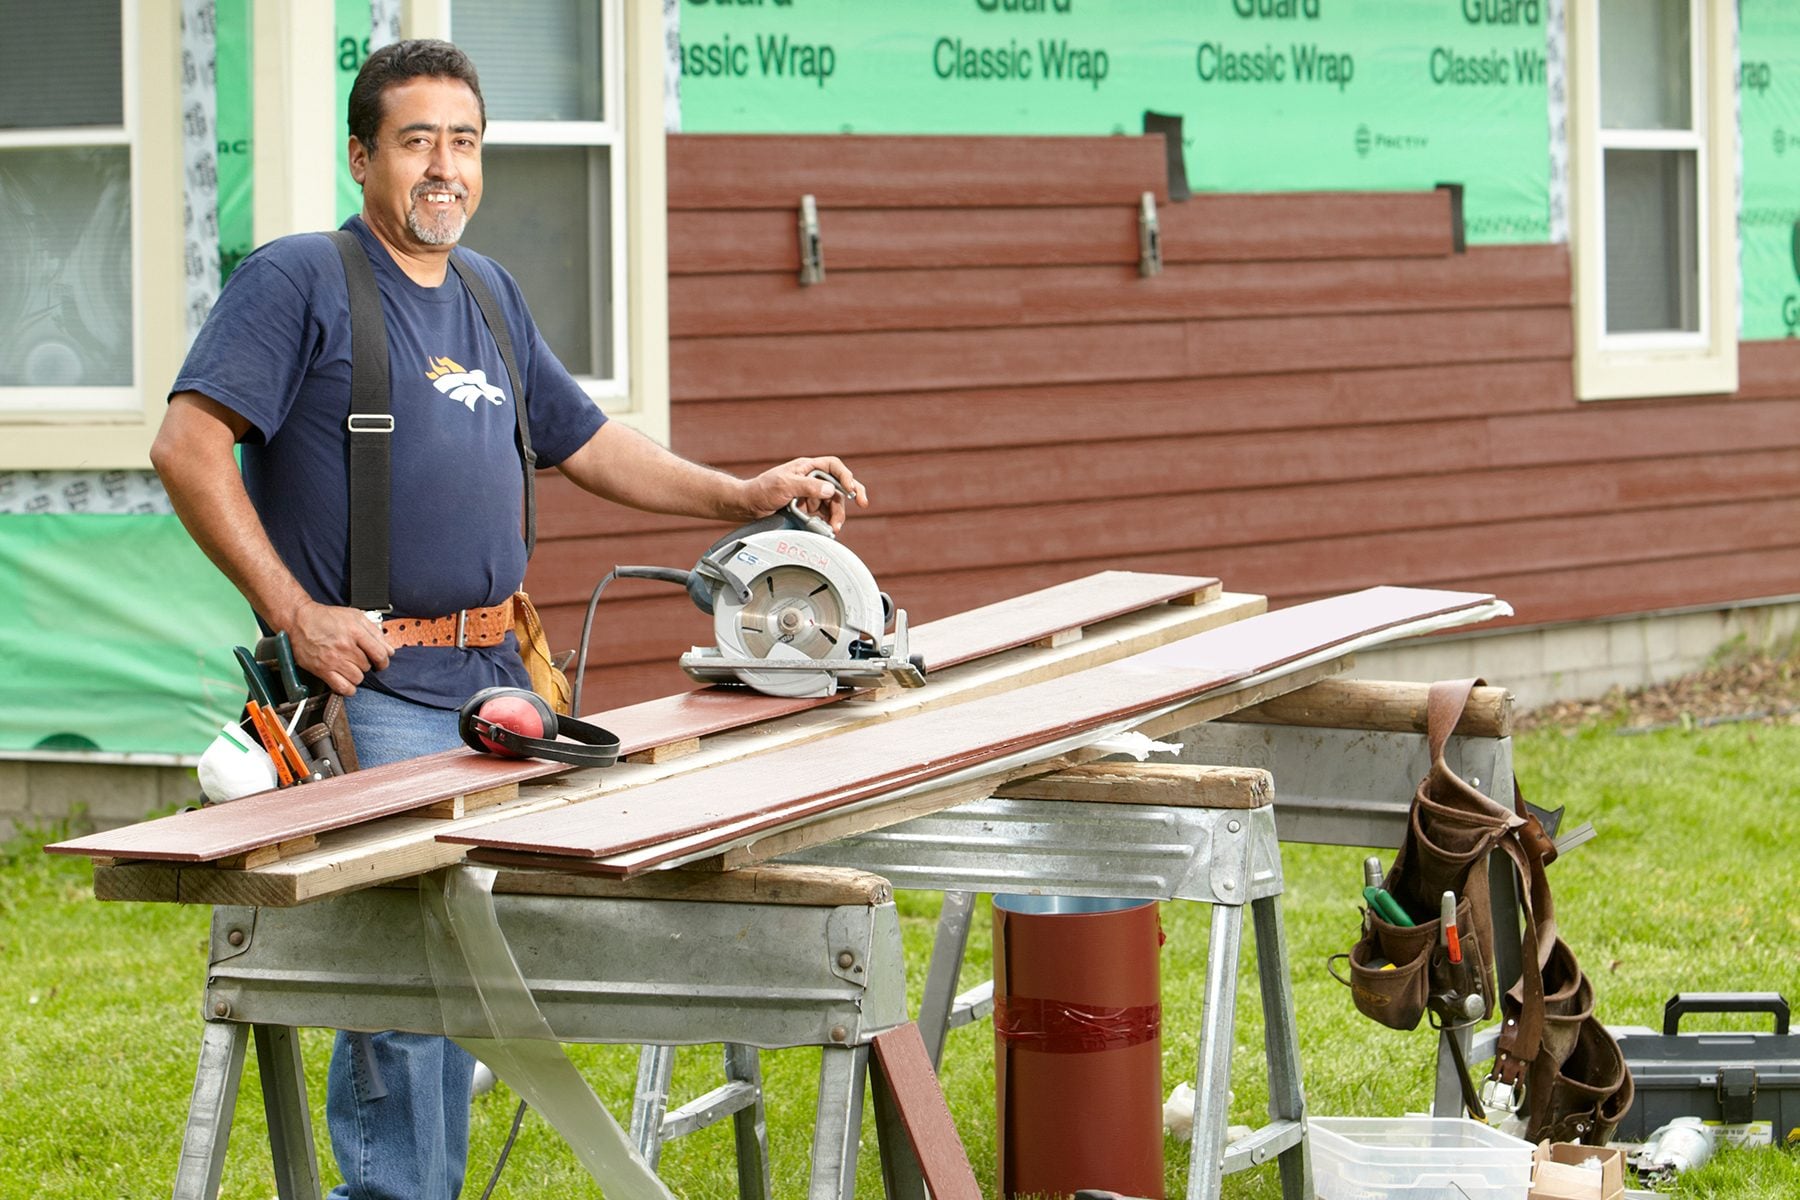
Fiber cement siding can give a house the clean lines of painted wood without volunteering for wood’s favorite hobbies: rotting, feeding insects, and demanding constant attention. It is durable, noncombustible, and available as lap boards, panels, shakes, and trim. Yet it is not foolproof. A beautiful plank installed over sloppy flashing is still a very expensive rain funnel.
Correct fiber cement siding installation is a wall-management project, not merely an exercise in firing nails. The job requires a flat substrate, a continuous drainage plane, correctly integrated flashing, safe dust control, compatible fasteners, proper clearances, and protected cut edges. Requirements vary by brand, profile, climate, framing, wind exposure, and local code, so the current instructions for the exact product always outrank general advice.
Why Fiber Cement Requires Special Handling
Fiber cement is commonly made with cement, mineral fillers, cellulose fibers, and water. The boards are tough after installation but heavy and somewhat brittle while being moved. Carry long planks vertically on edge with help; carrying one flat like an oversized pizza can end with two smaller, less useful pizzas.
The material also contains crystalline silica. Powered cutting can release fine dust that should not be inhaled, so a low-dust cutting plan is essential. Fiber-cement shears, approved score-and-snap methods, or a dedicated saw connected to effective dust collection are better choices than uncontrolled dry cutting.
Plan the Installation Before Opening the First Bundle
Read the Product Guide and Check Local Rules
Download the latest guide for the exact siding line, thickness, finish, and regional formulation. Verify approved sheathing, stud spacing, fasteners, joint details, clearances, wind-load requirements, exterior-insulation limits, and rainscreen options. Obtain permits where required. Coastal, high-wind, and wildfire-prone locations may need special attachment or wall-assembly details.
Order the Complete System
Measure the wall area, subtract large openings, and add waste for cuts and breakage. About 10 percent extra may suit a simple house, while dormers, gables, and decorative patterns often need more. Include starter material, trim, flashing, compatible sealant, approved fasteners, touch-up coating, weather-resistive barrier materials, and mounting blocks.
Store Boards Dry and Flat
Keep siding covered, flat, and off the ground. Do not install saturated boards. Protect factory-finished faces from mud and abrasive dust, and carry long pieces on edge. Careful storage prevents shrinkage, cracking, staining, and the classic job-site strategy known as “perhaps the caulk will hide it.”
Tools and Silica-Dust Safety
A practical tool kit includes a tape measure, chalk line, level or laser, square, siding gauges, pneumatic nailer where approved, drill, snips, caulk gun, stable cutting table, and safe ladders or scaffolding. Use blades designed for fiber cement, not ordinary high-tooth-count wood blades.
Wear eye and hearing protection, gloves, and suitable work clothing. Follow OSHA rules plus the tool and siding manufacturers’ instructions. OSHA’s specified method for handheld saws with blades eight inches or smaller requires outdoor cutting with a commercially available dust-collection system that provides the tool manufacturer’s recommended airflow and uses a filter rated at least 99 percent efficient. Clean with a HEPA-filtered vacuum or another approved method rather than dry sweeping or compressed air.
How to Install Fiber Cement Siding Step by Step
1. Remove Obstructions and Repair the Wall
On a re-siding project, remove cladding that prevents a flat, code-compliant assembly. Inspect sheathing, framing, window openings, rim joists, and roof intersections for rot, insects, loose panels, and old leaks. Repair structural or moisture damage before covering it. Siding improves curb appeal; it does not provide counseling for hidden decay.
2. Create a Flat, Plumb Substrate
Fiber cement follows the plane beneath it. Correct bowed framing, proud sheathing edges, and uneven furring before installation. When working over masonry, exterior foam, or a rainscreen, use the specified furring dimensions, spacing, and structural fasteners. A longer nail does not automatically turn insulation into framing.
3. Install the Weather-Resistive Barrier
Apply an approved weather-resistive barrier, or WRB, in shingle fashion so upper layers lap over lower layers and direct water outward. Integrate it with the foundation, windows, doors, decks, roof intersections, utility penetrations, and transitions to masonry. Fiber cement is cladding, not the wall’s primary waterproofing layer.
A ventilated rainscreen made with vertical furring or an approved drainage mat can improve drainage and drying, particularly in wet climates. Coordinate it with the product manufacturer, wall design, local code, and fastener engineering instead of assuming every assembly is identical.
4. Flash Every Opening and Transition
Install sill-pan, jamb, and head flashing around windows and doors in the proper drainage sequence. Use Z-flashing above horizontal trim, band boards, mounting blocks, and similar projections. At roof-to-wall intersections, install step flashing and kick-out flashing that sends runoff into the gutter rather than behind the siding. Use butt-joint flashing where the manufacturer requires it.
Do not substitute sealant for flashing. Caulk ages; gravity remains annoyingly committed to its career.
5. Install Trim and Establish the Starter Course
Set corner boards, window and door trim, and approved blocks for lights, faucets, vents, and electrical equipment. Mark a level baseline and install the specified starter strip so the first lap course sits at the correct angle. Maintain the required clearance above soil, paving, roofs, decks, and horizontal flashing. These values differ by product and condition, so use the manufacturer’s table rather than one memorized number.
6. Lay Out Courses With a Story Pole
Mark the planned exposure on a story pole and coordinate courses with window heads, sills, band boards, and soffits. Keep the reveal consistent and adjust it only within permitted limits. Snap reference lines every few courses so tiny errors do not accumulate into a top board shaped like an apology.
7. Cut Boards With Full Support
Support both sides of every cut. Shears create relatively little airborne dust, while a dedicated fiber-cement saw with an approved blade and dust extraction generally makes cleaner straight cuts. Perform powered cutting outdoors. For notches, avoid sharp inside corners when the instructions call for drilled relief holes, and never force the tool through an unsupported plank.
Remove dust from factory finishes promptly with a soft brush, microfiber cloth, or HEPA vacuum. Dust left on damp boards may stain or bond to the coating.
8. Fasten Each Course Correctly
Use approved corrosion-resistant nails or screws with the required head, shank, length, spacing, and framing penetration. Stainless steel is often preferred in coastal or highly corrosive locations; other environments may permit hot-dipped galvanized fasteners. Fasten into studs or an approved structural nail base as directed.
For blind-nailed lap siding, place fasteners in the specified zone near the top edge. Drive heads snug and flush, not buried or left proud. Overdriving can fracture the board; underdriving prevents the next plank from lying flat. Replace cracked pieces instead of negotiating with them.
9. Stagger Joints and Preserve Drainage Gaps
Stagger butt joints between courses and place them over framing or approved off-stud accessories as required. Install joint flashing where specified. At trim and dissimilar materials, maintain the prescribed gap and use compatible sealant only where directed.
Do not caulk spaces intended to drain, including gaps above horizontal flashing. Do not fill lap overlaps unless the manufacturer explicitly requires it. More caulk is not automatically more waterproof; sometimes it creates a tiny bathtub behind the wall.
10. Finish and Inspect
Seal or coat exposed cut edges according to the product instructions. Use color-matched touch-up coating sparingly on factory-finished boards. Paint primed siding with an approved high-quality exterior coating within the required time and weather conditions.
Before removing access equipment, check alignment, clearances, fastener depth, damaged edges, missing flashing, open penetrations, blocked drainage paths, and sealant adhesion. Photograph concealed flashing before it is covered. Those images are valuable for quality control and future repairs.
Common Installation Mistakes
- Ignoring product instructions: Brand-specific details vary, and warranty coverage may depend on compliance.
- Installing over a wavy wall: Rigid boards reveal substrate defects instead of politely ignoring them.
- Relying on caulk instead of flashing: Sealant cannot replace pan, head, step, Z-, or kick-out flashing.
- Cutting without silica controls: Uncontrolled dry sawing creates a preventable health hazard.
- Using wrong or overdriven fasteners: Poor attachment can crack boards, stain finishes, or weaken wind resistance.
- Violating clearances: Siding too close to grade, roofing, slabs, or flashing can stay wet.
- Sealing drainage paths: Caulking every visible gap may trap water.
- Leaving cut edges untreated: Exposed edges can absorb moisture and reduce coating performance.
DIY or Professional Installation?
A skilled DIYer may successfully side a one-story shed, garage, or simple wall with safe cutting equipment and a reliable helper. A whole house is less forgiving. Long heavy boards, scaffolding, complex flashing, electrical penetrations, exterior insulation, and wind-load requirements often justify professional installation.
When comparing contractors, ask which manufacturer guide controls the work, how silica dust will be managed, how windows and roof intersections will be flashed, and how fasteners and clearances will be verified. A low bid that excludes water management is not a bargain. It is a future invoice wearing a fake mustache.
Field Experience: What the Job Actually Teaches You
The first practical lesson is that layout saves more time than speed. Installers who rush to place the first board sometimes discover near the second-story windows that their course lines land nowhere useful. A story pole, elevation sketch, and ten minutes spent calculating the reveal can prevent hours of ripping narrow pieces near the soffit. The wall does not care how energetic the crew felt at 8 a.m.; it remembers every accumulated eighth of an inch.
The second lesson is that fiber cement rewards a two-person rhythm. One worker measures and cuts while another installs, with siding gauges supporting each plank at a consistent exposure. Long boards are carried vertically, rotated into position, and held until the fasteners are set. When one person tries to wrestle a 12-foot plank alone from a ladder, productivity falls, corner damage rises, and the vocabulary becomes surprisingly creative.
Experienced crews also build a dedicated cutting station downwind and away from open doors, vehicles, and neighbors’ laundry. The station has a stable bench, full board support, dust collection, spare blades, edge-treatment supplies, and a waste bin. This organization keeps silica dust away from the building and avoids awkward cuts on scaffolding. It also reduces breakage because the offcut does not drop and tear away the final inch.
Material staging matters nearly as much as cutting. Product bundles should be placed where workers can reach them without carrying boards through mud, around sharp corners, or across busy walkways. Trim, flashing, fasteners, sealant, and touch-up supplies should be organized by elevation. Fewer unnecessary trips mean fewer dropped boards and fewer improvised substitutions.
Another recurring lesson is to inspect flashing before it disappears. Once siding covers a window head or roof-wall intersection, a backward lap may look normal from the ground. Good installers pause, photograph the detail, and verify that every upper layer drains over the lower one. They pay special attention to kick-out flashing because one missing piece can send years of roof runoff behind the wall. Water rarely announces an error immediately; it prefers a slow reveal with expensive supporting characters.
Fastener setup deserves a test board. Air pressure that worked on framing may bury siding nails. Before beginning an elevation, experienced installers fire several fasteners into a scrap assembly, adjust the depth control, and confirm that heads sit flush. They repeat the test when hose length, temperature, substrate, or tool changes. A minute of calibration is cheaper than replacing a row of cracked planks.
Finally, the cleanest installations treat caulk as a designed joint material rather than decorative frosting. Installers identify which joints need sealant, which need flashing, and which must remain open for drainage. They tool narrow beads, use compatible products, and avoid smearing factory finishes. The best wall usually comes from a crew that plans water flow, handles boards gently, controls dust, and resists improvisation. Fiber cement is durable, but its durability begins with disciplined detailsand a final walk-around before everyone packs up.
Conclusion
Correct fiber cement siding installation is a chain of precise decisions. Begin with sound framing and a flat substrate. Build a continuous drainage plane. Flash every interruption. Cut outdoors with effective dust control. Use approved fasteners, gaps, overlaps, and clearances. Protect cut edges and inspect the work before the ladders come down.
The siding may last for decades, but its performance depends on what happens behind it and along its edges. Follow the current product instructions, local code, and engineered details for the project, and the finished exterior will look sharp, shed water properly, and require far fewer emergency conversations with a moisture meter.
Research note: Manufacturer guidance was synthesized from current James Hardie, Allura, and Nichiha product and installation resources. OSHA regulations and safety publications informed the silica-dust precautions. Water-management and field-installation recommendations were cross-checked against Building Science Corporation, the U.S. Department of Energy, Fine Homebuilding, This Old House, and Family Handyman. Product-specific instructions and local codes control whenever they differ from this educational overview.











