
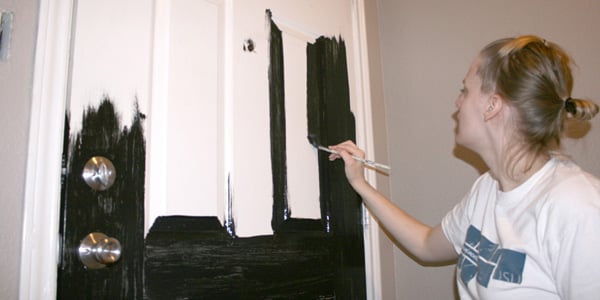
A little black dress can rescue a wardrobe, and a little black door can perform roughly the same miracle for a tired home exterior. It is crisp, adaptable, slightly dramatic, and surprisingly forgiving. More importantly, repainting and refining an existing entrance can produce a major visual transformation without introducing your savings account to a wrecking ball.
This continued entry remodel focuses on turning an ordinary doorway into a polished focal point. The project begins with black paint, but the finished look depends just as much on preparation, hardware, lighting, weather protection, and the small details surrounding the door. Done thoughtfully, the result feels intentional rather than merely dark.
Why a Black Front Door Works So Well
Black is one of the most versatile front door colors because it creates contrast without demanding that every other exterior feature compete for attention. Against white siding, it looks sharp and classic. On red brick, it adds definition. Paired with stone, stained wood, gray shingles, or warm stucco, it can make the entry feel grounded and architectural.
A black front door also moves easily between design styles. It can look traditional with polished brass hardware, industrial with matte-black fixtures, contemporary with long linear handles, or transitional with brushed nickel. Unlike a trendy accent color that may feel dated after a few seasons, black usually remains compatible when porch furniture, planters, wreaths, and exterior trim change.
That does not mean every can of black paint produces the same effect. Some blacks have blue, brown, green, or charcoal undertones. A cool black can sharpen a modern gray exterior, while a warmer near-black often looks more comfortable beside brick, cream trim, or natural wood. Testing a sample outdoors is essential because direct sun, shade, reflected landscaping, and porch lighting can all change how the color appears.
Design research basis:
Start With an Entryway Reality Check
Before choosing paint, examine the entrance as a complete system. A beautiful door cannot distract forever from a loose threshold, rotting trim, crooked light fixture, or mysterious draft that whistles every time the wind changes direction.
Inspect the Door and Frame
Open and close the door several times. It should swing smoothly, latch without being lifted or shoved, and sit evenly within the frame. Look for peeling paint, rust, swollen wood, cracks, soft trim, loose hinges, water stains, and daylight showing around the edges.
Minor cosmetic damage can often be repaired with sanding, appropriate filler, primer, and paint. A badly warped slab, deteriorated jamb, failing threshold, or recurring water intrusion may require professional repair or full replacement. Painting over structural trouble is not remodeling; it is putting eyeliner on a raccoon.
Review the Entire Approach
Stand at the sidewalk or driveway and look at the entrance as a visitor would. Is the walkway clear? Are the steps even? Can the house numbers be read from the street? Does the lighting identify the door after sunset? Are shrubs blocking the path or crowding the porch?
A successful entry remodel guides the eye and the feet toward the door. The approach should feel obvious, safe, and welcoming rather than like the first level of an escape-room game.
Plan the Black Door Color Palette
The easiest way to create a cohesive exterior is to repeat a limited number of finishes. The black door may serve as the dominant accent, while the trim, metal hardware, porch light, address numbers, and planters support it.
- White or cream exteriors: Use a true black or soft charcoal with warm brass, bronze, or black hardware.
- Red or brown brick: Consider a warmer black with bronze, antique brass, or aged copper details.
- Gray siding: Choose a black with enough depth to remain distinct from the siding. Brushed nickel or matte black can keep the palette modern.
- Natural wood and stone: A softened black often connects better with organic textures than an extremely blue-black shade.
- Dark exterior walls: Create separation with contrasting trim, glass panels, warm lighting, or distinctive hardware.
Paint sheen matters, too. Satin and semi-gloss finishes are popular for exterior doors because they are easier to clean and more resistant to moisture than flat paint. A high-gloss black door can be glamorous, but it highlights dents, brush marks, and imperfect prep with the enthusiasm of a high-definition television.
How to Paint a Front Door Black
1. Choose the Right Conditions
Check the paint manufacturer’s recommended temperature and humidity range. Avoid painting when rain is expected or when intense sunlight will heat the surface and cause the coating to dry too quickly. If the door must remain in place, begin early enough for the final coat to dry before it needs to be closed.
2. Remove or Protect the Hardware
Removing the lockset, handle, knocker, kick plate, and decorative hardware produces cleaner edges. Take reference photos and store screws in labeled bags. When hardware cannot be removed, protect it carefully with painter’s tape.
3. Clean Before Sanding
Exterior doors collect dust, fingerprints, pollen, traffic film, and residue around the handle. Wash the surface with a suitable cleaner, rinse as directed, and let it dry. Sanding a dirty door simply turns grime into a more evenly distributed design feature.
4. Repair and Sand
Scrape away loose or peeling paint. Repair small dents, cracks, or damaged wood with a filler intended for the door material and exposure conditions. Sand rough areas and feather the edges of sound existing paint so the final finish looks smooth. Remove all dust afterward.
5. Apply the Correct Primer
Primer improves adhesion, blocks stains, and creates a consistent base. Bare wood, exposed metal, repaired areas, glossy surfaces, and major color changes may require different products. Follow the recommendations for wood, steel, fiberglass, or previously painted doors rather than selecting primer through optimism alone.
6. Paint in a Logical Order
For a paneled door, begin with recessed panels and detailed profiles using a quality angled brush. Then paint the horizontal rails, vertical stiles, and broad flat sections with a brush or small roller suited to the coating. Maintain a wet edge and watch corners for drips or pooled paint.
Two thin coats generally create a smoother and more durable result than one heavy coat. Allow the recommended drying time between coats, lightly address imperfections if needed, and avoid reinstalling hardware until the finish is sufficiently cured.
7. Paint the Visible Edges Carefully
The hinged edge, latch edge, top, and bottom may need special treatment depending on the door material and manufacturer’s instructions. Some factory-finished doors have restrictions regarding dark colors or edge painting, so check the warranty before beginning.
Paint preparation basis:
Upgrade the Hardware Without Creating Finish Confusion
New hardware can make an existing door feel substantially more expensive. Choose a lockset and handle that suit the scale of the door. A small knob can look lost on a tall entry, while an oversized pull may overwhelm a narrow cottage door.
Black hardware creates a seamless, monochromatic appearance, although some details can disappear against the paint. Brass and gold-toned finishes provide warmth and contrast. Brushed nickel feels clean and understated, while bronze works especially well with traditional brick, stone, and warm neutral exteriors.
Try to limit the visible entrance to one primary metal finish and, at most, one supporting finish. The lockset, knocker, kick plate, porch light, doorbell, mailbox, and house numbers do not have to be identical, but they should appear related. Five unrelated finishes can make a small porch resemble the hardware aisle after a minor earthquake.
Do Not Forget Security
Confirm that hinges are secure, the latch aligns correctly, and the deadbolt operates smoothly. Decorative improvements should never interfere with the door’s basic job of closing, locking, and protecting the opening. When replacing a lockset, follow the manufacturer’s installation instructions and seek professional help if the frame or strike area is damaged.
Use Lighting to Make the Black Door Look Intentional
Black absorbs light, so a poorly illuminated entry can disappear after sunset. Updated porch lighting restores depth, highlights the paint finish, and makes locks, steps, and house numbers easier to see.
For a single-door entrance, one properly scaled fixture may be enough. A larger entry with sidelights often looks more balanced with a pair of sconces. Covered porches may also benefit from a ceiling fixture or pendant, while subtle path lighting can define the route from the driveway or sidewalk.
Choose exterior-rated fixtures appropriate for their exposure to moisture. Warm light generally feels more welcoming and complements black paint, wood, brick, and brass. Extremely cool light can make a traditional porch feel more like a loading dock.
Entry detail basis:
Finish the Space Around the Door
Refresh the Trim
Crisp trim creates a clean frame around a black door. Repair cracks, fill nail holes, recaulk appropriate joints, and repaint worn casing. White trim delivers strong contrast, while cream, taupe, gray, or natural wood can soften the effect.
Install Visible House Numbers
House numbers should be attractive, but they must also be readable. Select a size, color, and location that remain visible from the street in both daylight and evening conditions. Mounting modern numbers on a contrasting plaque can prevent them from disappearing into brick, stone, or dark siding.
Add Planters With Restraint
One or two appropriately scaled planters can add color and soften the hard lines of a dark door. Choose plants suited to the actual sunlight and climate rather than the lifestyle promised by the plant tag. Symmetrical planters suit formal entrances, while an asymmetrical grouping can make a casual porch feel collected and relaxed.
Layer the Doormat
A durable outdoor rug beneath a smaller doormat can define a compact stoop and introduce pattern. Make sure the layers do not block the door swing, curl at the corners, or create a tripping hazard. Style is lovely; remaining upright is lovelier.
Connect the Exterior and Interior
The view through an open door should feel like a continuation of the entrance. A slim console, wall hooks, a bench, a mirror, or closed shoe storage can keep the interior landing functional. In a tiny foyer, prioritize clear circulation and one useful storage feature rather than cramming in furniture simply because the catalog had a persuasive photograph.
Improve Comfort With Weatherstripping and Sealing
An entry remodel should perform as well as it photographs. Inspect the weatherstripping along the top and sides of the frame. It should make consistent contact without preventing the door from closing. Replace brittle, torn, compressed, or missing material.
Check the door sweep and threshold at the bottom. When the door is closed, you should not see obvious daylight beneath it. The sweep should block drafts and wind-driven debris without dragging excessively across the threshold.
Also examine exterior joints around the frame for failed sealant and evidence of water entry. Persistent moisture, rot, or movement around the opening deserves professional evaluation. When replacement becomes necessary, compare complete door systems, installation requirements, climate suitability, and verified energy-performance ratings rather than selecting by appearance alone.
Performance research basis:
Budget-Friendly Entry Remodel Priorities
When the budget is limited, prioritize work that improves both appearance and function:
- Repair damage and stop water intrusion.
- Correct door alignment, locking, and sealing problems.
- Prepare and paint the door properly.
- Replace visibly worn hardware.
- Improve lighting and house-number visibility.
- Add planters, a mat, and seasonal accessories last.
This order prevents decorative purchases from distracting from necessary repairs. A new wreath cannot negotiate with a warped jamb, no matter how many tasteful berries it contains.
Before purchasing a replacement door, determine whether you need only a new slab or a complete prehung unit with its frame. Existing dimensions, jamb condition, swing direction, glass configuration, material, and installation complexity can significantly affect the scope of the project. A professional installer is often the safer choice when the opening is out of square, the framing is damaged, or waterproofing details are uncertain.
Repair-versus-replacement basis:
Common Black Front Door Mistakes
- Skipping the sample: A black that looks neutral indoors may appear blue, green, or brown outside.
- Painting over glossy or peeling surfaces: Inadequate preparation often leads to poor adhesion and an uneven finish.
- Applying one thick coat: Heavy paint is more likely to sag, pool in panels, and remain soft around hardware.
- Ignoring direct sun: Dark doors can become hot, and some materials or manufacturers may limit very dark finishes.
- Using interior paint: The coating must be suitable for exterior exposure and compatible with the substrate.
- Mixing too many decorative styles: A modern handle, Victorian knocker, rustic lantern, and coastal sign rarely become best friends.
- Decorating before repairing: Fix drafts, rot, loose steps, and failing trim before shopping for accessories.
Entry Remodel Experience: What the Process Really Feels Like
A realistic black-door remodel often begins with dangerous confidence. The door looks small. The paint can looks small. Surely this is a two-hour project followed by a heroic photograph before lunch. Then the hardware comes off, the sunlight changes, and three generations of old brush marks introduce themselves.
The first useful lesson is that preparation takes longer than painting. Cleaning reveals scratches hidden beneath fingerprints. Sanding exposes old drips along the panel edges. A loose hinge explains why the latch has required a shoulder bump for the last two years. None of these discoveries is glamorous, but addressing them is what separates a lasting entry remodel from a temporary color change.
Sampling the black paint is another memorable moment. The first option may look sophisticated on the sample card and unexpectedly navy on the door. The second may appear rich in morning shade but slightly brown in late-afternoon sun. Testing several swatches beside the trim, brick, and hardware saves both paint and emotional speeches in the driveway.
Once the right color is chosen, the first coat can be alarming. Dark paint emphasizes every missed sanding mark, and the partially covered door may resemble a stage set from a very low-budget mystery movie. The temptation is to apply more paint immediately. Resisting that impulse, allowing proper drying time, and applying a controlled second coat usually produces the smooth, deep finish imagined at the beginning.
Hardware installation creates the most satisfying change. A worn lockset may have blended into the old door, but a clean new handle against black paint suddenly looks deliberate and substantial. Updating the porch light and house numbers extends the effect. At that point, the entrance no longer appears to have received a single painted object; it reads as a coordinated remodel.
The less exciting improvements often become the most appreciated. Fresh weatherstripping can reduce a noticeable draft. A properly adjusted sweep keeps leaves and dust from sneaking under the door. Tightened hinges eliminate rubbing, and a repaired threshold makes the entrance feel solid underfoot. Guests may compliment the color, but the homeowner notices that the door finally closes without negotiation.
Decorating the finished entry requires restraint. After spending hours staring at an empty porch, it is easy to purchase two lanterns, four planters, a bench, three rugs, and a decorative sign announcing that the building is, in fact, a home. Adding items one layer at a time produces a calmer result. A pair of planters, a well-sized mat, and one seasonal element may be enough.
The greatest lesson is that a successful entry remodel is built from small decisions. No individual task seems dramatic: sand one edge, tighten one screw, move one house number, replace one bulb. Together, those details change how the entire front of the house feels. The black door becomes the visual anchor, but careful preparation and functional repairs are the quiet supporting cast keeping the star from falling off its hinges.
Conclusion
The “Little Black Dre..Door” approach proves that an entry remodel does not need to be enormous to transform a home’s first impression. A well-prepared black front door can create contrast, highlight architecture, and provide a flexible backdrop for changing décor. Pair it with coordinated hardware, effective lighting, readable house numbers, healthy trim, and dependable weather sealing, and the entrance becomes more attractive, comfortable, and functional.
The secret is treating the doorway as a complete composition rather than an isolated paint project. Start with repairs, prepare every surface properly, choose finishes that relate to one another, and add decoration only after the fundamentals are working. Your entrance should look polished, welcome visitors, and close without requiring a running start.











