
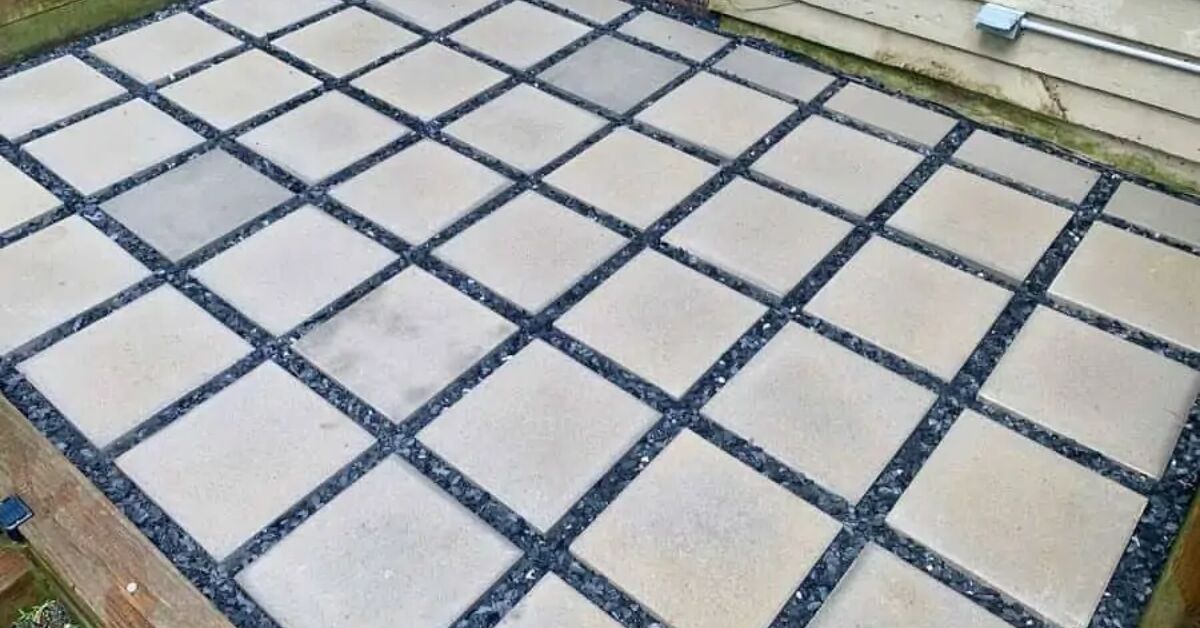
A concrete paver patio is basically the backyard glow-up that doesn’t require a reality-TV crew, a permit-sized headache,
or a lifetime commitment to one giant slab. Done right, pavers look high-end, feel solid underfoot, and stay repairable:
if one section settles, you fix that sectionno jackhammer opera required.
This guide walks you through the proven, industry-standard approach to building a paver patio: smart planning, a properly
compacted base, a crisp bedding layer, tight edge restraint, and joints that lock everything together. The theme is simple:
your patio is only as good as what’s underneath it. (Yes, that’s also true for cake.)
What You’re Building (The Layer Cake, But With Gravel)
A classic “dry-laid” concrete paver patio has four main layers:
- Subgrade (your native soil) shaped and compacted
- Aggregate base (crushed stone) the strength + drainage layer
- Bedding sand a thin, screeded “setting bed” (not a sandbox)
- Concrete pavers the finished surface, locked in by edge restraint and joint sand
Step 0: Plan Like a Pro (So You Don’t Dig Twice)
Check rules, utilities, and drainage first
- Call 811 before you dig (U.S. standard). You don’t want your “patio project” becoming a “neighborhood internet outage.”
- Confirm HOA rules and local requirementsespecially if you’re altering grading or building near property lines.
- Pick a spot that drains away from your home. If water currently pools there, plan a fix (regrade, add a drain, or consider permeable pavers).
Choose size, shape, and pattern with real-life use in mind
Design isn’t just aestheticsit’s furniture math. A practical patio usually needs space for:
a table + chairs (often 10’×10′ minimum), or a lounge zone (12’×16′ is a common sweet spot).
- Simple rectangle = fastest layout, easiest cuts, clean look.
- Curves = beautiful, but expect more cutting and more patience.
- Patterns: Running bond is beginner-friendly; herringbone is extremely stable and looks custom.
Pick pavers that match your climate and lifestyle
Concrete pavers come in many thicknesses and finishes. For typical backyard patios, standard thickness pavers work great.
If you’re doing a driveway or heavy loads, that’s a different design conversation.
Tools and Materials (The “Don’t Start Without This” Checklist)
Tools
- Shovel, rake, wheelbarrow
- Measuring tape, marking paint, string line + stakes
- 4′ level (or longer) + a straight 2×4 for checking grade
- Hand tamper (small areas) or plate compactor (recommended for anything bigger than “tiny”)
- Rubber mallet
- Push broom + leaf blower (for joint sand cleanup)
- Paver splitter or wet saw/angle grinder with masonry blade (for cuts)
- Knee pads (your knees will write you a thank-you note later)
Materials
- Concrete pavers (buy 5–10% extra for cuts and oops moments)
- Crushed stone base (often called “paver base” or “road base”)
- Bedding sand (commonly coarse concrete sand; not play sand)
- Edge restraint (plastic, aluminum, or concrete edge system) + spikes
- Jointing sand or polymeric sand
- Optional: geotextile fabric (especially helpful in clay/silty soils)
Step 1: Layout the Patio and Set the Slope
The goal is a patio that sheds water away from the house. A reliable target is a gentle pitch that you’ll never notice
while walking, but rainwater will absolutely notice.
- Mark the patio outline with marking paint.
- Drive stakes outside the corners and run string lines to define the finished edges.
-
Set string height for the finished patio surface. Then adjust the string so it slopes away from the home.
(Pro tip: measure your slope over distance so it stays consistent.)
Example slope math (easy mode)
If your patio extends 10 feet from the house, a gentle drop of about 2–3 inches across that span is typically in the “sweet spot”
for drainage without feeling tilted.
Step 2: Calculate Dig Depth (Because Guessing Is How Patios Get Lumpy)
Your excavation depth depends on paver thickness, the bedding sand, and the base thickness.
For a typical pedestrian patio, a common build-up is:
- Pavers: often ~2⅜” thick (varies by product)
- Bedding sand: ~1″ after screeding
- Aggregate base: commonly 4–6″ (more in weak soils or freeze/thaw climates)
That means many patios require roughly 7–10 inches of excavation, plus a little wiggle room to fine-tune final height.
If you live where winters are harsh, or your soil is clay-heavy, plan on a thicker base and better drainage strategy.
Step 3: Excavate and Prep the Subgrade
This is the sweaty part. Put on music. Invite a friend. Bribe them with future patio snacks.
- Remove sod and soil to your calculated depth.
- Dig the area slightly wider than the patio footprint so edge restraints have room to sit on solid base.
- Shape the subgrade to match your planned slope.
- Compact the soil with a hand tamper or plate compactor.
When to use geotextile fabric
If your soil is clayey, silty, or tends to get muddy, geotextile can help keep base stone from mixing into the soil over time.
Lay it over the compacted subgrade before placing base material.
Step 4: Build a Rock-Solid Aggregate Base (This Is the Whole Game)
A paver patio fails for one main reason: the base wasn’t properly built and compacted. The fix is not “more sand.”
The fix is a well-graded, well-compacted aggregate base built in lifts.
How to place base correctly
- Add crushed stone in 2-inch lifts (layers), not one giant dump.
- Rake it roughly level, then compact thoroughly.
- Repeat until you reach your target base thickness.
- Check slope frequently with a level and a straight board.
Compaction tips that prevent future regret
- Make multiple passes with the plate compactor.
- Lightly moisten dusty base material (not muddy) to improve compaction.
- Keep the surface within a tight tolerancehigh spots become wobbly pavers; low spots become puddles.
Step 5: Screed the Bedding Sand (Thin, Even, and Untouched)
Bedding sand is not where you “fix” a bad base. It’s a thin leveling layer that makes pavers sit evenly.
Too thick, and your pavers will settle. Too uneven, and your patio will feel like a keyboard.
- Place two 1″ pipes (PVC or metal) parallel across the compacted base.
- Pour bedding sand between the pipes.
- Screed with a straight board to create a smooth 1″ layer.
- Remove pipes and fill the voids carefully.
Important: Once the sand is screeded, don’t walk on it. Lay pavers from the edge and work off the pavers.
Step 6: Lay the Pavers (Where It Starts to Look Like Something)
Start square and stay consistent
- Begin at a straight edge or corner (often the longest, straightest reference line).
- Set each paver gently into the sanddon’t slide it around like you’re shuffling cards.
- Maintain consistent joint spacing (many pavers have built-in spacers).
- Check alignment every few rows with string lines.
Patterns that make your patio look expensive
- Running bond: classic brick look, very forgiving.
- Herringbone: visually dynamic and very stablegreat for high-traffic zones.
- Basketweave: charming, cottage vibe, still straightforward to install.
Cutting pavers without losing your mind
Cuts usually happen at edges, curves, or around posts/steps. Mark cut lines clearly.
A wet saw gives the cleanest cuts; a splitter is faster for straight cuts; an angle grinder works but kicks up dustwear eye and respiratory protection.
Step 7: Install Edge Restraints (The “Seatbelt” for Your Patio)
Edge restraints prevent the whole field of pavers from slowly creeping outward over time.
Without a solid edge, joint sand escapes, pavers loosen, and you’ll start noticing gaps like missing teeth.
- Place edge restraint tight against the pavers.
- Anchor with spikes into the base (follow the manufacturer’s spacing guidance).
- For a hidden look, bury the restraint and backfill with soil or decorative stone.
Step 8: Compact the Pavers and Lock the Joints
Compact the surface
Use a plate compactor with a protective pad (so you don’t scuff pavers). This seats pavers into the bedding sand and helps joints fill properly.
Choose joint sand: regular or polymeric
- Jointing sand: classic and easy to refresh; may allow more weeds over time.
- Polymeric sand: hardens when activated with water, helping resist washout, weeds, and insects.
How to apply polymeric sand the right way
- Make sure pavers are dry. Avoid windy days if possible (sand will go on a side quest).
- Sweep sand into joints thoroughly.
- Compact again to settle sand, then sweep more until joints are full.
- Remove all excess sand from the paver faces (a leaf blower helps).
- Lightly mist with water in controlled passesenough to activate, not so much you wash polymers out.
- Keep foot traffic off for at least a day (longer if the product says so).
Step 9: Finish Edges, Backfill, and Make It Look Intentional
- Backfill along the outside of the edge restraint with soil, gravel, or mulch.
- Add a border course in a contrasting color for a “designer” look without designer pricing.
- Consider edging with landscape lighting, planters, or a small gravel strip for crisp transitions.
Maintenance (So It Stays Beautiful, Not “Before Photo”)
Seasonal care
- Sweep regularly so debris doesn’t become a permanent roommate.
- Rinse occasionally; use a mild cleaner for stains (test first).
- Top off joints if sand settles over timeespecially after the first few rains.
- In freeze-thaw regions, avoid harsh metal shovels that chip pavers; use plastic edges.
Should you seal pavers?
Sealing is optional. It can deepen color and help resist staining, but it’s not mandatory for durability.
If you do seal, follow the sealer’s prep and cure instructions carefully, and reapply as recommended.
Common Mistakes (AKA “Patio Plot Twists”)
- Skipping base compaction: the #1 cause of settling and wobble.
- Using round gravel: it doesn’t lock togethercrushed stone is your friend.
- Too much bedding sand: thick sand acts like a sponge and shifts.
- No edge restraint: pavers spread, joints open, and the patio slowly unzips.
- Bad drainage: water pooling leads to sand loss, stains, and winter damage.
- Messy polymeric sand application: leftover haze can harden on pavers and ruin the finish.
Time and Budget Reality Check
For a DIYer, a simple patio can be a weekend projectunless you’re building something large, working in tough soil, or aiming for a fancy pattern with curves.
Material costs vary widely by paver type and region, but many homeowners plan budgets per square foot that include pavers, base, sand, and tool rentals.
A practical example: a 12′ × 16′ patio (192 sq ft)
- Pavers: 192 sq ft + 5–10% extra for cuts
- Base: depends on thickness; order enough for multiple compacted lifts
- Sand + jointing sand: enough for a screeded bed and full joints
- Tool rental: plate compactor and saw can be worth every penny
Conclusion: Your Backyard, Upgraded
A beautiful concrete paver patio isn’t magicit’s physics and patience. If you focus on slope, base thickness,
and compaction, the “pretty part” (paver layout) becomes the fun part. Build it like it matters, and your patio will
look sharp for yearsready for coffee mornings, cookouts, and that one friend who always says, “Wow, you did this yourself?”
(Smile. Nod. Accept compliments. Pretend the digging never happened.)
Real-World Experiences and Lessons DIYers Commonly Learn (An Extra )
People who build their first concrete paver patio almost always start with the same thought: “It’s just laying bricks, right?”
Then they meet the base layer, and suddenly it’s a full-body workout with a side of geometry. One of the most common experiences
is realizing that the project is won or lost before the first paver is set. DIYers often report that once the base is flat,
compacted, and sloped correctly, laying pavers feels almost relaxinglike outdoor LEGO. But if the base is even slightly off,
every row becomes a negotiation: tap, lift, add a pinch of sand, retap, check again, repeat. It’s not “hard,” exactlyit’s just
relentless about consequences.
Another frequent lesson is how much weather timing matters. Many homeowners plan a weekend build, then get surprised by a rain
forecast that turns screeded sand into a soggy mess. The experienced move is to treat the bedding sand like a “no rain, no shortcuts”
zone. If it gets wet, it’s often better to pause and let things dry than to push forward and trap problems underneath the surface.
The same goes for polymeric sandDIYers learn quickly that applying it right before a storm is like painting your house in a wind tunnel.
There’s also the emotional roller coaster of cutting pavers. The first cut can feel intimidatingno one wants to shatter an expensive piece.
Then, after a few clean cuts, confidence skyrockets… until you hit a weird edge, a curve, or a tiny sliver piece that refuses to behave.
Many DIYers end up loving the “border and soldier course” approach because it hides minor sins and makes the patio look deliberate and crisp.
A border also reduces the number of awkward edge cuts, which lowers both stress and the likelihood of inventing new words your neighbors don’t need to hear.
A surprisingly common experience is discovering that the patio looks better once it’s furnished. Fresh pavers can feel visually busy,
especially with strong patterns. But as soon as you add a table, chairs, planters, and maybe a fire pit, everything “clicks” into a cohesive space.
People often say the patio doesn’t just add square footageit changes how they use the yard. Breakfast moves outside. Kids end up doing crafts outdoors.
Friends gather where there used to be patchy grass. The patio becomes a “destination,” not just a surface.
Finally, many first-timers learn a simple truth: renting the right tools is not a luxury. A plate compactor can feel like an added expense,
but DIYers who skip it often notice settling, uneven joints, or wobbly spots later. The same is true for a proper saw or splitter.
The typical story goes like this: someone tries to “make do,” spends hours fighting the wrong tool, then rents the correct one and finishes in a fraction
of the time. The experience usually ends with the same takeaway: the patio isn’t the place to test your patience with improvised methods.
If you build the base carefully, use edge restraints, and lock the joints correctly, you get that rare DIY outcomesomething that looks professional
and feels even better because you know exactly what’s under every single paver.











