
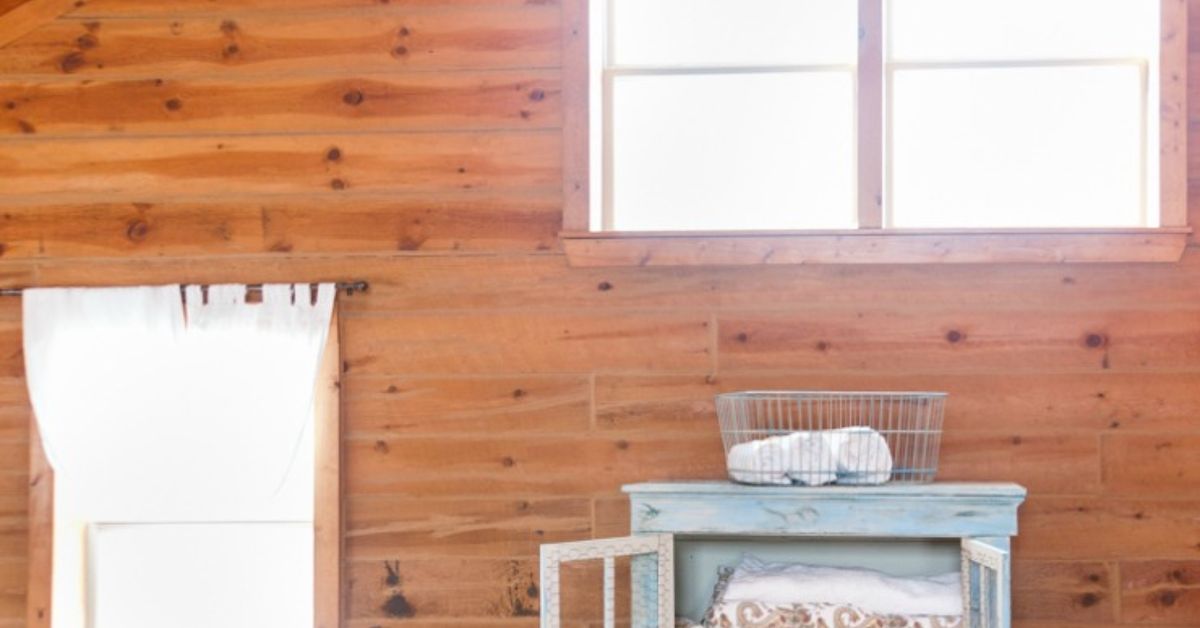
An old cabinet may look like it has reached the end of its useful life, especially when its shelves sag, its finish resembles burnt toast, and one door closes only after a persuasive shoulder bump. Look again. With a few repairs, well-planned shelving, and a durable new finish, that forgotten piece can become a practical freestanding linen closet.
This cabinet makeover is especially useful in older homes, apartments, guest rooms, and bathrooms without built-in storage. Instead of paying for a custom closet, you can repurpose furniture you already own or rescue an inexpensive cabinet from a thrift store. The finished piece can hold towels, sheets, blankets, toiletries, and other household linens while adding character that flat-pack furniture often lacks.
Why Repurpose an Old Cabinet?
Turning an old cabinet into a linen closet solves two problems at once: it reduces clutter and keeps usable furniture out of the waste stream. It may also cost considerably less than installing built-in storage, particularly when the cabinet is structurally sound and needs only cosmetic work.
A freestanding linen cabinet is flexible, too. It can occupy an unused hallway wall today and move into a guest bedroom tomorrow. Unlike a permanent closet, it does not require framing, drywall, or a week of wondering why there is suddenly a mysterious electrical wire in the wall.
The project also offers creative freedom. A vintage armoire can become a dramatic statement piece, while an old kitchen pantry cabinet can be painted to blend into the room. Even a media cabinet may work once its electronics-related openings are patched or repurposed for ventilation.
Choose the Right Cabinet for the Conversion
Inspect the Structure Before Falling in Love
Good proportions and decorative doors are helpful, but structural condition matters more. Place the cabinet on a level surface and gently test it for movement. The frame should not rack from side to side, the base should feel solid, and the doors should remain reasonably aligned.
Look for water damage, soft wood, swollen particleboard, loose joints, major cracks, and signs of active insects. A musty odor that remains after cleaning can indicate a moisture problem. Minor scratches and missing knobs are easy fixes; extensive rot or a severely distorted frame can turn a weekend project into an archaeological expedition.
Check the interior dimensions as well. A useful linen closet should be deep enough for folded towels and sheets but not so deep that pillowcases disappear into a shadowy back row. Many folded household linens fit comfortably on shelves approximately 14 to 20 inches deep, although the ideal measurement depends on your folding method and available space.
Identify the Cabinet Material
Solid wood is usually forgiving because it can be repaired, sanded, stained, or painted. Plywood is also a strong choice. Veneered furniture requires gentler sanding because the decorative wood layer may be thin. MDF and particleboard can still work, but damaged edges and moisture-swollen panels are harder to restore.
If the cabinet has an old painted finish and may date from before 1978, do not immediately attack it with a power sander. Disturbing lead-based paint can create hazardous dust. Have the coating evaluated with an appropriate lead test or consult a lead-safe professional, especially when children or pregnant people may be exposed. When the age is unknown, caution is much more attractive than respiratory regret.
Tools and Materials
The exact supply list depends on the
Tools and Materials
The exact supply list depends on the cabinet, but most conversions require the following:
- Screwdrivers, drill, cabinet, but most conversions require the following:</p and suitable drill bits
- Tape measure, combination square, and pencil
- Wood glue, clamps, and wood filler
- Sandpaper or sanding sponges in appropriate grits
- Shop vacuum and clean, lint-free cloths
- Degreasing cleaner compatible with the existing finish
- Primer and durable cabinet or furniture paint
- Paintbrushes and a small foam or microfiber roller
- Shelf boards, shelf pins, cleats, or metal shelf standards
- Replacement hinges, knobs, or pulls if needed
- Wall-compatible anti-tip hardware
- Eye protection, gloves, and suitable respiratory protection
Optional upgrades include baskets, shelf liner, cedar blocks, labels, a battery-powered motion light, and magnetic door catches. Buy accessories after measuring the finished interior rather than before. Storage baskets have a supernatural ability to be half an inch too wide.
How to Turn an Old Cabinet Into a Linen Closet
1. Remove and Label the Hardware
Take off the doors, hinges, knobs, drawers, and removable shelves. Put screws and small parts in labeled bags. If hinges will be reused, mark each one according to its original location. Old cabinets are rarely perfectly symmetrical, and exchanging two nearly identical hinges can create an afternoon of unnecessary door wrestling.
2. Clean Every Surface
Vacuum dust from corners, joints, and hardware recesses. Wash the cabinet with a degreasing cleaner suitable for the material, then remove cleaner residue according to the product directions. Let the piece dry completely before making repairs or applying a finish.
Do not try to trap mildew or persistent odors beneath paint. Correct the source first. A cabinet intended for clean linens should be dry, clean, and odor-free before the first towel enters it.
3. Repair the Cabinet Box
Tighten loose fasteners and reinforce weak joints with wood glue and clamps where appropriate. Fill unused hardware holes, dents, and shallow cracks with wood filler. Replace a damaged back panel if it no longer keeps the cabinet square.
Check the bottom carefully because towels and bedding become surprisingly heavy in quantity. If the base flexes, reinforce it with a new plywood panel or solid support rails. Replace sagging shelves rather than hoping folded washcloths will somehow reverse gravity.
4. Plan the Linen Storage Layout
Inventory what the cabinet will hold before positioning shelves. Bath towels need more vertical clearance than washcloths, while bulky comforters may require an entire lower compartment. Frequently used items should sit between waist and eye level. Reserve the top shelf for seasonal blankets, spare pillows, or rarely used guest linens.
A practical arrangement might include:
- An upper shelf for extra blankets and pillows
- Two middle shelves for sheet sets and bath towels
- A shallow shelf for hand towels and washcloths
- A lower area for baskets containing toiletries or cleaning cloths
Adjustable shelves provide the greatest flexibility. Install shelf-pin sleeves with a drilling guide, or mount vertical shelf standards inside the cabinet. For a simpler design, attach level wooden cleats to the side panels and rest fixed shelves on them. Confirm that screws will not penetrate the cabinet exterior.
5. Cut and Test the Shelves
Measure the interior width at the front, center, and back because an older cabinet may not be perfectly square. Cut shelf boards to the smallest measurement minus a little clearance for installation. Sand the edges smooth and test each shelf before painting.
Plywood with a finished front edge offers strength without excessive weight. Solid wood is attractive but may expand and contract with humidity. MDF produces smooth painted shelves but is heavy and vulnerable to moisture, making it less desirable in a damp bathroom.
For wider shelves, add a front-edge strip or center support to reduce sagging. The correct support depends on shelf material, thickness, span, and expected load. When in doubt, build for the stack of towels you will eventually own, not the three towels currently behaving themselves.
6. Prepare the Finish
If the existing coating is safe to disturb, remove loose or peeling material and lightly scuff glossy surfaces so primer can bond. Many furniture refinishing projects do not require sanding all the way to bare wood. A common preparation sequence is to sand, vacuum, and wipe away the remaining fine dust.
Use a sanding sponge around trim and profiles, where a power sander can quickly flatten decorative details. Veneer and MDF require a particularly light touch. Work in a well-ventilated area and follow the safety directions for every cleaner, deglosser, primer, paint, or stripping product.
7. Prime and Paint
Choose a primer suited to the surface and existing finish. Bare wood, stained wood, MDF, laminate, and previously painted furniture may need different products. A stain-blocking primer is useful when old wood tannins or discoloration might bleed through a light paint color.
Apply thin, even coats and allow the specified drying time. Lightly sand between coats if the paint manufacturer recommends it. A satin or semi-gloss cabinet paint is generally easier to wipe clean than a flat finish. Let the final coating cure fully before loading the shelves; “dry to the touch” does not always mean ready for a forty-pound stack of bedding.
You can paint the exterior and interior the same color for a seamless appearance or use a contrasting interior. Soft white, pale gray, muted blue, and warm green work well for linen storage. Leaving attractive natural wood visible is another option if the finish is stable and can be cleaned or renewed safely.
8. Reassemble and Upgrade the Doors
Reinstall the hinges, doors, and hardware. Adjust the hinges until gaps look even and the doors operate without rubbing. Add magnetic catches if the doors drift open. New knobs can modernize a plain cabinet, while cleaned original hardware preserves its vintage character.
If air circulation is a concern, retain existing openings in the back panel or add discreet ventilation holes where they will not weaken the structure. Cane, perforated metal, or fabric-backed door panels can also improve airflow while changing the cabinet’s appearance.
9. Anchor the Cabinet
A tall freestanding cabinet should be secured to the wall with anti-tip hardware appropriate for the cabinet and wall construction. Fasten the system into a wall stud or use a correctly rated anchor where permitted by the hardware manufacturer. Baseboards may leave a gap behind the cabinet, so spacers may be necessary to keep it plumb.
Anchoring is particularly important in homes where children live or visit. Doors, drawers, and climbable shelves can shift a cabinet’s center of gravity. Wall attachment is therefore a safety step, not a decorative suggestion.
Organize the Finished Linen Cabinet
Store linens only when they are completely clean and dry. Even slightly damp towels can create odors or encourage mildew inside an enclosed cabinet. If the cabinet stands near a shower, laundry area, basement wall, or other moisture source, improve room ventilation and monitor for condensation.
Group items by use instead of stacking everything by size. Keep each sheet set together by folding it into one matching pillowcase. Place bath towels in one zone, guest linens in another, and small items in labeled baskets. This prevents the familiar household mystery in which seven fitted sheets exist but none fits the bed currently being made.
Avoid packing shelves so tightly that air cannot circulate or items cannot be removed without causing a textile avalanche. Rotate seasonal linens and periodically wipe the empty shelves. Cedar blocks or sachets may add a pleasant scent, but they should not be treated as a substitute for cleanliness, dryness, or proper pest control.
Design Ideas for Different Rooms
Bathroom Linen Cabinet
Use moisture-resistant paint, ventilated storage baskets, and rust-resistant hardware. Keep toilet paper and frequently used towels within easy reach, but do not place the cabinet where it will receive direct shower spray.
Hallway Linen Closet
Choose a shallow cabinet that leaves a comfortable walking path. Paint it close to the wall color for a built-in look, or use a rich contrasting shade to make the piece feel intentional.
Guest-Room Storage
Dedicate one shelf to fresh sheets, another to towels, and a small basket to travel-size essentials. A label reading “For Guests” politely prevents residents from raiding the supply on ordinary laundry day.
Farmhouse or Vintage Style
Preserve some original wood, use simple bin pulls, and add beadboard or wallpaper to the cabinet back. If distressing a newly applied safe finish, keep the effect subtle. Furniture should look gently aged, not as though it escaped a wood-chipper incident.
Common Cabinet Makeover Mistakes
- Skipping the structural inspection: Paint cannot repair rot, unstable joints, or a weakened base.
- Sanding an unknown old coating: Test questionable finishes and use lead-safe practices before creating dust.
- Painting over dirt or wax: Residue prevents primer and paint from bonding properly.
- Installing shelves without a storage plan: Random spacing often wastes valuable vertical room.
- Loading uncured paint: Heavy linens can stick to or imprint a finish that has not fully cured.
- Ignoring humidity: A beautiful cabinet cannot protect linens in a chronically damp room.
- Forgetting the wall anchor: Tall storage furniture can tip even when it initially appears stable.
What a Realistic Cabinet Conversion Teaches You
A representative cabinet makeover often begins with unreasonable optimism. The cabinet looks charming in the seller’s photo, fits into the car with only minor negotiation, and seems to need “just a coat of paint.” Once it reaches the workshop, the practical details introduce themselves. One hinge is bent, two shelves are warped, and the back panel is attached with an assortment of nails that appears to document several decades of repair philosophies.
The first valuable lesson is to finish the dirty work before choosing accessories. It is tempting to buy matching baskets immediately, but interior measurements can change after supports, shelf edging, or a replacement back panel are installed. In one typical conversion of a narrow dining-room cabinet, waiting until the shelves were complete prevented the purchase of baskets that would have missed fitting by less than half an inch.
The second lesson is that preparation usually takes longer than painting. Cleaning old furniture may reveal wax, kitchen grease, furniture polish, and residue around the handles. A careful wash, light scuffing, dust removal, and compatible primer create a far better result than applying an expensive paint directly over a questionable surface. The glamorous portion may be the final color, but the invisible preparation is what keeps that color attached.
Shelf spacing also benefits from a rehearsal. Before drilling holes, stack the towels, sheets, and blankets you expect to store inside. Place temporary cardboard strips at the proposed shelf heights, then test whether items can be removed comfortably. This exercise often reveals that mathematically equal spacing is not functionally equal. Towels may need ten or twelve inches, while a basket of washcloths needs much less. The bottom compartment may deserve extra height for a comforter or laundry hamper.
Another common discovery is that old cabinets are rarely square. A shelf that fits perfectly near the doors may jam against the back. Measuring at several points and trimming to the narrowest dimension saves repeated trips to the saw. A small amount of clearance is useful, especially after primer and paint add thickness to both the shelf and the cabinet interior.
Color can produce the most satisfying transformation. A heavy, dark cabinet may feel much lighter in a warm white or subdued sage finish. Painting the interior a second color adds personality without dominating the room. New hardware can complete the change, but original knobs are worth cleaning first; what looks dull may simply be hiding beneath years of grime.
The final lesson arrives when the cabinet is loaded. Neatly folded towels make the makeover look complete, yet safety and daily usability determine whether it remains successful. The cabinet should be anchored, the doors should open freely, and common items should be reachable without a step stool. After several weeks, shelf labels and baskets may need adjustment. Good storage is not a museum displayit should survive rushed mornings, laundry day, and the household member who believes folding a towel once counts as organizing.
When those practical details are handled, the project delivers more than extra storage. It preserves an existing piece, gives an awkward wall a purpose, and creates a linen closet tailored to the household. The old cabinet retains its character, but it finally receives a job description.
Conclusion
To turn an old cabinet into a linen closet successfully, begin with a structurally sound piece, address hazardous or damaged finishes, and design the shelves around the linens you actually own. Careful cleaning, repair, preparation, and painting will make the makeover durable, while ventilation and wall anchoring keep it practical and safe.
The result can be more useful and distinctive than a new mass-produced cabinet. Best of all, every time someone admires it, you can casually say, “Oh, that old thing?” after spending several days measuring it with the concentration of a structural engineer.
Note: Product instructions, cabinet materials, and wall construction vary. Follow manufacturer directions, use appropriate protective equipment, and seek qualified help when dealing with possible lead paint, extensive damage, or uncertain anchoring conditions.











