
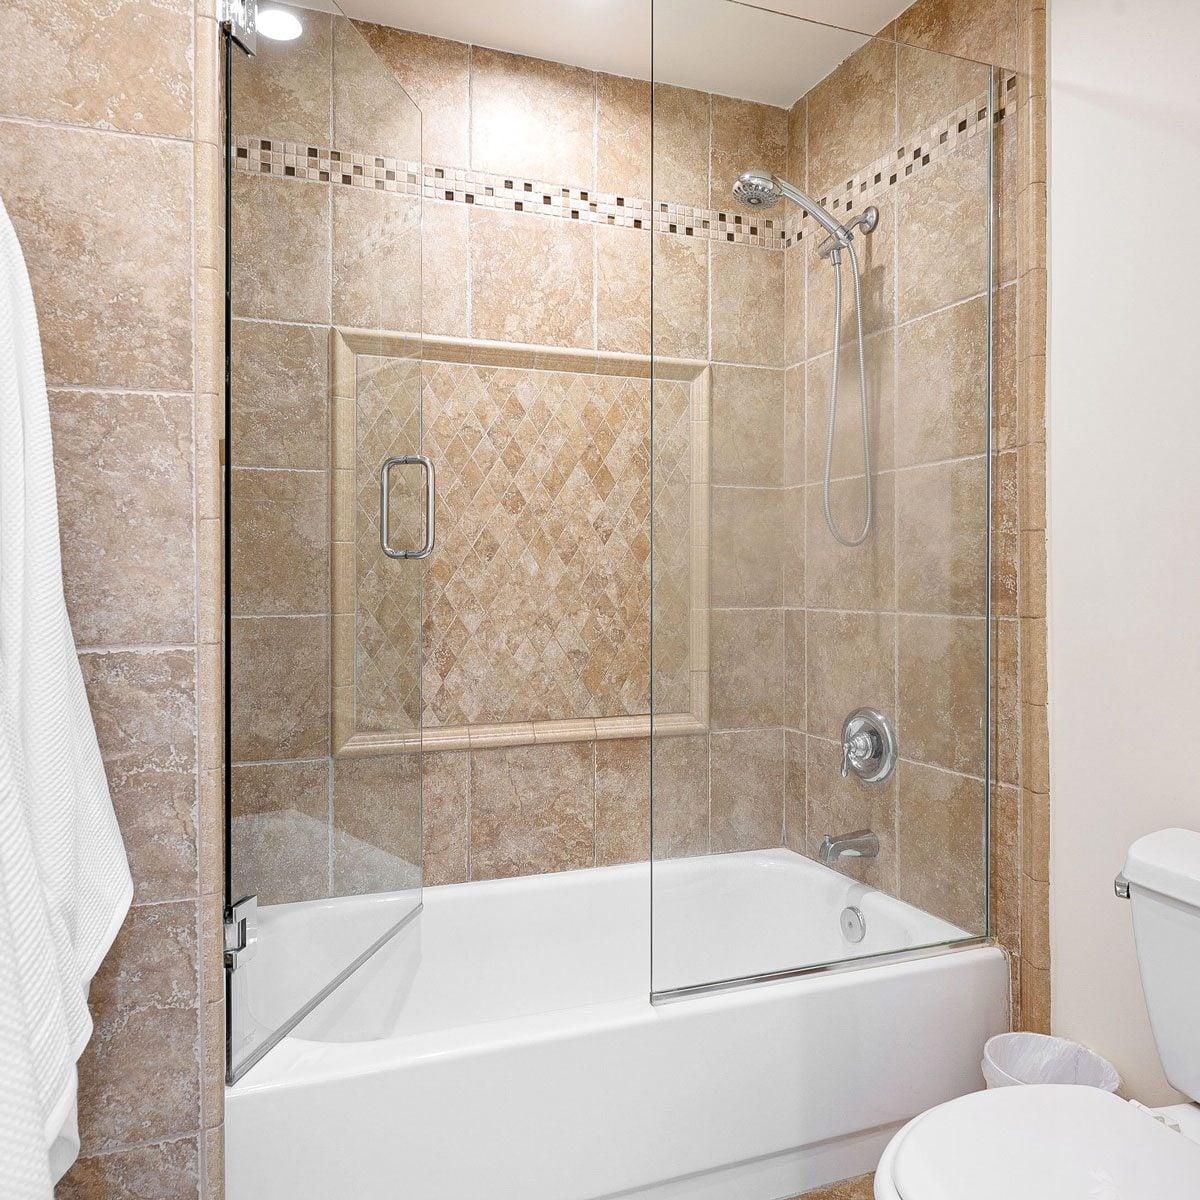
A tub and shower combo is the bathroom equivalent of a multitool: compact, practical, and capable of handling almost anything. It gives hurried adults a quick place to shower, children a proper bathtub, pets a convenient washing station, and exhausted homeowners somewhere to soak after discovering that bathroom grout does not clean itself.
Although a combination unit is often associated with basic builder-grade bathrooms, it does not have to look ordinary. Thoughtful tile, glass, fixtures, storage, lighting, and color can turn a standard bathtub alcove into a polished focal point. Better yet, combining a tub and shower generally uses less floor space than installing two separate fixtures, making it particularly useful in guest bathrooms, family bathrooms, and smaller primary suites.
The following tub and shower combo ideas range from affordable updates to full-scale remodeling concepts. Each one balances appearance with practical considerations such as water containment, cleaning, storage, safety, and long-term durability.
What to Consider Before Choosing a Tub and Shower Combo
Before falling in love with dramatic marble tile or a rainfall showerhead the size of a dinner plate, examine how the bathroom will actually be used.
Measure the Existing Alcove
Many residential alcove tubs are approximately 60 inches long and 30 to 32 inches wide, but “approximately” is not a measurement you should give a contractor. Measure the length, width, depth, wall height, drain position, and plumbing location. Measure everything twice, then measure again after someone asks whether you included the wallboard.
Keeping the new drain and supply lines close to their current locations can simplify a remodel. Moving plumbing may be worthwhile during a major renovation, but it usually adds labor, demolition, and repair work.
Identify the Main Users
A household with young children may prioritize a comfortable tub, rounded edges, a handheld showerhead, and easy-to-clean surfaces. Older adults may benefit from grab bars, a nonslip tub floor, brighter lighting, and conveniently positioned controls. In a guest bathroom, durable finishes and uncomplicated fixtures may matter more than spa features that require an instruction manual.
Plan the Waterproofing First
Tile and grout create the visible finish, but they are not the entire waterproofing system. A properly built tub surround needs an approved water-resistant or waterproof assembly behind the finished surface, with careful sealing around the tub flange, plumbing penetrations, niches, corners, and joints. Waterproofing is not the glamorous part of the remodel, but neither is discovering a mushroom growing behind the baseboard.
1. Create a Timeless Subway Tile Alcove
White subway tile remains one of the most adaptable tub and shower combo ideas because it can lean traditional, contemporary, farmhouse, coastal, or industrial depending on the surrounding details. It reflects light, works with nearly every fixture finish, and can make a small bathroom appear cleaner and more open.
To keep the installation from looking generic, experiment with the layout. A vertical stack visually draws the eye upward and makes a low ceiling seem taller. A running-bond pattern feels familiar and relaxed, while a herringbone section adds movement without covering the entire room in visual fireworks.
Grout color dramatically affects the result. White or pale gray grout creates a quiet, seamless surface. Medium gray emphasizes the tile pattern and generally hides discoloration better. Very dark grout creates strong graphic contrast, although uneven grout lines will become more noticeable.
How to Personalize the Look
Add a narrow tile border, a contrasting niche, or a ledge that runs along the back wall. Brushed nickel fixtures keep the design soft, polished chrome adds sparkle, and matte black hardware provides a sharper outline. Warm brass can prevent an all-white bathroom from feeling like a particularly stylish refrigerator.
Subway tile is especially effective when paired with a white alcove tub, a simple glass screen, and a vanity in wood, navy, sage green, or charcoal.
2. Replace the Curtain With a Clear Glass Door
A clear glass enclosure can immediately make a tub and shower combination feel more architectural. Unlike a curtain, glass allows the tile design to remain visible and reduces the visual barrier across the room. This is useful in small bathrooms, where uninterrupted sightlines can make the space feel larger.
Sliding doors work well where there is not enough clearance for a swinging panel. A hinged door offers a clean, upscale appearance but needs adequate space to open safely. Another option is a fixed glass splash panel covering the shower end of the tub. It creates a minimalist look, although its width and showerhead position must be carefully planned to prevent water from escaping.
Make Glass Easier to Maintain
Choose tempered safety glass designed for bathroom use. Consider a protective coating that reduces mineral buildup, and keep a small squeegee nearby. A 30-second wipe after showering is considerably easier than holding a diplomatic summit with six months of hard-water spots.
Frameless or minimally framed glass looks especially attractive with large-format tile because fewer lines interrupt the wall surface. For privacy, use fluted, frosted, or lightly textured glass rather than hiding the entire enclosure behind a heavy frame.
3. Turn the Tub Wall Into a Tile Feature
A tub surround is a natural place to use color or pattern because it already occupies a defined architectural zone. Instead of treating it as a blank waterproof box, make it the bathroom’s primary focal point.
For a calm, modern design, use large-format porcelain tile with a stone or concrete appearance. Fewer grout joints can create a more continuous surface and simplify routine cleaning. For a livelier room, consider handmade-look ceramic tile, geometric patterns, glossy zellige-style squares, or a vertical band of mosaics.
You do not need seven competing patterns to make the space memorable. Choose one statement surface and allow the floor, vanity, and walls to play supporting roles. Otherwise, the bathroom may begin to resemble a tile showroom during an earthquake.
Try Material Drenching
For a cocoon-like effect, extend the same tile across all three tub walls and onto the ceiling above the shower. You can also continue the color onto the surrounding painted walls. This “material-drenched” approach works particularly well with warm beige, muted green, soft gray, terracotta, and marble-inspired finishes.
Always verify that the selected product is approved for the intended wall, ceiling, or wet-area application. The prettiest tile in the store is not necessarily the correct tile for a shower.
4. Pair a Deep Soaking Tub With a Luxury Shower System
A combination layout can still deliver a spa-like bathing experience. Start with a deeper alcove soaking tub that fits the available footprint. Then add a shower system designed for flexibility rather than simply attaching the largest showerhead available.
A practical setup might include an adjustable wall-mounted showerhead plus a handheld sprayer on a slide bar. The fixed showerhead handles daily use, while the handheld unit helps with rinsing the tub, washing children, bathing pets, cleaning the walls, and accommodating users of different heights.
A rainfall showerhead can create a relaxing effect, but placement matters. In a standard tub alcove, an oversized ceiling-mounted head may send water outside the tub or make it difficult to keep your hair dry. A wall-mounted rain-style head with an adjustable angle is often easier to control.
Keep the Controls Convenient
Position the valve where users can reach it without standing directly beneath cold water. During a full remodel, separate controls or a thermostatic system can improve comfort and reduce temperature fluctuations. Select coordinated fixtures, but do not assume every component works with every valve hidden inside the wall. Compatibility is much less exciting to discuss than finish colors, yet considerably more important when the wall is already tiled.
Modern tub and shower systems are available with handheld sprays, multiple spray patterns, body sprays, and coordinated finishes suited to traditional or contemporary rooms.
5. Build a Glass-Enclosed Wet Room
For a larger bathroom, consider placing a bathtub and shower within one glass-enclosed wet zone. The tub may be freestanding, back-to-wall, or built into a deck, while the shower occupies the open floor beside it. A fixed panel or full glass enclosure separates the wet area from the vanity and toilet.
This layout creates an impressive, spa-like focal point while allowing the tub and shower to share waterproofed walls, lighting, and visual materials. It can also make a large room feel more intentional by grouping bathing functions instead of scattering fixtures around the perimeter.
Understand the Maintenance
A wet room requires more than placing a pretty bathtub inside a large shower. The floor must be properly sloped and drained, surfaces must be waterproofed, and ventilation must be strong enough to remove moisture. The tub exterior, nearby glass, and floor may receive regular overspray, so choose finishes that tolerate frequent cleaning.
Place towel storage outside the main spray path, and consider a handheld shower for rinsing the tub and wet-room floor. Heated flooring can improve comfort, while a bench or ledge adds a place for toiletries and makes the room more functional.
6. Convert a Clawfoot Tub Into a Vintage Shower Combo
A clawfoot tub with a shower conversion kit delivers character that a standard molded surround cannot easily imitate. This approach suits historic homes, cottage bathrooms, eclectic interiors, and anyone who believes bathroom fixtures should occasionally wear decorative feet.
A typical conversion includes a riser pipe, elevated showerhead, faucet assembly, and ceiling- or wall-supported curtain ring. A wraparound curtain keeps water inside the tub while preserving the open appearance of the freestanding fixture when the shower is not in use.
Protect the Surrounding Room
Any wall within the shower’s splash zone needs an appropriate water-resistant finish. The curtain should overlap enough to prevent gaps, and the tub must be positioned so the surrounding floor can be cleaned. Freestanding tubs placed too close to a wall can create a narrow dust-and-moisture canyon accessible only to a mop designed by engineers at a space agency.
Because older tubs and homes may have unusual plumbing conditions, inspect the fixture, floor structure, supply lines, and drain before beginning. A vintage look is charming; vintage leaks are less collectible.
7. Design a Family-Friendly and Future-Ready Combo
The most successful tub and shower combo is not merely attractive on installation day. It remains comfortable and useful as household needs change.
Begin with a tub that has a textured or slip-resistant floor. Add solid blocking inside the walls during construction so grab bars can be installed immediately or added later. Blocking is inexpensive while the framing is exposed and much more annoying to retrofit after the tile is finished.
A handheld shower on an adjustable slide bar can serve children, seated users, tall adults, and anyone cleaning the tub. Choose a pressure-balanced or thermostatic valve to help manage sudden temperature changes. Install bright, bathroom-rated lighting and make sure the tub edge, controls, niche, and floor are easy to see.
Add Storage Without Creating Clutter
A recessed niche keeps bottles off the tub rim, but its location should work for both bathers and standing shower users. A long horizontal niche offers generous storage, while two smaller niches allow products to be separated by user or height. A solid-surface shelf is another low-maintenance option because it avoids multiple tiny grout joints.
Grab bars do not have to make the bathroom look institutional. Many manufacturers offer bars that coordinate with faucet finishes or double as shelves and towel bars. Safety can blend into the design rather than arriving later as an awkward afterthought. NKBA guidance recommends waterproof wall finishes around tub and shower areas and planning reinforced walls for grab-bar installation.
Finishing Details That Improve Any Tub and Shower Combo
Use a Cohesive Metal Finish
Matching every metal component is not mandatory, but the finishes should appear intentional. One dominant finish can cover the faucet, showerhead, glass hardware, and towel bar. A secondary finish may be introduced through lighting or cabinet hardware. Two coordinated metals look layered; five unrelated metals look like the bathroom was assembled from a lost-and-found box.
Improve the Lighting
General ceiling lighting alone often leaves a tub alcove gloomy. Add a wet-location-rated recessed fixture above the bathing area where appropriate. Combine it with vanity lighting and, when possible, natural light. A dimmer allows the room to shift from bright morning headquarters to relaxing evening retreat.
Choose an Effective Exhaust Fan
Ventilation helps surfaces dry and reduces lingering humidity. Select a bathroom exhaust system appropriate for the room size and duct configuration, and vent it outdoors rather than into an attic. Run it during bathing and long enough afterward to remove moisture.
What Remodeling Experience Teaches About Tub and Shower Combos
Photos of completed bathrooms tend to focus on polished tile and perfectly folded towels. The most useful lessons, however, often come from the decisions made before those towels entered the room.
Preserving the Existing Layout Can Protect the Budget
One of the clearest lessons from bathroom renovation projects is that a design does not need a radically different floor plan to feel new. Keeping the tub, drain, valve, and toilet in roughly the same positions can leave more money for visible improvements such as tile, glass, storage, lighting, and fixtures.
Homeowners sometimes begin with a modest plan and then decide to move the drain six inches, relocate the valve, widen the alcove, and rebuild the adjacent closet. Each choice may be defensible, but together they can transform a cosmetic project into a construction documentary with twelve episodes.
When the existing layout functions well, upgrade the surfaces and details first. A new tub, full-height tile, clear glass, coordinated hardware, and a recessed niche can completely change the room without redesigning the plumbing map.
Storage Must Be Planned Around Real Bottles
Small niches look elegant in renderings because digital shampoo bottles are apparently the size of chess pieces. In real bathrooms, families own pump bottles, oversized conditioners, bath toys, razors, washcloths, and at least one mysterious product nobody remembers purchasing.
Before building a niche, measure the tallest and widest products normally used in the shower. Include enough height for pump dispensers to operate. Slightly slope horizontal surfaces toward the tub so water drains instead of collecting at the back. Place the niche away from the most direct spray when the layout allows.
For shared bathrooms, two storage zones may work better than one oversized compartment. Children’s products can remain low and accessible, while adult toiletries stay higher. A separate hook or small shelf for washcloths also prevents the tub rim from becoming a damp storage facility.
Small Samples Can Hide Big Surprises
A tile sample viewed under showroom lighting may look completely different inside a windowless bathroom. Warm white can become yellow, cool gray can turn blue, and a subtle pattern may become extremely enthusiastic when repeated across three walls.
Bring samples into the actual room and examine them during morning, afternoon, and evening lighting. Place the tile beside the tub, flooring, vanity finish, paint, and metal fixtures. Whenever possible, make a sample board that includes the intended grout color. Grout can change the apparent color and rhythm of the entire installation.
Cleaning Should Influence the Design
Every tub and shower combo requires maintenance, but some details make the work noticeably easier. Large tiles create fewer grout lines. Simple glass panels contain fewer tracks and corners. Wall-mounted accessories leave the tub ledge clear. Handheld sprayers simplify rinsing.
Textured tile may add visual depth but can collect residue. Deep grout joints, elaborate trim, and narrow gaps behind freestanding fixtures can turn a beautiful bathroom into a weekly obstacle course. Before approving a detail, imagine cleaning it while tired on a Saturday morning. This mental exercise has prevented many decorative ledges from entering the world.
The Best Combo Reflects Everyday Habits
A luxurious soaking tub is worthwhile when someone actually enjoys bathing. A handheld shower is invaluable in homes with children, pets, mobility needs, or frequent cleaning. A frameless enclosure is appealing when users are willing to squeegee it. A curtain may be the better choice when easy washing, low cost, and full tub access matter most.
Successful bathroom design is not about selecting the most expensive feature. It is about choosing a combination of features that supports the people using the room. The right solution may be a custom wet room wrapped in porcelain slabs, or it may be a straightforward alcove tub with excellent lighting, sensible storage, and a showerhead that does not attack anyone when the water turns on.
Conclusion
A tub and shower combination can be efficient without feeling basic. A classic tiled alcove, clear glass enclosure, dramatic feature wall, deep soaking tub, enclosed wet room, clawfoot conversion, or future-ready family design can turn one compact footprint into the hardest-working area of the bathroom.
Begin with accurate measurements, daily household needs, proper waterproofing, and a realistic maintenance plan. Then use tile, fixtures, lighting, glass, and storage to establish the style. When practical details support the design, the result will look polished long after the renovation dustand the contractor’s coffee cupshave disappeared.












