
Vinyl siding is the blue-jeans of exterior cladding: affordable, tough, and usually low drama. But when a baseball, lawn mower rock, grill flare-up, or suspiciously enthusiastic ladder attack leaves a crack, hole, or loose panel behind, your house suddenly looks like it lost a small argument with the weather. The good news is that many vinyl siding repairs are very doable if you choose the right fix for the damage.
This guide breaks down three practical ways to repair vinyl siding, from small cosmetic fixes to full panel replacement. You’ll also learn how to avoid common mistakes, how to spot trouble hiding behind the siding, and why “just caulk the heck out of it” is not always a winning strategy. The goal is simple: make the repair look good, keep water out, and avoid creating a bigger problem than the one you started with.
Before You Start: Know What Type of Damage You’re Looking At
Before you grab tools and channel your inner weekend contractor, take a minute to inspect the siding like a detective, not a demolition crew. Vinyl siding repair works best when the fix matches the damage.
Minor damage usually includes:
- Hairline cracks
- Small punctures or holes
- A loose edge that has popped free
- A slightly buckled panel with no major break
More serious damage usually includes:
- Large cracks or splits
- Melted sections from reflected heat or a grill placed too close
- Storm-torn, missing, or badly warped panels
- Moisture signs around windows, doors, corners, or inside walls
If you see water stains indoors, soft wall areas, mold, repeated gaps, or damaged sheathing underneath, do not stop at a cosmetic repair. That means the siding may be part of a bigger moisture problem, and the smarter move is to investigate the flashing, trim, or wall assembly before snapping in a replacement piece.
Helpful tools and materials
- Zip tool or vinyl siding removal tool
- Utility knife
- Aviation snips or tin snips
- Hammer
- Measuring tape
- Flat pry bar
- Replacement siding or patch material
- Exterior-grade color-matched caulk or repair compound
- Soft brush, mild soap, and garden hose for cleaning
One more pro tip before the fun begins: matching old siding can be harder than the repair itself. Sun-faded vinyl often looks different from brand-new stock. If possible, pull a matching piece from an inconspicuous area, such as behind shrubs or under a deck skirt, and use the new panel there instead. That little switcheroo can make your repair look far less obvious.
Way #1: Reattach or Stabilize Loose Vinyl Siding
If a panel is not cracked but has come loose, rippled, or popped out of its lock, you may not need a patch or a full replacement. Sometimes the best vinyl siding repair is simply putting the panel back where it belongs and making sure it can still move the way vinyl is designed to move.
When this method works best
- A lower edge has detached after wind or impact
- A panel looks loose but is not broken
- The siding buckles in heat because it was nailed too tightly
How to do it
- Inspect the panel and the one above it. Look for broken locks, crushed edges, or missing fasteners.
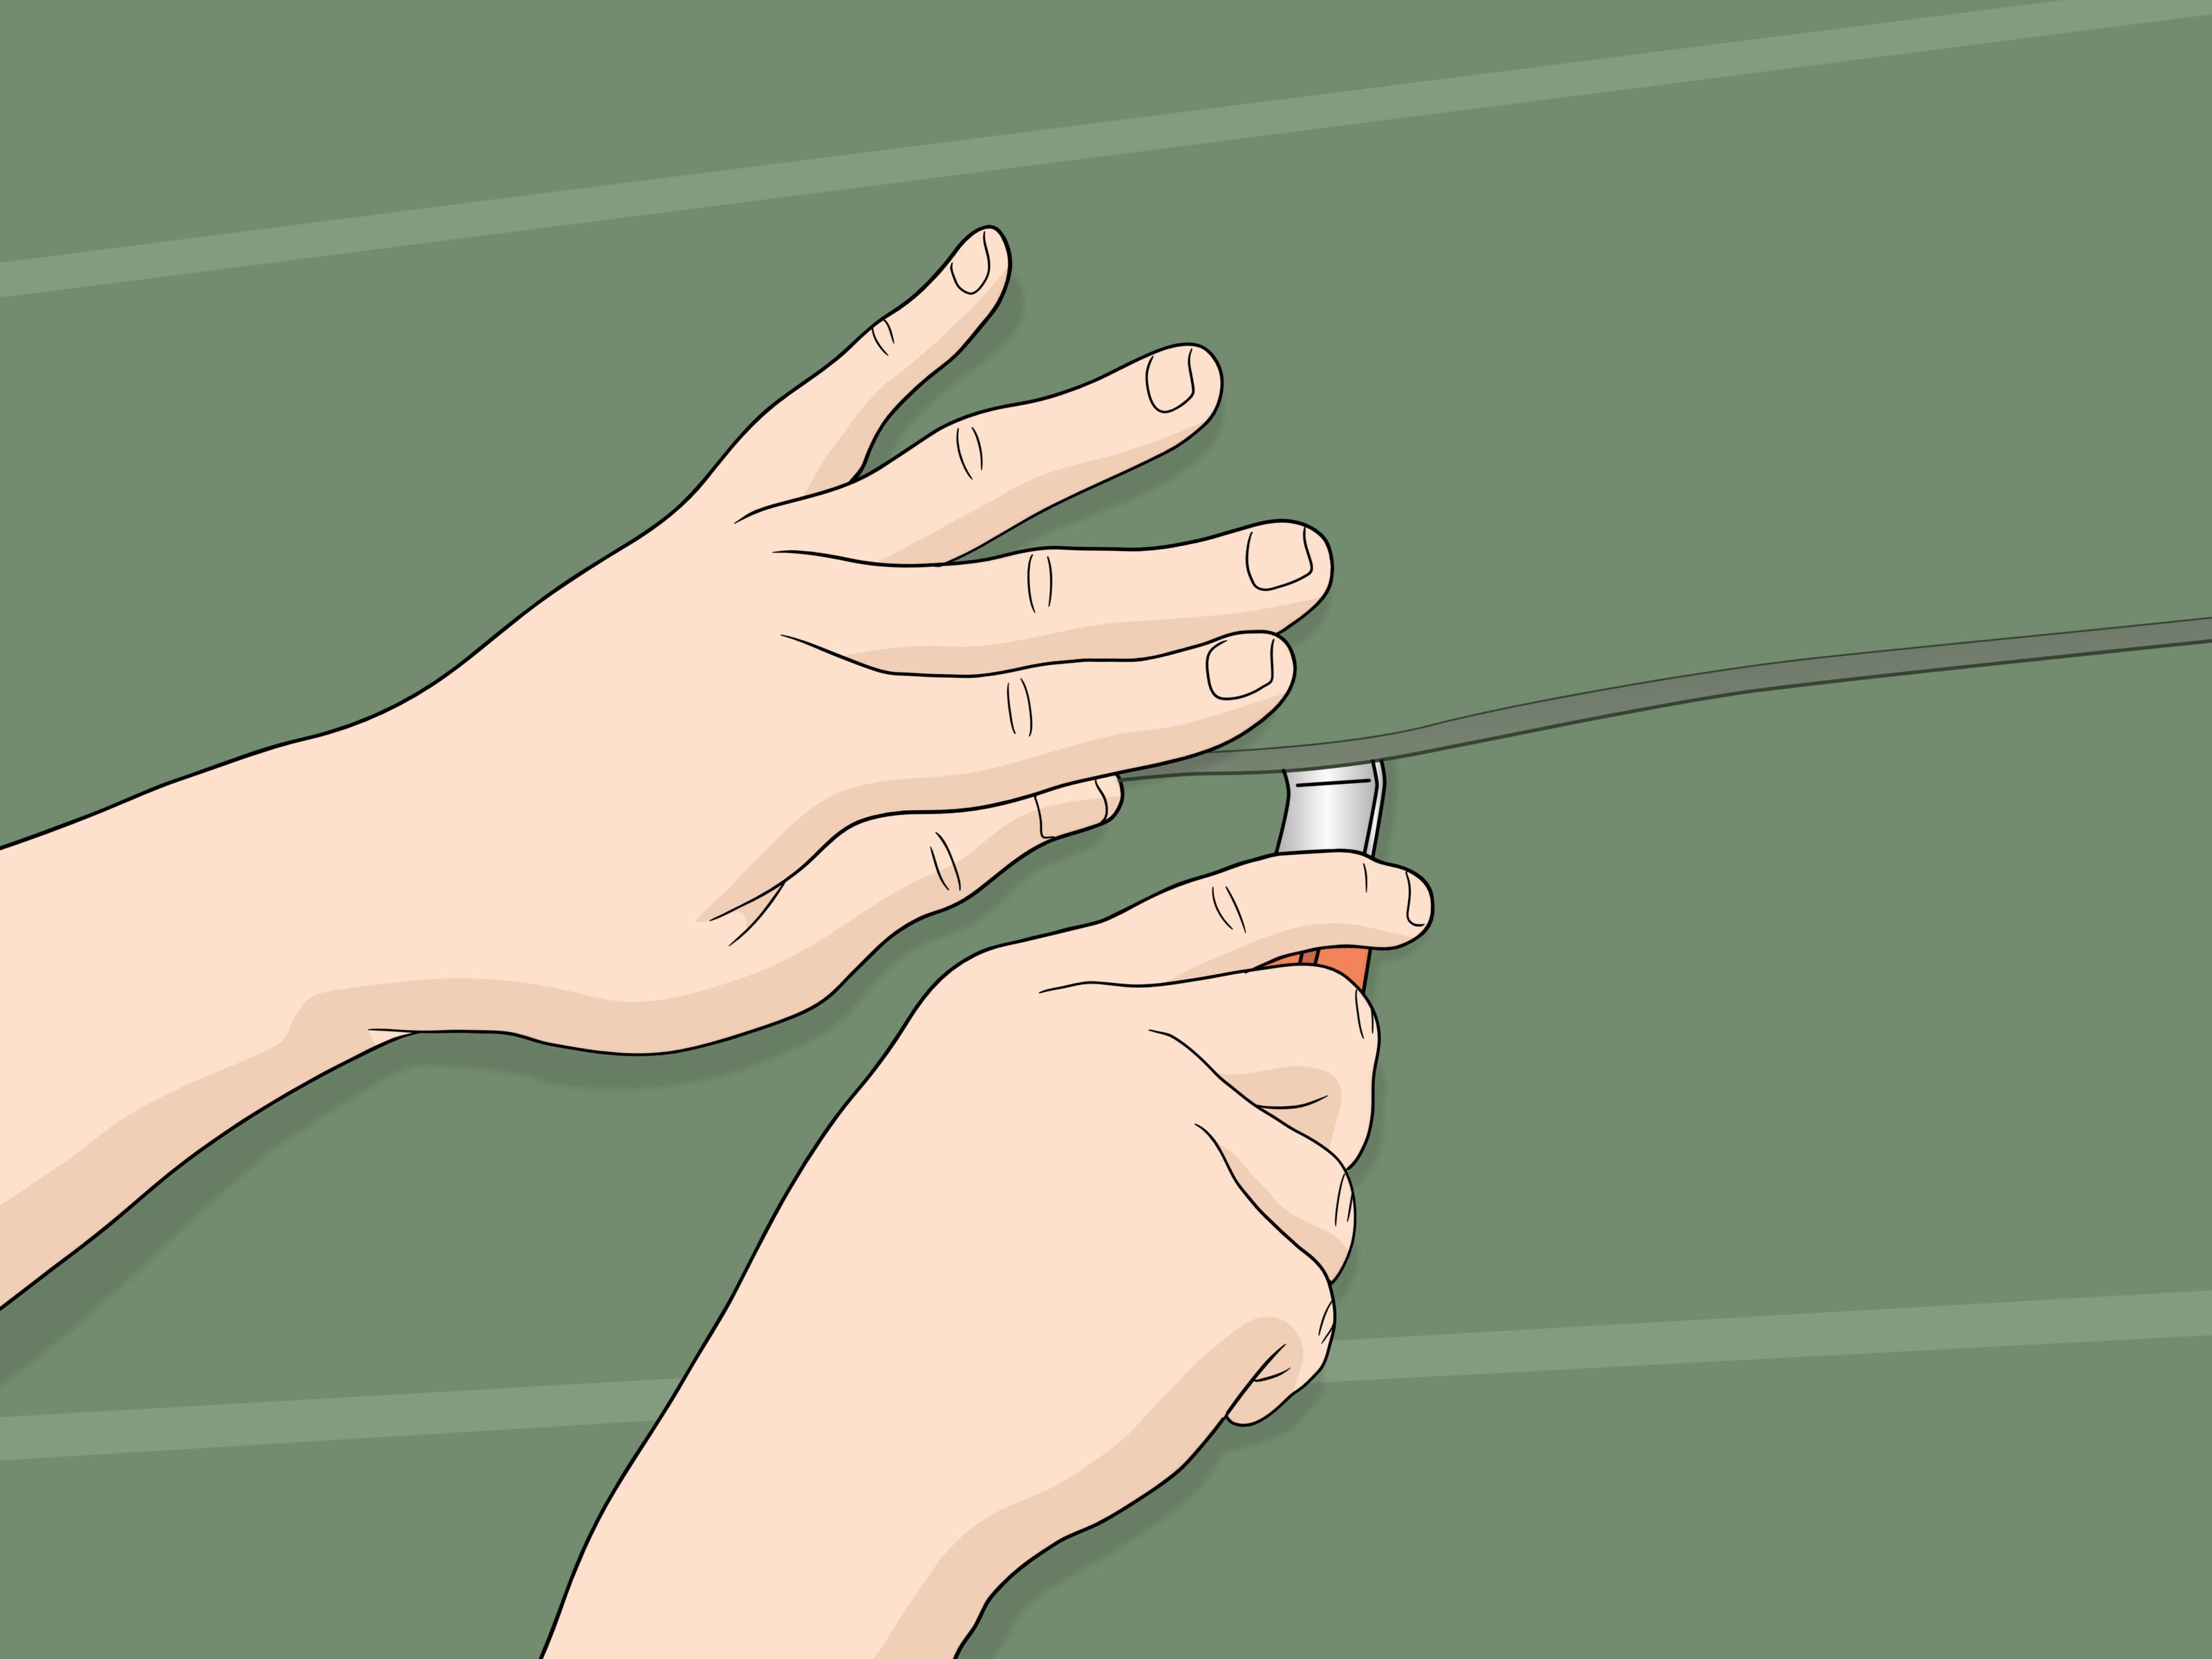
- Use a zip tool to unlock and relock the panel. Slide the curved end under the overlap and gently pull down to disengage the lock.
- Check the nailing pattern. Vinyl siding should not be pinned down like it owes someone money. Nails need to sit in the center of the slots and be left slightly proud so the panel can expand and contract.
- Reposition the panel. Hook the lower lip into the course below and zip it back into place.
- Replace missing fasteners if needed. Nail into the nailing hem, not through the face, and do not drive nails tight.
This repair is especially useful when the siding looks bad in the afternoon sun but mysteriously improves in cooler weather. That often points to a movement issue, not a broken panel. In other words, your siding may not be failing; it may just be throwing a fit because it cannot expand properly.
What to avoid
- Do not face-nail through visible vinyl unless the specific situation absolutely requires a specialty fix.
- Do not hammer nails tight against the panel.
- Do not confuse buckling from installation error with melting from heat. Melted vinyl usually has a distorted, shiny, sagging look.
Best for: loose edges, mild ripples, and panels that have unlocked but are still intact.
Way #2: Patch Small Holes and Cracks
When the damage is small, patching can be the fastest and least noticeable fix. This is the repair equivalent of getting a clean little stitch instead of full reconstructive surgery. For tiny punctures, hairline cracks, or shallow chips, a vinyl siding repair kit, exterior-grade patch product, or color-matched flexible caulk may be enough.
When this method works best
- Small holes from hardware removal
- Tiny impact cracks
- Minor cosmetic damage that has not compromised the full panel
How to patch vinyl siding
- Clean the area first. Wash off dirt, chalking, mildew, and loose debris. Let it dry completely.
- Trim rough edges. If the crack has ragged vinyl sticking out, carefully shave or trim it so the patch sits flat.
- Apply the repair material. Use a vinyl-compatible patch kit or exterior repair compound designed to stay flexible outdoors.
- Smooth the surface. Feather the edges so the repair blends into the surrounding siding.
- Paint only if appropriate. Some patch products are paintable, some are meant to be color-matched as-is. Follow product instructions and test first.
For some homeowners, self-adhesive vinyl repair patches are the easiest route. They are quick, simple, and useful for cracks or small holes where appearance matters but perfection is not the goal. A patch can be a smart stopgap on a detached garage, utility wall, or less visible elevation.
Where patching goes wrong
Patching is a small-damage solution, not a miracle. If the hole is large, the siding is brittle, or the damaged section sits in a highly visible front-wall location, patching may look like what it is: a patch. In those cases, replacing the damaged section usually gives a cleaner result.
Also, avoid using random leftover sealants that are too rigid, too glossy, or not rated for exterior siding. Vinyl expands and contracts. Your repair needs to flex with it. Otherwise, you fix the crack now and create a bigger one later. Congratulations, you invented a sequel.
Best for: small holes, hairline cracks, and minor blemishes that do not justify removing the whole panel.
Way #3: Replace a Damaged Section or Entire Panel
If the siding is cracked, broken, melted, or visibly warped, replacement is usually the best repair. This is especially true when the lock edge is damaged, the panel has split across a long section, or the vinyl has been deformed by heat. A full or partial panel replacement sounds intimidating, but it is often the cleanest and most durable fix.
When replacement is the right move
- The damage is larger than a small patch can hide
- The vinyl is melted or brittle
- A panel is torn loose after a storm
- The lock edges are broken
- The area is highly visible and appearance matters
Step-by-step replacement process
- Unlock the siding above the damaged panel. Use a zip tool to separate the interlocking edge.
- Remove the nails holding the damaged piece. A pry bar can help lift them cleanly.
- Cut out the damaged section if doing a partial replacement. Use snips or a utility knife and leave room for overlap.
- Measure and cut the new piece. If replacing only a section, make the new piece long enough to overlap adjacent siding for a secure fit.
- Slide the new piece into place. Hook the bottom into the panel below and tuck the top under the course above.
- Nail correctly. Place nails in the center of the slots, spacing them appropriately, and leave a slight gap under the nail head so the siding can move.
- Relock the upper course with the zip tool. Work methodically across the seam until everything snaps back together.
If you are replacing only part of a long panel, take your time with the overlap and cutting. That is the difference between “nice repair” and “why does this wall look like it was fixed by a raccoon with a toolbox?”
Special case: melted vinyl siding
Melted siding is often caused by reflected sunlight from low-E windows or by heat sources placed too close to the wall, including grills. Replacing the panel fixes the appearance, but unless you address the heat source, the problem can come back. That means repair plus prevention, not repair and wishful thinking.
Best for: large cracks, storm damage, melted areas, broken locks, and repairs that need to look as close to original as possible.
Common Vinyl Siding Repair Mistakes to Avoid
- Nailing too tight: Vinyl needs room to move with temperature changes.
- Skipping the inspection: A neat patch over a hidden leak is not a win.
- Using pressure washing as prep: Too much force can drive water behind the siding.
- Forcing a color match: New vinyl can look noticeably different from older faded siding.
- Overusing caulk: Caulk is not a universal substitute for proper locking, overlap, flashing, or panel replacement.
- Ignoring repeated damage: If the same spot keeps failing, investigate sunlight reflection, trim details, water intrusion, or impact from nearby equipment.
When You Should Call a Professional
DIY vinyl siding repair makes sense for many common problems, but not every issue should be solved with courage and a Saturday afternoon. Call a siding professional if:
- You see moisture damage behind the wall
- Several panels are loose, warped, or missing
- The siding is old and discontinued, making matching difficult
- You suspect flashing failure around windows or doors
- The damage may be related to structural movement or repeated heat exposure
Sometimes the smartest repair is knowing when the wall needs more than a patch. There is no trophy for fixing siding beautifully while the sheathing behind it quietly turns into oatmeal.
Final Thoughts
The best way to repair vinyl siding depends on the size and cause of the damage. Loose panels can often be resecured. Small holes and cracks can often be patched. Bigger breaks, melted spots, and badly warped panels are usually better replaced. If you match the repair method to the problem, work carefully with the panel locks, and respect vinyl’s need to expand and contract, you can restore both the look and function of your siding without turning the project into a full exterior remodel.
In short: inspect first, repair second, and do not let a tiny crack become a full-blown wall drama.
Field-Tested Lessons and Real-World Repair Experiences
In real-world vinyl siding repairs, the biggest surprise for most homeowners is not the actual repair step. It is everything around it. For example, people often expect the hardest part to be using the zip tool, but the tool is usually the easy part after five minutes of practice. The tricky part is figuring out whether the siding is simply loose, actually broken, or trying to warn you about a hidden moisture issue nearby.
One of the most common experiences with vinyl siding is discovering that a “small crack” is really a location problem. A crack near a hose bib, light fixture, dryer vent, or lower roof line tends to have a story behind it. Sometimes a ladder rubbed there for years. Sometimes lawn equipment threw gravel at the wall. Sometimes repeated heat from reflected sunlight slowly weakened the panel until it split. The lesson is that the repair lasts longer when you fix the cause, not just the symptom.
Another common experience is color mismatch shock. Homeowners buy what looks like the correct replacement panel, hold it up to the house, and suddenly realize their original siding has faded more than they thought. The new panel is technically right and visually wrong. In practice, the best-looking repairs often come from moving a less-faded old panel from a hidden area to the damaged visible area, then installing the new panel where no one will notice. It is a sneaky little design trick, but a very effective one.
Temperature also matters more than people expect. Vinyl behaves better when it is not bitterly cold. In cooler weather, older siding can be more brittle, and a repair that should take twenty minutes turns into an exercise in patience and creative vocabulary. On milder days, the material is easier to unlock, flex, and relock without damage. That does not mean you cannot repair siding in cold weather, but it does mean you should work more gently and avoid rushing.
Many homeowners also learn that “quick fixes” vary wildly in quality. A tiny hole hidden behind patio furniture may be perfectly fine with a patch. A front-elevation crack at eye level usually deserves a cleaner, more invisible repair. This is why experienced installers tend to think in terms of visibility, movement, and water exposure instead of only hole size. The best repair is not always the fastest one; it is the one that still looks reasonable after a summer of heat, rain, and sun.
Finally, there is the maintenance lesson almost everyone learns eventually: regular inspection saves money. A loose panel after a storm is a quick fix when caught early. The same loose panel left flapping for months can invite water, dirt, insects, and damage around trim details. Vinyl siding is forgiving, but it is not magic. A quick walk around the house a few times a year, especially after severe weather, can catch problems while they are still cheap, simple, and mildly annoying instead of expensive, complicated, and mood-destroying.











