
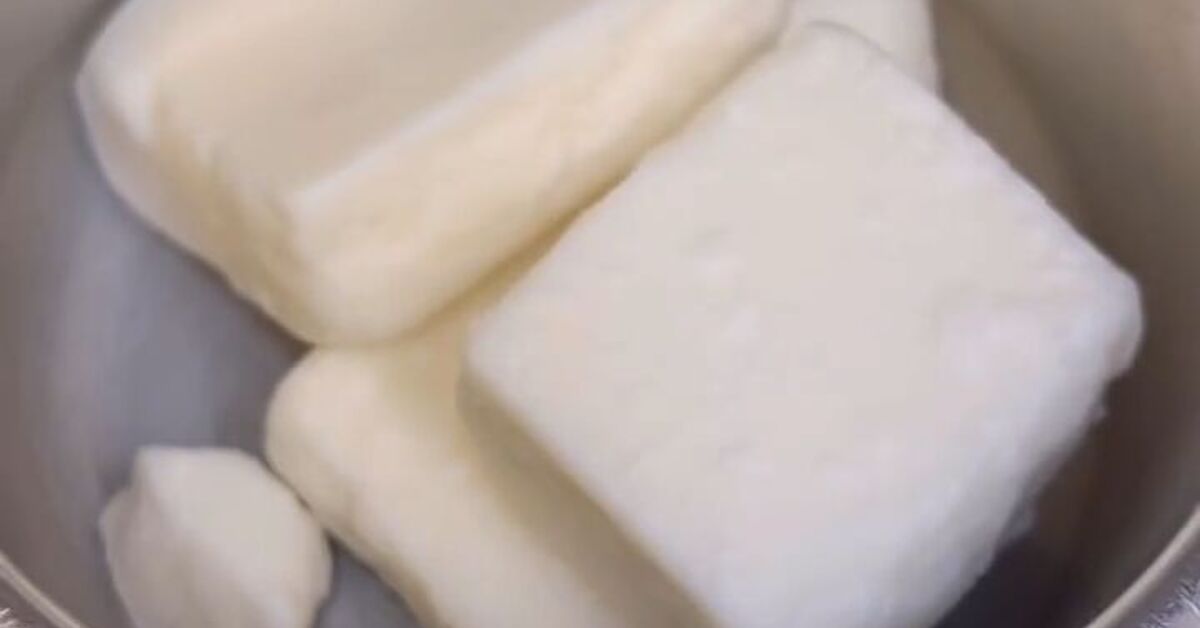
There are two kinds of people in this world: people who walk into a room and say, “It smells amazing in here,” and people who immediately want to know how to make that happen without spending $18 on one tiny cube of scented wax. If you are proudly in the second group, welcome. Your nose has excellent financial instincts.
DIY wax fragrance bars, also called wax melts or scented wax bars, are small pieces of fragranced wax that slowly melt in a wax warmer. Unlike candles, they do not need a wick or an open flame to release scent. That makes them a cozy, customizable way to freshen your home, experiment with seasonal fragrances, and use up leftover candle-making supplies without turning your kitchen into a suspiciously fragrant science lab.
The best part? Making homemade wax melts is surprisingly simple. You melt wax, add fragrance oil, pour the mixture into molds, let it cool, and give it a little time to cure. That is the basic recipe. The magic comes from using the right wax, measuring fragrance properly, controlling temperature, and resisting the urge to dump in “just a little more vanilla pumpkin cinnamon forest rain” until your wax bars smell like a craft store exploded.
This guide walks you through how to make DIY wax fragrance bars in a few simple steps, with beginner-friendly tips, safety notes, scent ideas, troubleshooting advice, and real-world experience from the kind of project that starts as “just one batch” and somehow ends with your pantry smelling like lavender, coffee, and ambition.
What Are DIY Wax Fragrance Bars?
DIY wax fragrance bars are solid pieces of wax blended with fragrance. When placed in an electric or tealight wax warmer, the wax melts and releases aroma into the air. They are popular because they are easy to use, easy to store, and easy to customize. You can make them in clamshell molds, silicone candy molds, ice cube trays, bar molds, or cute seasonal shapes like leaves, stars, hearts, flowers, and tiny pumpkins that look adorable until you realize you now own 47 of them.
Wax fragrance bars are not the same as candles. Candles use a wick and flame. Wax melts use heat from a warmer. Because there is no wick, you do not need to worry about wick size, tunneling, mushrooming, or trimming. However, you still need to pay attention to hot wax, safe fragrance levels, proper ventilation, and warmer safety. Flame-free does not mean brain-free.
Why Make Wax Fragrance Bars at Home?
Making wax melts at home gives you control over the ingredients, scent strength, shape, color, and batch size. Store-bought wax melts are convenient, but homemade wax fragrance bars let you create blends that match your home, mood, season, or very specific personality phase. Want your living room to smell like fresh linen and lemon? Easy. Want your office to smell like cedarwood and coffee because you are pretending to be productive in a mountain cabin? Also easy.
DIY wax bars are also budget-friendly once you have basic supplies. A bag of soy wax or wax melt wax can make several batches, and a small bottle of fragrance oil goes a long way when measured correctly. They also make thoughtful homemade gifts. Package a few bars in a kraft box, add a label, tie it with twine, and suddenly you are “the creative friend.” No one has to know you made them while wearing pajama pants.
Best Wax for Homemade Wax Melts
The wax you choose affects how firm your bars are, how easily they release from molds, how strongly they hold fragrance, and how they melt in a warmer. For beginners, soy wax is one of the easiest choices because it is widely available, simple to melt, and commonly used in home fragrance projects.
Soy Wax
Soy wax is popular for DIY wax fragrance bars because it is plant-based, easy to work with, and has a smooth, creamy look. Standard container soy wax can work, but wax designed specifically for melts often performs better because it is firmer and releases cleanly from molds. If your bars feel too soft or smudge when handled, you may need a harder soy blend or a wax labeled for tarts and melts.
Paraffin Wax
Paraffin wax is known for strong scent throw and excellent color performance. It can create firm, glossy wax bars that release fragrance well. Some crafters prefer soy because it is renewable, while others like paraffin because it is reliable and powerful. The best choice depends on your priorities: natural appeal, scent strength, cost, texture, or appearance.
Beeswax and Coconut Wax Blends
Beeswax has a naturally sweet honey-like scent and a firmer texture, but it can be more expensive and may compete with added fragrance. Coconut wax blends are often soft and luxurious, but they may need to be combined with harder waxes for stable bars. For beginners, a soy wax melt blend is usually the least dramatic option, and drama belongs in reality TV, not your measuring cup.
Supplies You Need
Before you start, gather everything in one place. Wax sets quickly once it cools, so this is not the ideal time to discover your thermometer is in the garage, your mold is dusty, or your cat has developed a sudden interest in aromatherapy.
- Soy wax, paraffin wax, or wax melt blend
- Candle-safe fragrance oil or essential oil approved for wax use
- Digital kitchen scale
- Heat-safe pouring pitcher or glass measuring cup
- Double boiler setup or wax melter
- Thermometer
- Silicone molds or wax melt clamshells
- Stirring utensil
- Optional candle dye or mica approved for wax
- Labels or airtight containers for storage
A digital scale is not optional if you want consistent results. Measuring fragrance by drops, spoonfuls, or “vibes” can lead to weak scent, oily bars, or wax that refuses to set properly. Fragrance load is usually calculated by weight, not volume. That means 1 ounce of fragrance oil is not always the same as 1 fluid ounce in a measuring spoon. Your scale is the responsible adult in this project.
How Much Fragrance Oil Should You Use?
For DIY wax fragrance bars, many recipes use a fragrance load between 6% and 10%, depending on the wax and fragrance oil. Always check the maximum fragrance load recommended by your wax supplier and the safe usage rate recommended by the fragrance oil manufacturer. More fragrance does not always mean a stronger scent. Too much oil can make wax bars greasy, soft, smoky in a warmer, or poorly blended.
Here is a simple formula:
Wax weight x fragrance percentage = fragrance oil amount
For example, if you use 16 ounces of wax and want an 8% fragrance load, multiply 16 by 0.08. That gives you 1.28 ounces of fragrance oil. For a smaller batch, 8 ounces of wax at 8% fragrance load needs 0.64 ounces of fragrance oil.
Beginners should start around 6% to 8%. Once you know how your wax behaves, you can test higher or lower amounts. Think of fragrance oil like hot sauce: the right amount is wonderful, but too much can make everyone quietly open a window.
Step-by-Step Guide: How to Make DIY Wax Fragrance Bars
Step 1: Prepare Your Workspace
Cover your counter with parchment paper or a silicone mat. Set out your molds on a flat, heat-safe surface. Keep children and pets away from the work area because melted wax is hot, slippery, and very committed to landing on exactly the wrong surface.
Make sure your molds are clean and dry. Water can interfere with wax texture and may cause bubbling or spitting when added to hot wax. If you are using clamshell molds, open them before pouring. If you are using silicone molds, place them on a tray so they are easy to move without wobbling.
Step 2: Weigh the Wax
Decide how much wax you want to make. For a beginner batch, 8 ounces of wax is a comfortable amount. It is enough to fill several small molds without creating a lifetime supply of “oops, too much cinnamon.”
Place your pouring pitcher or heat-safe container on the scale, tare it to zero, and weigh your wax. Write down the amount so you can calculate your fragrance oil. Good notes help you recreate successful batches and avoid repeating experiments that smell like a confused bakery.
Step 3: Melt the Wax Slowly
Melt the wax using a double boiler or wax melter. A double boiler can be as simple as a saucepan with a few inches of water and a heat-safe pouring pitcher set inside it. Heat gently and stir occasionally. Avoid direct high heat, which can scorch wax or make it too hot too quickly.
Many waxes are heated to around 170°F to 185°F before fragrance is added, but you should follow the instructions for your specific wax. Temperature matters because fragrance oil needs enough heat to bind evenly with the wax. If the wax is too cool, the oil may not blend well. If it is too hot, some delicate scent notes may flash off faster than your motivation after reading a complicated recipe.
Step 4: Add Color, If Desired
If you want colored wax fragrance bars, add candle dye once the wax is melted. Use dye made for wax. Food coloring is water-based and does not mix properly with wax. Mica can look beautiful, especially in wax warmers, but too much can settle at the bottom or create residue. Use a light hand. You are making wax melts, not a glitter volcano.
For a clean, modern look, skip color entirely. White or cream wax bars feel fresh and minimal, and they fit nearly any packaging style. For seasonal batches, try pale orange for pumpkin spice, soft green for eucalyptus mint, beige for vanilla sandalwood, or icy blue for winter air scents.
Step 5: Weigh and Add Fragrance Oil
Weigh your fragrance oil in a separate small container. When the wax reaches the fragrance-add temperature recommended by your wax supplier, remove it from heat and add the fragrance oil. Stir slowly and thoroughly for about two minutes. This helps the fragrance bind evenly throughout the wax.
Do not whip the mixture like cake batter. Stirring too aggressively can add air bubbles, and your finished bars may look pitted or uneven. Gentle stirring is enough. Imagine you are persuading the fragrance to join the wax, not interrogating it.
Step 6: Cool Slightly Before Pouring
Some waxes pour best around 130°F to 160°F, while others have different ideal pour temperatures. If you pour too hot, the bars may develop sinkholes, frosting, or uneven tops. If you pour too cool, the wax may thicken and create clumps. Follow your wax instructions and test until you find the sweet spot.
For soy wax melts, cooling slightly before pouring often gives a smoother finish. If you are using a silicone mold with small details, pour carefully and tap the mold gently to release trapped air bubbles.
Step 7: Let the Bars Cool Completely
Allow the wax fragrance bars to cool at room temperature until fully solid. Do not rush them into the refrigerator unless your wax instructions allow it. Fast cooling can sometimes cause cracking, frosting, or separation. Let them sit undisturbed for several hours or overnight.
Once the bars are firm, remove them from the molds. Silicone molds usually release easily. If a bar resists, flex the mold gently rather than digging at it with a knife. Wax bars are dramatic but fragile; treat them like tiny scented cookies you absolutely should not eat.
Step 8: Cure Before Using
Curing gives the fragrance time to settle and bond with the wax. Some wax melts smell good after 24 to 48 hours, while soy wax often improves after several days to two weeks. If your first sniff seems weak, do not panic. Seal the bars in a container, label them, and test again later.
For best results, store finished wax melts in an airtight container or clamshell away from sunlight, heat, and strong odors. Wax can absorb surrounding smells, which is charming only if you wanted lavender bars with a hint of leftover pizza.
Easy DIY Wax Melt Recipe for Beginners
Use this starter recipe as a simple test batch:
- 8 ounces soy wax melt blend
- 0.64 ounces candle-safe fragrance oil for an 8% fragrance load
- Optional wax dye
- Silicone mold or wax melt clamshells
Melt the wax gently to the recommended temperature, usually around 170°F to 185°F depending on the wax. Add dye if using. Remove from heat, stir in fragrance oil for about two minutes, cool slightly, pour into molds, and let the bars set overnight. Cure for several days before testing in a wax warmer.
This recipe is small enough for beginners but large enough to teach you how the wax behaves. Once you like the result, scale up carefully using the same percentages.
Best Fragrance Ideas for Homemade Wax Bars
Choosing fragrances is the most fun part of making DIY wax fragrance bars. It is also where restraint becomes important. Blending six scents together sounds creative until your kitchen smells like a pine tree wearing sunscreen inside a cupcake shop.
Fresh and Clean Blends
Try lemon and basil, lavender and linen, eucalyptus and mint, or cotton blossom and white tea. These blends work well in bathrooms, laundry rooms, and entryways because they make the house smell clean even when there is a suspicious pile of shoes by the door.
Warm and Cozy Blends
Vanilla, amber, sandalwood, cinnamon, clove, and cashmere-style fragrances create a soft, comforting mood. These are great for fall and winter or any day when you want your home to feel like it has its life together.
Gourmand Blends
Coffee, caramel, sugar cookie, pumpkin spice, apple pie, and toasted marshmallow are popular, but they can become overpowering. Start with a lower fragrance load for sweet scents, especially in small rooms. Nobody wants to feel trapped inside a cinnamon roll.
Relaxing Blends
Lavender, chamomile, cedarwood, bergamot, and soft musk can create a peaceful atmosphere. Use these in bedrooms or reading corners, but avoid very intense scents before sleep if fragrance tends to bother you.
Common Mistakes to Avoid
Using Too Much Fragrance Oil
Overloading fragrance is one of the most common beginner mistakes. It can make wax bars oily, sticky, soft, or uneven. Stay within the safe usage rate and maximum fragrance load for your wax.
Adding Fragrance at the Wrong Temperature
If the wax is too hot or too cool, fragrance performance may suffer. Use a thermometer. Guessing the temperature by staring at melted wax is not a skill, no matter how confidently you do it.
Skipping the Cure Time
Freshly poured wax melts may smell weaker than expected. Give them time. Curing can noticeably improve cold throw and hot throw, especially with soy wax.
Using Random Containers or Molds
Use molds that can handle warm wax. Thin plastic containers may warp. Some decorative molds may hold fragrance odor permanently. Silicone molds are beginner-friendly and easy to clean.
Expecting One Melt to Scent the Whole House
Wax melts work best when matched to room size. One small cube may scent a bathroom beautifully but barely whisper in an open-concept living room. Use the right amount for the space and warmer.
Safety Tips for DIY Wax Fragrance Bars
Wax melts are flame-free when used in an electric warmer, but they still involve heat, fragrance, and melted wax. Always place warmers on stable, heat-resistant surfaces. Keep them away from curtains, paper, bedding, and anything that can melt, burn, or be knocked over. Keep wax melts and fragrance oils away from children and pets.
Use fragrance oils designed for candles or wax melts. Some essential oils are not suitable for heated wax applications, and some may irritate sensitive people. If anyone in your home has asthma, allergies, migraines, or fragrance sensitivity, use wax melts sparingly and ventilate the room. Recent indoor-air research has also raised questions about how scented wax melts can release compounds that react with indoor ozone, so moderation and airflow are smart habits.
Never pour hot wax down the sink. It can harden in pipes and create plumbing problems with the confidence of a villain. Let leftover wax cool, scrape it out, and dispose of it in the trash. Clean tools with paper towels while the wax is still warm, then wash with hot soapy water if needed.
How to Use Homemade Wax Melts
Place one or two pieces of your DIY wax fragrance bar into the dish of a wax warmer. Turn on the warmer or light the tealight if your warmer uses one. As the wax melts, it will release fragrance into the room. When the scent fades, turn off the warmer and let the wax cool. To remove used wax, warm it slightly until the edge loosens, then slide it out with a paper towel. Some people place cotton balls into warm melted wax to absorb it before wiping the dish clean.
Do not add water. Do not add fresh fragrance oil directly to used wax in a warmer. Do not leave warmers running unattended for long periods. Follow the manufacturer’s instructions for your specific warmer.
Packaging and Storing DIY Wax Fragrance Bars
Once cured, store your wax bars in clamshells, glass jars, tins, wax paper bags, or airtight containers. Label each batch with the fragrance name, wax type, date poured, and fragrance percentage. These notes are helpful when you make a batch that smells amazing and then realize you named it “Batch 3?? maybe vanilla??”
Keep wax melts in a cool, dark place. Heat can soften them, and sunlight can fade color or affect fragrance. If you are gifting them, include simple instructions: place one cube in a wax warmer, do not eat, keep away from pets and children, and use only as directed. The “do not eat” line may feel unnecessary until someone sees a perfect little vanilla-colored heart and makes poor life choices.
Real Experience: What I Learned Making DIY Wax Fragrance Bars
The first time you make DIY wax fragrance bars, you may feel wildly overprepared and underprepared at the same time. You have wax, fragrance oil, molds, a thermometer, and optimism. Then the wax starts melting, the thermometer fogs up, and suddenly you understand why candle makers talk about temperature like it is a moody houseguest.
My biggest lesson is that simple batches usually turn out better than complicated ones. A plain soy wax bar with one clean fragrance often performs better than a dramatic four-scent blend with color swirls, botanicals, and glitter. The simple bar melts evenly, smells balanced, and looks professional. The complicated one may look exciting, but sometimes it smells like a holiday parade crashed into a spa.
Another useful lesson is to make small test batches. It is tempting to melt a huge bowl of wax because the process feels easy once you begin. But if the scent is too strong, too weak, or just not your style, you now own a mountain of wax cubes you will avoid forever. Small batches let you test fragrance loads, cure times, colors, and warmer performance without wasting supplies.
Temperature control also matters more than beginners expect. When fragrance oil is added at the proper temperature and stirred long enough, the finished bars tend to smell smoother and more consistent. When it is rushed, the wax may set strangely or the fragrance may not throw well. Two minutes of stirring feels longer than expected, but it is worth it. Put on a song if needed. Stir through at least half of it.
I also learned that cold throw and hot throw are different. Cold throw is how the wax smells when solid. Hot throw is how it smells when melted. A bar may smell mild in the package but bloom beautifully in a warmer. Another may smell powerful cold but fade quickly once heated. That is why testing matters. Label your batches and write notes like “great in bathroom,” “too sweet,” or “smells like expensive laundry.” These notes are gold when you want to recreate a winner.
Color is fun, but less is usually more. Pale colors look elegant and hide fewer imperfections than dark, heavy dyes. Natural white wax also photographs well if you plan to sell or gift your bars. If using mica, test carefully because too much shimmer can settle in the warmer dish. Pretty is good; scrubbing sparkly wax residue from a warmer at 10 p.m. is less good.
Storage can make or break the final result. Leaving cured wax bars uncovered on a shelf may seem harmless, but scent fades faster when bars are exposed to air. Strong fragrances can also mingle together. Peppermint next to vanilla may be delightful. Peppermint next to leather, mango, and pine can become a scented identity crisis. Airtight packaging keeps each batch cleaner and more distinct.
Finally, homemade wax fragrance bars make excellent gifts because they feel personal without requiring advanced crafting skills. A set of three scents can match a season, a mood, or a person’s home. Try “Morning Kitchen” with coffee and vanilla, “Clean House Energy” with lemon and linen, or “Cozy Blanket” with amber and sandalwood. Add a printed label and suddenly your kitchen project looks boutique. Just remember to keep one batch for yourself. Quality control is important, and sometimes quality control smells like lavender.
Conclusion
Learning how to make DIY wax fragrance bars in a few simple steps is one of the easiest ways to bring custom home fragrance into your space. With wax, fragrance oil, a scale, a thermometer, and a few molds, you can create scented wax melts that feel personal, practical, and gift-worthy. The process is beginner-friendly, but the details matter: choose the right wax, measure fragrance by weight, add scent at the correct temperature, stir thoroughly, pour carefully, and allow the bars to cure.
Start simple, take notes, and test your wax melts in real rooms before scaling up. Once you understand how your wax and fragrance oils behave, you can experiment with seasonal blends, minimalist scents, layered aromas, and beautiful packaging. Homemade wax fragrance bars are proof that a small craft project can make a whole home feel warmer, cleaner, cozier, and just a little more put togethereven if there are dishes in the sink pretending not to exist.












