
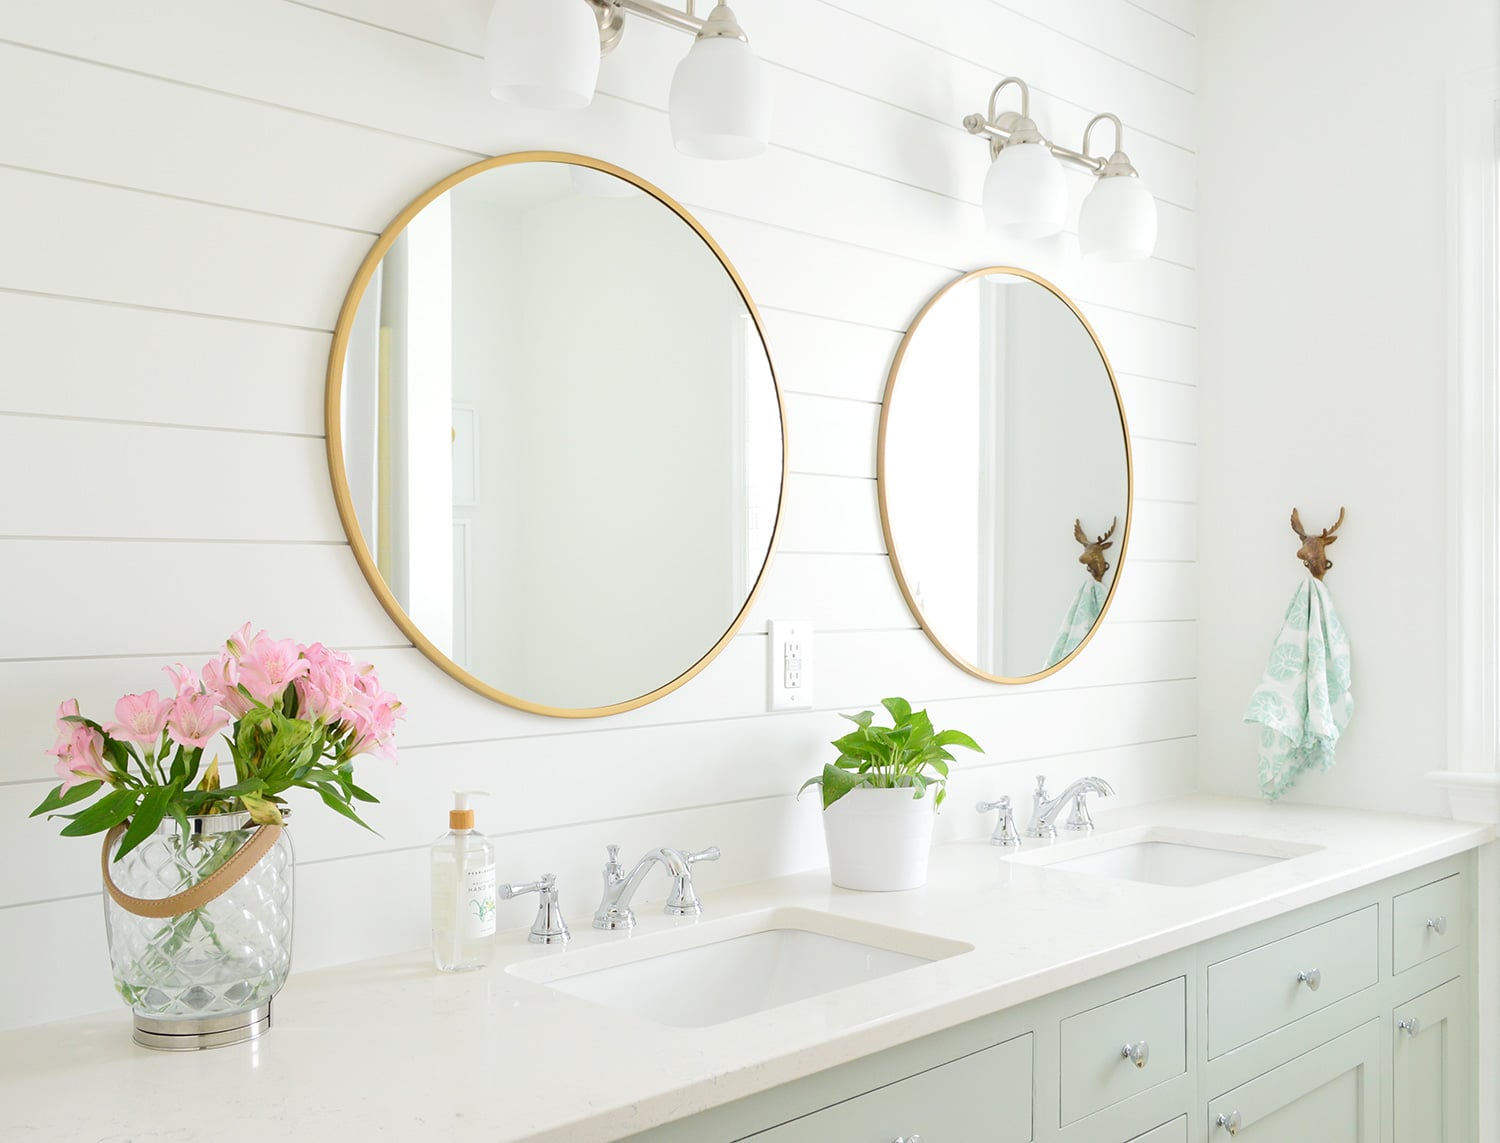
A quick demo-free bathroom makeover is the home improvement version of a magic trick: no sledgehammer, no dust cloud, no mysterious plumbing bill that makes you stare silently into the distance. Instead of ripping out tile, moving pipes, or replacing everything that has ever known toothpaste, this approach focuses on smart surface updates, better lighting, refreshed fixtures, and styling choices that make a tired bathroom feel clean, intentional, and surprisingly expensive.
The best part? You do not need to demolish your bathroom to rescue it from builder-grade boredom. Many bathrooms look dated not because the bones are bad, but because the details are sleepy: yellowed caulk, harsh lighting, a mirror that looks like it came free with the house, mismatched towels, dull paint, cluttered counters, and hardware that has seen things. Fix those details, and suddenly your bathroom starts acting like it belongs in a design magazine instead of a before photo.
This guide walks through a practical, fast, and budget-friendly bathroom refresh you can complete without major renovation. Whether you own your home, rent an apartment, or simply want to avoid living with a toilet in the hallway for three weeks, these demo-free bathroom makeover ideas will help you create a space that feels brighter, cleaner, and more personal.
What Is a Demo-Free Bathroom Makeover?
A demo-free bathroom makeover is a cosmetic bathroom upgrade that avoids demolition. That means you are not tearing out walls, relocating plumbing, replacing tubs, or removing major tile surfaces. Instead, you work with the existing layout and improve everything around it.
Think of it as “style surgery” with no anesthesia required. You might repaint the walls, replace cabinet pulls, install a new mirror, update lighting, refresh grout, add peel-and-stick accents, swap the shower curtain, organize storage, and bring in decor that makes the room feel finished. The transformation can be dramatic, but the process stays manageable.
Demo-free does not mean boring
Some people hear “no demo” and imagine a sad little towel swap. Not today. A smart no-demo bathroom makeover can include bold paint, a moody accent wall, a vanity refresh, modern faucets, framed mirrors, new shelves, stylish storage, upgraded textiles, and lighting that no longer makes everyone look like they are being interrogated in a gas station.
Start With a Bathroom Reality Check
Before you buy paint, baskets, tile stickers, or a brass towel ring because the internet said brass is “having a moment,” take ten minutes to inspect the room. A quick bathroom makeover works best when you know what is cosmetic and what needs actual repair.
Look for peeling caulk, cracked grout, active leaks, soft flooring, moldy corners, poor ventilation, loose fixtures, and outlets that should be upgraded by a professional if they are unsafe or outdated. Cosmetic updates are wonderful, but they should not cover serious moisture or electrical problems. A pretty bathroom with hidden water damage is just a disaster wearing lip gloss.
Make a simple priority list
Divide your bathroom into three categories: must fix, quick upgrade, and nice-to-have. Must-fix items include leaks, mold, failing caulk, and broken ventilation. Quick upgrades include paint, lighting, hardware, mirrors, textiles, and storage. Nice-to-have items might include wallpaper, peel-and-stick flooring, new art, or decorative shelving.
This keeps your makeover focused. Without a list, it is dangerously easy to walk into a home store for caulk and leave with seven baskets, a fake fern, and a shower curtain named “Coastal Oatmeal.”
Refresh the Walls With Bathroom-Friendly Paint
Paint is one of the fastest ways to transform a bathroom without remodeling. Because bathrooms deal with steam, splashes, and frequent cleaning, choose a moisture-resistant interior paint with a washable finish. Satin and semi-gloss finishes are often practical choices because they are easier to wipe down than flat paint.
For a small bathroom makeover, light warm neutrals, soft greens, misty blues, creamy whites, and gentle taupes can make the space feel open and calm. For a powder room, you can go bolder with deep navy, charcoal, terracotta, forest green, or dramatic wallpaper-style paint colors. Powder rooms are tiny stages. Let them perform.
Try painting the vanity
If your vanity is structurally fine but visually tired, paint it. A dated oak cabinet can become crisp and modern with proper cleaning, sanding, priming, and a durable cabinet-grade paint. Popular vanity colors include soft black, sage green, warm gray, navy, mushroom beige, and classic white.
Pair the fresh paint with new knobs or pulls, and the vanity suddenly looks intentional instead of “came with the house and never apologized.” This is one of the best budget bathroom makeover ideas because it changes a large visual surface without replacement costs.
Upgrade the Mirror for Instant Style
A plain frameless mirror can work, but many builder-grade bathroom mirrors feel unfinished. Replacing the mirror is a quick demo-free upgrade with a big visual payoff. A round mirror softens a boxy bathroom. A black metal frame adds contrast. A warm wood frame brings texture. A brass or antique-style frame creates a boutique-hotel effect without requiring boutique-hotel money.
If replacing the mirror is not realistic, consider adding a frame kit or DIY trim around the existing mirror. This approach can make a basic mirror look custom while avoiding glass removal. Just measure carefully, use bathroom-safe materials, and make sure everything is securely attached.
Fix the Lighting Before You Judge the Room
Bad bathroom lighting is responsible for at least half of all “I look tired” moments. Many older bathrooms have harsh overhead lights or dated vanity bars that cast shadows in all the wrong places. Swapping a light fixture can instantly modernize the room, though electrical work should be handled safely and professionally when needed.
Choose lighting that suits the size and function of the bathroom. Vanity lights at face level are better for grooming than a single ceiling fixture. Warm, bright bulbs can make the space feel clean without turning it into an operating room. If your fixture allows it, use bulbs with good color rendering so makeup, shaving, and skincare happen in reality rather than bathroom-fiction lighting.
Small bathroom lighting tip
In a small bathroom, avoid oversized fixtures that crowd the mirror. Slim sconces, simple vanity bars, or a clean globe light can brighten the room without overwhelming it. The goal is “fresh and flattering,” not “airport runway.”
Replace Hardware for a Low-Cost Designer Look
Cabinet knobs, drawer pulls, towel bars, robe hooks, toilet paper holders, and faucet finishes all influence how polished your bathroom feels. Replacing hardware is one of the easiest no-demo bathroom updates because it usually requires basic tools and a little patience.
For a cohesive look, choose one dominant finish. Matte black feels modern and graphic. Brushed nickel is timeless and practical. Brass adds warmth. Chrome feels clean and classic. You do not have to match every single metal perfectly, but avoid making the room look like a clearance bin had a meeting.
Measure before buying
If you are replacing drawer pulls, measure the distance between screw holes. This is called the center-to-center measurement. Buying new pulls with the same measurement prevents extra drilling and keeps the project delightfully non-dramatic.
Refresh Grout and Caulk for a Cleaner Bathroom
Nothing makes a bathroom look old faster than dingy grout and cracked caulk. The good news is that refreshing these small lines can make tile, tubs, and sinks look dramatically cleaner. This is not glamorous work, but it is powerful. Think of it as flossing for your bathroom.
Start by cleaning grout with an appropriate bathroom cleaner and a stiff brush. For stained grout, a grout pen can brighten lines quickly. If caulk is cracked, peeling, or moldy, remove it and apply a fresh bead of mildew-resistant bathroom caulk. Smooth application takes practice, but even an imperfect fresh line often looks better than the ancient, haunted caulk it replaced.
Use Peel-and-Stick Products Carefully
Peel-and-stick tile, vinyl flooring, and removable wallpaper can be excellent tools for a quick demo-free bathroom makeover, especially for renters or short-term updates. They can add pattern, color, and personality without traditional tile work. However, bathrooms are humid spaces, so product choice and surface prep matter.
Use peel-and-stick products only on clean, dry, smooth surfaces. Avoid placing basic adhesive products inside showers or areas that receive direct, repeated water exposure unless the manufacturer specifically approves that use. In high-moisture zones, cheap peel-and-stick materials may lift, curl, or trap moisture. Translation: your bathroom floor should not start doing yoga.
Where peel-and-stick works best
Good locations include powder room floors, low-splash wall areas, vanity backsplashes, accent walls, and rental-friendly floor updates over smooth existing surfaces. Buy extra material for mistakes and pattern matching. Let adhesive products acclimate to room temperature before installation, and use a roller or firm pressure to improve bonding.
Update the Shower Area Without Replacing It
You do not need a full shower remodel to make the shower zone feel new. Start with the easiest swap: the shower curtain. Hang the curtain higher and wider if possible to make the ceiling feel taller and the room look more polished. Choose a fabric curtain liner combination for a softer, more elevated look.
Next, replace rusty curtain rings, add a better bath mat, and consider upgrading the showerhead. A modern showerhead can improve the daily experience without major work. If your shower has glass doors, deep clean the tracks, remove hard-water stains, and replace worn seals if needed.
Style the shower like a spa
Use matching refillable bottles, a simple shower caddy, a teak stool if space allows, and fresh eucalyptus if you like the look. Just remember: spa-like does not mean storing seventeen products on the tub ledge. A bathroom feels calmer when it stops auditioning for a pharmacy shelf.
Make the Vanity Zone Work Harder
The vanity is often the visual center of a bathroom. If you cannot replace it, refresh it. Clean the countertop, remove old silicone around the sink if necessary, polish the faucet, paint the cabinet, swap hardware, and add a tray for daily essentials.
If the countertop is dated but still functional, use styling to redirect attention. A framed mirror, updated faucet, fresh hand towel, small vase, and coordinated soap dispenser can make the whole area feel more intentional. In design, confidence matters. If you style the space like the vanity is a choice, people may stop noticing it was originally beige for reasons unknown to science.
Add Storage That Looks Like Decor
Bathrooms collect tiny objects like they are training for a clutter Olympics. Better storage is essential for a successful bathroom refresh. Add floating shelves above the toilet, baskets under the vanity, drawer dividers, over-the-door hooks, adhesive organizers inside cabinet doors, or a narrow cabinet if floor space allows.
Use closed storage for less attractive items such as razors, medicine, and backup toothpaste. Use open storage for good-looking items such as rolled towels, jars of cotton rounds, candles, plants, and decorative boxes. The trick is not to own fewer things overnight; it is to stop letting every object stand on the counter like it pays rent.
Declutter before decorating
Before buying anything decorative, remove expired products, nearly empty bottles, duplicate tools, and mystery samples from 2018. A bathroom makeover feels bigger when the surfaces are clear. Clean space is the cheapest luxury.
Bring in Better Textiles
Textiles are the fastest way to change the mood of a bathroom. Replace worn towels, faded bath mats, and a tired shower curtain with pieces that share a color palette. You do not need everything to match exactly. In fact, a layered mix often looks more expensive.
Try solid bath towels with patterned hand towels, a textured bath mat, and a shower curtain that introduces color or movement. If your bathroom is mostly white, textiles are where you can add warmth. If your bathroom has colorful tile, choose towels that complement rather than compete.
Add Personality With Art and Accessories
Bathrooms deserve art. They are rooms, not plumbing closets with ambition. Choose moisture-tolerant framed prints, small paintings, sculptural hooks, decorative trays, plants, candles, or vintage finds. Avoid priceless art in steamy bathrooms, but do not be afraid to decorate.
A small framed landscape, botanical print, abstract piece, or funny-but-not-too-funny sign can make the room feel finished. The key is restraint. One or two thoughtful pieces look stylish. Fifteen signs about soaking, relaxing, flushing, and washing hands can start to feel like the bathroom is yelling instructions.
Choose Plants That Can Handle Bathroom Life
Plants can make a bathroom feel fresh and alive, especially if the room has natural light. Good bathroom-friendly options may include pothos, snake plant, philodendron, peace lily, or ferns, depending on light and humidity. If your bathroom has no window, use realistic faux greenery or rotate a plant in temporarily.
Plants soften hard tile, add color, and create a relaxed look. Just do not place plants where they will block ventilation, crowd the sink, or fall dramatically into the toilet. Nature is beautiful, but it needs boundaries.
Do Not Ignore Ventilation
A bathroom makeover should look good, but it also needs to stay healthy. Moisture control is critical because bathrooms produce steam and humidity every day. Use the exhaust fan during showers and leave it running afterward, or open a window when weather allows. Let shower doors or curtains stay partly open so surfaces dry faster.
If the fan is weak, noisy, dusty, or ineffective, clean it or consider replacement. A beautiful bathroom with poor ventilation can quickly develop mildew, peeling paint, and musty smells. That is not a makeover; that is a humid little rebellion.
A Weekend Plan for a Quick Demo-Free Bathroom Makeover
If you want a realistic weekend schedule, break the project into manageable phases. Do not try to paint, caulk, install wallpaper, change lighting, organize drawers, and become a new person all in one afternoon. That is how projects turn into floor piles.
Friday evening: clean and plan
Remove everything from counters, shelves, shower ledges, and drawers. Toss expired products. Deep clean the sink, toilet, tub, shower, mirror, and floors. Take photos of the room so you can compare before and after. Make your shopping list and measure mirror width, cabinet hardware spacing, wall areas, and floor dimensions if using peel-and-stick materials.
Saturday: paint, hardware, and repairs
Patch small wall holes, tape edges, and paint the walls or vanity. Replace cabinet hardware, towel hooks, and toilet paper holder if planned. Remove and replace failing caulk after surfaces are clean and dry. Let paint and caulk cure according to product instructions.
Sunday: style and organize
Install the mirror, hang the shower curtain, place shelves or baskets, organize drawers, add towels, art, and accessories. Finish with a final clean. Then stand in the doorway and admire your bathroom like you are on a renovation show, even if the only camera is your phone and your audience is the cat.
Budget-Friendly Demo-Free Bathroom Makeover Ideas
A bathroom refresh does not require a luxury budget. Start with the upgrades that deliver the biggest visible change for the least money.
Under $100
Replace towels, add a new shower curtain, refresh caulk, buy a bath mat, change cabinet knobs, add a plant, install adhesive hooks, or use a grout pen. These updates are small, but together they can make the bathroom feel cleaner and more styled.
$100 to $300
Paint the walls, update the mirror, replace lighting, add shelves, change the faucet, or refresh the vanity with paint and hardware. This is the sweet spot for many quick bathroom makeovers because the changes are noticeable without becoming a major project.
$300 to $800
Consider higher-quality lighting, a new faucet, peel-and-stick flooring, a framed mirror, better storage furniture, upgraded showerhead, and a full textile refresh. This level can completely change the feeling of a bathroom while still avoiding demolition.
Common Mistakes to Avoid
The biggest mistake in a demo-free bathroom makeover is covering problems instead of solving them. Do not paint over mold, ignore leaks, or stick flooring over damaged surfaces. The second mistake is choosing materials that cannot handle humidity. The third is buying decor before decluttering. A cluttered bathroom with new decor is still cluttered; now it just has accessories.
Another common error is mixing too many styles. Modern black fixtures, farmhouse signs, coastal rope baskets, glam crystal lighting, and neon towels can all be cute separately. Together, they may create a bathroom identity crisis. Choose one general direction and repeat colors, finishes, and textures.
Real-Life Experience: What a Quick Demo-Free Bathroom Makeover Feels Like
The first thing you learn during a quick demo-free bathroom makeover is that the room is smaller than your ambition. On paper, the project sounds simple: paint, mirror, light, hardware, towels, done. In real life, you discover that the old towel bar was installed with the emotional intensity of a bridge engineer, the previous caulk has fossilized, and the vanity drawer contains four hotel lotions from vacations no one remembers.
Still, the experience is surprisingly satisfying because every small task creates visible progress. Cleaning the grout makes the floor look younger. Removing clutter makes the counter feel larger. Replacing a plastic soap pump with a simple dispenser makes the sink area look calmer. Swapping an old mirror for a framed one changes the whole personality of the room. It is not one giant dramatic moment; it is a series of tiny wins that add up.
One practical lesson is to start with cleaning before shopping. A deep clean reveals what actually needs changing. Sometimes the tile is not ugly; it is just hidden under soap scum and bad lighting. Sometimes the vanity does not need replacing; it needs paint, pulls, and a little dignity. Cleaning first also prevents you from buying decorative distractions that do not solve the real problem.
Another lesson is that lighting should happen early. A new wall color can look completely different under old bulbs. If the bathroom has cool, bluish lighting, warm neutrals may look gray and skin may look like it recently joined a vampire book club. Better bulbs or a new fixture can make paint, tile, and textiles look more accurate.
Paint is rewarding, but prep matters. Bathroom walls often have residue from hairspray, steam, soap, and years of “I’ll wipe that later.” Wash the walls, let them dry, patch holes, and use painter’s tape carefully. Rushing the prep stage is how you get peeling paint and edges that look like they were cut by a squirrel with confidence.
Caulking is the humbling part. It looks easy in videos. Then you try it and realize smooth caulk lines require patience, the right angle, and fewer dramatic hand movements. The good news is that removable mistakes are part of the process. Work in short sections, keep a damp cloth nearby, and do not apply too much at once. Fresh caulk is worth the effort because it instantly makes the bathroom look cleaner.
Peel-and-stick flooring or wallpaper can be a game changer, but it deserves respect. Measure twice, buy extra, and do not start at 10 p.m. unless you enjoy making life choices under fluorescent lighting. Pattern matching takes time. Cutting around toilets and corners is not impossible, but it is fiddly. A sharp utility knife, patience, and cardboard templates can save your sanity.
The biggest emotional payoff usually comes at the styling stage. Once the towels are folded, the mirror is clean, the shelves are organized, and the shower curtain is hung high, the bathroom suddenly feels intentional. You may find yourself walking past it just to peek inside. This is normal. You have turned a purely functional space into a room that feels cared for.
A quick demo-free bathroom makeover also teaches restraint. You do not need to change every surface. Sometimes the smartest design move is to leave the existing tile alone and choose colors that make it look deliberate. Beige tile can look warm with terracotta, cream, and wood. Gray tile can feel modern with black, white, and soft green. Pink vintage tile can become charming with brass, white, and botanical prints. Working with what you have is often cheaper and more stylish than fighting it.
Finally, the experience proves that home improvement does not have to be dramatic to be meaningful. You are not rebuilding the bathroom. You are making daily routines feel better. Brushing your teeth under flattering light, reaching for a fresh towel, stepping onto a clean bath mat, and seeing a clutter-free counter can genuinely improve the mood of the morning. That is the quiet power of a demo-free makeover: no rubble, no chaos, just a better room and fewer reasons to apologize when guests ask to use the bathroom.
Conclusion
A quick demo-free bathroom makeover is one of the smartest ways to refresh your home without taking on a full remodel. By focusing on paint, lighting, hardware, mirrors, textiles, storage, grout, caulk, and moisture control, you can make a dated bathroom feel brighter, cleaner, and more stylish in a single weekend.
The secret is not doing everything. It is doing the right things in the right order. Fix moisture issues, clean deeply, choose a simple color palette, upgrade the most visible details, and style the space with restraint. Your bathroom does not need a sledgehammer to feel new. Sometimes it just needs better lighting, fresh caulk, and a shower curtain that has not emotionally given up.












