
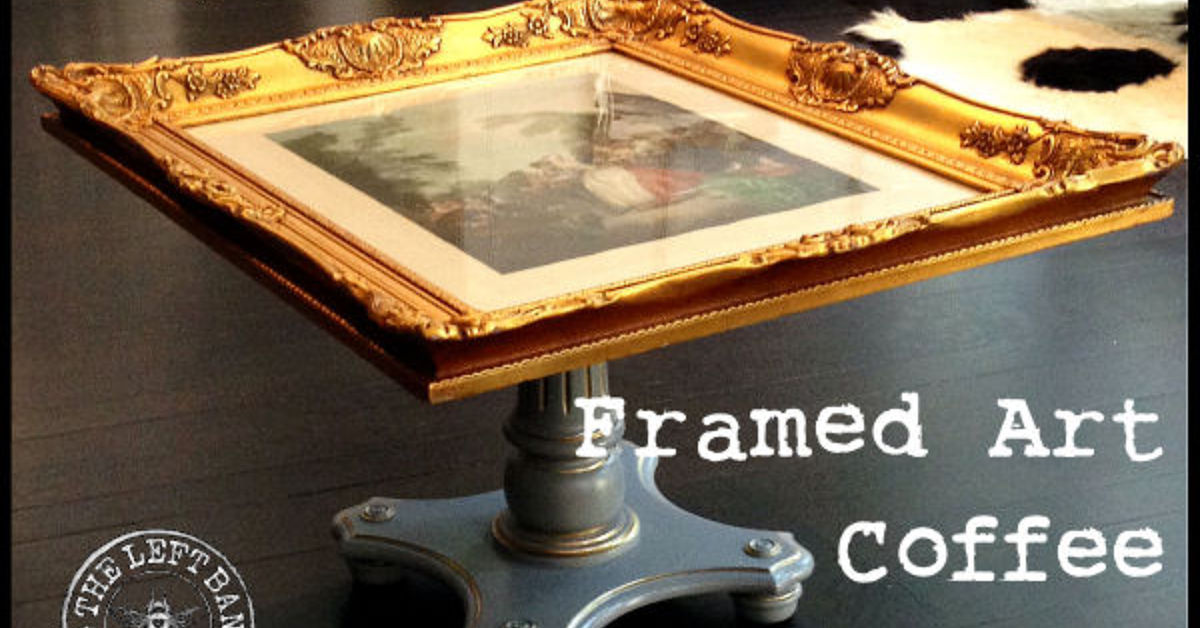
A coffee table usually performs three glamorous duties: holding drinks, collecting remote controls, and displaying a suspiciously untouched stack of design books. A DIY framed art coffee table, however, earns its spot in the living room by becoming part furniture, part oversized picture frame, and part personal gallery.
This project features a recessed display area beneath a removable clear top. Inside, you can showcase a large art print, vintage map, family-photo collage, pressed textiles, wallpaper sample, concert posters, or your children’s latest artistic masterpiece. When your decorating mood changes, the display changes with itwithout requiring you to buy another table or explain the purchase to your household accountant.
The design below uses a sturdy wooden base, a framed tabletop, a removable art panel, and professionally cut tempered glass or acrylic. It is approachable for confident beginners, customizable for nearly any decorating style, and practical enough for everyday living.
What Is a Framed Art Coffee Table?
A framed art coffee table is essentially a display table with a shallow compartment built into its top. The surrounding wooden border functions like an oversized picture frame, while a transparent surface protects the artwork and provides a flat area for normal coffee-table use.
Unlike permanently decorated tabletops, the artwork is removable. You can switch from a botanical print in spring to a vintage ski poster in winter, create a rotating family-photo collection, or finally give that beautiful fabric remnant a purpose beyond occupying a drawer.
The framed design also adds visual weight. A simple rectangular base can look surprisingly polished once the tabletop includes a broad border, crisp mitered corners, and a carefully fitted insert.
Recommended Finished Dimensions
This plan creates a medium-size rectangular coffee table suitable for most sofas:
- Overall length: 42 inches
- Overall width: 24 inches
- Finished height: approximately 17 inches
- Visible art opening: approximately 32 by 14 inches
- Frame border: approximately 5 inches wide
These measurements are suggestions rather than sacred woodworking law. Before buying lumber, use painter’s tape to outline the proposed table on your floor. Check walking clearance, sofa proportions, and whether anyone is likely to collide with a corner while carrying snacks.
Materials and Supplies
Wood and Structural Materials
- One sheet of 3/4-inch cabinet-grade plywood or a suitable partial sheet
- Four 2-by-2 boards for the legs
- 1-by-3 boards for the aprons and internal supports
- 1-by-6 boards for the framed tabletop border
- 1/4-inch plywood, hardboard, or MDF for the removable art backing
- Wood glue
- 1 1/4-inch pocket-hole screws
- 2-inch or 2 1/2-inch pocket-hole screws, depending on material thickness
- Wood filler
- Small turn buttons, mirror clips, or removable backing clips
- Clear silicone bumpers or glazing pads
Transparent Top
- Custom-cut tempered glass, ideally with polished edges
- Or clear acrylic sheet for a lighter, easier-to-handle alternative
For a horizontal glass tabletop, order the glass from a professional supplier rather than cutting ordinary window glass yourself. The U.S. Consumer Product Safety Commission explains that tempered glass is designed to break into smaller fragments instead of large, sharp shards. A voluntary ASTM standard also calls for tempered glass on horizontal table and desk surfaces.
Tools
- Tape measure and combination square
- Pencil
- Circular saw or table saw
- Miter saw
- Drill and driver
- Pocket-hole jig
- Clamps
- Random-orbit sander
- Router with a rabbeting bit, or table saw for cutting the recess
- Safety glasses, hearing protection, and dust protection
Pocket-hole construction is especially useful for this project because the fasteners can be hidden inside the table. Beginner coffee-table plans from Kreg commonly combine dimensional lumber, plywood, glue, and pocket-hole joinery for straightforward assembly.
Suggested Cut List
Verify every dimension against the actual thickness of your lumber before cutting. Boards with the same label do not always share identical real-world measurements.
- Four legs: 2 by 2 by 16 inches
- Two long aprons: 1 by 3 by 36 inches
- Two short aprons: 1 by 3 by 18 inches
- Two interior support rails: 1 by 3 by approximately 18 inches
- Two long frame pieces: cut to create a 42-inch outside dimension
- Two short frame pieces: cut to create a 24-inch outside dimension
- One recessed support panel: sized after the frame is assembled
- One removable art backing: approximately 33 by 15 inches
The frame pieces may be joined with 45-degree miters or square butt joints. Miters create the classic picture-frame appearance, while butt joints are easier for beginners and can look intentionally modern.
How to Build a DIY Framed Art Coffee Table
Step 1: Plan the Artwork Before Building the Table
Choose the approximate artwork first. This prevents the classic DIY situation in which you build a beautiful opening and later discover that every print you love is two inches too wide.
Arrange prints, photographs, postcards, or fabric on a paper template matching the proposed opening. Leave at least half an inch around the visible composition so the frame does not cover important details. For a collage, photograph the layout before moving anything. Your memory will not save you when 47 nearly identical vacation photos are scattered across the floor.
Step 2: Cut and Prepare the Wooden Parts
Cut the legs, aprons, support rails, and frame pieces. Mark every component immediately. Labels such as “long apron” and “short frame” are far more helpful than staring at six boards and asking them to identify themselves.
Sand the parts before assembly, beginning around 120 grit and progressing to 180 or 220 grit. Sanding individual pieces is easier than trying to reach tight inside corners after the base has been assembled. Established furniture-refinishing guidance similarly recommends progressing from a medium grit to 220 grit and removing dust before applying finish.
Step 3: Assemble the Table Base
Drill pocket holes at both ends of the apron boards. Attach one long apron between two legs using wood glue and appropriately sized pocket-hole screws. Repeat for the opposite side.
Connect the two assemblies with the short aprons. Work on a flat surface, clamp each joint, and check for square by measuring diagonally from corner to corner. If both diagonal measurements match, the base is square. If they do not, gently adjust the frame before the glue sets.
Add two interior support rails across the width of the base. These rails support the framed top and reduce flexing. Position them far enough from the center to avoid interfering with the display compartment.
Step 4: Build the Oversized Picture Frame
Cut the tabletop frame pieces with 45-degree ends. Dry-fit all four pieces on a flat surface before adding glue. The outside dimensions should be 42 by 24 inches, although a minor variation is fine as long as the frame is square.
Glue and clamp the corners. Reinforce them from below with pocket screws, splines, biscuits, dowels, or flat metal corner braces. A coffee table receives more bumps than wall art, so the frame needs stronger joinery than a decorative picture frame.
A traditional frame uses a rabbet, which is an open-sided recess cut along an edge. Besides locating the inserted material, a rabbet provides a more positive mechanical connection than a simple edge-to-edge joint.
Step 5: Create the Recess for the Glass and Artwork
Turn the assembled frame upside down. Use a router and rabbeting bit to cut a continuous recess around the inside opening. Make several shallow passes rather than forcing the router to remove the full depth at once.
The recess must accommodate three elements:
- The clear glass or acrylic top
- A small air gap or thin spacer
- The art backing panel beneath it
A practical configuration is to seat the transparent top near the upper edge of the frame and support the art panel on separate strips or clips lower in the cavity. This keeps the artwork from touching the glazing and allows the backing to be removed from below.
Router guidance from Rockler recommends setting up the bit and guide carefully and making predictable cuts along a smooth edge. Test the setup on scrap wood before routing the actual frame. Scrap wood exists partly to prevent expensive wood from becoming emotionally complicated firewood.
Step 6: Add the Art-Panel Supports
Attach narrow wooden strips around the underside of the opening to form a ledge for the backing panel. Alternatively, install small turn buttons or mirror clips that rotate out of the way when you want to remove the art.
Do not permanently glue the backing in place. The chief advantage of a display coffee table is the ability to change its contents. A sealed backing turns a flexible design into a tiny wooden museum with one permanent exhibition.
Step 7: Attach the Framed Top to the Base
Center the frame over the assembled base. The overhang should be even on all sides. Secure the top from below through the aprons or support rails.
If the frame is solid wood, use tabletop fasteners, figure-eight connectors, or slightly elongated screw holes to allow seasonal wood movement. If most of the top is stable plywood or MDF with applied trim, ordinary concealed screws may be sufficient.
Confirm that no screw is long enough to emerge through the upper surface. Few design details attract attention faster than an unexpected metal point beside someone’s coffee mug.
Step 8: Fill, Sand, and Finish
Fill visible nail holes, small gaps, and imperfections. Allow the filler to dry, then sand the repaired areas flush. Vacuum the table and wipe away remaining dust.
For a natural appearance, apply stain followed by a clear protective finish. Pine and other porous softwoods may absorb stain unevenly, so testing a pre-stain conditioner on scrap material can help produce a more consistent color.
For a painted table, prime the surface first, especially when using MDF. Lightly sanding MDF and removing the dust improves primer and paint adhesion, while a quality bonding primer provides a more durable foundation on smooth or composite surfaces.
Because coffee tables face spills, condensation, cleaning, and frequent contact, protect the wood with a durable furniture topcoat. Apply the finish in the direction of the grain, allow it to dry, sand lightly between coats, and follow the manufacturer’s curing instructions. Two coats provide basic protection; a third coat is sensible for heavily used surfaces.
Step 9: Prepare and Install the Artwork
Mount the artwork to the removable backing using archival photo corners, acid-free tape, spray adhesive rated for the chosen materials, or a separate mat board. Avoid ordinary household tape on irreplaceable prints because its adhesive can discolor paper over time.
For a fabric insert, stretch the textile gently over the backing and secure it on the reverse side. For a map or poster, use a mat or border to make the composition look intentional. For a collage, mix image sizes but maintain consistent spacing.
Clean both sides of the glass or acrylic before installation. Place small clear bumpers inside the recess so the transparent panel does not rattle directly against the wood. Lower it carefully into position, then install the prepared art backing from below.
Creative Framed Art Coffee Table Ideas
Vintage Travel Table
Display an old highway map, train tickets, postcards, luggage labels, and black-and-white travel photographs. Choose a warm walnut stain to give the table a collected-over-time appearance.
Modern Graphic Table
Use one bold abstract print beneath a slim black frame. Paint the base matte black or soft white and choose low-iron glass when maximum clarity is important.
Family Memory Table
Create a seasonal photo collage with handwritten captions, children’s drawings, birthday cards, or copies of family recipes. Use copies rather than originals for anything emotionally or financially valuable.
Textile Display Table
Frame a section of quilt, embroidered cloth, woven textile, or interesting wallpaper. Textiles bring softness to the wooden structure and work particularly well in bohemian, cottage, and eclectic interiors.
Natural History Table
Arrange pressed leaves, botanical illustrations, seed packets, or nature photographs. Make sure organic materials are completely dry and securely mounted before sealing them beneath the clear top.
Common Mistakes to Avoid
Ordering the Glass Too Early
Do not order glass based only on planned measurements. Assemble and finish the frame first, measure the completed recess in several places, and give those actual dimensions to the glass supplier.
Making the Glass Fit Too Tightly
Wood moves slightly and handmade frames are rarely perfect to the thousandth of an inch. Leave a small clearance around the glass and use transparent bumpers to prevent movement.
Skipping the Dry Fit
Assemble the base, frame, support panel, artwork, and glazing without glue or finish before final installation. A complete dry fit reveals alignment problems while they are still merely annoying instead of permanently educational.
Using Unsupported Ordinary Glass
Do not substitute a thin pane from a discarded picture frame. Coffee-table glazing should be selected for horizontal furniture use, properly supported, and professionally edged.
Trapping Dust Under the Top
Clean the frame cavity, artwork, backing, and glazing immediately before assembly. Inspect everything under bright light. One trapped hair can become the only object you see for the next six months.
My Experience Building a Framed Art Coffee Table
The first lesson I learned was that the framed top should be designed before the base. I originally treated the base as the main project and the display opening as a decorative feature to be figured out later. That approach created unnecessary measurement problems. Once the art opening, frame width, rabbet depth, backing panel, and glazing were planned as one assembly, the rest of the table became much easier.
The second lesson involved mitered corners. On the workbench, four individually cut 45-degree corners looked perfect. When they met one another, however, they formed something that was technically rectangular but emotionally closer to a parallelogram. The solution was not aggressive clamping. It was recutting one piece, checking the saw angle, and dry-fitting the frame with a square before touching the glue bottle.
I also discovered that a wide wooden frame can make a table look visually heavy. A dark stain emphasized that weight, while a medium-tone finish allowed the artwork to remain the focal point. On another version, painting the base and frame the same muted color produced a cleaner, more contemporary appearance. The finish should support the displayed art rather than compete with it.
The removable backing turned out to be one of the most important details. My first idea was to trap the art between the glass and a permanently attached panel. That would have been quicker, but it would also have defeated the reason for building the table. Small rotating clips added only a few minutes to the project and made changing the display simple.
The glazing required patience. A frame that appeared perfectly square still varied slightly from one end to the other. Measuring only once would have produced a piece that was too tight. I measured the opening at the top, center, and bottom, used the smallest dimensions, and discussed the necessary clearance with the glass shop. The professionally polished edges also made handling and cleaning the panel far more comfortable.
Another practical discovery was that the artwork should not sit directly against the glass. Paper can wrinkle, photographs can cling to smooth surfaces, and tiny imperfections become more obvious when pressed against the glazing. A shallow separation created with a mat, spacer, or lowered backing ledge makes the display look more like professionally framed art.
Finishing took longer than construction. The table looked complete after the first coat, but it was not ready for daily use. Light sanding between coats removed rough raised grain, and allowing the final finish to cure prevented books, bumpers, and decorative objects from leaving impressions. “Dry to the touch” and “ready for a mug of hot coffee” are not always the same milestone.
The most enjoyable part was changing the display. I began with a single oversized print, then tried a collage of postcards and photographs. The collage created more conversation because visitors leaned closer to inspect the details. A bold print looked calmer and made the room feel less busy. Both options worked; they simply changed the table’s personality.
My final lesson was to keep the first display simple. A framed art coffee table is already a strong visual feature. It does not need twenty decorative objects piled on top. A tray, one small plant, and enough open space for drinks allowed the art beneath the surface to remain visible. The result felt custom, personal, and considerably more expensive than the materials suggestedwhich is one of the better rewards a DIY project can offer.
Final Thoughts
A DIY framed art coffee table transforms an ordinary piece of furniture into an adaptable display. Its basic construction relies on familiar woodworking techniques, but the removable artwork makes the finished table feel unique.
Measure the display components carefully, build a square and well-supported frame, choose safe glazing, and resist rushing the finish. Once completed, the table can evolve with your home. Replace the print, create a new collage, add seasonal textiles, or feature the work of a different family artist whenever inspiration arrives.











