
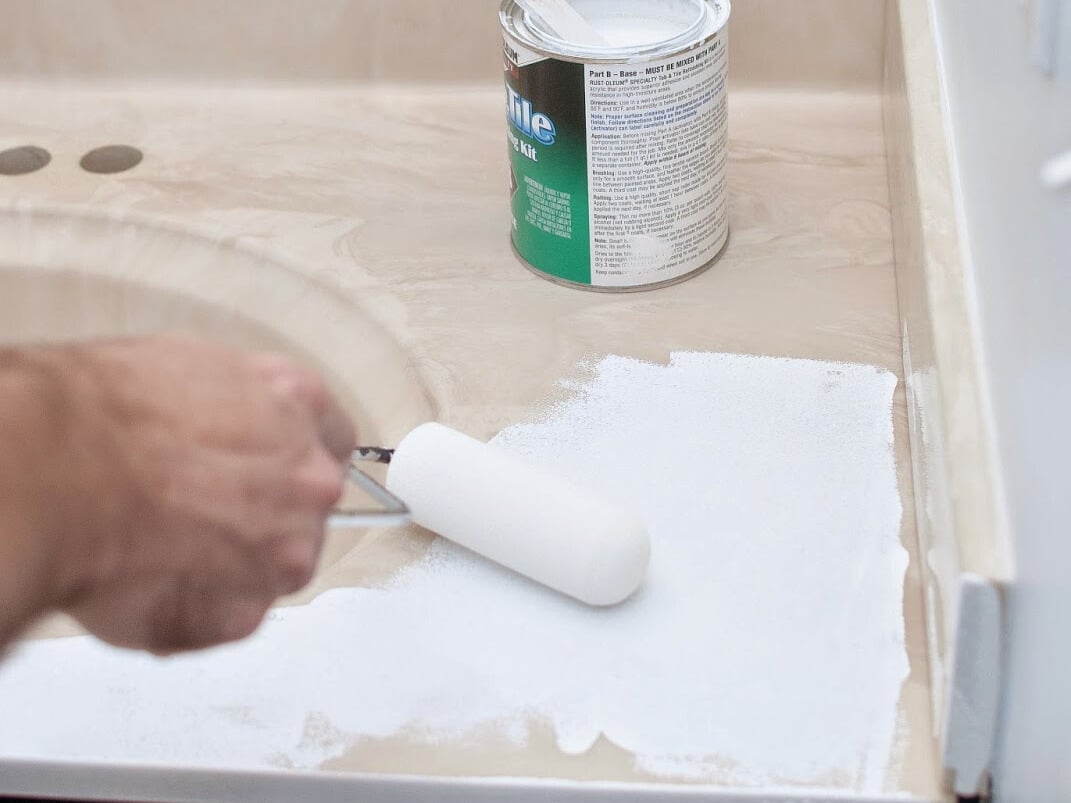
A tired bathroom vanity has a special talent: it can make the whole room look older, grumpier, and more expensive to fix than it really is. The good news is that a full demolition is not your only option. A painted bathroom sink and countertop makeover can breathe new life into a worn vanity without sending your budget into a dramatic spiral. With the right prep, the right products, and a little patience, you can turn a dingy sink-and-top combo into something crisp, modern, and surprisingly polished.
This kind of makeover works best when the vanity top is structurally sound but visually sad. Maybe the cultured marble is yellowed, the laminate looks dated, or the integrated sink has the kind of mysterious discoloration that laughs at ordinary cleaner. Painting can be a smart cosmetic upgrade when replacement is not practical yet. It is not magic, and it is not a forever finish, but it can absolutely be a smart, stylish stop on the road to a better bathroom.
The real secret is knowing what kind of makeover you are doing. This is not wall paint plus optimism. Bathroom sinks and countertops deal with moisture, soap, standing water, heat styling tools, toothpaste splatter, and the occasional bottle of face serum that lands with the force of a tiny meteor. That means the finish has to be built for adhesion, moisture resistance, and daily wear. If you go in with a realistic plan, the results can look fantastic.
Why a Painted Bathroom Sink and Countertop Makeover Appeals to So Many Homeowners
There is a reason this makeover keeps showing up in DIY circles: the math is compelling. Replacing a vanity top, sink, faucet, backsplash, and trim details can snowball fast. Painting, by contrast, is usually a weekend-scale project with a smaller materials bill and far less disruption. For guest bathrooms, powder rooms, or older primary baths that need a visual reset, it can deliver a big style upgrade without requiring a contractor, a dumpster, and a temporary emotional support bucket.
It also offers serious design flexibility. You can go bright white for a clean hotel look, soft greige for a more updated classic feel, or faux stone if you want the vanity to pretend it costs far more than it did. Some DIY kits are made specifically for laminate, cultured marble, and vanity tops, while sink refinishing systems are better suited to porcelain, ceramic, fiberglass, and similar bathroom surfaces. In plain English: your sink and counter might need different products even if they are touching each other like best friends.
Before You Paint: Know Which Surface You Actually Have
Not every vanity top behaves the same way. A painted bathroom sink and countertop makeover starts with identifying the existing material, because product choice determines whether your finish looks sleek or starts peeling like a bad sunburn.
Laminate Countertops
Laminate is one of the most paint-friendly surfaces for this kind of project, especially when it is cleaned well, lightly sanded, and paired with a bonding primer or refinishing kit. It is common in older bathrooms and often the easiest candidate for a cosmetic update.
Cultured Marble Vanity Tops
Cultured marble is also a common contender. Many small-project countertop refinishing kits are designed for this exact material. The glossy factory finish, however, means prep is everything. If the surface is not properly deglossed and cleaned, the coating may fail.
Porcelain or Ceramic Sinks
If the sink basin is porcelain or ceramic, it usually needs a tub-and-tile-style refinishing system or another epoxy-based product designed for wet, slick, high-use fixtures. Regular cabinet or countertop paint is not the answer here. The sink bowl takes the most abuse, so this is the part of the project where shortcuts go to die.
Natural Stone or Premium Solid Surface
If your bathroom already has quality quartz, granite, or another premium surface, painting may not be the smartest long-term move. It can still be done, but it is more of a temporary style play than a durable upgrade. If the material is valuable, replacement or professional refinishing may make more sense than covering it up.
How to Prep for a Painted Bathroom Sink and Countertop Makeover
Prep is the least glamorous part of the job and the one most likely to determine whether you end up bragging about your vanity or angrily Googling “why is my paint bubbling.” Moisture, soap residue, hair product buildup, and old caulk all interfere with adhesion. So yes, this is the moment to become weirdly serious about cleaning.
Step 1: Clear the Area Completely
Remove countertop clutter, soap dispensers, trays, toothbrush holders, and anything else living on the vanity. If possible, remove the faucet hardware, drain trim, and old caulk lines around the sink or backsplash. At a minimum, tape carefully around all fixtures and edges. Your future self will appreciate not having to scrape dried coating off a faucet handle with the patience of a museum conservator.
Step 2: Deep-Clean the Surface
Use a degreasing cleaner or the cleaner recommended by your refinishing kit. Focus on corners, edges, caulk lines, and the rim around the sink bowl where soap and toothpaste like to collect. Rinse and dry thoroughly. Any residue left behind can weaken the bond between surface and coating.
Step 3: Sand or Etch as Directed
Most glossy vanity surfaces need light sanding to help the new finish grip. This is especially true for laminate, cultured marble, and previously glossy painted surfaces. The goal is not to gouge the countertop into submission. You want a uniformly dulled surface that gives primer or epoxy something to hold onto.
Step 4: Repair Chips and Cracks
Small dings, scratches, or chips should be filled before coating. Use an appropriate filler or repair product, then sand smooth. Paint hides color problems far better than texture problems. If your surface has a crater, the paint will politely highlight it.
Step 5: Dust Removal Matters
After sanding, vacuum up the dust and wipe everything down with a damp lint-free cloth or tack cloth if the product instructions allow it. Leftover sanding dust can ruin an otherwise beautiful finish by creating grit, drag marks, or weak spots.
Ventilation Is Not Optional
A bathroom is a small room, and small rooms hold fumes like they are collecting them as a hobby. During a painted bathroom sink and countertop makeover, ventilation is not a nice extra. It is basic safety. Open windows, run exhaust fans, and if practical, use a fan to push air out of the room. Follow all product labels, and do not improvise chemistry experiments with cleaners, solvents, or strippers.
This point matters even more if you are stripping or refinishing old sink coatings. Some stripping products used in bathtub refinishing have been linked to severe injury and death in poorly ventilated bathrooms. For a DIY bathroom makeover, that means reading labels carefully, choosing safer systems when possible, and refusing to treat fumes like part of the aesthetic.
Choosing the Right Coating for the Sink and Countertop
The fastest way to sabotage a painted bathroom sink and countertop makeover is to treat every surface like it can be coated with the same can of paint. It usually cannot.
For the Countertop
Countertop refinishing kits and epoxy-based countertop coatings are the most common choices for laminate and cultured marble vanity tops. Some systems create a solid-color finish, while others mimic stone or marble. These kits are popular because they are designed to resist moisture and provide better adhesion than standard interior paint.
For the Sink
If the sink is porcelain, ceramic, fiberglass, or another slick bathroom fixture, use a tub-and-tile refinishing product or sink-specific epoxy coating. The sink bowl deals with standing water and constant cleaning, so it needs something formulated for that environment. In many cases, the sink should be coated separately from the counter, even if the color is meant to match.
For the Vanity Base
If you are painting the vanity cabinet too, use a quality cabinet paint or durable trim enamel. Bathrooms benefit from finishes that can handle humidity and routine wipe-downs. Satin or semi-gloss is often the sweet spot: durable enough to clean, polished enough to feel intentional, and less likely than ultra-gloss to show every tiny flaw.
Design Ideas That Make a Painted Vanity Look More Expensive
Paint alone changes the color. The full makeover effect comes from styling choices that help the vanity feel updated rather than merely repainted.
Go Crisp and Bright
A soft white or bright neutral sink-and-countertop finish can instantly make a bathroom feel cleaner and larger. Pair it with matte black hardware for contrast, brushed nickel for a classic update, or warm brass if you want the room to feel more custom.
Try Faux Stone Carefully
Stone-look kits can look surprisingly good when applied with restraint. The best results usually come from subtle layering rather than dramatic sponge theatrics. In other words, you want “refined marble-inspired finish,” not “countertop attacked by a theatrical cloud.”
Don’t Ignore the Backsplash and Caulk
Fresh caulk lines and a clean backsplash edge do more for the finished look than people expect. Old, cracked caulk can make even a well-painted vanity feel unfinished. Re-caulking after full cure helps seal edges and sharpen the visual lines.
Upgrade the Supporting Cast
New faucet hardware, drawer pulls, lighting, or a mirror frame can amplify the makeover dramatically. The painted vanity becomes the anchor, and a few supporting changes help the bathroom feel intentionally redesigned instead of merely rescued.
What to Expect From Durability
Let’s be honest: a painted bathroom sink and countertop makeover is a budget-friendly cosmetic refresh, not an indestructible factory finish. That does not make it a bad idea. It just means expectations should be reasonable. A painted vanity top in a lightly used bathroom can look great for years with gentle care. In a busy primary bathroom where people treat the sink like a chemistry station, wear will show sooner.
The sink bowl usually ages faster than the surrounding countertop because it faces the most water, scrubbing, and impact. That is why cure time matters so much. If the label says wait three days before use, wait three days. If it says longer under humid conditions, believe it. Touching, cleaning, or splashing the finish too early can weaken the coating before it fully hardens.
Maintenance is simple but important. Use mild soap or nonabrasive cleaners, avoid scouring pads, do not leave standing water for long periods, and skip the habit of dropping metal grooming tools into the sink like you are feeding coins into a fountain. Gentle treatment extends the life of the finish.
Common Mistakes That Ruin the Makeover
Most failures come down to impatience. Not bad luck. Not cursed plumbing. Impatience.
Painting Over Soap Scum or Gloss
If the surface is not fully cleaned and deglossed, the new coating may peel, fisheye, or fail to bond.
Using the Wrong Product
Wall paint, chalk paint, or generic craft coatings are not built for bathroom sink duty. A pretty label does not equal waterproof toughness.
Ignoring Humidity
Bathrooms stay humid long after showers end. Plan the project during a stretch of dry weather if you can, and keep air moving while the coating cures.
Rushing Cure Time
Dry to the touch is not the same as cured. This is the makeover equivalent of taking cookies out of the oven because the top looks done while the middle is still pudding.
Is a Painted Bathroom Sink and Countertop Makeover Worth It?
For many homeowners, yes. It is especially worth it when the existing vanity is structurally solid, replacement is not in the budget, and the bathroom needs a visual lift now rather than “someday.” It is also a smart choice for guest baths, rental-friendly upgrades where permanent replacement is not practical, house-prep projects before listing, or design refreshes in homes with older finishes that drag down the room.
The smartest mindset is to view this makeover as a strategic upgrade. You are buying style, brightness, and a cleaner visual impression at a fraction of replacement cost. If you prep well, choose the correct products, ventilate the room properly, and treat the finished surface with a little respect, the payoff can be dramatic. It is one of those rare DIY projects where the mirror starts reflecting a bathroom that looks far more expensive than the receipt would suggest.
Experiences Related to a Painted Bathroom Sink and Countertop Makeover
One of the most common experiences people report after a painted bathroom sink and countertop makeover is surprise. Not polite surprise. Real surprise. The kind where you walk in the next morning, flip on the light, and briefly wonder whether someone swapped your old vanity while you were asleep. That is because vanity tops have an outsized effect on how a bathroom feels. When the sink and counter go from stained, yellowed, or builder-grade beige to bright white, soft gray, or faux marble, the whole room starts reading cleaner and more intentional.
Another very real experience is that the prep phase feels much longer than the painting phase. People often imagine the transformation will come from rolling on the color, but the real work is in cleaning, sanding, taping, repairing chips, and waiting for everything to dry. It can feel tedious in the moment. Still, the people who end up happiest with the finished result are usually the ones who took their time before opening the paint. The folks who rush through prep are often the same ones later poking at a peeling edge and saying something unprintable.
There is also the emotional satisfaction of saving a bathroom that looked one step away from a full remodel. A painted bathroom sink and countertop makeover often gives homeowners a sense of momentum. Once the vanity looks fresh, the old mirror suddenly feels replaceable, the dated light fixture becomes impossible to ignore, and a new faucet starts sounding like an excellent idea. In that way, the project often becomes a gateway upgrade. It changes not only the surface, but the homeowner’s confidence in what the room can become.
At the same time, the lived experience teaches people where the finish is strongest and where it is most vulnerable. Most learn pretty quickly that the countertop usually wears better than the sink basin. Toothbrush cups, hand soap, and folded towels are no big deal. Repeatedly dropping metal tools, leaving puddles around the drain, or scrubbing with abrasive pads is another story. That does not mean the makeover failed. It simply means painted bathroom surfaces reward gentle habits. Many homeowners end up changing how they clean and use the vanity without really thinking about it.
Another common experience is how much compliments matter. Guests notice it. Family notices it. Even people who never comment on home projects suddenly ask, “Wait, did you replace the whole vanity?” That question is basically the gold medal of a budget makeover. The project feels even more worthwhile when the result looks expensive from across the room, especially if the actual investment was modest.
Finally, there is the practical experience of living with a finish that is improved, not immortal. Most people who love this project understand that touch-ups may eventually be part of the story. But they still consider it a win because the bathroom looked better for a fraction of replacement cost, and the makeover bought time. In many homes, that is the whole point. A painted bathroom sink and countertop makeover is not pretending to be a luxury stone installation. It is a clever, realistic, high-impact refresh that makes an everyday room feel better right now. And sometimes, in home improvement, “better right now” is exactly the right kind of beautiful.













