
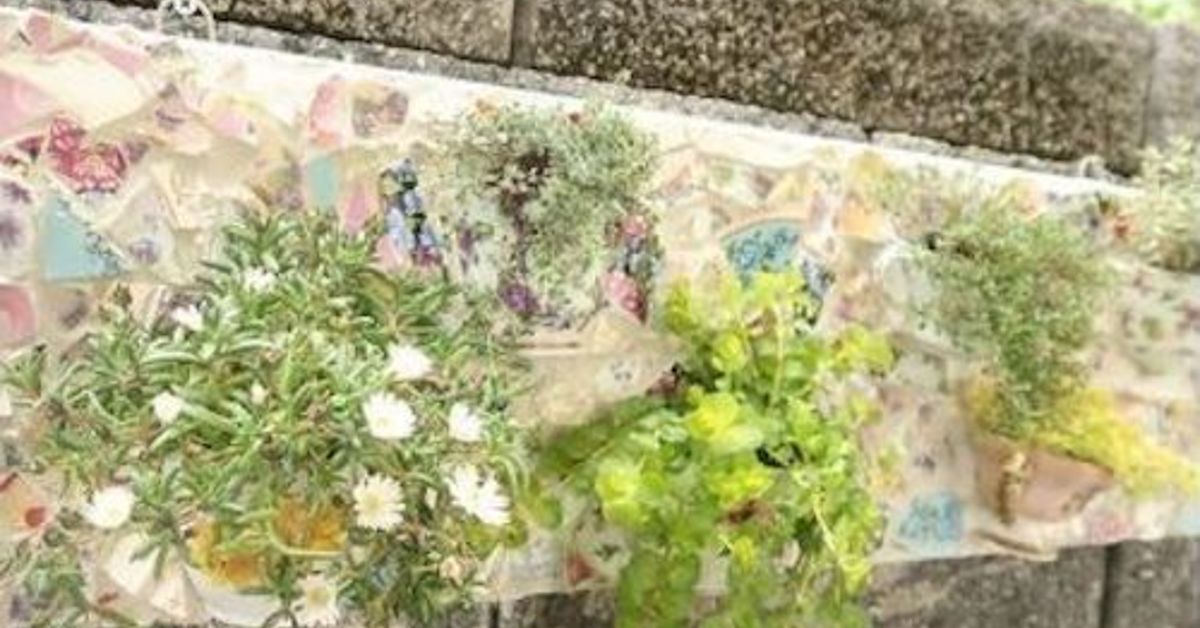
A mosaic teacup planter is what happens when a forgotten teacup, a handful of broken tiles, and one ambitious houseplant decide to start a tiny design firm together. It is charming, budget-friendly, wonderfully customizable, and small enough to fit on a windowsill, desk, porch table, bookshelf, or that one awkward corner where nothing looks right except maybe a plant wearing a crown.
This DIY project combines two popular ideas: upcycling old china and creating small decorative planters for succulents, herbs, mini flowers, or trailing houseplants. Instead of tossing chipped saucers or mismatched teacups, you can transform them into eye-catching mosaic planters with ceramic shards, glass gems, pebbles, beads, old jewelry pieces, or tile scraps. The result is part planter, part art object, and part proof that “I might use this someday” can occasionally be a valid storage strategy.
In this guide, you will learn how to make a mosaic teacup planter from start to finish, choose the right plants, handle drainage, avoid common mistakes, and style your finished piece so it looks intentional rather than like a craft drawer exploded politely.
What Is a Mosaic Teacup Planter?
A mosaic teacup planter is a small container garden made from a teacup that has been decorated with mosaic pieces. The cup becomes the planter, while the exterior is embellished with tiny fragments arranged into a pattern, border, image, or abstract design. The mosaic can be subtle and elegant, bright and cottagecore, coastal and beachy, or delightfully chaotic in the best possible way.
The teacup itself may be vintage china, porcelain, ceramic, stoneware, or even a sturdy thrift-store mug. The mosaic surface can be created with broken plates, glass tiles, mirror pieces, seashells, river stones, buttons, or craft tesserae. Grout fills the spaces between the pieces and gives the project a finished look.
Because teacups are small, they are best suited for plants with compact roots and moderate water needs. Succulents are a favorite choice because they enjoy snug containers and do not need constant watering. Small herbs, mosses, mini violets, baby tears, and trailing plants can also work if you match the plant to the light, soil, and drainage conditions.
Why This DIY Project Works So Well
The beauty of a mosaic teacup planter is that it turns imperfections into features. A chipped rim becomes “character.” A mismatched saucer becomes “collected.” A broken plate becomes “art material.” This is the kind of project that lets you feel thrifty, creative, and slightly smug at the same time.
It also has strong practical benefits. Teacups are easy to find at thrift stores, flea markets, estate sales, yard sales, and the back of kitchen cabinets. Mosaic materials can often be gathered from leftover tile, broken ceramics, old jewelry, or craft-store remnants. The project does not require a large workspace, and one finished planter makes a thoughtful handmade gift.
From an SEO-friendly home and garden perspective, the mosaic teacup planter fits several popular search interests: DIY planters, upcycled teacup crafts, succulent planter ideas, mosaic crafts, vintage decor, cottagecore gardening, and small-space indoor plants. In plain English, people love cute plant containers that look expensive but secretly cost less than lunch.
Materials You Will Need
Basic Supplies
To make a mosaic teacup planter, gather a clean teacup, a matching or contrasting saucer, mosaic pieces, strong waterproof adhesive, grout, a small spatula or craft stick, gloves, safety glasses, a sponge, and a soft cloth. You may also need tile nippers, sandpaper, painter’s tape, a diamond drill bit, and a spray bottle of water.
For the planting portion, choose cactus or succulent mix for drought-tolerant plants, or a light potting mix for moisture-loving varieties. Avoid heavy garden soil because it can compact inside a small container and hold too much water around the roots.
Best Mosaic Materials
Ceramic tile, glass tile, broken china, stained glass, small stones, mirror fragments, and sea glass all work beautifully. For beginners, pre-cut mosaic tiles are easiest because the pieces are uniform and less sharp. Broken china creates a romantic vintage look, but it requires extra care because the edges can be sharp and irregular.
If you want a polished design, pick two or three colors and repeat them around the cup. If you prefer a playful design, mix patterns from old plates and use the teacup as a tiny gallery wall. Blue-and-white china pieces look timeless, pastel tiles feel sweet and springlike, and metallic beads add a little sparkle without making the planter look like it is headed to a disco.
Safety First: Cute Does Not Mean Careless
Mosaic projects involve sharp materials, adhesives, grout, and sometimes drilling, so safety matters. Wear safety glasses when cutting tiles, breaking plates, or drilling ceramic. Use gloves when handling sharp pieces. Work on a protected surface, and keep pets and children away from glass shards, grout powder, and adhesive.
If you are using vintage or imported ceramic pieces, remember that older dishware may contain lead in the glaze. Since this project is decorative and not meant for serving food, repurposing questionable teacups as planters can be a safer use than drinking from them. Still, avoid sanding unknown vintage glazes, and do not use old ceramic dust or fragments where children might handle them often.
When mixing grout or cutting ceramic, avoid breathing dust. Work in a ventilated area, follow the product label, and clean with a damp cloth instead of sweeping dry dust into the air. A beautiful planter is delightful; inhaling craft debris is less delightful.
How to Make a Mosaic Teacup Planter
Step 1: Clean and Prepare the Teacup
Wash the teacup and saucer with mild soap and water, then dry them completely. Any grease, dust, or sticker residue can weaken the adhesive bond. If the cup has a very glossy surface, lightly roughen the area you plan to decorate with fine-grit sandpaper. Wipe away the dust with a damp cloth and let the cup dry again.
Decide whether you want to mosaic the whole cup, just the lower half, the handle, the saucer, or a decorative band near the rim. Beginners may find it easier to start with the saucer or a simple border around the cup before attempting a full wraparound design.
Step 2: Plan the Design
Lay your mosaic pieces on the table before gluing them. This helps you test colors, spacing, and patterns. For a floral design, use small curved pieces as petals and green fragments as leaves. For a geometric style, repeat squares, triangles, or penny-round tiles. For a “found treasure” look, combine china fragments, glass gems, and a tiny charm or two.
Leave small gaps between the pieces for grout. If the pieces are too close together, the grout will not settle properly. If the gaps are huge, the planter may look clunky. Aim for spacing that feels balanced, like a good group photo where everyone has personal space but nobody looks abandoned.
Step 3: Glue the Mosaic Pieces
Apply a small amount of waterproof adhesive to the back of each mosaic piece and press it onto the teacup. Work in sections so pieces do not slide around. Curved teacups can be tricky, so use smaller pieces that follow the shape more easily. Painter’s tape can help hold stubborn pieces in place while the adhesive sets.
Let the adhesive cure according to the product directions. Do not rush this step. If the glue is still soft when you grout, the pieces can shift, and your neat little pattern may develop the confidence of a toddler with finger paint.
Step 4: Apply the Grout
Mix grout according to the package instructions, or use premixed grout for convenience. Wearing gloves, spread grout over the mosaic and press it into the gaps. A craft stick, gloved finger, or small rubber spatula works well for a teacup-sized project.
After the gaps are filled, wipe away excess grout with a damp sponge. Rinse the sponge often and avoid flooding the surface. Let the grout firm up, then buff the tiles with a soft cloth to remove haze. Allow the grout to cure fully before sealing or planting.
Step 5: Seal the Mosaic
A grout sealer helps protect the finished surface from moisture and staining. This is especially useful if the planter will sit outdoors, near a sink, or anywhere it may get splashed. Apply sealer according to the label directions and let it dry completely before adding soil or plants.
Step 6: Handle Drainage
Drainage is the most important plant-care detail in this project. A teacup without drainage can hold water at the bottom, which may lead to soggy roots and root rot. The best solution is to drill a drainage hole using a diamond bit designed for ceramic or porcelain. Place the cup on a stable surface, use light pressure, keep the bit cool with water, and wear eye protection.
If you do not want to drill, use the teacup as a decorative cachepot. Place the plant in a small nursery pot with drainage holes, then set that pot inside the teacup. Remove the inner pot for watering, let it drain, and return it to the cup. This method keeps the teacup pretty and the roots happier.
Avoid relying on a layer of rocks at the bottom as your only drainage strategy. Rocks can take up valuable root space and may leave water sitting where roots do not want it. A drainage hole or removable inner pot is usually the better option.
Best Plants for a Mosaic Teacup Planter
Succulents
Succulents are the classic choice for a mosaic teacup planter. Echeveria, Haworthia, Sempervivum, Graptopetalum, and small Kalanchoe varieties all look lovely in miniature containers. They prefer bright light, well-draining soil, and watering only after the mix has dried.
For a rosette-shaped succulent, choose a teacup with a wide opening so the plant has room to show off. For upright succulents, use a heavier saucer to keep the planter stable. For trailing succulents like string of pearls, place the teacup on a shelf so the vines can spill over the edge like they are making a dramatic entrance.
Mini Herbs
Small herbs such as thyme, oregano, or chives can grow in teacup planters if they receive enough light and drainage. However, herbs usually need more root room and more consistent moisture than succulents, so they may outgrow the cup quickly. Treat them as short-term decorative kitchen planters or transplant them when they become crowded.
Small Flowering Plants
Mini African violets, baby kalanchoe, and tiny bulbs can create a sweet tabletop display. These plants need care that matches their type. Some enjoy more moisture than succulents, so do not plant them in the same cup unless their needs are similar.
Air Plants
If drainage makes you nervous, use an air plant. Tillandsia does not need soil, so the teacup can become a decorative holder instead of a traditional planter. Add pebbles, moss, or sea glass, nestle the air plant on top, and remove it for soaking or misting based on its care needs.
Design Ideas for a Mosaic Teacup Planter
The Cottage Garden Cup
Use floral china fragments, pastel grout, and a ruffled succulent for a soft romantic look. Pair it with a saucer edged in tiny green tiles to echo leaves. This style works beautifully on a windowsill, vanity, brunch table, or garden-themed shelf.
The Coastal Teacup
Combine sea glass, white pebbles, pale blue tiles, and sandy beige grout. Plant a compact succulent or add an air plant for a beach-house feel. It is basically a vacation souvenir without the sunburn.
The Modern Mini Planter
Choose black, white, gray, or metallic mosaic pieces and keep the pattern clean. A single Haworthia or Echeveria looks sculptural in this setting. This design works well on a desk, floating shelf, or minimalist coffee table.
The Memory Cup
Use pieces from a broken family plate, a charm from old jewelry, or tiles in meaningful colors. A memory cup can become a sentimental gift, especially when planted with a cutting from a loved one’s plant. It is a gentle way to preserve something broken without keeping the entire box of fragments forever.
Care Tips After Planting
Place the planter where the plant receives the right light. Most succulents prefer bright light, while some small houseplants prefer bright indirect light. Rotate the cup every week or two so the plant grows evenly. Check the soil before watering rather than following a strict calendar.
For succulents, water deeply but infrequently. Let the soil dry before watering again. If the cup has a drainage hole, water until a little moisture escapes into the saucer, then empty excess water. If using the cachepot method, water the inner pot separately and return it only after it stops dripping.
Watch for warning signs. Stretching stems may mean the plant needs more light. Mushy leaves often suggest overwatering. Shriveled leaves can mean the plant is too dry. White crust on the soil or cup may indicate mineral buildup from water or fertilizer.
Common Mistakes to Avoid
The first mistake is choosing a plant that grows too large. A teacup is adorable, but it is not a long-term home for a basil bush with dreams of becoming a shrub. Stick with compact plants or be ready to repot later.
The second mistake is skipping drainage. Even a low-maintenance succulent can fail if its roots sit in water. Drainage is not glamorous, but neither is explaining to guests why your plant looks like steamed lettuce.
The third mistake is using too much adhesive. Thick blobs can squeeze between mosaic pieces and leave less room for grout. Apply enough to hold each piece securely, but not so much that it becomes part of the design.
The fourth mistake is grouting too soon. Adhesive needs time to cure. Patience gives the mosaic strength and keeps the pieces in place.
The fifth mistake is overdecorating the rim. A teacup still needs to be comfortable to handle and safe around the plant. Keep sharp pieces away from the rim and handle areas where fingers naturally go.
Where to Display a Mosaic Teacup Planter
A mosaic teacup planter looks charming on a kitchen windowsill, breakfast tray, bedside table, office desk, bathroom shelf, patio bistro table, or plant stand. Group three cups together for a collected look, or pair one decorated cup with a plain pot to let the mosaic shine.
For gift giving, place the planter on a matching saucer and add a small care tag. Mention the plant name, light preference, and watering instructions. This small detail prevents the recipient from loving the plant too aggressively with a watering can.
For seasonal styling, change the top dressing. Use moss in spring, tiny pebbles in summer, warm-toned gravel in fall, and a few miniature ornaments in winter. Just keep decorations away from the plant crown so air can circulate.
Experience Notes: What Making a Mosaic Teacup Planter Teaches You
The first time you make a mosaic teacup planter, you may assume the hardest part will be the mosaic. Surprisingly, the hardest part is often choosing the teacup. Suddenly every cup has a personality. The chipped floral one looks sweet. The plain white one looks classy. The gold-rimmed one whispers, “I used to attend proper tea parties.” Before long, you are standing in a thrift store holding six teacups and negotiating with yourself like a tiny ceramics auctioneer.
One helpful experience is to start with a cup you like but do not fear ruining. A priceless family heirloom is not the best first project. Use a thrifted cup, a chipped mug, or a saucer from a mismatched set. Once you understand how adhesive behaves on curved ceramic and how grout changes the final color balance, you can move on to more sentimental pieces.
Another lesson is that small mosaic pieces are easier on curved surfaces. Large fragments may look beautiful on the table, but they can refuse to sit flat on a teacup. Smaller pieces follow the curve better and create a smoother finish. If you are using broken china, arrange the most interesting printed pieces where they can be seen easily, such as the front of the cup or saucer edge.
Grout color also matters more than beginners expect. White grout makes colors look fresh and bright, but it can feel busy with high-contrast pieces. Gray grout softens the design and hides imperfections. Dark grout creates drama but may overpower delicate florals. When unsure, test a few mosaic pieces on scrap cardboard and place different grout colors beside them before committing.
Plant choice is another experience-based detail. A tiny succulent looks perfect at first, but some varieties stretch quickly if they do not receive enough light. Haworthia and compact Echeveria often behave better indoors than sun-hungry plants placed far from a window. If your home has lower light, an air plant or small low-light houseplant in a removable nursery pot may be more forgiving.
Watering teaches humility. A teacup planter is small, so conditions change quickly. Soil can dry fast in bright light but stay wet too long if the cup has no drainage. The best habit is to touch the soil and observe the plant. A schedule is helpful, but the plant gets the final vote.
The most satisfying part is watching the finished planter become more than a craft. On a windowsill, it catches light. On a desk, it makes work feel less gray. As a gift, it feels personal without being overly formal. A mosaic teacup planter is not just a small container garden; it is a reminder that broken pieces, odd leftovers, and tiny spaces can still become something beautiful. Not bad for a cup that once lost its saucer and its social standing.
Conclusion
A mosaic teacup planter is a creative, affordable, and deeply satisfying DIY project for plant lovers, craft enthusiasts, and anyone who believes old china deserves a second act. With the right teacup, safe mosaic materials, proper adhesive, careful grouting, and smart plant selection, you can create a miniature planter that feels both handmade and stylish.
The key is balancing beauty with plant health. Add drainage when possible, use the right soil, choose compact plants, and water according to need rather than habit. Whether your style is vintage floral, coastal, modern, whimsical, or sentimental, a mosaic teacup planter brings personality to small spaces and gives new life to forgotten pieces.
In a world full of plain plastic pots, this little project says, “Yes, my succulent lives in a teacup covered in mosaic tile, and frankly, it has never looked more emotionally supported.”











