
Note: The title below keeps your requested wording exactly as written. The article content discusses mini DIY pine cone Christmas trees.
Some Christmas crafts are charming. Some are affordable. Some are so cute they make you want to whisper, “Well, that’s aggressively festive.” Mini DIY pine cone Christmas trees belong in all three categories. They are tiny, rustic, easy to personalize, and delightfully forgiving. If a branch is crooked, that is not a flaw. That is woodland character. If your glitter lands everywhere except the pine cone, congratulations: your holiday spirit has officially entered the room.
These mini trees are popular for a reason. They use natural texture that already looks tree-like, they work in farmhouse, vintage, Scandinavian, glam, and kid-friendly holiday themes, and they can be made with simple craft supplies. A single afternoon can produce a full tiny forest for mantels, tiered trays, gift toppers, place settings, classroom crafts, or Christmas village displays. Better yet, you do not need professional-level DIY skills. You mostly need dry pine cones, a little glue, and the courage to accept that faux snow has a personal mission to end up on your sweater.
This guide walks through exactly how to make mini pine cone Christmas trees, how to decorate them in different styles, what mistakes to avoid, and how to display them so they look far more expensive than they actually are. That is the holiday dream, really.
Why Mini Pine Cone Christmas Trees Work So Well
The best DIY Christmas decor usually checks a few boxes: it is inexpensive, visually interesting, easy to customize, and doesn’t require a garage full of tools. Mini pine cone Christmas trees nail all of that. Pine cones already have layered scales that mimic branches, so they naturally read as tiny trees. With a little green paint, white dry brushing, metallic shimmer, or miniature ornaments, they transform fast.
They also fit nearly any decorating style. Leave them natural and they look rustic. Paint them white and they feel snowy and Scandinavian. Add gold edges and suddenly they are ready for a fancy holiday table that says, “Yes, I absolutely know what a tablescape is.” Add pom-poms and bright paint, and they become playful enough for kids’ crafts and family decorating days.
Supplies You’ll Need
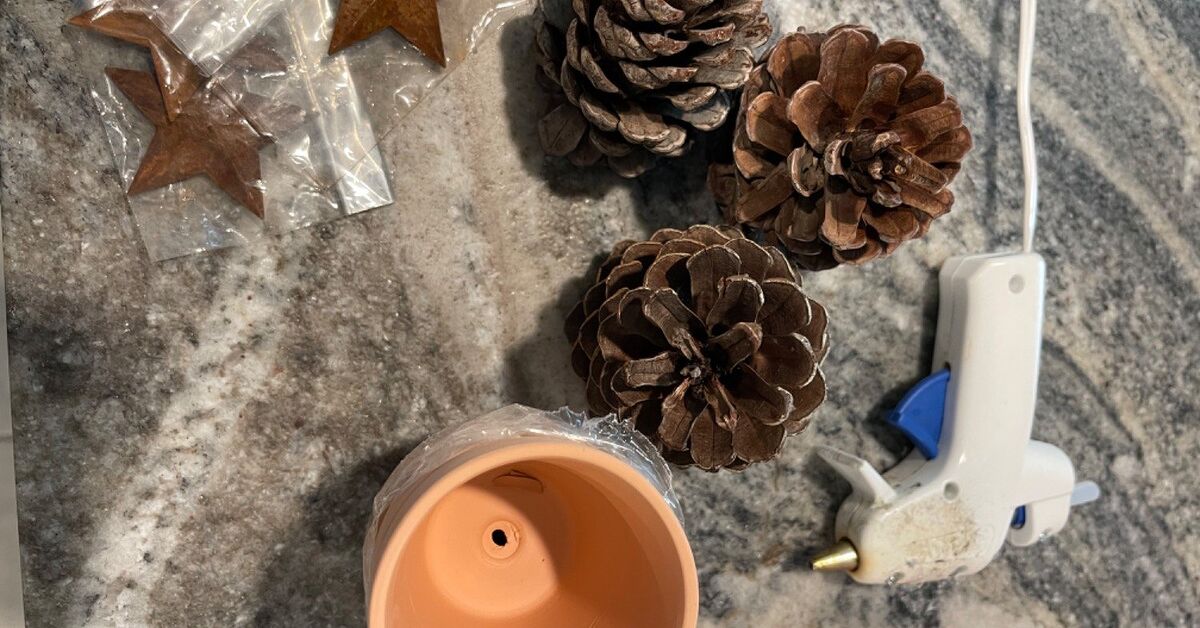
Basic Materials
- Small or medium pine cones
- Acrylic craft paint in green, white, gold, silver, or any holiday color you like
- Paintbrushes or foam brushes
- Hot glue gun or tacky craft glue
- Mini pom-poms, beads, sequins, glitter, or tiny buttons
- Wood slices, corks, small spools, bottle caps, or air-dry clay for bases
- Twine, ribbon, or mini stars for toppers
- Paper towels or a craft mat to protect the table
Optional Extras
- Fake snow or white glitter
- Metallic paint pens
- Mini jingle bells
- Battery tea lights for display
- Cinnamon or essential oil for scent
- Mini wooden beads for ornaments or toppers
If you want a quick, beginner-friendly version, you really only need pine cones, paint, glue, and a base. Everything else is decoration theater.
Step 1: Choose the Right Pine Cones
Not every pine cone wants to be a Christmas tree, and that is okay. For the best mini DIY pine cone Christmas trees, look for cones that are open, balanced, and roughly symmetrical. Small to medium cones work especially well because they are easy to mount and decorate without becoming top-heavy.
What to Look For
- Open scales that resemble tree branches
- A flat or stable bottom, or at least one that can be trimmed slightly
- Cones without heavy sap buildup or crumbling scales
- Similar sizes if you want a matching set
Long slender cones can make elegant, skinny trees. Rounder cones create a fuller, storybook look. If you are making a whole display, mix sizes for a more natural mini forest effect.
Clean and Dry Them First
If you gathered pine cones outdoors, brush off dirt, loose needles, and debris before crafting. Let them dry fully before painting or gluing. Damp pine cones can close up in humidity, and wet surfaces do not play nicely with paint, glitter, or glue. In other words, moisture is the chaos goblin of this craft.
If the cones are dusty, wipe them gently and leave them in a warm, dry spot. Once they are dry and open, they are much easier to decorate and much less likely to surprise you later.
Step 2: Pick a Base That Makes Your Tree Look Finished
A base does more than help the tree stand upright. It also makes the final piece look intentional instead of like a pine cone that wandered onto your shelf and got dressed for December. The most popular options are wood slices, wine cork rounds, thread spools, clay disks, or small unfinished wood cubes.
Hot glue the bottom of the pine cone to the base and hold it steady for a few seconds. If your pine cone is uneven, add a tiny bead of glue where needed to stabilize it. This is not cheating. This is engineering.
Base Ideas by Style
- Rustic: raw wood slice or birch disk
- Farmhouse: white-painted wood round
- Vintage: small spool or distressed block
- Modern: matte black or metallic-painted base
- Kid-friendly: colorful bottle cap or clay puck
Step 3: Paint Your Pine Cone Tree
This is where the magic happens. Paint changes the entire mood of your mini tree. You can fully coat the cone or just highlight the tips. Both look great, and both save you from overthinking a craft that is supposed to be fun.
Classic Green Christmas Tree
Use acrylic craft paint and lightly brush it over the outer scales. You do not have to push paint into every deep crevice. In fact, leaving some natural brown visible gives the tree depth and makes it look more realistic. Dark green creates a classic evergreen feel, while sage or olive green looks softer and trendier.
Snowy White-Frosted Tree
For a snowy effect, use a dry brush with white paint and sweep it lightly over the tips of the scales. This gives the appearance of fresh snow without burying the natural texture. You can also add iridescent glitter while the paint is still tacky for sparkle that catches the light.
Metallic Holiday Tree
Gold, champagne, silver, and copper all work beautifully for holiday decor. Metallic-painted pine cones look especially elegant in centerpieces or place settings. A light coat is often better than a thick one, because heavy paint can flatten the cone’s natural detail.
Colorful Retro Tree
Do not underestimate pink, aqua, red, or pastel trees. If your holiday decorating style leans whimsical or vintage, bright colors can look fantastic. These are especially cute when paired with mini pom-poms as ornaments.
Step 4: Decorate Your Mini Tree Like a Tiny Professional Elf
Once the paint dries, it is time for ornaments. This is the step where the craft gets personal. You can go sparse and chic or fully commit to joyful excess. There is room in this world for both minimalist snow dusting and pine-cone-maximalism.
Easy Decorating Ideas
- Glue mini pom-poms onto the tips like ornaments
- Add tiny beads for a more polished look
- Dot on white paint for snow
- Wrap thin twine or metallic thread around the cone like garland
- Use glitter glue for less mess than loose glitter
- Top with a small wooden star, cardstock star, or jingle bell
Keep scale in mind. Oversized decorations can make a tiny tree look clunky fast. Small embellishments usually look more convincing and prettier from a distance.
Step 5: Add Trunks, Snow, and Finishing Touches
If you want a more realistic tree shape, create a trunk by gluing the pine cone onto a short stick, cinnamon stick, or twig before attaching it to the base. This gives the tree a little height and makes it feel more like a true miniature evergreen.
For snow around the base, use faux snow, cotton batting, white felt, Epsom salt, or even small white pom-poms. If the trees are part of a table display, scatter a few around candle holders or evergreen clippings for a cozy woodland look.
You can also add scent by displaying the trees near cinnamon sticks or using lightly scented pine cones. Just make sure any scented additions are fully dry and not overpowering. Your decor should whisper Christmas, not tackle guests at the door.
Mini DIY Pine Cone Christmas Tree Style Ideas
Rustic Woodland
Use natural cones, a little white paint on the tips, jute twine, and wood bases. Display with greenery, dried orange slices, and candles.
Farmhouse Christmas
Paint the cones muted green or white, use distressed bases, and add tiny black-and-white ribbon bows. These work beautifully on tiered trays and mantels.
Glam Holiday
Choose gold or silver paint, crystal beads, glitter, and mirrored or metallic bases. These make simple but elegant table accents.
Vintage Color Pop
Use bottle-brush-inspired colors like pink, mint, aqua, and bright red. Add mini pom-poms or pearl beads and cluster them in groups.
Kid-Friendly Fun
Let kids paint the cones green, then add pom-poms, googly eyes, or tiny stars. Not every tree has to look catalog-perfect. Some should look like happiness with glue on it.
Common Mistakes to Avoid
- Using damp pine cones: they may close or resist paint and glue
- Applying too much paint: thick paint hides the lovely texture
- Using oversized decorations: tiny trees need tiny ornaments
- Skipping the base: a base makes the tree sturdier and more polished
- Over-glittering immediately: add sparkle in layers so it looks intentional, not like a craft store explosion
How to Display Mini Pine Cone Christmas Trees
One tree is cute. A group is a moment. Arrange several together in varying heights for the best visual impact. Place them on a mantel, bookshelf, windowsill, dining table, or entryway console. They also work beautifully as:
- Place card holders for holiday meals
- Gift toppers tied onto wrapped presents
- Christmas village accents
- Tiered tray decor
- Classroom or office holiday crafts
- Stocking-stuffer-size handmade gifts
Store them in a sturdy box with tissue paper between layers after the season ends. If you used fragile embellishments, keep them upright instead of tossing them into a decoration bin like they owe you money.
Frequently Asked Questions
Can I leave the pine cones natural?
Absolutely. Natural pine cone Christmas trees are some of the prettiest because the texture does most of the work. A little faux snow or subtle glitter is often all they need.
What if my pine cones close up later?
Pine cones react to moisture and humidity. Keep finished trees in a dry indoor space. If they close slightly, letting them dry out again often helps them reopen.
Can kids make these?
Yes, with age-appropriate supplies. Younger children do well with paint, pom-poms, and tacky glue. Hot glue should be handled by an adult.
How many can I make in one afternoon?
A simple batch of six to twelve is very realistic if your pine cones are already clean and dry. Once you start, it becomes strangely hard to stop. Tiny forests have that effect.
Real-World Crafting Experiences With Mini DIY Pine Cone Christmas Trees
One of the most relatable experiences with this craft is discovering that no two pine cones behave the same way. You can line up ten cones on the table and think you are about to create a perfectly coordinated collection, only to find that one looks elegant, one looks adorably chunky, one refuses to stand straight, and one somehow resembles a grumpy owl. That is part of the charm. Mini pine cone Christmas trees are rarely about perfection. They are about personality.
Many people find that the first tree becomes the “test tree.” It is the one where you learn not to overload the paint, not to use giant pom-poms on a tiny cone, and definitely not to squeeze out enough hot glue to secure a bookshelf. The second and third trees usually go faster, and by the fifth, you start making creative choices on purpose instead of by accident. That progression is one reason the craft feels so satisfying. It rewards experimentation without demanding expert technique.
Another common experience is how quickly this project becomes social. It is the kind of craft that works beautifully at a kitchen table with family, at a classroom craft station, or during a casual holiday get-together with friends. Everyone starts with the same basic shape, yet the results end up wildly different. One person makes a snowy woodland tree. Someone else makes a glitter bomb with a gold star. A child might add oversized eyes and claim it is a “Christmas tree character,” which honestly sounds like a future holiday movie franchise.
There is also something nostalgic about working with pine cones. They feel familiar and seasonal in a way that store-bought decor sometimes does not. For many people, making mini pine cone Christmas trees becomes tied to collecting materials on a chilly walk, unpacking paint from the craft drawer, and turning ordinary natural objects into something festive. The process feels slow in the best way. It invites you to sit down, focus on a small creative task, and make something with your hands that can actually be displayed the same day.
Crafters often mention that these mini trees solve a decorating problem too. Sometimes a space needs just a little holiday charm, not a full garland, wreath, or giant centerpiece. A trio of mini pine cone trees on a shelf can do the job instantly. They are especially useful for small apartments, dorm rooms, office desks, and little corners that need cheer without clutter. They are festive without taking over the room like an overenthusiastic inflatable snowman.
Perhaps the best experience tied to this craft is that it creates decorations with memory built into them. A slightly crooked tree made during a school break, a set of elegant metallic trees for a first holiday table, or a goofy pom-pom-covered creation from a family craft night can all become keepsakes. Years later, they still carry that handmade warmth. And that, more than flawless symmetry or perfect glitter placement, is what makes mini DIY pine cone Christmas trees worth making.
Final Thoughts
If you want a Christmas craft that is affordable, flexible, beginner-friendly, and genuinely adorable, mini DIY pine cone Christmas trees are hard to beat. They can be rustic or glamorous, playful or elegant, simple or embellished. They work as ornaments, centerpieces, shelf decor, gift toppers, and tiny handmade gifts. Best of all, they turn a humble pine cone into something that feels festive, thoughtful, and full of character.
So gather your pine cones, pick your favorite style, and make a tiny forest that suits your holiday mood. Whether your final look is snowy and sophisticated or cheerfully covered in pom-poms, these little trees prove that the best Christmas decor does not have to be expensive or complicated. Sometimes it just has to be small, charming, and willing to sparkle a little.













