
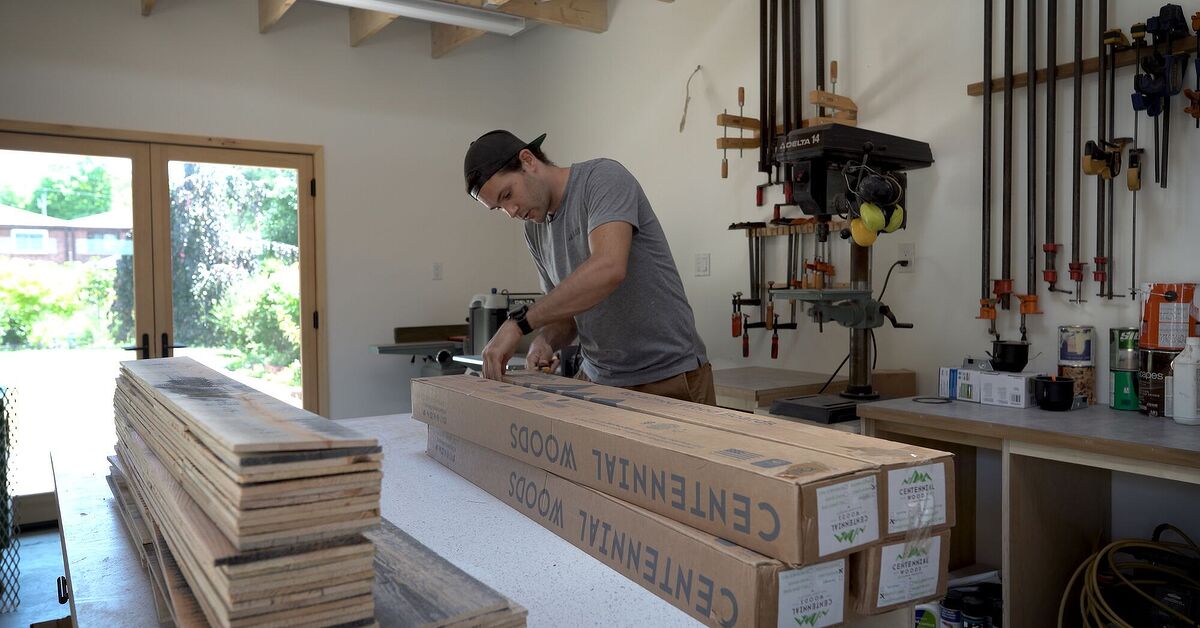
There are two kinds of workshop walls: the ones that quietly hold up the building, and the ones that make you stop mid-project, wipe sawdust off your glasses, and say, “Well, look at that handsome thing.” A reclaimed wood accent wall belongs firmly in the second category. It adds warmth, texture, storage potential, and just enough rustic charm to make your workshop feel less like a place where extension cords go to tangle themselves and more like a space where good ideas actually want to happen.
Installing a reclaimed wood accent wall in my workshop was not just a cosmetic upgrade. It was a practical weekend project that turned a plain wall into a visual anchor, gave the room more personality, and created a durable background for tools, shelves, project photos, and the occasional “I’ll fix that later” pile. The best part? Reclaimed wood already comes with character. Scratches, nail holes, knots, saw marks, and weathered color variations are not flaws. They are the design. Finally, a project where imperfections count as style points.
This guide walks through the full process: choosing reclaimed boards, preparing the wall, cleaning and checking the wood, laying out the pattern, fastening the planks, trimming the edges, finishing the surface, and learning from the little workshop surprises that show up along the way. Whether you are using barn wood, pallet boards, salvaged fencing, old flooring, or pre-milled reclaimed wall planks, the goal is the same: build a wood accent wall that looks intentional, stays secure, and does not require you to invent new swear words halfway through the installation.
Why a Reclaimed Wood Accent Wall Works So Well in a Workshop
A workshop should be functional, but that does not mean it has to look like a storage closet with power tools. Reclaimed wood brings natural texture into a space that is often dominated by concrete, drywall, metal shelving, and fluorescent lighting. The color variation in old boards instantly softens the room. Gray, brown, honey, charcoal, and reddish tones mix together in a way new lumber rarely manages without a lot of staining and emotional negotiation.
Another advantage is durability. A workshop wall takes abuse. Boards bump into it. Clamps lean against it. Dust lands on it like it pays rent. Reclaimed wood is already seasoned, dented, and full of life, so a few new marks will not ruin the look. In fact, they may blend right in. Compared with a freshly painted wall, a reclaimed wood wall is much more forgiving. A scuff on painted drywall says, “Please repair me.” A scuff on reclaimed wood says, “I have survived worse.”
There is also a sustainability angle. Reusing salvaged lumber keeps usable material out of the waste stream and gives old wood a second purpose. That matters, especially in a workshop where scraps tend to multiply mysteriously. Installing reclaimed wood is a small but satisfying way to reuse what already exists instead of buying brand-new decorative paneling.
Planning the Accent Wall Before Cutting Anything
Before a single board touched the wall, I measured the space and decided what I wanted the wall to do. Was it purely decorative? Would it support shelves? Would tools hang from it? Would it be visible in project photos or videos? In my case, the wall needed to look good, handle light-duty storage, and create a warmer backdrop behind the main workbench.
Start by measuring the wall width and height, then multiply those numbers to estimate square footage. Add 10 to 15 percent extra material for cuts, damaged boards, odd lengths, and mistakes. Reclaimed wood is not factory-perfect, and that is exactly the point. Some pieces will be bowed. Some will split when cut. Some will look wonderful until you realize they are shaped like a potato chip. Buy or gather more than the exact amount you need.
Choose a Layout That Fits the Room
The most common layout is horizontal planks, which makes a wall feel wider and gives a classic barn wood look. Vertical boards can make the ceiling appear taller and feel slightly more modern. A herringbone or chevron pattern adds movement, but it also adds cutting time, waste, and the kind of math that makes a peaceful Saturday suddenly feel like a geometry exam.
For a workshop, I prefer a staggered horizontal layout. It is forgiving, easy to install, and works well with boards of different lengths. The trick is to avoid lining up seams from row to row. Random-looking is good; accidentally repetitive is not. Before installing, lay several boards on the floor and shuffle them around until the color, width, and texture feel balanced.
Choosing the Right Reclaimed Wood
Reclaimed wood can come from barns, fences, pallets, old flooring, shipping crates, factories, or architectural salvage yards. Each source has its own personality. Barn wood often has deep weathering and rich texture. Old flooring may be more stable and uniform. Fence boards can be affordable but may need extra cleaning. Pallet wood is tempting because it can be cheap or free, but it requires caution because some pallets may have been exposed to chemicals, moisture, or unknown cargo.
For an interior workshop accent wall, look for boards that are dry, structurally sound, and free from active insect damage. Avoid wood that smells strongly of chemicals, fuel, mildew, or mystery. Mystery is fun in novels, not in building materials. Also avoid boards with heavy rot, crumbly edges, or severe warping unless you plan to cut around the bad sections.
Check for Nails, Screws, Staples, and Hidden Metal
Old wood often contains old metal. That includes nails, staples, screws, broken fasteners, wire, and occasionally tiny metal pieces hiding just below the surface. Before cutting, sanding, or planing reclaimed wood, inspect every board carefully. Use pliers to pull visible nails and a metal detector or magnetic wand to find hidden pieces. This step protects your saw blades, your tools, and your face. A hidden nail meeting a spinning blade is not rustic charm; it is a bad afternoon with sparks.
Clean Without Erasing the Character
The goal is to remove dirt, dust, loose debris, and anything unpleasant without stripping away the aged surface that makes reclaimed wood special. A stiff plastic-bristle brush works well for most boards. Vacuum the wood thoroughly, then wipe it down with a slightly damp cloth. Avoid soaking the boards because reclaimed lumber can absorb water unevenly and warp as it dries.
If the boards are especially dirty, clean them outdoors and let them dry completely before bringing them into the shop. For questionable material, consider kiln-dried reclaimed lumber from a reputable supplier. It usually costs more, but it saves time and reduces the risk of pests or excessive moisture.
Safety First: Dust, Lead Paint, and Old Finishes
Reclaimed wood can carry old paint, unknown stains, dust, mold residue, or finishes that should not be sanded casually. If the wood has old paint and may have come from a pre-1978 building, treat it with caution because lead-based paint was commonly used in older structures. Do not aggressively sand, grind, or saw painted reclaimed boards indoors without proper testing and protection. When in doubt, use a lead test kit, choose unpainted boards, or consult a certified professional.
Wear eye protection, hearing protection, gloves, and a properly fitted dust mask or respirator when cutting and preparing boards. Use dust collection when possible. A workshop already produces enough sawdust to season a casserole; there is no need to add mystery dust from old lumber.
Preparing the Workshop Wall
A reclaimed wood accent wall is only as good as the surface behind it. Start by clearing the wall and removing anything that will get in the way, including hooks, outlet covers, shelves, and trim if necessary. Patch major holes or damaged drywall. The wall does not have to be beautiful, but it should be flat enough to support the boards.
Next, locate and mark the studs. Most residential wall studs are spaced 16 inches on center, though older buildings and certain walls may vary. Use a stud finder, magnet, small drill bit, or careful tapping to confirm the framing. Mark vertical stud lines lightly with pencil or painter’s tape. These lines will guide nail placement and help ensure the planks are secured to solid structure, not just drywall.
Paint the Background Wall Dark
This step is optional, but highly recommended. Reclaimed boards are rarely perfectly straight. Small gaps between planks may appear, especially if the edges are uneven. Painting the wall black, charcoal, or dark brown before installation makes those gaps disappear into shadow. It is a simple trick that makes the finished wall look cleaner and more professional.
Tools and Materials
You do not need a professional cabinet shop to install a reclaimed wood wall, but having the right tools makes the project smoother. For my workshop wall, the essential tools included a tape measure, pencil, level, stud finder, miter saw, jigsaw, brad nailer or finish nailer, air compressor or battery nailer, construction adhesive, caulk gun, safety glasses, hearing protection, dust mask, pry bar, and a shop vacuum.
Materials included reclaimed boards, finish nails, adhesive, trim pieces for the edges, optional clear sealer, painter’s tape, and replacement outlet box extenders if needed. Electrical boxes may need adjustment because adding wood changes the wall surface depth. Always follow local electrical code, and call an electrician if you are unsure. Electricity is very useful, but it is not known for being forgiving.
Installing the First Row
The first row sets the tone for the entire wall. If it is crooked, every row after it will politely continue the mistake. Use a level to establish a straight reference line. Do not assume the floor, ceiling, or workbench is level. Workshops are wonderful places, but many of them were apparently built by people who believed “close enough” was a measurement system.
Begin at the most visible edge of the wall. Apply construction adhesive to the back of the first board in a wavy pattern, press it into place, and fasten it with finish nails into studs where possible. If the board ends between studs, angle nails slightly or use adhesive to help hold it securely. Continue across the row, cutting the final board to fit.
Leave a small expansion gap at the edges where the wood meets adjacent walls, cabinets, or trim. Wood moves with humidity changes, even if it is old. A tiny gap hidden by trim is better than a wall that buckles because the boards had nowhere to go.
Staggering Seams and Mixing Boards
Once the first row is installed, continue upward or downward depending on your starting point. Stagger the seams so the wall looks natural. Avoid creating a stair-step pattern unless that is your design intention. Mix colors and textures as you go. If one section has all the dark boards and another has all the pale boards, the wall can look patchy instead of balanced.
Keep stepping back to inspect the layout. This is especially important in a workshop, where lighting can exaggerate shadows and texture. A board that looks subtle up close may look like a racing stripe from ten feet away. If a plank feels too bold, save it for a less obvious spot or cut it into shorter pieces.
Cutting Around Outlets, Switches, and Obstacles
Outlets and switches are where accent wall confidence goes to be tested. Turn off power to the circuit before removing covers or working near electrical boxes. Measure carefully, mark the board, and cut openings with a jigsaw or oscillating multi-tool. The cut does not need to be furniture-grade perfect because the cover plate will hide small imperfections, but it does need to allow safe access to the electrical box.
If the wood thickness leaves the outlet recessed behind the new wall surface, install an approved electrical box extender. Do not bury outlets behind boards, and do not force cover plates to bend into place. Good design should not create electrical hazards. The wall can be rustic; the wiring should not be.
Finishing the Edges
Raw plank edges can look charming in some spaces, but in a workshop, clean edges usually make the project feel finished. Use simple trim boards, outside corner molding, or ripped strips of matching reclaimed wood to frame the accent wall. Around doors, windows, cabinets, or built-in storage, trim helps hide uneven cuts and gives the wall a deliberate look.
At the ceiling, you may need to rip the final row to fit. Measure in several places because ceilings are often not perfectly level. Cut the top row slightly smaller if trim will cover it. If no trim is planned, take your time and scribe the boards for a cleaner fit.
Sealing the Reclaimed Wood
Whether to seal the wall depends on the wood and how the workshop is used. Unsealed reclaimed wood has a raw, authentic look, but it also holds dust. A clear matte water-based polyurethane or furniture wax can help lock down loose fibers and make the wall easier to clean without making it look shiny or plastic. Test your finish on scrap boards first. Some sealers darken the wood dramatically, and surprise is not always a design strategy.
For a workshop, I like a low-sheen finish. It keeps the natural texture visible while making dust removal easier. Avoid heavy gloss unless you want your rustic wall to look like it has been dipped in pancake syrup.
How Long Does the Project Take?
The installation itself can often be done in a day for a small or medium wall, but preparation may take just as long. Cleaning boards, removing nails, checking for metal, sorting colors, painting the background wall, and planning the layout all require time. A realistic schedule is one day for prep and one day for installation, especially if you are working alone.
Rushing the prep stage is the most common mistake. The wall goes up quickly when the boards are clean, sorted, and ready. If you skip that work, you will spend the installation stopping every few minutes to pull nails, recut warped boards, or ask why your “easy weekend project” has become a personal character test.
Common Mistakes to Avoid
Using Wet or Unstable Wood
Wood that has not dried properly may shrink, twist, or cup after installation. Let boards acclimate inside the workshop for several days before fastening them to the wall. Stack them with airflow between layers if possible.
Skipping Studs
Adhesive helps, but nails into studs provide strength. Drywall alone is not enough for heavier boards, shelves, or tool-hanging plans. Marking studs before you start saves frustration later.
Over-Sanding the Boards
Too much sanding can erase the weathered surface that makes reclaimed wood appealing. Sand only sharp splinters, rough edges, or areas that will be touched often. Keep the patina.
Creating a Repeating Pattern
Random layouts still need intention. Avoid lining up seams or clustering similar boards. A good reclaimed wood wall looks relaxed, not chaotic.
Ideas for Making the Workshop Wall More Useful
Once the accent wall is installed, it can become more than decoration. Add floating shelves for stains, finishes, and small containers. Mount a French cleat system for flexible tool storage. Install hooks for aprons, hearing protection, clamps, or frequently used hand tools. Add task lighting to bring out the wood grain and improve visibility at the bench.
If you create content, photograph projects, or record videos in your workshop, the reclaimed wood wall makes an excellent background. It hides minor dust, adds visual depth, and makes even a simple glue-up look more intentional. Just remember to clean the wall occasionally. Rustic does not have to mean “wearing three years of airborne sawdust.”
My 500-Word Experience: What I Learned Installing a Reclaimed Wood Accent Wall in My Workshop
The biggest lesson I learned is that reclaimed wood has opinions. New lumber usually behaves like it came from a store. Reclaimed wood behaves like it has lived a life, paid taxes, raised children, and does not appreciate being rushed. Some boards were straight and cooperative. Others had a gentle curve that turned into a dramatic bend the moment I tried to install them. I quickly learned to sort boards into categories: great pieces for eye-level areas, decent pieces for corners, short pieces for fillers, and “thank you for your service” pieces for the scrap bin.
I also learned that preparation is the difference between a relaxing project and a workshop sitcom. Pulling old nails took longer than expected, but it was worth every minute. I found fasteners that were obvious, fasteners that were sneaky, and one broken nail that seemed personally committed to destroying my saw blade. Running a magnet over each board became part of the routine. It felt excessive until it found something. Then it felt genius.
Painting the wall dark before installing the boards was another small decision that paid off. Reclaimed boards do not always meet perfectly, and a few gaps are inevitable. With the dark background, those gaps disappeared. Without it, I would have seen bright drywall lines peeking through like tiny little reminders of regret.
The layout stage surprised me too. I thought I could install boards randomly and trust the natural variation. That worked for about five minutes. Then I stepped back and realized I had accidentally created a dark blob in the center of the wall. From then on, I laid out several rows at a time on the floor. I mixed wide boards with narrow boards, rough boards with smoother ones, and dark pieces with lighter pieces. The final result looked natural, but only because I carefully arranged the “randomness.” Design is funny that way. The best casual look usually has a clipboard hiding behind it.
Cutting around outlets was the slowest part of the installation. Measure twice, cut once is good advice, but for outlets I prefer measure twice, stare suspiciously, measure again, cut carefully, and keep the cover plate nearby for emotional support. Box extenders made the outlets sit properly after the added wall thickness, which gave the finished project a safer and cleaner result.
By the time the final trim piece went up, the workshop felt completely different. The reclaimed wood wall made the space warmer, more finished, and more personal. It also made the workbench area feel like a proper station rather than a random horizontal surface where tools gather for meetings. The wall now holds shelves, a few often-used tools, and enough character to make the whole shop feel more inviting.
Would I do it again? Absolutely. I would just spend more time sorting boards at the beginning, buy extra finish nails before starting, and keep a better vacuum setup nearby. Reclaimed wood is dusty. Workshops are dusty. Together, they create a dust alliance. But the final wall is worth it. It is practical, good-looking, sustainable, and forgiving. In other words, it is exactly the kind of project a workshop deserves.
Conclusion
Installing a reclaimed wood accent wall in a workshop is one of those rare DIY projects that delivers both style and function. It transforms a plain wall into a durable, textured focal point while giving old materials a second life. With careful planning, proper safety steps, clean boards, smart fastening, and a balanced layout, the finished wall can look professional without losing the imperfect charm that makes reclaimed wood so appealing.
The most important advice is simple: do not rush the prep. Inspect every board, remove metal, clean the surface, let the wood acclimate, mark your studs, and plan your layout before the nailer comes out. Once the boards start going up, the project moves quickly, and each row adds more character to the space. By the end, your workshop will feel warmer, more intentional, and maybe even organized enough to fool visitors. No promises on the extension cords.
Note: This article synthesizes practical guidance from reputable U.S. home-improvement, woodworking, design, and safety resources. Always follow local building codes, electrical requirements, and product instructions when installing wall materials in a workshop.











