
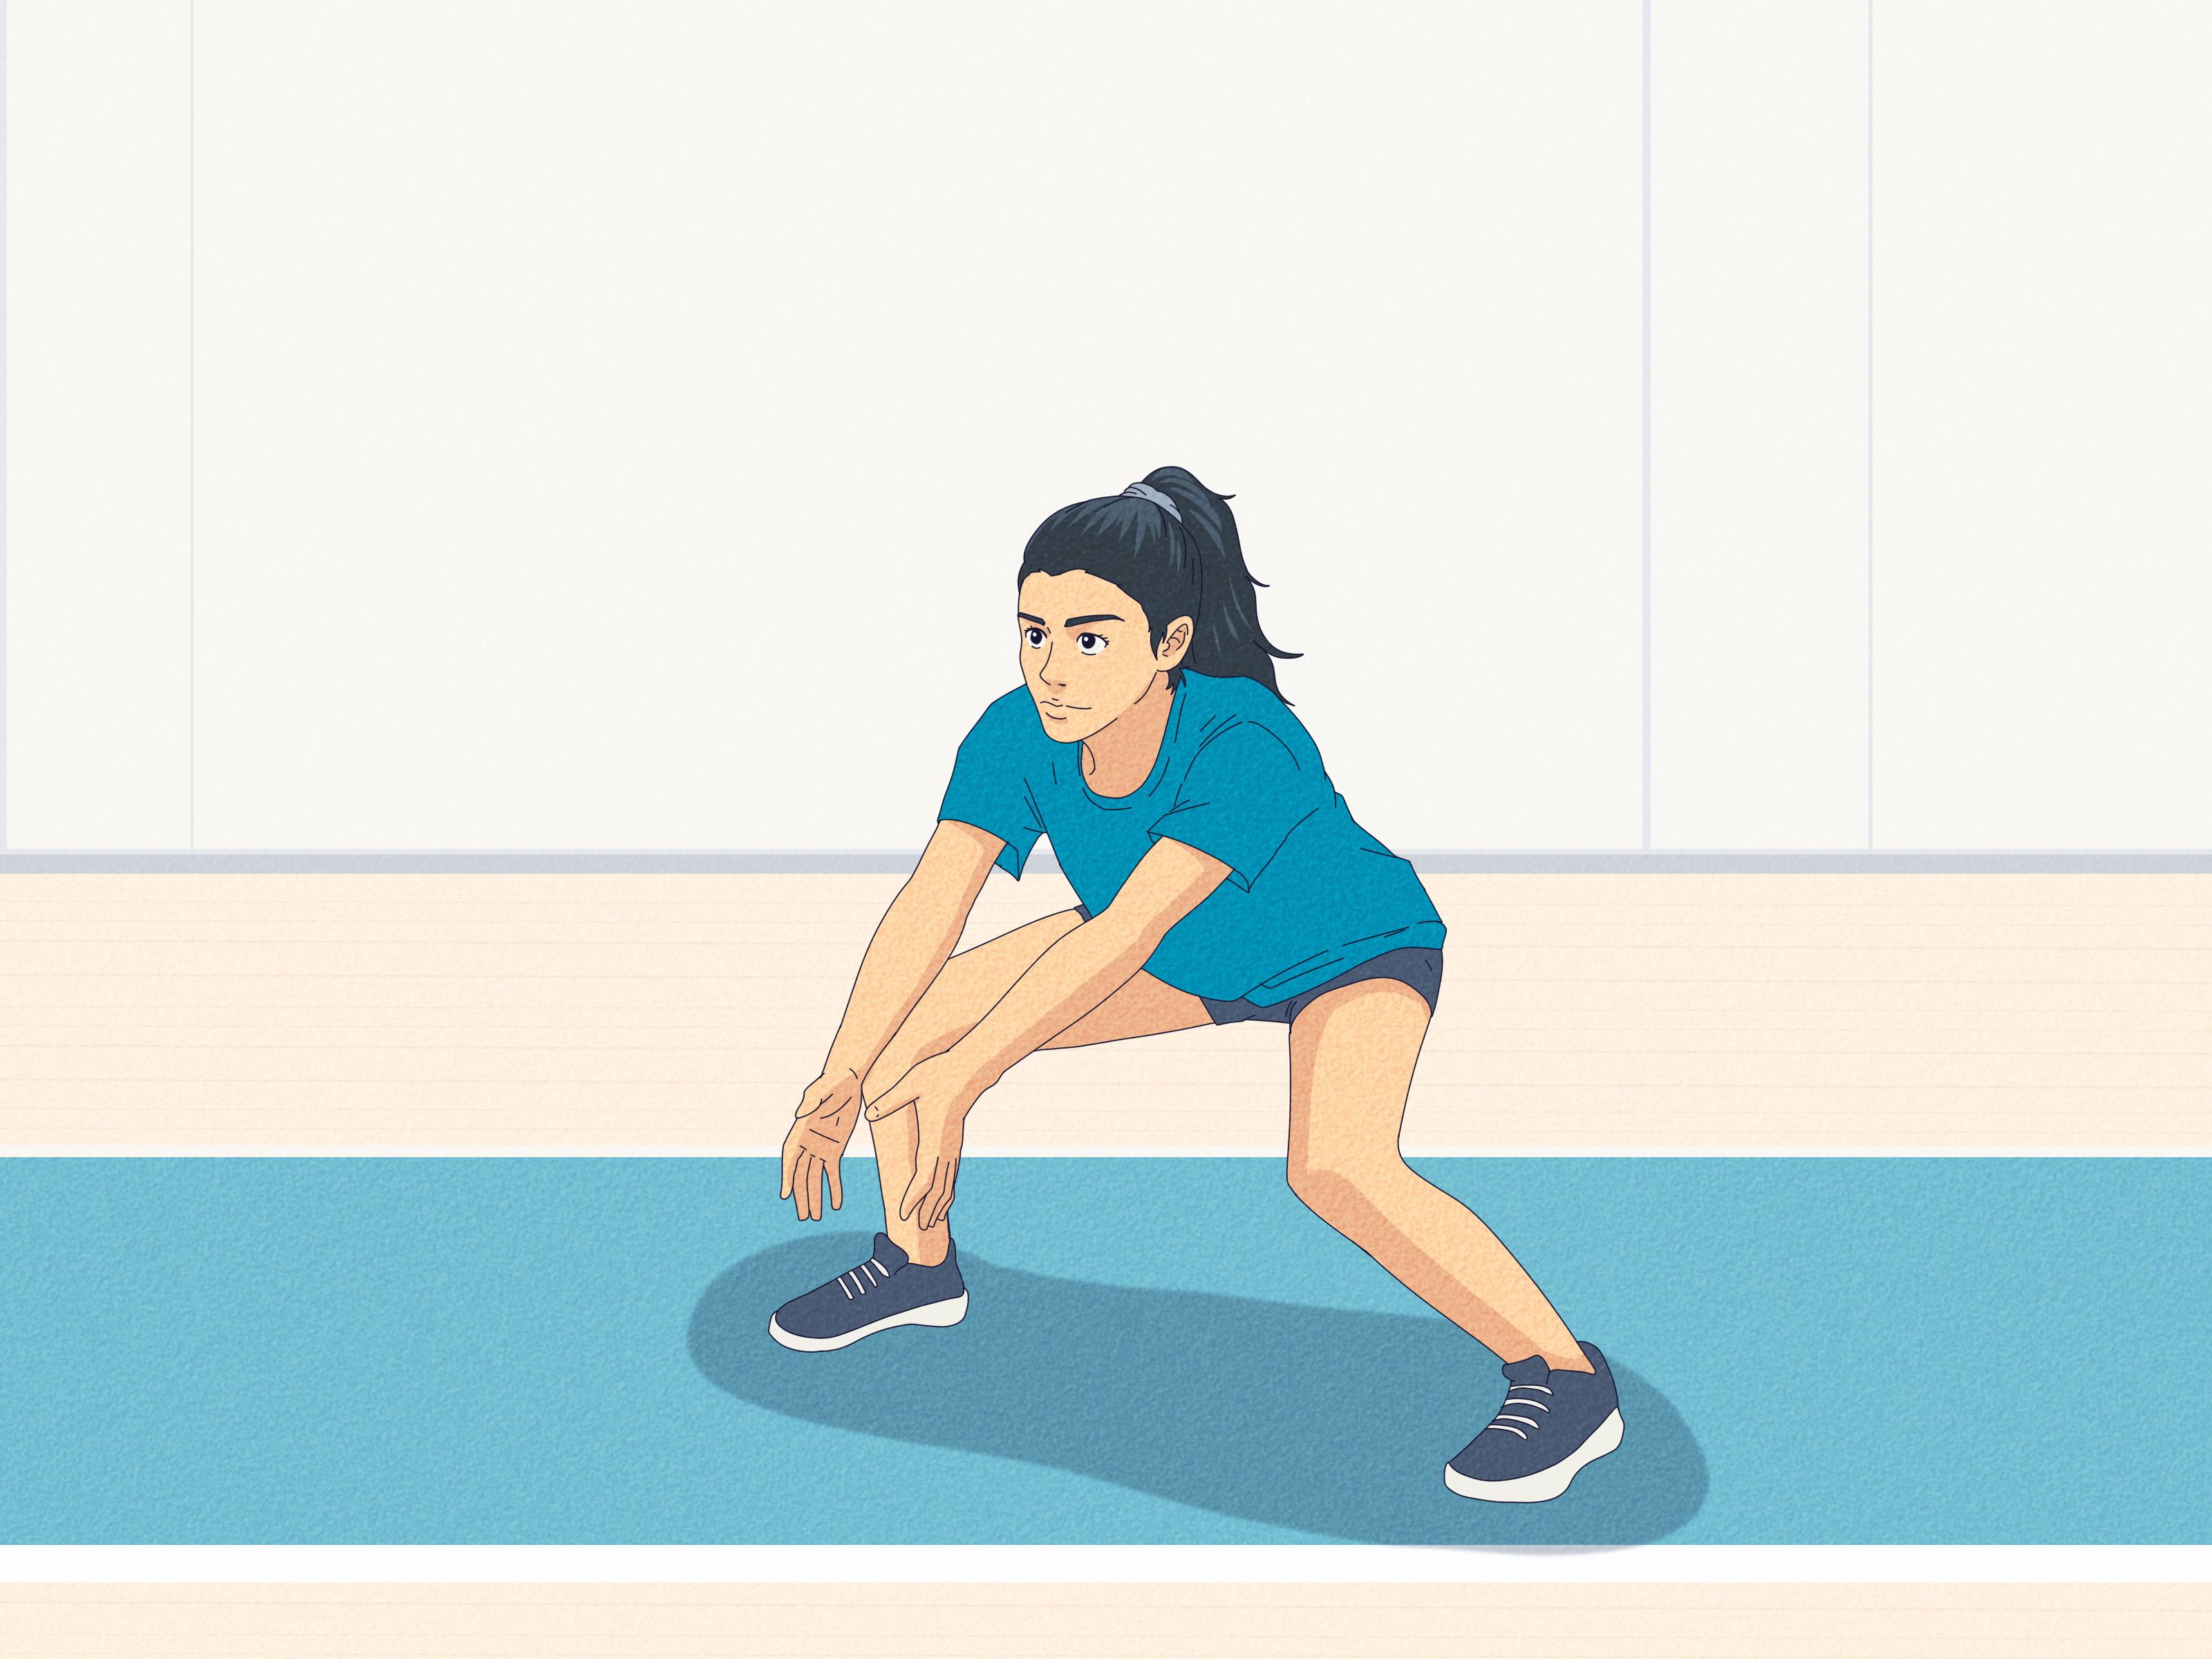
The underhand serve is the friendly front door of volleyball. It is simple enough for beginners, dependable enough for nervous match moments, and sneaky enough to score points when placed well. While the overhand serve gets the highlight-reel treatment, the underhand serve quietly does its job like the teammate who always brings extra water and never forgets knee pads.
If you are learning volleyball for school, recreation, youth league, gym class, or backyard domination at the family barbecue, mastering the underhand serve gives you immediate control over the start of each rally. A good serve does not need to break the sound barrier. It needs to clear the net, land in bounds, and make the receiving team work. That is the goal.
This guide explains how to do an underhand serve in 12 practical steps, with beginner-friendly technique, real coaching cues, common mistakes, practice drills, and simple ways to add power without turning your shoulder into a catapult.
What Is an Underhand Serve in Volleyball?
An underhand serve is a volleyball serve made by striking the ball from below waist or chest level with an upward-forward swing. The ball is usually held in the non-dominant hand while the dominant hand swings through it using either a closed fist, flat hand, or heel of the palm.
It is often taught first because the movement is controlled, the ball starts close to the body, and the timing is easier than an overhand serve. For new players, that matters. Volleyball already has enough moving pieces: rotations, calling the ball, avoiding the net, and remembering not to celebrate before the ball actually lands. The underhand serve keeps the first skill manageable.
Why Learn the Underhand Serve First?
The underhand serve builds three important beginner habits: balance, clean contact, and directional control. It also teaches players how a serve starts the rally and how serving strategy can create pressure. A soft but accurate serve to an open zone is often more useful than a powerful serve that flies out of bounds like it has vacation plans.
For younger players or adults new to volleyball, the underhand serve is especially helpful because it requires less upper-body strength. Players can use weight transfer from the back foot to the front foot, a straight arm swing, and a firm contact point to send the ball over the net consistently.
Before You Start: Basic Serving Rules
Before practicing, know the basics. In standard volleyball, the server stands behind the end line in the service zone. At the moment of contact, you should not step on or over the end line. After the ball is served, you may step into the court. The served ball may touch the net and still be playable if it crosses into the opponent’s court. Lines count as in, so a serve landing on the boundary line is a good serve, not a tragedy with a whistle.
Rules can vary slightly in school, youth, recreational, and modified leagues. Some beginner leagues allow closer serving lines, second-chance serves, or coach-friendly adjustments. Always follow the rules of your league or class.
How to Do an Underhand Serve: 12 Steps
Step 1: Stand Behind the End Line
Start behind the end line, facing the net and your target area. Do not crowd the line. Give yourself a little space so your front foot does not accidentally land on it during the serve. A foot fault is one of the easiest mistakes to avoid, yet it appears at the worst possible time, usually right after you tell yourself, “I’ve got this.”
If you are brand new or practicing in gym class, begin closer to the net if your coach allows it. Once your motion is consistent, move back step by step until you can serve from the legal line.
Step 2: Choose Your Target
Do not simply aim “somewhere over there.” Pick a target before every serve. Aim for the middle of the court if you are learning. It gives you the biggest margin for error. As you improve, aim for deep corners, short zones, seams between passers, or the player who looks least comfortable receiving.
A target gives your body a job. Without one, your swing becomes a wish with shoes on.
Step 3: Set Your Feet Correctly
Place your feet about shoulder-width apart. If you are right-handed, put your left foot slightly forward and your right foot back. If you are left-handed, put your right foot forward and your left foot back. Your toes can point partly toward the net, with your body slightly angled.
This staggered stance helps you transfer weight forward. Power in an underhand serve does not come only from the arm. It comes from the smooth combination of legs, hips, shoulder, and swing.
Step 4: Hold the Ball in Your Non-Dominant Hand
Hold the volleyball in your non-dominant hand at about waist level or slightly in front of your hitting shoulder. For a right-handed server, the ball should sit slightly in front of the right shoulder. For a left-handed server, place it in front of the left shoulder.
This detail matters. If you hold the ball too far across your body, your arm will swing sideways and your serve may drift left or right. If you hold it too far away, you may reach and lose power. Think of the ball as sitting on an invisible tee, waiting to be struck cleanly.
Step 5: Keep the Ball Still
Many beginners toss the ball, panic, chase it with their arm, and accidentally invent modern dance. For a basic underhand serve, keep the ball steady. Some leagues require the ball to be released before contact, while many beginner settings teach players to strike from a stable hand. Follow your league’s rule, but keep the movement small and controlled.
If a release is required, use a tiny lift rather than a dramatic toss. The goal is not to throw the ball into orbit. The goal is to meet it at the same contact point every time.
Step 6: Make a Firm Hitting Surface
You can hit an underhand serve with a closed fist, a flat hand, or the heel of your palm. Beginners often use a closed fist because it creates a firm, compact contact surface. If you use a fist, keep the thumb outside the fingers, not tucked inside. If you use an open hand, keep the wrist firm and contact with the heel of the palm.
A floppy hand steals energy from the ball. A firm hand sends energy through it. Imagine knocking on a solid door, not waving goodbye to a parade.
Step 7: Shift Your Weight Back
Before swinging, place a little more weight on your back foot. Your knees should be slightly bent, your shoulders relaxed, and your eyes on the ball. This loaded position prepares you to move forward with control.
Do not crouch so low that you need a rescue team to stand up. A small athletic bend is enough. You should feel balanced and ready, not folded like a lawn chair.
Step 8: Swing Your Arm Straight Back
Draw your hitting arm straight back like a pendulum. Keep the motion simple. Your elbow can stay mostly straight, and your shoulder should guide the swing. Avoid bending the elbow too much or chopping at the ball. The underhand serve works best when the arm travels in a smooth line from back to front.
Think “swing through,” not “poke.” A poke usually sends the ball weakly into the net. A smooth swing gives the ball lift and distance.
Step 9: Step Forward as You Swing
As your arm swings forward, step with your front foot and shift your weight toward the net. This is where power appears without forcing it. Your legs move first, your body follows, and your arm finishes the job.
A helpful rhythm is: ready, step, swing. Say it quietly during practice. It may feel silly, but good cues work. Volleyball courts are full of people shouting “mine,” “help,” and “sorry,” so one more quiet phrase will not hurt.
Step 10: Contact the Bottom-Back of the Ball
Strike the lower back portion of the ball with a firm hand. Your swing should move upward and forward, sending the ball in an arc over the net. Watch the ball all the way into contact. Looking up too early is a common reason players miss-hit the serve.
If the ball goes straight up, you may be hitting too low or swinging too vertically. If it drives into the net, you may be contacting too flat or failing to follow through. If it shoots sideways, check whether the ball is lined up with your hitting shoulder.
Step 11: Follow Through Toward Your Target
After contact, let your arm continue toward the target. Your hand should finish in the direction you want the ball to travel. Do not stop your arm immediately after hitting the ball. A short, frozen swing often produces short, nervous serves.
Your follow-through is the steering wheel. Point it where you want the serve to go.
Step 12: Recover and Get Ready to Play Defense
The serve is not the end of your job. After the ball crosses the net, move into the court and get ready for the return. Your team may need you to pass, cover, or react quickly. Great servers do not admire their serve like it is a painting in a museum. They serve, move, and play the next ball.
Common Underhand Serve Mistakes and How to Fix Them
The Ball Keeps Hitting the Net
If your serve keeps falling short, use more weight transfer and strike slightly lower on the back of the ball. Make sure your arm swings upward and forward. Also check your contact surface. A soft wrist absorbs power, while a firm fist or palm transfers it.
The Serve Goes Too High
A high serve can still be legal, but if it floats straight up and lands on your side, your swing is too vertical. Contact the ball a little more behind it and finish forward, not just upward.
The Ball Goes Sideways
Sideways serves usually come from poor ball placement. Hold the ball in front of your hitting shoulder, not in the center of your body or outside your hip. Also keep your swing path straight. If your arm crosses your body, the ball will follow.
You Miss the Ball Completely
This happens more often than people admit. Keep the ball still, reduce the toss, and slow down. Practice the motion without hitting first: hold, step, swing, freeze. Then add contact.
Beginner Drills to Improve Your Underhand Serve
Wall Target Drill
Stand several feet from a wall and mark a safe target with tape or chalk. Practice serving into the target using the same routine each time. This helps you focus on contact and follow-through without chasing balls across the entire gym.
Short-to-Long Drill
Begin close to the net or a target line. After three successful serves, take one step back. If you miss two in a row, step forward. This builds confidence and distance gradually.
Zone Serving Drill
Place cones, towels, or floor markers in different court zones. Try to serve to one zone at a time. Start with the middle of the court, then progress to deep corners and short areas.
Routine Drill
Use the same pre-serve routine every time. For example: breathe, check feet, choose target, hold ball, step, swing. Routines reduce nerves because your body knows what comes next.
How to Add Power Without Losing Control
Power should come after consistency. Once you can serve over the net regularly, add power by improving your weight transfer, using a firmer contact point, and increasing arm speed slightly. Do not try to crush the ball with your arm alone. That often causes wild misses and sore shoulders.
Throwing practice can help. A one-step throw teaches the same idea: step forward, rotate naturally, and send force through the ball. You can also practice shadow swings without a ball to build rhythm. The smoother your motion, the more efficient your serve becomes.
How to Aim an Underhand Serve Strategically
Once your serve is consistent, start thinking like a player, not just a beginner trying to survive the whistle. Aim deep to push passers backward. Aim short to make them move forward. Aim between two players to create communication problems. Aim at a weaker passer when appropriate, but be respectful. Volleyball is competitive, not villain training.
The best underhand servers are not always the strongest. They are accurate, calm, and intentional. A serve that lands in a tough spot can be more valuable than a fast serve that gives the opponent an easy pass.
Safety and Comfort Tips
Use a properly inflated volleyball. A ball that is too hard can sting, especially for younger players. Warm up your shoulders, wrists, and legs before repetitive serving practice. Stop if you feel sharp pain. Muscle tiredness is normal during practice; pain that feels sudden or intense is not something to “tough out.”
Practice in a clear area. Underhand serves can travel unpredictably when you are learning, and nobody wants to be remembered as the person who served a ball into the snack table.
Real-World Experience: What Learning the Underhand Serve Actually Feels Like
Learning the underhand serve is rarely a perfect straight line. Most players go through a familiar pattern. First, the ball refuses to cross the net. Then it crosses the net but lands somewhere near the parking lot. Then, suddenly, one serve drops beautifully into the court and you feel like you have unlocked a secret volleyball achievement badge.
The biggest experience-based lesson is this: consistency comes from boring repetition, but boring repetition does not have to feel miserable. The players who improve fastest usually create a tiny routine and repeat it. They do not change five things after every miss. They adjust one thing at a time. If the ball is short, they add weight transfer. If the ball is sideways, they fix the ball position. If the ball goes too high, they finish more forward. Simple corrections beat emotional chaos every time.
Many beginners also underestimate how important confidence is. The serve happens when everyone is watching. There is a quiet second before contact when the court feels enormous and the net appears to grow taller just to be rude. That pressure is real. A routine helps because it gives your mind something useful to do. Instead of thinking, “Please do not embarrass me,” think, “Target, feet, ball, step, swing.”
Another practical experience: start closer than your pride wants to. New players often insist on serving from the full end line before their body is ready. That can create bad habits, like wild swinging, leaning backward, or twisting the wrist. Serving from a shorter distance lets you learn clean contact first. Then you move back gradually. This is not cheating during practice; it is smart progression.
For youth players, lighter training balls or softer volleyballs can make a big difference. If a player is afraid of the sting, they will swing timidly. Once comfort improves, power usually follows. For adult beginners, the challenge is often overthinking. Adults want instructions, diagrams, and possibly a spreadsheet. The body, however, learns by doing. Read the steps, then practice in short sets: 10 serves, rest, 10 serves, adjust, 10 serves again.
In actual games, an underhand serve can be surprisingly effective. Recreational teams often struggle more with placement than speed. A calm underhand serve to the open middle or deep corner can win points because it forces movement and communication. You do not need to apologize for using it. A legal serve that scores is a good serve. Volleyball does not award bonus points for looking dramatic.
The final experience-based tip is to celebrate progress. Your first goal is not an ace. Your first goal is clean contact. Then your goal is clearing the net. Then landing in bounds. Then aiming. Then serving under pressure. Each layer builds on the last. That is how an underhand serve grows from a beginner skill into a reliable weapon.
Conclusion
The underhand serve is one of the best starting points in volleyball because it teaches balance, contact, rhythm, and court awareness without overwhelming new players. By standing behind the end line, setting your feet, holding the ball in front of your hitting shoulder, using a firm hand, stepping forward, contacting the lower back of the ball, and following through toward your target, you can build a serve that is simple, legal, and dependable.
Practice with patience. Start close if needed, move back gradually, and focus on one correction at a time. Once your serve consistently lands in bounds, begin aiming for zones and using placement as a strategy. The underhand serve may look basic, but when it is accurate and confident, it can start rallies, score points, and give beginners a strong foundation for every other volleyball skill.












