
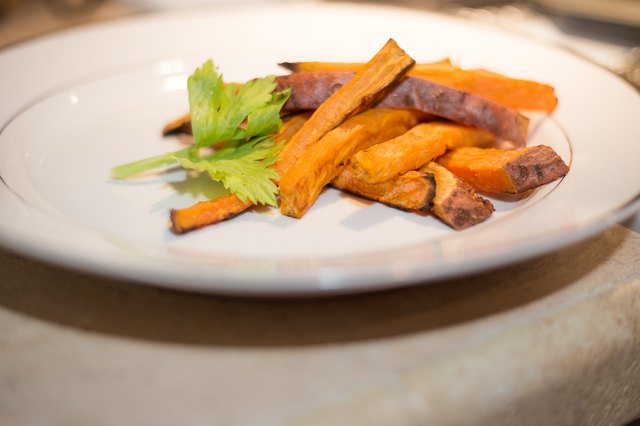
Sweet potato fries are the charming troublemakers of the side-dish world. They look like fries, smell like fries, and promise the crispy joy of friesbut if you simply slice them, oil them, and toss them into the oven, they often come out limp, steamy, and emotionally complicated. The good news? Crispy baked sweet potato fries are absolutely possible. The even better news? You do not need a deep fryer, restaurant equipment, or a culinary degree from the University of Crunch.
The secret is understanding what sweet potatoes are working with: natural sugar, plenty of moisture, and less starch than regular potatoes. That combination gives them their deep caramel flavor, but it also makes them prone to softness. To make baked sweet potato fries crispy, you need to manage moisture, maximize surface area, use enough heat, and avoid crowding the pan. Think of it as helping the fries become their best selvesgolden, crisp-edged, tender inside, and ready for dipping sauce glory.
This guide breaks down the best method, the science behind the crunch, common mistakes, seasoning ideas, serving tips, and real kitchen experience so your next batch does not resemble orange shoelaces with ambition.
Why Baked Sweet Potato Fries Are Hard to Make Crispy
Regular potatoes crisp easily because they are higher in starch. Sweet potatoes contain more sugar and moisture, which means they brown quickly but soften easily. That is why one batch can go from pale to burnt around the edges while still refusing to crisp in the middle. Dramatic? Yes. Delicious? Still yes. Crispy? Not yet.
The challenge is creating a dry, lightly coated surface that can roast instead of steam. Moisture is the enemy of crispiness. If fries are wet, overcrowded, under-oiled, over-oiled, or cut too thick, the oven becomes a tiny sauna. A cozy sauna is wonderful for humans. It is terrible for fries.
The best crispy baked sweet potato fries use a few smart techniques together: thin uniform cuts, a quick soak or rinse, thorough drying, a light starch coating, a moderate amount of oil, high oven heat, and plenty of space on the baking sheet.
The Best Ingredients for Crispy Baked Sweet Potato Fries
Sweet Potatoes
Choose firm sweet potatoes with smooth skin and no soft spots. Medium sweet potatoes are easier to cut evenly than huge ones, which can be woody or awkward. Orange-fleshed sweet potatoes are the classic choice because they become creamy inside and caramelized outside. Purple or white sweet potatoes can work too, but their texture and sweetness may vary.
Cornstarch
Cornstarch is the crispy-fries helper you did not know you needed. A thin coating absorbs surface moisture and creates a delicate crust. The key word is thin. Too much cornstarch can make the fries dusty or chalky. You want a whisper, not a snowstorm.
Oil
Use a neutral or lightly flavored oil with good heat tolerance, such as avocado oil, canola oil, grapeseed oil, or olive oil. Oil helps transfer heat and encourages browning. Too little oil leaves the fries dry and leathery; too much oil makes them greasy and heavy. Aim for about 1 tablespoon of oil per medium sweet potato.
Salt and Seasonings
Salt is essential, but timing matters. For maximum crispiness, add most of the salt after baking. Salt pulls moisture out of vegetables, and moisture is exactly what we are trying to evict from the premises. Seasonings like smoked paprika, garlic powder, onion powder, black pepper, cayenne, cumin, or chili powder can be added before baking, but delicate herbs should go on after baking so they do not burn.
Step-by-Step: How to Make Baked Sweet Potato Fries Crispy
Ingredients
- 2 medium sweet potatoes, scrubbed and peeled if desired
- 1 1/2 tablespoons cornstarch
- 2 tablespoons avocado oil or olive oil
- 1/2 teaspoon smoked paprika
- 1/4 teaspoon garlic powder
- 1/4 teaspoon black pepper
- Fine sea salt, added mostly after baking
- Optional: pinch of cayenne for heat
1. Cut the Fries Evenly
Cut the sweet potatoes into fries about 1/4 inch thick. Uniform size is not just for good looks; it helps every fry cook at the same speed. Thin fries get crispier because more of their surface touches heat. Thick wedges can be tasty, but they usually turn out softer.
Trim a thin slice from one side of each sweet potato to create a stable base. Then slice lengthwise into slabs, and cut those slabs into sticks. Keep your fingers tucked safely away from the knife. Crispy fries are fun; kitchen drama is not.
2. Soak or Rinse the Fries
Place the cut fries in a bowl of cold water for 20 to 30 minutes. This helps rinse away surface starches and gives the fries a cleaner exterior for roasting. Some cooks skip soaking and still get good results, especially when using cornstarch, but soaking can help reduce gumminess and improve texture.
If you are short on time, rinse the fries under cold water until the water runs mostly clear. That shortcut will not be quite as effective as soaking, but it is better than sending wet, starchy fries straight into the oven and hoping for a miracle.
3. Dry Them Like You Mean It
This is the step that separates crispy fries from sad fries. Drain the sweet potatoes and dry them thoroughly with a clean kitchen towel or paper towels. They should feel dry to the touch before you add cornstarch or oil. If they are wet, the coating turns pasty and the fries steam.
Spread them out on a towel and pat every side. Yes, it is slightly annoying. Yes, it is worth it. The oven cannot crisp what the towel did not dry.
4. Coat with Cornstarch First
Add the dry fries to a large bowl. Sprinkle the cornstarch over them and toss until each fry has a very light, even coating. If you see clumps, keep tossing. If the fries look heavily powdered, shake off the excess. Too much starch creates a dusty texture instead of a crisp shell.
A zip-top bag also works well: add fries and cornstarch, seal the bag, and shake gently. This method coats evenly and makes you feel like you are conducting a very important snack experiment.
5. Add Oil and Seasonings
Drizzle the oil over the coated fries and toss until glossy. Add smoked paprika, garlic powder, black pepper, and cayenne if using. Hold back most of the salt until the end. A tiny pinch before baking is fine, but the final seasoning should happen after the fries leave the oven.
6. Use Two Baking Sheets
Preheat the oven to 425°F. For extra crispiness, place the baking sheets in the oven while it preheats. Hot pans start browning the fries immediately and help prevent sticking.
Arrange the fries in a single layer with space between each piece. Do not let them pile up, overlap, or cuddle. Fries need personal space. If you crowd them, they steam. If they steam, they soften. If they soften, someone at the table says, “These are still good,” which is polite but not the goal.
7. Bake, Flip, and Rotate
Bake for 15 minutes, then flip the fries with a spatula or tongs. Rotate the pans if using two racks. Bake another 12 to 18 minutes, until the fries are browned at the edges and tender inside. The exact time depends on thickness, oven accuracy, and how crowded the pan is.
Watch carefully near the end. Sweet potatoes contain natural sugars, so they can brown quickly. A few dark caramelized tips are delicious. Fully blackened fries are not a personality trait we need to encourage.
8. Let Them Rest Briefly
When the fries come out of the oven, let them rest on the pan for 3 to 5 minutes. This short pause helps the exterior firm up. Then sprinkle with salt and any fresh herbs, such as parsley or cilantro. Serve immediately for the best texture.
Best Oven Temperature for Crispy Sweet Potato Fries
The sweet spot is usually 425°F. This temperature is hot enough to evaporate moisture and brown the surface, but not so aggressive that the natural sugars burn before the inside cooks. Some cooks prefer 450°F for extra browning, especially with thicker fries or heavy pans. If your oven runs hot, stick with 425°F and keep an eye on the edges.
Convection ovens can help because circulating air removes moisture faster. If using convection, reduce the temperature to about 400°F or check the fries earlier to prevent over-browning.
Should You Use Parchment Paper?
Parchment paper makes cleanup easy and reduces sticking, but it can slightly reduce direct pan contact. For the crispiest bottom surface, bake directly on a lightly oiled metal sheet pan. If you are nervous about sticking, parchment is still a good option, especially if your baking sheet has seen things it refuses to discuss.
A dark metal baking sheet usually browns better than a pale, thin pan. Heavy rimmed sheet pans hold heat well and produce better crisping. Glass baking dishes are not ideal because they do not create the same dry, direct heat.
Common Mistakes That Make Sweet Potato Fries Soggy
Cutting Them Too Thick
Thick fries stay soft because the interior holds more moisture. For crispier results, keep them around 1/4 inch wide.
Skipping the Drying Step
Wet fries do not roast well. Dry them thoroughly after soaking or rinsing.
Using Too Much Oil
Oil helps crisping, but excess oil makes fries heavy. They should be lightly coated, not swimming.
Overcrowding the Pan
This is the biggest mistake. If the fries touch too much, trapped steam softens them. Use two pans or cook in batches.
Adding Too Much Cornstarch
A thin coating works best. Too much cornstarch can taste powdery and prevent proper browning.
Salting Too Early
Salt can draw moisture from the fries. Add most of it after baking for better texture.
Flavor Ideas for Baked Sweet Potato Fries
Smoky Classic
Use smoked paprika, garlic powder, black pepper, and sea salt. This is the dependable favorite that goes with burgers, grilled chicken, grain bowls, and sandwiches.
Spicy Chili-Lime
Season with chili powder, cumin, garlic powder, and cayenne. After baking, finish with lime zest and a squeeze of lime juice. Add the juice lightly so the fries do not soften too quickly.
Herby Garlic Parmesan
After baking, toss with grated Parmesan, parsley, garlic powder, and a little salt. Parmesan adds savory depth and makes the fries taste like they came from a restaurant with tiny metal baskets.
Maple-Cinnamon Snack Fries
For a sweet-savory version, skip garlic and paprika. After baking, sprinkle with cinnamon and a tiny pinch of salt, then drizzle very lightly with maple syrup. Use restraint; syrup can soften the fries fast.
Best Dipping Sauces
Crispy baked sweet potato fries love contrast. Their natural sweetness pairs beautifully with creamy, tangy, smoky, spicy, or salty sauces.
- Garlic aioli: mayonnaise, lemon juice, grated garlic, salt, and pepper.
- Chipotle yogurt sauce: Greek yogurt, chipotle powder, lime juice, and honey.
- Honey mustard: Dijon mustard, honey, a little mayo, and apple cider vinegar.
- Sriracha mayo: mayonnaise, sriracha, lime juice, and a pinch of garlic powder.
- Tahini lemon dip: tahini, lemon juice, water, garlic, and salt.
Serve sauces on the side instead of drizzling them over the fries. A drizzle looks pretty for about twelve seconds, then the crispiness clocks out early.
Are Baked Sweet Potato Fries Healthy?
Baked sweet potato fries can be a nutritious side dish when prepared with moderate oil and balanced seasoning. Sweet potatoes provide complex carbohydrates, fiber, potassium, and beta-carotene, the plant pigment that gives orange sweet potatoes their bright color. Beta-carotene can be converted by the body into vitamin A, which supports normal vision and immune function.
Baking instead of deep-frying reduces added fat while still delivering a satisfying roasted flavor. That said, “baked” does not automatically mean “eat the whole tray while standing over the stove.” Portion size still matters, especially if the fries are served with rich sauces. Pair them with protein and vegetables for a balanced meal.
How to Store and Reheat Sweet Potato Fries
Sweet potato fries are best fresh. Once they cool, their moisture softens the crisp exterior. If you have leftovers, store them in an airtight container in the refrigerator for up to 3 days.
To reheat, skip the microwave unless softness is your dream. Use a 400°F oven or air fryer until hot and slightly crisp again. Spread the fries in a single layer and heat for 5 to 10 minutes. They may not become as crispy as the first bake, but they will be far better than microwaved fries, which tend to become floppy little orange regrets.
Extra Kitchen Experience: What Actually Works After Many Batches
After making baked sweet potato fries many different ways, one lesson becomes clear: crispiness is not one trick. It is a chain of small decisions. When one link breaks, the fries usually soften. The most reliable batch starts before the oven even turns on, with the cut. Fries that are too thick rarely crisp enough in the oven. They may taste wonderful, but they lean more roasted sweet potato than true fry. A 1/4-inch cut is the practical sweet spot because the fries still have a tender center while the edges can brown and firm up.
The second lesson is that drying matters more than most people think. A quick pat is not always enough. After soaking, the fries should be spread out and pressed with a towel until they no longer feel slick. When I rush this step, the fries always tell on me. The cornstarch clumps, the oil slides around, and the finished texture is softer. When I dry them properly, the coating is lighter and the edges crisp faster.
Another useful experience is to avoid treating the baking sheet like a parking lot during a holiday sale. There must be space between the fries. Two pans are better than one crowded pan, even if washing an extra pan feels like betrayal. Crowding traps steam, and steam is the villain in this story. If you only have one sheet pan, bake in batches. The first batch can stay warm in a low oven while the second batch cooks.
Preheating the pan also makes a noticeable difference. A hot metal surface gives the fries a head start, especially on the underside. The sound of the fries gently sizzling when they hit the pan is a good sign. Be careful when spreading them out, of course, because hot pans are not interested in forgiveness.
One thing that does not work well is adding heavy wet sauces before serving. Sweet potato fries are delicate compared with restaurant deep-fried fries. They can handle dipping, but they do not appreciate being buried under sauce. If you want loaded fries, use thicker wedges and accept a softer texture, or serve toppings separately so people can build each bite.
Finally, serve them immediately. Baked sweet potato fries have a short crispy window, and that is normal. They are not designed to sit around for an hour while everyone “just finishes one thing.” Put the dip on the table first, call people over before the fries come out, and season them the moment they are ready. When served hot from the pan, with crisp browned edges and a creamy center, they are one of the best oven-baked sides you can make.
Conclusion
Learning how to make baked sweet potato fries crispy is mostly about controlling moisture and heat. Cut the fries thinly and evenly, soak or rinse them, dry them very well, coat them lightly with cornstarch, add just enough oil, spread them out on hot baking sheets, and bake at high heat. Finish with salt after baking and serve right away.
Once you master the method, sweet potato fries become more than a backup side dish. They are colorful, flavorful, naturally sweet, and endlessly customizable. Serve them with burgers, roasted chicken, sandwiches, grain bowls, or a heroic amount of dipping sauce on game day. Crispy baked sweet potato fries may require a little patience, but the payoff is worth every towel, pan, and “Are they ready yet?” from the kitchen doorway.












