
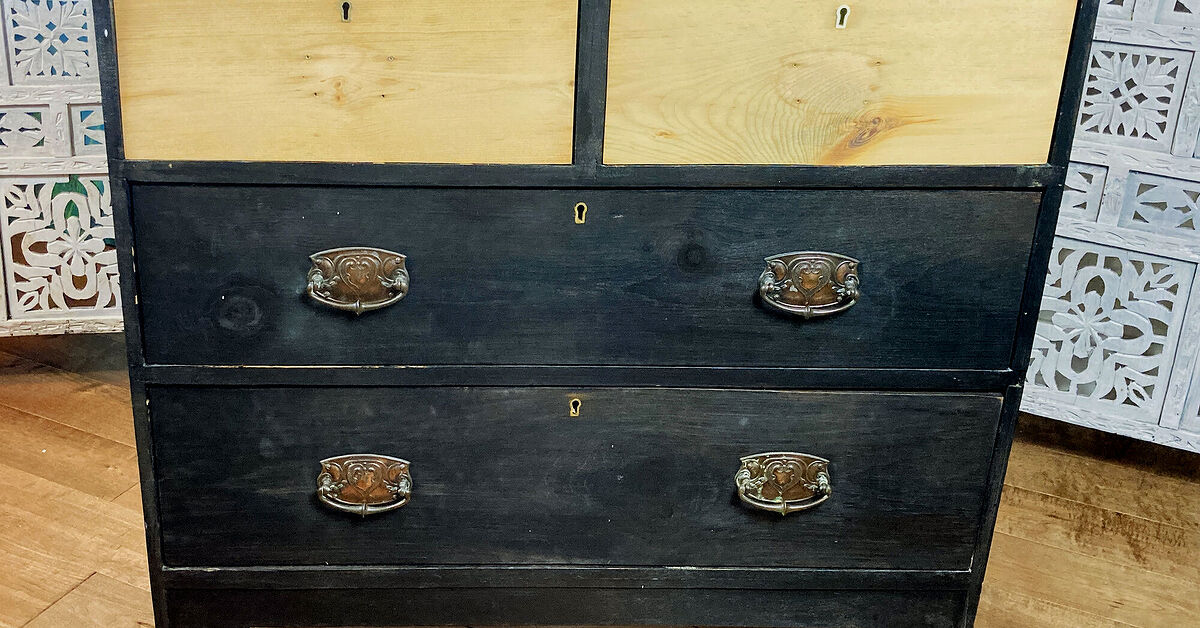
An old dresser has a special talent for making a room feel tired. It sits there in the corner, silently judging your decor choices, wearing scratches from 2009 and hardware that looks like it survived three moves and one questionable garage sale. The good news? You do not need to replace it. With a lick of paint, a little patience, and a few smart prep steps, that dated dresser can become the star of your bedroom, hallway, nursery, guest room, or even your living room.
Painting an old dresser is one of the most satisfying DIY furniture makeover projects because the transformation is big, the cost is usually modest, and the learning curve is beginner-friendly. You can turn a dark, bulky dresser into a soft sage-green statement piece, make a plain pine dresser look high-end with black satin paint, or give a thrift-store find a cottage-style finish with chalk paint and new knobs. The magic is not just in the paint color, though. The real secret is preparation. Paint is charming, but it is not a miracle worker. It needs a clean, lightly scuffed, properly primed surface to look smooth and last.
This guide walks you through how to makeover your old dresser with paint from start to finish, including choosing the right paint, prepping the surface, fixing flaws, applying thin coats, sealing the finish, and styling the final piece. Think of it as a makeover day for furniture: clean, exfoliate, prime, color, protect, accessorize. Your dresser is about to have its main-character moment.
Why Painting an Old Dresser Is Worth It
A dresser makeover is more than a weekend craft. It is a practical way to save money, reduce waste, and create a custom piece that fits your home better than many mass-produced options. Quality older dressers are often made from solid wood or wood veneer over sturdy frames. Even when the finish looks rough, the structure may be better than newer budget furniture.
Painting lets you keep the useful bones of the piece while changing the mood completely. A bulky brown dresser can look modern in a deep charcoal. A chipped white dresser can become playful in dusty blue. A plain dresser can feel designer-level with a warm neutral paint color, brass hardware, and a satin topcoat. The project also gives you control over the final look. You choose the sheen, the color, the hardware, and the personality.
Before You Begin: Check the Dresser’s Condition
Before opening a paint can, inspect the dresser closely. Pull out every drawer. Wiggle the frame gently. Check whether the drawers slide smoothly, whether the top is warped, and whether any veneer is lifting. Paint can disguise cosmetic flaws, but it will not repair a broken drawer track or a swollen particleboard side.
Good Candidates for a Paint Makeover
A dresser is usually worth painting if it has a stable frame, working drawers, minor scratches, faded stain, outdated color, or hardware that can be replaced. Solid wood, quality veneer, and many laminate dressers can be painted successfully when the right primer is used.
Dressers That Need Extra Caution
Be careful with furniture that has flaking old paint, strong musty odors, water damage, or peeling veneer. If the dresser may have been painted before 1978, avoid aggressive sanding until you know whether lead paint is present. Lead dust can be dangerous, especially when old paint is scraped or sanded. Test first, work safely, and consider professional help for questionable older pieces.
Tools and Supplies You Will Need
You do not need a professional workshop to paint a dresser, but having the right supplies makes the job smoother. Gather a screwdriver, mild dish soap, clean rags, painter’s tape, drop cloths, wood filler, putty knife, sanding sponge or sandpaper, tack cloth, primer, furniture paint, paintbrush, small foam or microfiber roller, paint tray, protective gloves, and a topcoat if needed.
For sandpaper, medium grit works well for smoothing rough areas, while fine grit is useful between coats. A small angled brush helps reach corners, trim, and drawer edges. A mini roller is helpful for large flat surfaces like drawer fronts, sides, and the dresser top. If you want a very smooth finish, do not rely only on a brush unless you enjoy brush marks as an artistic statement.
Step 1: Remove Drawers and Hardware
Start by removing the drawers and taking off all knobs, pulls, and decorative hardware. Put screws and small parts in a labeled bag so they do not vanish into the mysterious household portal where missing socks and tiny Allen wrenches live.
If you plan to reuse the hardware, clean it separately. Brass, bronze, chrome, and painted metal pulls can often be refreshed with gentle cleaning. If the old hardware feels dated, replacing it is one of the easiest ways to make a painted dresser look intentional instead of “I got bored on Saturday.”
Step 2: Clean the Dresser Thoroughly
Cleaning is not optional. Dressers collect dust, furniture polish, skin oils, candle residue, and who knows what else. Paint does not stick well to grime. Mix mild dish soap with warm water and wipe every surface you plan to paint. Pay attention to drawer fronts, edges around handles, and the top surface, where polish and oils often build up.
After cleaning, wipe the dresser with a damp cloth to remove soap residue, then let it dry completely. Painting over moisture is a shortcut to regret. If the dresser has a greasy or glossy finish, you may need a stronger deglosser or a dedicated furniture cleaner, but always follow the product directions and work with good ventilation.
Step 3: Repair Scratches, Dents, and Old Hardware Holes
If your dresser has dents, deep scratches, chipped corners, or hardware holes you no longer want, fill them before sanding. Use wood filler for small repairs. Press it into the damaged area with a putty knife, slightly overfill the spot, and let it dry according to the label. Once dry, sand it smooth so it blends into the surrounding surface.
This is also the time to decide whether you are changing the hardware size. If your new drawer pulls require different screw spacing, fill the old holes and drill new ones after painting. For the cleanest result, measure twice. Then measure again because dressers love making people look foolish.
Step 4: Sand or Degloss the Surface
Sanding does not always mean stripping the dresser down to raw wood. In most paint makeovers, the goal is to scuff the existing finish so primer and paint can grip. Use medium-grit sandpaper or a sanding sponge to lightly rough up glossy surfaces. Then switch to a finer grit to smooth any rough patches.
If the dresser has a very slick factory finish or laminate surface, sanding alone may not be enough. In that case, use a high-adhesion primer made for glossy or difficult surfaces. Some DIYers use liquid deglosser for detailed pieces where sanding every curve is annoying. Whether you sand or degloss, wipe away all dust before moving on. Dust under paint creates texture, and not the good “handcrafted artisan” kind.
Step 5: Prime for Better Adhesion
Primer is the difference between a dresser that looks good for years and a dresser that chips when you look at it too confidently. A primer helps paint bond to the surface, blocks stains, and creates an even base color. For raw wood, a quality wood primer is usually enough. For laminate, glossy finishes, or slick factory coatings, choose a bonding primer. For old stained wood that may bleed through, use a stain-blocking primer.
Apply primer in a thin, even coat. Use a brush for corners and details, then roll larger flat areas. Let it dry fully. If the surface feels gritty after priming, lightly sand it with fine-grit sandpaper and wipe away the dust. This small step makes the final paint finish look much smoother.
Step 6: Choose the Best Paint for Your Dresser
The best paint for a dresser depends on the look you want and how much wear the piece will get. Dressers are high-touch furniture. Drawers are opened, tops collect jewelry trays and books, and corners get bumped by laundry baskets. Durability matters.
Latex or Acrylic Furniture Paint
Latex and acrylic paints are popular because they are water-based, easy to clean up, and available in endless colors. Choose a paint designed for trim, cabinets, doors, or furniture if you want better durability than standard wall paint.
Alkyd Enamel Paint
Waterborne alkyd enamel is a strong choice for furniture because it levels nicely and cures to a harder finish. It is often used for cabinets and trim, making it a good option for a dresser that needs to handle daily use.
Chalk-Style Paint
Chalk-style paint is loved for vintage, matte, and distressed looks. It often requires less prep than traditional paint, but it usually needs wax or a protective topcoat to handle wear. It is great for farmhouse, cottage, shabby chic, and antique-inspired makeovers.
Spray Paint
Spray paint can work well on small dressers, detailed drawer fronts, or hardware, but it requires careful ventilation, masking, and light coats. It is not always the easiest choice for a large dresser unless you have a good setup and a steady hand.
Step 7: Pick the Right Color and Sheen
Color changes everything. For a timeless dresser makeover, consider warm white, mushroom beige, navy, charcoal, olive green, soft black, dusty blue, or muted terracotta. If the room already has a lot of color, a neutral dresser can calm things down. If the room feels bland, a painted dresser can become the accent piece.
Sheen matters, too. Matte finishes hide imperfections but may be less wipeable unless sealed. Satin is a popular middle ground because it has a soft glow and decent durability. Semi-gloss feels cleaner and more modern but shows bumps, brush marks, and surface flaws more easily. High-gloss can look dramatic, but it demands careful prep because it exposes every little imperfection like a gossip with a magnifying glass.
Step 8: Apply the First Coat of Paint
Stir the paint well. Start with the detailed areas using a quality brush. Paint inside trim, along edges, and around curves. Then use a mini roller on broad flat surfaces. Work in thin coats rather than trying to cover everything at once. Thick paint can drip, sag, and take longer to cure.
Paint drawer fronts while they are removed and lying flat if possible. This helps prevent drips. For the dresser frame, paint one section at a time, keeping a wet edge so the finish blends smoothly. Follow the direction of the wood grain when brushing. Let the first coat dry completely before judging the color. First coats often look streaky. That is normal. Do not panic. The second coat is where the dresser starts getting its confidence back.
Step 9: Sand Lightly Between Coats
For a smoother finish, lightly sand between coats with fine-grit sandpaper. You are not removing the paint; you are knocking down tiny bumps, dust specks, and raised grain. Wipe the surface with a tack cloth or clean microfiber cloth afterward.
This step may feel fussy, but it makes a noticeable difference. Smooth painted furniture looks more expensive. It also feels better to the touch, which matters because you will use the dresser every day.
Step 10: Apply the Second Coat
Apply the second coat the same way: brush details, roll flat areas, use thin layers, and avoid overworking the paint. If you are painting a dark dresser with a light color, you may need a third coat. The same is true for bold colors like red, deep green, or bright yellow. Let each coat dry according to the paint label.
Do not rush the drying time. Dry-to-touch is not the same as cured. A dresser can feel dry on the surface but still be soft underneath. If you reinstall hardware too soon or place objects on top too quickly, you may dent or mark the finish.
Step 11: Seal the Finish If Needed
Not every paint requires a separate topcoat, but many dresser makeovers benefit from extra protection. Chalk-style paint usually needs wax or a clear coat. Matte finishes may need sealing for better wipeability. The dresser top, drawer edges, and areas around handles are the most likely to wear.
Choose a water-based polyurethane, polycrylic, furniture wax, or clear protective finish based on your paint type and desired look. Test the topcoat in a hidden area first, especially over dark paint, because some clear finishes can change the color slightly. Apply thin coats and let them dry fully.
Step 12: Update the Hardware
Hardware is the jewelry of the dresser. New knobs or pulls can make a simple paint job look polished. Brass pulls look beautiful against navy, black, olive, and creamy white. Matte black hardware gives a modern edge. Glass knobs add vintage charm. Wood knobs painted the same color as the dresser create a seamless, custom look.
If you reuse old hardware, consider cleaning it, polishing it, or spray-painting it with a metal-friendly finish. Just make sure the style matches your final vision. A gorgeous painted dresser with sad hardware is like wearing a tuxedo with flip-flops. Memorable, yes. Ideal, not really.
Step 13: Let the Dresser Cure Before Heavy Use
Paint curing can take days or even weeks depending on the product, humidity, temperature, and number of coats. During this time, be gentle. Avoid placing heavy decor on top. Do not slam drawers. If you add drawer liners, wait until the paint no longer feels soft. You can use the dresser carefully after it dries, but full durability comes after curing.
Design Ideas for a Painted Dresser Makeover
Classic White With Brass Pulls
A white dresser with brass hardware works in almost any room. It feels fresh, bright, and easy to style with lamps, books, plants, or framed art.
Moody Black or Charcoal
Black paint can make an old dresser look expensive, especially with a satin finish. Pair it with gold hardware for a dramatic look or black hardware for a sleek, minimalist style.
Soft Sage Green
Sage green is a friendly color that works well in bedrooms, nurseries, and cottage-style spaces. It pairs beautifully with wood tones, cream bedding, and natural textures.
Two-Tone Wood and Paint
If the dresser has a beautiful wood top or drawer fronts, consider painting only the frame. The mix of natural wood and painted color can look custom and warm.
Color-Blocked Drawers
For a playful makeover, paint the dresser frame one color and the drawers another. This works especially well in kids’ rooms, creative studios, or eclectic interiors.
Common Mistakes to Avoid
The biggest mistake is skipping prep. Paint may stick for a while, but poor prep usually shows up later as chips, scratches, or peeling. Another mistake is using wall paint without considering durability. Wall paint is made for walls, not drawer fronts that get touched every morning before coffee.
Also avoid painting in a dusty area, applying thick coats, reinstalling hardware too soon, or ignoring cure time. If you are painting outdoors, avoid windy days unless you want leaves, bugs, and one heroic piece of grass permanently featured in your finish.
About of Real-World Experience: What Actually Makes a Dresser Makeover Look Good
The biggest lesson from painting old dressers is that the “quick makeover” is only quick if you do not count drying time, decision time, or the 20 minutes spent staring at paint swatches under three different lights. In real life, a dresser makeover is simple, but it rewards patience. The projects that look the best are usually the ones where the painter slowed down during the boring parts: cleaning, sanding, priming, and waiting.
One practical experience is that the top of the dresser deserves extra attention. Drawer fronts get all the glamour in before-and-after photos, but the top surface takes the most abuse. It holds lamps, perfume bottles, charging cables, keys, folded clothes, and sometimes a cup of coffee that should not be there but absolutely is. If the top is scratched or uneven, spend extra time filling dents and sanding it smooth. Use a durable paint and consider a protective clear coat. A pretty dresser with a weak top finish will start looking tired faster than expected.
Another experience: hardware can completely change the perceived quality of the piece. A basic thrifted dresser painted in a soft neutral can look surprisingly high-end with well-scaled handles. Size matters. Tiny knobs on a large dresser may look awkward, while oversized pulls can make a simple piece feel custom. Before drilling new holes, tape paper templates or sample hardware to the drawers and step back. Look at the dresser from across the room. The right hardware should feel balanced, not like it wandered in from a different furniture family.
Paint color also behaves differently on furniture than it does on a wall. A color that looks subtle on a swatch may look much stronger on a dresser because the piece has edges, shadows, and dimension. Dark colors can be stunning, but they show dust and lint more easily. Light colors brighten a room, but they may need more coats over dark wood. Mid-tone colors, such as sage, blue-gray, mushroom, and warm taupe, are often forgiving choices because they add personality without shouting.
One underrated trick is to paint the dresser in a comfortable working position. Raise smaller pieces on sturdy supports when possible, or at least remove drawers and paint them separately. When you paint too close to the floor, you are more likely to miss lower edges, overload the brush, or discover later that one corner looks like it was painted during an earthquake. Good lighting helps, too. Move a lamp around the piece to catch drips, roller marks, and missed spots before they dry.
Finally, the best dresser makeovers do not try to erase every sign of age. A tiny dent or subtle unevenness can give a piece charm. The goal is not to make old furniture look plastic-new. The goal is to make it look loved, useful, and intentional. When you clean it well, paint it carefully, protect the finish, and style it with confidence, an old dresser can become one of the most interesting pieces in the room.
Conclusion: A Lick of Paint Can Go a Long Way
Making over an old dresser with paint is one of the most rewarding DIY projects for beginners and experienced home decorators alike. It is affordable, creative, and practical. With the right preparation, primer, paint, and patience, you can transform a scratched, outdated dresser into a beautiful custom piece that fits your home perfectly.
The process is simple: clean the dresser, repair flaws, sand or degloss, prime carefully, apply thin coats of paint, protect the finish, and finish with hardware that suits the style. Do not rush the prep, do not drown the piece in thick paint, and do not underestimate the power of a good knob. Your old dresser is not done yet. It just needs a fresh start, a good color, and maybe a little applause.
Note: Always read and follow the safety instructions on paint, primer, stripper, and topcoat labels. Work in a well-ventilated area, protect your floors, and test older painted furniture for lead before sanding or scraping.











