
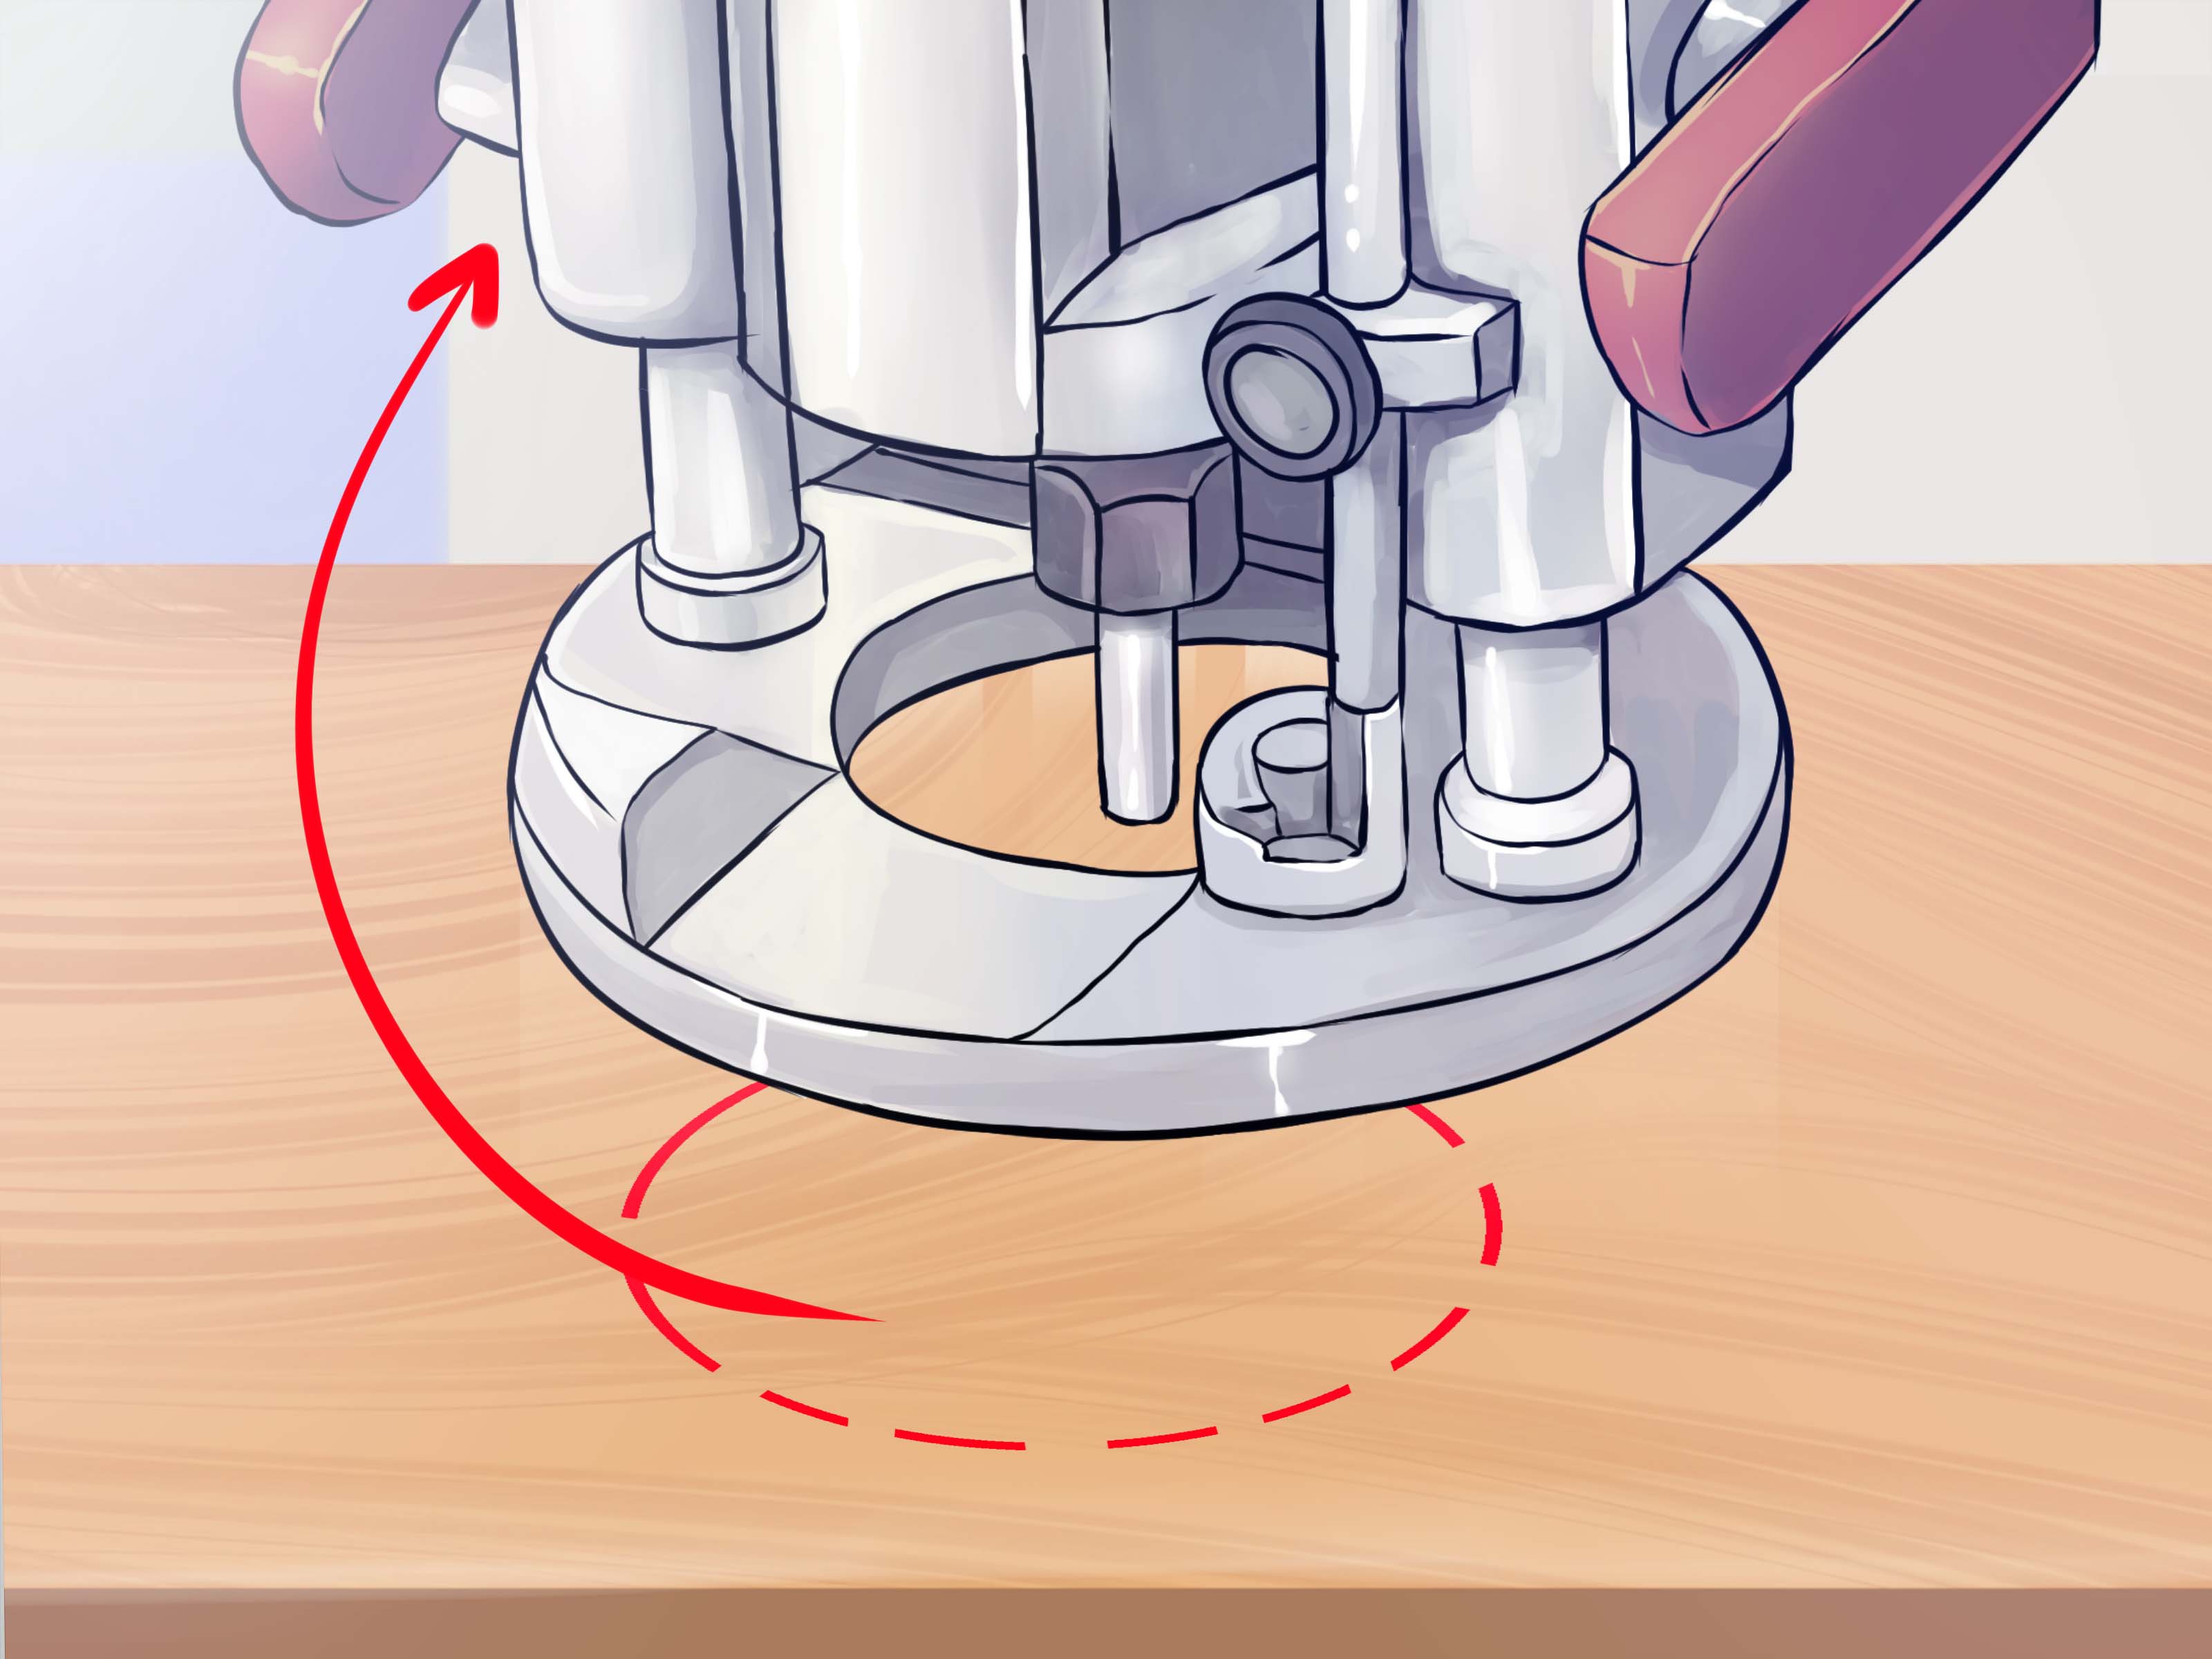
A plunge router is one of those woodworking tools that looks slightly dramatic, sounds very serious, and can make your project look like it was built by someone who owns an apron with pencils in the pocket. Unlike a fixed-base router, a plunge router lets you lower the spinning bit straight down into the wood while the base stays flat on the surface. That makes it ideal for stopped grooves, mortises, inlays, template work, juice grooves, hinge recesses, flutes, dados, and other cuts that do not begin at the edge of a board.
The secret to using a plunge router well is not raw bravery. It is setup. A clean bit, a locked workpiece, a sensible depth setting, and a calm feed rate will do more for your results than trying to “feel it out” while the router screams like a tiny shop vacuum with career goals. This guide walks you through how to use a plunge router in 12 practical steps, with safety tips, beginner mistakes to avoid, and real workshop experience at the end.
What Is a Plunge Router?
A plunge router is a handheld woodworking router with a spring-loaded base. The motor and bit move up and down on guide posts, allowing you to start a cut in the middle of a workpiece. You lower the bit into the wood using the handles, then guide the router along a fence, template, jig, or marked path.
This design makes a plunge router especially useful when the cut needs a clear starting and stopping point. For example, if you are routing a mortise for a table leg, you do not want the groove to run off the end of the board like it missed its exit. A plunge router lets you start exactly where the layout says, stop exactly where the layout says, and pretend you were this precise all along.
Before You Begin: Safety Comes First
A plunge router removes wood quickly, which is wonderful until something is loose, dull, or pointed the wrong way. Always wear eye protection, hearing protection, and a dust mask or respirator when needed. Secure the workpiece with clamps, a vise, or a reliable jig. Keep both hands on the router handles during the cut, and never adjust the bit while the router is plugged in or the battery is installed.
Also, give the bit time to reach full speed before it touches the wood. Starting the cut too early can cause chatter, burning, rough edges, or a surprise that wakes up every dust bunny in the shop. Wait until the motor is running smoothly, then plunge steadily and guide the router with control.
Tools and Materials You Will Need
- Plunge router
- Correct router bit for the cut
- Wrenches or spindle lock for bit changes
- Clamps or a workholding system
- Straightedge, edge guide, template, or jig
- Scrap wood for test cuts
- Eye protection, hearing protection, and dust protection
- Pencil, ruler, square, and measuring tools
- Vacuum or dust collection when available
How to Use a Plunge Router: 12 Steps
Step 1: Choose the Right Router Bit
The bit determines the cut, so choose it before you touch the depth stop or start marking your board. A straight bit is common for grooves, dados, rabbets, and general waste removal. A spiral upcut bit is excellent for mortises because it helps pull chips out of the cut. A roundover bit softens edges, a flush-trim bit follows a template, and a V-groove bit creates decorative lines or lettering details.
Make sure the bit is designed for the material you are cutting. Hardwood, plywood, MDF, and softwood all behave differently. Dull bits burn wood, leave fuzzy edges, and make the router work harder. If the bit looks chipped, rusty, bent, or suspiciously ancient, retire it before it retires your project.
Step 2: Install the Bit Correctly
Unplug the router or remove the battery before installing a bit. Insert the bit shank into the collet, then pull it back slightly before tightening. Do not bottom the bit out inside the collet, because that can prevent proper tightening and may increase vibration. Tighten the collet firmly using the router’s wrench or spindle lock system.
After tightening, give the bit a visual check. It should be straight, secure, and centered. A loose router bit is not a “minor adjustment”; it is a fast-spinning problem looking for a dramatic entrance.
Step 3: Mark the Cut Clearly
Mark the start point, stop point, centerline, and edges of the cut. Use a sharp pencil, marking knife, square, or layout tool depending on the level of precision needed. For mortises, mark both ends and both sides of the opening. For grooves and dados, mark the path and the waste area so you do not accidentally rout the wrong side of the line.
If you are using a template or guide bushing, remember that the bit may not cut exactly along the template edge. You may need to account for the offset between the outside of the guide bushing and the cutting edge of the bit.
Step 4: Secure the Workpiece
Clamp the board to a stable bench or work surface. The workpiece should not rock, slide, flex, or vibrate. If the wood moves during routing, the bit may wander, the cut may become uneven, and your confidence may leave the room quietly.
Position clamps where they will not interfere with the router base. For long grooves, use a clamp-on straightedge or edge guide. For repeated parts, use a template. For mortises, use stop blocks so the router begins and ends in the same place every time.
Step 5: Set the Router on the Workpiece Before Starting
Place the router base flat on the wood, template, or guide before turning it on. The bit should be raised above the surface and able to spin freely without touching anything. Check that the cord is out of the cutting path if you are using a corded router. Few things ruin concentration faster than dragging a cord across your perfect layout line.
Hold both handles firmly and stand in a balanced position. You want to guide the router smoothly, not chase it across the bench like a caffeinated squirrel.
Step 6: Set the Plunge Depth
Most plunge routers use a depth rod and turret stop to control how deep the bit can cut. Lower the bit until it just touches the surface of the workpiece, then lock the plunge mechanism. Set the depth rod against the turret stop, adjust it to the desired cutting depth, and lock it in place.
For deeper cuts, do not remove all the waste in one pass. Use the turret’s stepped stops or manually adjust the depth in stages. Light passes are safer, cleaner, and easier on the bit and motor. A good beginner rule is to remove shallow layers, especially in hardwood or when using a wide bit.
Step 7: Make a Test Cut on Scrap Wood
Before routing the real workpiece, make a test cut using scrap from the same material. This confirms the bit depth, fence position, feed direction, and final appearance. Test cuts are not wasted time; they are tiny insurance policies made of wood.
Check the width, depth, and edge quality. If the cut burns, reduce the depth, sharpen or change the bit, adjust speed if your router has variable speed, or move at a steadier pace. If the router chatters, check that the bit is tight, the workpiece is secure, and the guide is stable.
Step 8: Start the Router and Let It Reach Full Speed
Turn on the router while the bit is above the wood. Wait until the motor reaches full speed. This usually takes only a moment, but that moment matters. Starting the cut before the bit is spinning properly can cause rough entry marks and extra vibration.
Keep the base flat and your hands steady. A plunge router works best when the base stays fully supported. If the router tilts, the bit can cut deeper on one side, creating an uneven groove or a gouge that will require creative sanding and possibly emotional support.
Step 9: Plunge Smoothly Into the Wood
Lower the bit into the wood with firm, even pressure. Do not slam it downward. Once the depth rod contacts the stop, lock the plunge mechanism if your router requires it. This keeps the cut consistent as you move along the guide.
When making a stopped groove or mortise, start at the marked beginning point, plunge to depth, move through the cut, and stop at the marked endpoint. Then turn off the router only after the bit is clear or the cut is complete, depending on the operation. Wait for the bit to stop spinning before lifting the router away from the work.
Step 10: Feed the Router in the Correct Direction
Feed direction matters because the bit spins clockwise when viewed from above. For outside edges, you generally move the router counterclockwise around the workpiece. For inside cuts, such as the inside edge of a frame or template opening, you generally move clockwise. When using a straightedge, feed so the router pulls gently against the guide rather than away from it.
Move steadily. Too slow can burn the wood. Too fast can overload the bit and leave a rough surface. Listen to the motor: a smooth, consistent sound usually means the router is cutting comfortably. A strained motor is the router’s way of saying, “Perhaps we should rethink this relationship.”
Step 11: Make Multiple Passes When Needed
For deep grooves, mortises, or juice grooves, make several shallow passes instead of one heroic pass. Increase the depth a little each time until you reach the final setting. This improves control and reduces tear-out, burning, and bit deflection.
Clear chips between passes. Packed chips create heat, block visibility, and can affect the quality of the cut. Use a vacuum, brush, or compressed air carefully. Never use your fingers near the bit area while the router is connected to power.
Step 12: Stop, Inspect, and Clean Up the Cut
When the cut is finished, release the plunge if needed, turn off the router, and wait for the bit to stop completely. Set the router down safely with the bit clear of the bench. Inspect the cut for depth, straightness, burning, tear-out, and fit.
If the cut is slightly shallow, you can often reset the depth and make another light pass. If it is too deep, congratulations: you have discovered why test cuts are beloved by patient woodworkers everywhere. Depending on the project, you may fix small errors with shims, plugs, filler, design changes, or strategic confidence.
Common Plunge Router Projects
Cutting Mortises
A plunge router is excellent for mortises because it can start and stop inside the board. Use a straight bit or spiral upcut bit, guide the router with a jig or fence, and take several shallow passes. Stop blocks help keep the mortise length consistent.
Making Stopped Dados and Grooves
Stopped dados and grooves are useful for shelves, cabinet dividers, decorative panels, and joinery. Clamp a straightedge parallel to your layout line, set the plunge depth, and use stop blocks to control the beginning and end of the cut.
Routing Inlays
For inlay work, use a template, guide bushing, and small straight bit. Take shallow passes and keep the router base stable. Inlay routing rewards patience. Rush it, and your delicate design may start looking like a map of a coastline no one asked for.
Creating Juice Grooves
Cutting board juice grooves are a popular plunge router project. Use a jig that controls the path, set a shallow starting depth, and make multiple passes. A round-nose or core box bit creates the smooth channel commonly seen on cutting boards.
Beginner Mistakes to Avoid
The most common plunge router mistake is cutting too deep in one pass. This increases the chance of burning, chatter, tear-out, and loss of control. Another mistake is relying on hand pressure alone instead of using a guide, fence, or jig. A plunge router is powerful, and even steady hands benefit from mechanical help.
Beginners also sometimes forget to check feed direction. If the router pulls away from the guide or suddenly feels hard to control, stop and review your setup. Finally, never skip the test cut. Scrap wood is cheaper than replacing the front panel of a cabinet door you spent three evenings building.
How to Get Cleaner Cuts With a Plunge Router
Use sharp bits, take shallow passes, and keep the router moving smoothly. Support the base fully, especially near edges or narrow boards. Add scrap backing where tear-out is likely. When routing across end grain, take extra care because the bit can grab more aggressively and the fibers may chip.
For precision work, use jigs whenever possible. A straightedge improves grooves. A mortising jig improves repeatability. A circle jig makes round cuts far easier. A template guide helps duplicate shapes. Good routing is not about proving you can freehand everything; it is about building a setup that makes success boringly predictable.
Maintenance Tips for Your Plunge Router
Keep the guide posts clean so the plunge action remains smooth. Dust buildup can make the router sticky or uneven. Clean the collet regularly, because debris inside the collet can prevent the bit from seating properly. Check power cords, switches, plunge locks, handles, and base plates before use.
Store router bits in a case or rack so the cutting edges do not bang into each other. Resin and pitch buildup can be removed with a bit cleaner made for cutting tools. A clean, sharp bit gives better results and makes the router safer and easier to control.
Experience Notes: What Using a Plunge Router Teaches You Over Time
The first thing many woodworkers learn about a plunge router is that confidence comes from setup, not muscle. When the fence is clamped firmly, the depth stop is dialed in, and the bit has already been tested on scrap, the actual cut feels almost simple. When one of those steps is skipped, the router suddenly feels like it has its own opinions.
One practical experience is that the sound of the router tells you a lot. A smooth hum with steady chip production usually means the bit is cutting well. A harsh, strained sound often means the pass is too deep, the feed is too fast, or the bit is dull. Burning smells usually mean heat is building up because the bit is dull, the speed is wrong, chips are not clearing, or the router is moving too slowly. Your ears and nose become part of the measuring system, which is less scientific than a caliper but surprisingly useful.
Another lesson is that plunge depth should be treated with respect. On paper, setting a depth rod looks easy. In practice, small errors matter. If you are routing a hinge mortise, even a tiny difference in depth can make the hinge sit proud or sink too low. For fine work, sneak up on the final depth. Make a shallow test cut, check the fit, adjust, and repeat. This patient approach feels slow until you compare it with the time required to fix a sloppy recess.
Templates also become more valuable with experience. At first, a beginner may think a template is extra work. Later, that same woodworker realizes the template is the work. Once the template is accurate, the router simply follows orders. This is especially true for repeated parts, curved shapes, inlays, and mortises. A good jig turns routing from a nervous event into a repeatable process.
Chip control is another real-world detail that matters more than beginners expect. A groove packed with chips heats up quickly and hides the layout line. When routing mortises or deep channels, pause between passes and clear the waste. A vacuum attachment can make the job cleaner, but even a quick stop to remove chips can improve the cut. Woodworking has enough mystery already; there is no need to rout blind through a pile of dust.
Feed direction becomes more natural with practice. In the beginning, it may feel like one more rule to memorize. Over time, you start noticing whether the router is pushing into the guide or pulling away from it. The correct direction gives you better control and a cleaner surface. The wrong direction can feel grabby or unpredictable. When in doubt, stop, think about bit rotation, and make a small test pass before committing to the real piece.
Perhaps the biggest lesson is that a plunge router rewards calm hands. Do not rush the plunge. Do not force the feed. Do not try to remove too much material just because the router technically can. The cleanest results often come from light passes, steady movement, and boring consistency. In woodworking, boring consistency is basically magic wearing safety glasses.
With practice, the plunge router becomes less intimidating and more like a precision partner. It can cut joinery, shape details, create decorative features, and solve problems that would be awkward with other tools. Start with simple grooves and shallow mortises, build a few jigs, keep your bits sharp, and let the tool teach you. Before long, you will look at a project and think, “A plunge router would make this easier,” which is the official moment when the tool has earned its space in your shop.
Conclusion
Learning how to use a plunge router is mostly about respecting the setup. Choose the right bit, secure the workpiece, set the depth carefully, test on scrap, and make controlled passes. Once you understand depth stops, feed direction, jigs, and chip control, the plunge router becomes one of the most versatile tools in the woodworking shop.
Whether you are cutting a mortise, making a stopped groove, routing an inlay, or adding a clean detail to a project, the same principles apply: sharp bit, stable base, shallow passes, steady hands. Do that, and your plunge router will help you create cleaner, more accurate work without turning your project into expensive firewood.











