
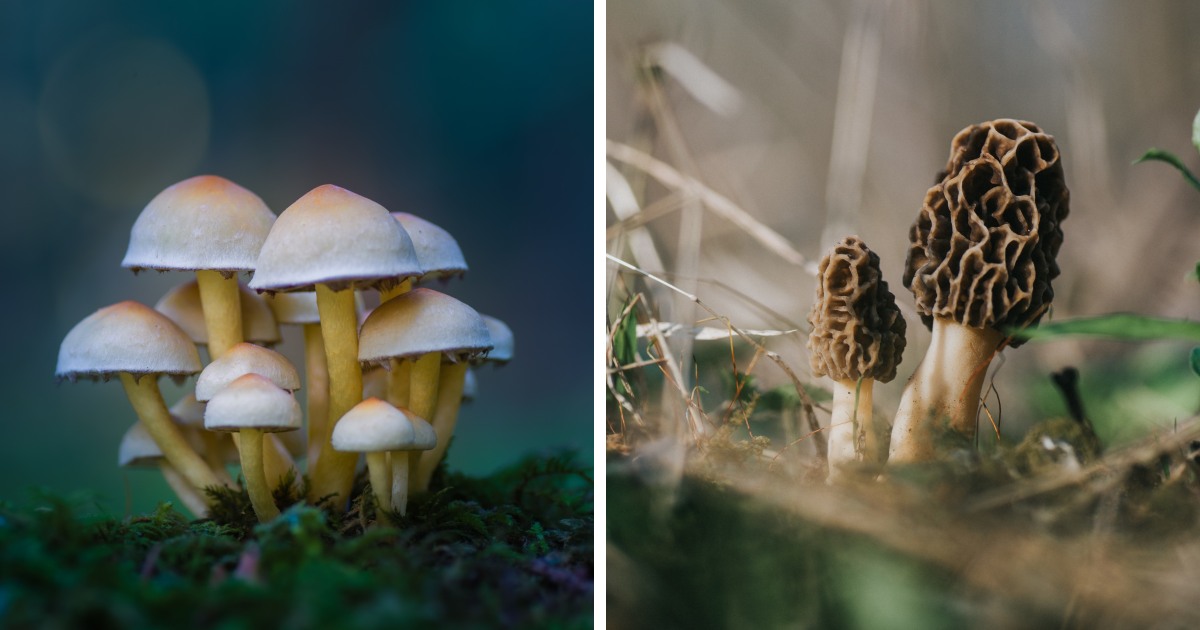
Some people go to the forest looking for a grand mountain view, a waterfall, or a dramatic sunrise that looks like it was personally sponsored by the sky. I go looking for mushrooms. Tiny ones. Weird ones. Ones shaped like umbrellas, pancakes, coral, cups, shelves, buttons, and occasionally something that looks like it escaped from a fairy-tale bakery.
Mushroom photography is a quiet kind of adventure. It does not shout for attention. It whispers from the damp leaves, glows under fallen logs, and waits patiently near mossy roots. You have to slow down, kneel, squint, and sometimes lie on the forest floor like a very committed raccoon with a camera. But when the light is right and the lens finally catches the delicate gills beneath a mushroom cap, the whole forest seems to reveal a secret.
This is the magic of capturing the fabulous beauty of mushrooms: it turns an ordinary walk into a treasure hunt. Every rotting stump becomes a possible gallery. Every patch of moss becomes a miniature landscape. Every raindrop becomes a tiny spotlight. And the best part? Mushrooms are not just pretty subjects. They are signs of a living, breathing forest at work.
Why Mushrooms Make Such Fabulous Photography Subjects
Mushrooms are nature’s tiny sculptures. They come in soft creams, rusty oranges, deep reds, smoky grays, golden yellows, and ghostly whites. Some have smooth caps like polished ceramic. Others look shaggy, wrinkled, velvety, cracked, slimy, or dusted with woodland glitter. If flowers are the forest’s jewelry, mushrooms are its mysterious little art installations.
What makes mushrooms especially exciting for photography is their variety. A cluster of small mushrooms rising from a log can look like a city skyline. A single fly agaric-style mushroom, red-capped and speckled, can feel like it belongs in an illustrated storybook. Shelf fungi growing on a tree can resemble stair steps for woodland creatures who apparently have very dramatic architecture taste.
Unlike large landscapes, mushrooms invite intimacy. You are not standing far away admiring a scene. You are entering a miniature world. The camera becomes a magnifying glass, and suddenly the unnoticed details matter: the curve of a cap, the texture of a stem, the glow of backlight through thin flesh, the way fallen pine needles frame the subject like nature’s own styling team.
The Forest Floor Is a Hidden Studio
A forest after rain is one of the best places to photograph mushrooms. Moisture encourages many fungi to produce visible fruiting bodies, and the entire woodland seems to soften. Leaves darken, bark gains texture, moss becomes brighter, and mushrooms appear almost luminous against the rich, damp background.
The forest floor also provides natural props. A brown leaf can add contrast to a pale mushroom. Green moss can create a dreamy carpet. A fallen branch can lead the viewer’s eye toward the subject. Even mud has its place, though admittedly it is less charming when it relocates itself onto your knees, elbows, and camera bag.
Light is another reason the forest is such a beautiful studio. Direct midday sunlight can be harsh, but cloudy skies and shaded woods create soft, even light that works wonderfully for macro photography. Early morning is especially lovely because dew clings to caps and spiderwebs. Late afternoon can also be magical, especially when low light slips between trees and gives mushrooms a golden outline.
Understanding What You Are Photographing
One of the most fascinating things about mushrooms is that the part we photograph is usually only a small visible piece of a much larger organism. The mushroom is the fruiting body, while the main body of the fungus often lives as mycelium in soil, wood, leaf litter, or around plant roots. In other words, the mushroom is the “hello” above ground, while the bigger story is happening quietly below.
Fungi help forests recycle nutrients by breaking down dead organic matter such as leaves, branches, and fallen trees. Without fungi, forests would be buried under their own leftovers. They also form relationships with plants, support soil health, create habitat for insects and wildlife, and contribute to the cycle of growth, decay, and renewal.
This knowledge changes how you photograph mushrooms. They are not decorations placed in the woods for your camera. They are working members of the ecosystem. Photographing them well means respecting their role. Step carefully. Avoid crushing nearby growth. Do not tear apart logs or scrape up moss just to improve a composition. A good mushroom photo should not leave the forest looking like it lost a wrestling match.
Essential Gear for Mushroom Photography
A Camera You Actually Like Using
You do not need the most expensive camera on Earth to capture beautiful mushroom images. A DSLR, mirrorless camera, advanced compact camera, or even a modern smartphone can work well if you understand light, focus, and composition. The best camera is the one that makes you want to keep exploring.
A Macro Lens or Close-Focus Option
A macro lens is ideal because it allows you to focus close and capture tiny details. A 60mm, 90mm, or 100mm macro lens can reveal the fine textures of mushroom caps, stems, pores, and gills. If you do not own a macro lens, extension tubes, close-up filters, or your phone’s macro mode can help you get closer.
A Small Tripod or Ground Support
Because mushrooms are low to the ground, a tripod that can spread flat is extremely helpful. A beanbag, folded jacket, or small ground pod can also stabilize your camera. Stability matters because forest light is often dim, and slower shutter speeds can make handheld shots blurry.
A Reflector, Diffuser, or Tiny Light
A small reflector can bounce light under a mushroom cap, revealing details that would otherwise hide in shadow. A diffuser can soften harsh light. Some photographers use small LED lights for gentle fill, but natural light often creates the most believable woodland mood.
How To Compose Beautiful Mushroom Photos
Get LowThen Get Lower
The biggest mistake in mushroom photography is shooting straight down from standing height. That angle often makes mushrooms look flat and ordinary. Instead, lower your camera to mushroom level. When you photograph from the side or slightly below, the mushroom suddenly gains character. You can see its cap shape, stem, gills, and relationship to the surrounding forest.
Watch the Background
A beautiful mushroom can disappear into a messy background. Before pressing the shutter, look behind your subject. Are there bright sticks, distracting leaves, or random blobs of light stealing attention? Move slightly left or right. A tiny shift can turn clutter into smooth woodland bokeh.
Use Foreground for Depth
Leaves, moss, grass, and tiny branches can create a soft foreground blur. This makes the image feel layered and immersive, as if the viewer has crouched down inside the mushroom’s world. Just be careful not to block the subject completely. Mystery is good. Confusion is less charming.
Tell a Story With Scale
A tiny mushroom beside a massive tree root can tell a story about fragility. A cluster growing from a decaying log can suggest renewal. A single mushroom glowing in dark moss can feel like a lantern. Great mushroom photography is not only about sharpness; it is about mood, context, and wonder.
Camera Settings That Work Well in the Woods
There is no single perfect setting for mushroom photography, but a few starting points help. For dreamy images with a soft background, try a wide aperture such as f/2.8 or f/4. This can isolate one mushroom beautifully, though the depth of field will be very thin. Focus carefully on the most important detail, such as the cap edge or gills.
For more detail across the mushroom, use a smaller aperture such as f/8 or f/11. This can be useful for larger fungi, clusters, or documentary-style shots. The trade-off is that less light enters the camera, so you may need a tripod, higher ISO, or slower shutter speed.
If the scene is dark, avoid pushing ISO too high unless your camera handles noise well. A tripod allows you to use lower ISO and slower shutter speeds without blur. For handheld photos, keep your shutter speed fast enough to prevent camera shake. In the forest, even your own breathing can feel like an earthquake when shooting close-up.
Focus Stacking: When One Shot Is Not Enough
Macro photography has a tiny depth of field. Sometimes only a sliver of the mushroom is sharp while the rest melts into blur. That can be artistic, but when you want more detail, focus stacking can help.
Focus stacking means taking several photos of the same subject at different focus points, then blending them in software to create one image with greater sharpness. For example, you might take one photo focused on the front edge of the cap, another on the gills, another on the stem, and another on the background. When combined, the final image can look crisp and detailed while still keeping a natural mood.
This technique works best when the subject is still. Wind, moving leaves, crawling insects, and enthusiastic photographers bumping their own tripod can make stacking harder. Patience is part of the craft. So is laughing quietly when a mosquito lands exactly where your perfect focus point was supposed to be.
Popular Mushroom Subjects To Look For
Tiny Cap-and-Stem Mushrooms
Small cap-and-stem mushrooms are classic subjects. They often grow in groups and look wonderful when photographed at ground level. Backlighting can make their caps glow, especially if they are thin or pale.
Shelf Fungi
Shelf fungi grow from logs and tree trunks in layered forms. They are excellent for pattern-based compositions. Their bands of color, curved edges, and repeated shapes can create strong visual rhythm.
Coral Fungi
Coral fungi can look like underwater creatures that somehow got lost in the woods. Their branching forms are delicate and sculptural, making them perfect for close-up detail shots.
Puffballs and Earthballs
Round fungi such as puffballs can add humor and simplicity to a photo. They may not always look glamorous, but with the right light and background, even a humble woodland sphere can become surprisingly elegant.
Colorful or Unusual Fungi
Bright orange, red, yellow, purple, or blue-green fungi can become instant focal points. However, color alone is not enough. Look for a clean composition, good light, and an angle that reveals form and texture.
Safety First: Photograph, Do Not Guess-Eat
Mushroom photography and mushroom foraging are not the same hobby, though they often overlap. If your goal is photography, the safest rule is simple: look, admire, photograph, and leave the eating decisions to trained experts. Many wild mushrooms are difficult to identify, and some toxic species resemble edible ones.
Never eat a wild mushroom unless you are completely certain of its identification and have guidance from a qualified expert or trusted local mycological group. Apps, quick internet searches, and “it looks like the picture” confidence are not enough. A camera mistake may cost you a blurry photo. A mushroom identification mistake can cost much more.
For photographers, this safety rule is freeing. You do not have to decide whether a mushroom belongs in a recipe. You only need to decide whether it belongs in the frame. Spoiler: many of them do.
Ethical Mushroom Photography in the Forest
Responsible photography begins with respect. Stay on established trails when required. Follow local park, forest, and preserve rules. Some places allow mushroom collecting with limits, while others prohibit it completely. Even if you are only taking photos, it is wise to understand the rules of the land you are visiting.
Avoid moving mushrooms for a better shot. Do not pull them up to photograph the underside unless you are participating in a proper scientific survey or guided identification activity where collection is allowed. Instead, use a low camera angle, a mirror, or gentle natural light to reveal hidden details.
Leave the scene as you found it. That means no carving into logs, no trampling moss beds, no rearranging the forest into a studio set. A mushroom photograph is more meaningful when it shows the subject in its real home.
Editing Mushroom Photos Without Losing the Magic
Editing can enhance a mushroom photo, but it should not smother it. Start with basic adjustments: exposure, contrast, white balance, highlights, shadows, and sharpness. Forest scenes often have green or brown color casts, so small white balance corrections can make the image feel more natural.
Use selective editing to guide the viewer’s eye. Brighten the mushroom slightly, darken distracting edges, and add gentle contrast to textures. Avoid oversaturation. Mushrooms are already strange and beautiful; they do not need to look like they were dipped in neon soup.
Cropping can also improve storytelling. A vertical crop may emphasize height and elegance. A horizontal crop can show the mushroom’s environment. A square crop can work well for centered, intimate compositions. The goal is not to prove you edited the photo. The goal is to help the viewer feel what you felt when you found it.
Why Mushroom Photography Teaches Patience
Mushrooms are small teachers. They reward attention, silence, and curiosity. You cannot rush through the forest and expect to see them all. Many hide under leaves, tuck themselves against logs, or blend perfectly into bark. Once you train your eyes, though, the forest changes. What once looked like a plain brown path becomes a living map of shapes and textures.
This is why mushroom photography can feel calming. It slows the mind. It asks you to notice the overlooked. It reminds you that beauty does not always arrive with dramatic music and a spotlight. Sometimes it is the size of a coin, growing quietly beside a twig.
My Personal Field Experience: Chasing Tiny Wonders With a Camera
The first thing I learned from photographing mushrooms is that the forest has a sense of humor. I will hike for twenty minutes without seeing anything, then stop to tie my shoe and discover an entire mushroom village beside my left boot. There they are, perfectly arranged, as if they had been waiting for me to stop acting important and look down.
My favorite mushroom photography days usually begin after rain. The air feels clean, the leaves shine, and the forest smells like earth, bark, and mystery. I pack light: camera, macro lens, microfiber cloth, small tripod, spare battery, water, and a snack that will absolutely be flattened in my bag by noon. I wear clothes I do not mind getting muddy because mushroom photography is not a standing hobby. It is a crouching, kneeling, leaning, crawling, “why is there moss on my sleeve?” kind of hobby.
One memorable morning, I found a cluster of tiny tan mushrooms growing from the side of a decaying log. From above, they looked ordinary. Cute, but not exactly award-winning. Then I lowered the camera until the lens was almost touching the moss. Suddenly the mushrooms towered like umbrellas over a miniature green valley. The background dissolved into soft circles of light. A bead of water hung from one cap like a glass ornament. That was the moment I remembered the golden rule: mushrooms are best photographed from their own level, not ours.
Another time, I spent nearly half an hour trying to photograph a white mushroom under a fern. The composition was beautiful, but the fern kept moving in the breeze. Every time I was ready, one tiny leaflet drifted into the frame like an unpaid actor demanding screen time. I waited, adjusted, waited again, and finally captured the shot during a two-second pause. The photo was peaceful. The process was not. But that is part of the fun. Nature photography teaches patience by gently annoying you until you improve.
I have also learned to appreciate imperfect mushrooms. A cracked cap, a tilted stem, a bite mark from an insect, or a mushroom leaning awkwardly into the dirt can be more interesting than a perfect specimen. Flaws tell stories. They show weather, age, wildlife, and survival. In a way, the most fabulous mushroom is not always the prettiest one. Sometimes it is the one with character, the one that looks like it has lived through three storms and still showed up for its portrait session.
When I walk through the forest with my camera now, I move differently. I scan fallen logs, shaded roots, mossy banks, and damp leaf piles. I notice how light slips through branches and where the background might become soft and painterly. I take fewer hurried photos and more thoughtful ones. I also leave more mushrooms untouched. The goal is not to collect them, rearrange them, or turn the forest into my personal display shelf. The goal is to witness them.
That is the real gift of mushroom photography. It makes the forest feel bigger by making me pay attention to what is small. It turns a quiet walk into a creative practice. It reminds me that beauty is not rare; it is often just low to the ground, wearing a little cap, waiting for someone patient enough to notice.
Conclusion
Going to the forest with a camera to capture the fabulous beauty of mushrooms is more than a photography project. It is a way of seeing. Mushrooms invite us into a hidden world of texture, color, decay, renewal, and quiet surprise. They teach us to slow down, respect the ecosystem, and find wonder in places most people step over without a second glance.
Whether you use a professional camera, a macro lens, or a smartphone, the secret is the same: get low, watch the light, protect the habitat, and let curiosity lead. The forest is full of tiny masterpieces. Mushrooms are proof that nature does not need a large canvas to create something unforgettable.












