
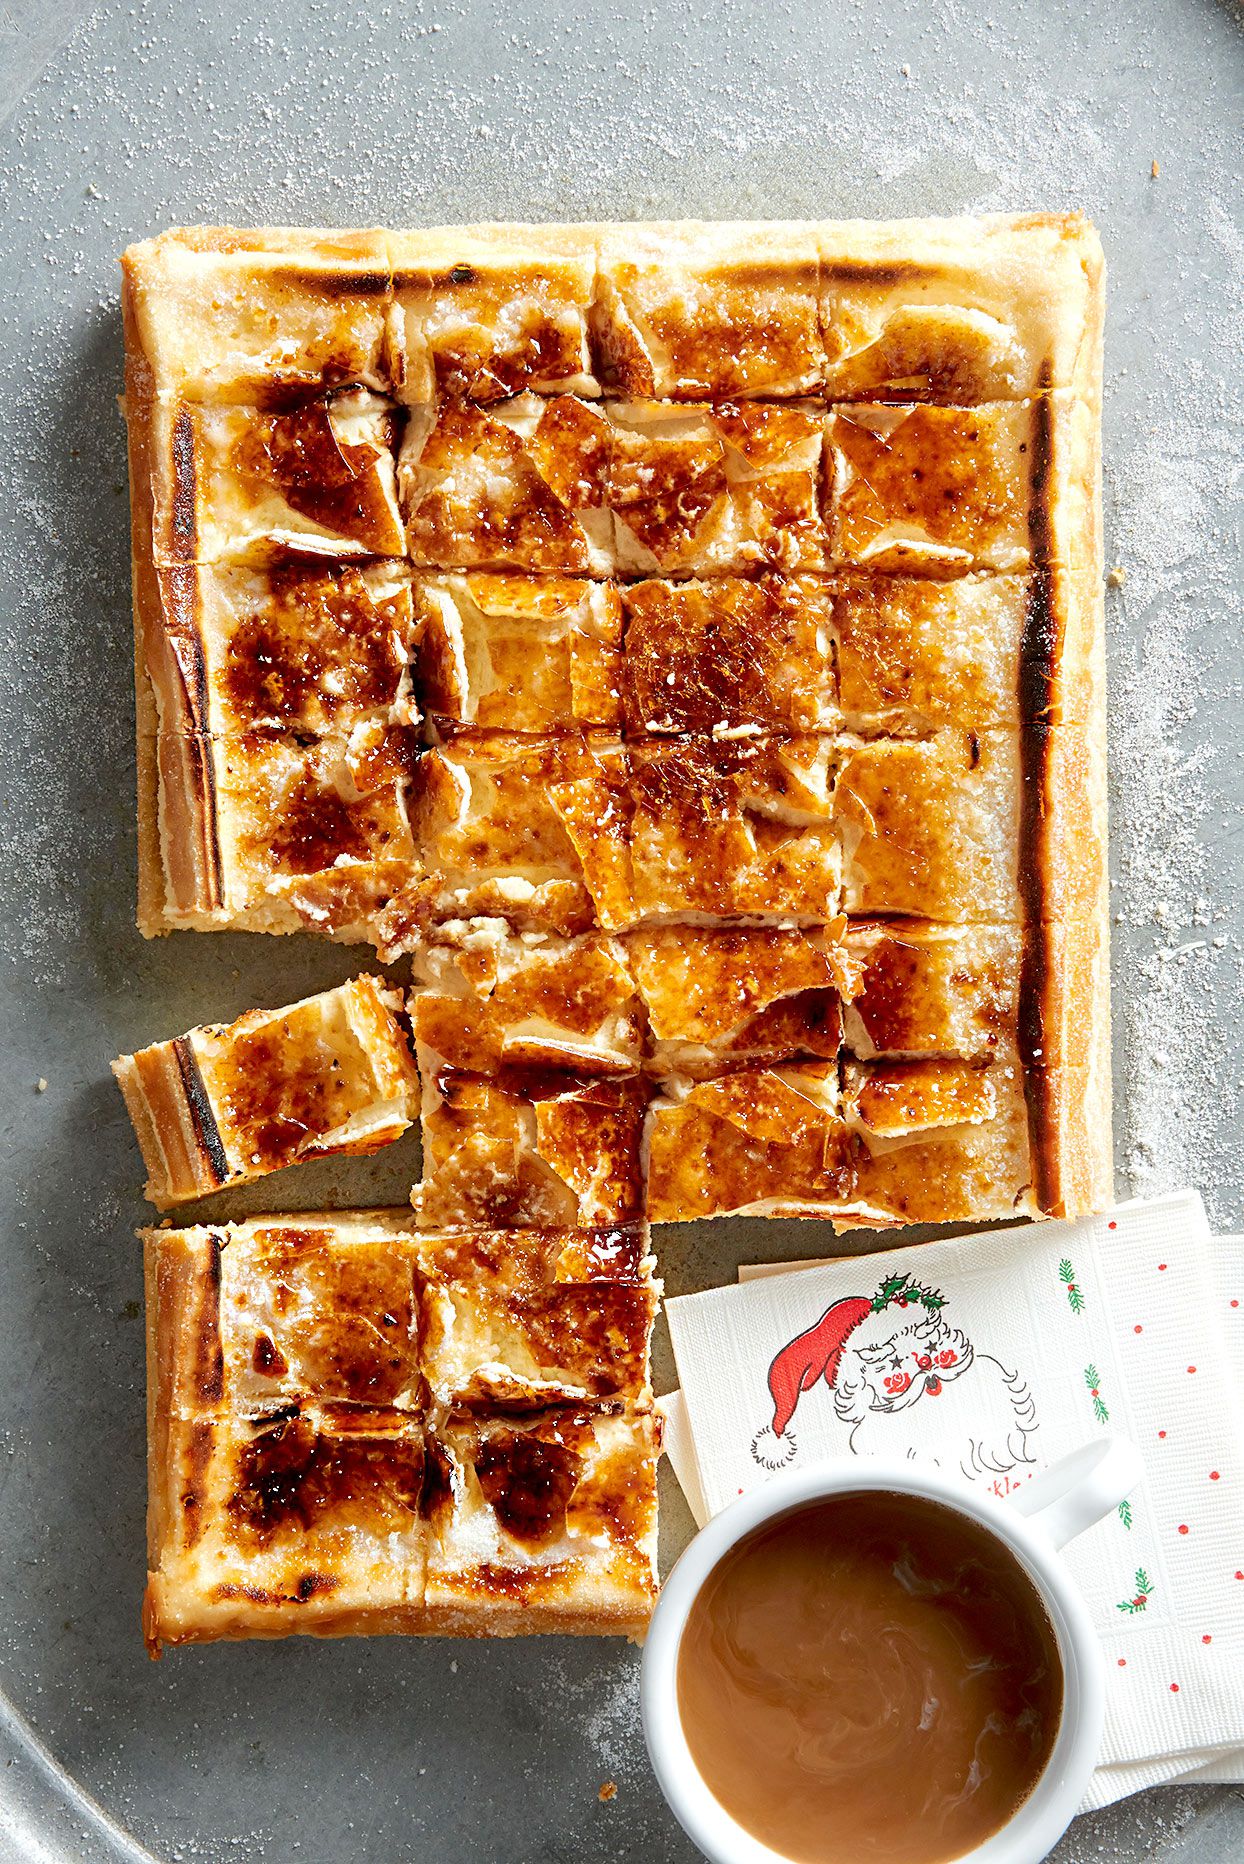
Some desserts politely ask for attention. Creme brulee cheesecake bars kick open the kitchen door wearing a caramelized sugar crown and say, “Yes, I am the reason you bought that little culinary torch.” These bars combine three things dessert lovers rarely argue about: a buttery graham cracker crust, a rich vanilla cheesecake filling, and the glassy, crackly sugar top of classic crème brûlée.
The result is elegant enough for holidays, birthdays, dinner parties, bridal showers, and “I survived Monday” celebrations, yet simple enough to make in a square baking pan. No giant springform pan drama. No slicing a tall cheesecake while whispering prayers. Just creamy, golden-topped dessert bars that look fancy but do not require a pastry-school diploma.
This creme brulee cheesecake bars recipe is designed for home bakers who want dependable texture, clean slices, and that magical spoon-tap moment when the sugar shell cracks. The recipe below uses familiar ingredients, practical techniques, and clear timing so you can bake with confidence instead of panic-snacking graham crackers over the sink.
What Are Creme Brulee Cheesecake Bars?
Creme brulee cheesecake bars are a mash-up dessert that brings together the creamy richness of cheesecake and the caramelized sugar topping of crème brûlée. Traditional crème brûlée is a baked custard finished with a thin layer of torched sugar. Cheesecake bars, meanwhile, are usually made with a crumb crust and a cream cheese filling baked in a rectangular or square pan.
In this recipe, the cheesecake filling takes center stage. It is smooth, tangy, lightly sweet, and flavored with vanilla. After chilling, each bar gets a sprinkle of sugar and a quick pass with a kitchen torch. The heat melts the sugar into a crisp amber shell. When you bite in, you get crunch, creaminess, buttery crumbs, and a tiny moment of dessert fireworks.
Why You Will Love This Creme Brulee Cheesecake Bars Recipe
These bars are perfect when you want a dessert that feels impressive but still behaves like a friendly baking project. Cheesecake bars are generally more forgiving than a full cheesecake because they bake in a thinner layer. That means less cooling stress, easier slicing, and fewer chances of the dreaded cheesecake canyon forming across the middle.
You will also love this recipe because it is make-ahead friendly. In fact, cheesecake bars need time to chill, so preparing them the day before serving is not just convenient; it is smart. The cold cheesecake sets firmly, the flavor deepens, and your future self gets to look organized. A rare and beautiful thing.
The Best Part: The Crackly Sugar Top
The caramelized topping is what turns simple cheesecake bars into crème brûlée cheesecake bars. The trick is to add the sugar topping right before serving. If you torch the sugar too early and refrigerate the bars afterward, the caramel layer can soften and lose its crisp texture. Dessert tragedy? Not quite. But definitely dessert disappointment.
Ingredients You Need
This recipe uses pantry-friendly ingredients with a few bakery-style upgrades. For the best flavor, use full-fat cream cheese and real vanilla extract or vanilla bean paste. Low-fat cream cheese can make the filling softer and less luxurious, and this dessert did not come here to be modest.
For the Graham Cracker Crust
- 1 1/2 cups graham cracker crumbs
- 2 tablespoons granulated sugar
- 1/4 teaspoon fine salt
- 6 tablespoons unsalted butter, melted
For the Cheesecake Filling
- 16 ounces full-fat cream cheese, softened
- 2/3 cup granulated sugar
- 1/2 cup sour cream, room temperature
- 2 large eggs, room temperature
- 1 large egg yolk, room temperature
- 2 teaspoons pure vanilla extract or vanilla bean paste
- 1 tablespoon all-purpose flour
- 1/4 teaspoon fine salt
For the Brulee Topping
- 3 to 4 tablespoons superfine sugar or granulated sugar
Superfine sugar melts quickly and evenly, which makes it a great choice for the brulee topping. Regular granulated sugar also works well; just use a thin, even layer. Too much sugar can turn into a hard candy helmet, and while dramatic, that is not the goal.
Equipment You Will Need
- 8-inch square baking pan
- Parchment paper
- Mixing bowls
- Electric hand mixer or stand mixer
- Rubber spatula
- Measuring cups and spoons
- Kitchen torch
- Sharp knife for slicing
A kitchen torch gives the best brûléed finish. The broiler can work in some crème brûlée recipes, but for cheesecake bars it is risky because the filling can soften before the sugar caramelizes properly. A torch keeps the heat focused on the sugar, where it belongs.
How to Make Creme Brulee Cheesecake Bars
Step 1: Prepare the Pan
Preheat the oven to 325°F. Line an 8-inch square baking pan with parchment paper, leaving overhang on two sides. This parchment sling makes it easy to lift the chilled cheesecake out of the pan later. Lightly grease the exposed sides of the pan if needed.
Step 2: Make the Graham Cracker Crust
In a medium bowl, combine the graham cracker crumbs, sugar, and salt. Pour in the melted butter and stir until the mixture looks like damp sand. Press it firmly into the bottom of the prepared pan. Use the flat bottom of a measuring cup to pack it evenly. A well-packed crust is the difference between a neat dessert bar and a delicious pile of crumbs pretending to be architecture.
Bake the crust for 8 to 10 minutes, or until lightly fragrant and set. Remove it from the oven and let it cool slightly while you prepare the filling.
Step 3: Mix the Cheesecake Filling
In a large bowl, beat the softened cream cheese on medium-low speed until smooth and creamy. Add the sugar and beat until combined, scraping down the bowl as needed. Keep the mixer speed moderate. Cheesecake filling does not need to be whipped like birthday cake batter. Too much air can cause puffing, sinking, or cracks.
Add the sour cream, vanilla, flour, and salt. Mix until just smooth. Add the eggs and egg yolk one at a time, mixing on low speed after each addition. Stop as soon as the batter looks silky and combined.
Step 4: Bake the Bars
Pour the cheesecake filling over the warm crust and smooth the top with a spatula. Bake for 30 to 38 minutes, or until the edges look set and the center still has a slight jiggle. The center should not look liquid, but it should not be completely firm either. Cheesecake continues to set as it cools.
Turn off the oven, crack the oven door open, and let the bars rest inside for 10 minutes. This gentle transition helps prevent sudden temperature shock. Remove the pan from the oven and let it cool at room temperature for about 1 hour.
Step 5: Chill Until Firm
Cover the pan and refrigerate the cheesecake bars for at least 4 hours, preferably overnight. This step is not optional. Warm cheesecake is soft, messy, and emotionally unstable. Chilled cheesecake is firm, creamy, and ready for clean slicing.
Step 6: Slice the Bars
Use the parchment overhang to lift the cheesecake from the pan. Place it on a cutting board. For clean slices, dip a sharp knife in hot water, wipe it dry, and cut straight down. Wipe the knife between cuts. You can make 9 generous bars or 16 smaller party-size squares.
Step 7: Add the Brulee Topping
Right before serving, sprinkle a thin, even layer of sugar over each cheesecake bar. Use about 1 teaspoon of sugar per larger bar, adjusting as needed based on size. Hold a kitchen torch a few inches from the surface and move it steadily in small circles until the sugar melts, bubbles, and turns golden amber.
Let the caramelized sugar cool for 1 to 2 minutes before serving. This gives the topping time to harden into that signature crackly shell.
Recipe Tips for the Best Cheesecake Bars
Use Room-Temperature Ingredients
Softened cream cheese, room-temperature eggs, and room-temperature sour cream blend more smoothly. Cold cream cheese can leave lumps in the batter, and while lumps are charming in mashed potatoes, they are not invited to cheesecake.
Do Not Overmix the Batter
Once the eggs go in, mix gently and briefly. Overmixing can add too much air, which may cause the cheesecake to rise too much in the oven and then sink as it cools.
Bake Until Just Set
The center should jiggle slightly when the pan is gently nudged. If the cheesecake looks completely firm in the oven, it may be overbaked by the time it cools. Overbaked cheesecake can turn dry or grainy instead of creamy.
Chill Before Torching
The bars must be fully chilled before adding the sugar topping. A cold, firm cheesecake base holds up better under the torch and slices more cleanly.
Torch the Sugar Right Before Serving
For the best texture, do not brûlée the bars hours in advance. The sugar crust is at its crispest shortly after torching. If you need to prepare ahead, bake and chill the cheesecake bars first, then slice and torch them just before guests arrive.
Flavor Variations
Vanilla Bean Creme Brulee Cheesecake Bars
Use vanilla bean paste instead of vanilla extract for a deeper vanilla flavor and those beautiful little specks throughout the filling. It gives the bars a bakery-style look with almost no extra effort.
Espresso Creme Brulee Cheesecake Bars
Add 1 teaspoon of instant espresso powder to the filling. Espresso adds a subtle bitterness that balances the sweet caramelized sugar topping beautifully.
Lemon Creme Brulee Cheesecake Bars
Add 1 teaspoon of lemon zest to the cheesecake filling. The citrus brightens the richness and makes the bars especially lovely for spring and summer gatherings.
Biscoff Crust Cheesecake Bars
Swap the graham cracker crumbs for crushed Biscoff cookies. The spiced cookie flavor pairs wonderfully with vanilla cheesecake and caramelized sugar.
How to Store Creme Brulee Cheesecake Bars
Store untorched cheesecake bars in an airtight container in the refrigerator for up to 5 days. For the best result, add the sugar topping and torch only the bars you plan to serve immediately.
If you have leftover bars that are already brûléed, they are still delicious the next day, but the sugar topping may soften in the refrigerator. Think of it as a caramel glaze situation rather than a crisp-shell situation. Different personality, still tasty.
Can You Freeze Them?
Yes, you can freeze the cheesecake bars before adding the brûlée topping. Chill the bars completely, slice them, and wrap each piece tightly in plastic wrap. Place the wrapped bars in a freezer-safe container and freeze for up to 2 months. Thaw overnight in the refrigerator, then sprinkle with sugar and torch before serving.
Common Mistakes to Avoid
Using Cold Cream Cheese
Cold cream cheese is the fastest route to lumpy batter. Let it soften properly before mixing. If you are short on time, cut it into small cubes and let it sit at room temperature until pliable.
Adding Too Much Sugar on Top
A thin sugar layer caramelizes better than a thick one. Too much sugar can burn on the surface while staying grainy underneath.
Holding the Torch Still
Keep the torch moving. If you hold it in one spot, the sugar can scorch and taste bitter. Aim for golden amber, not volcanic black.
Skipping the Chill Time
Cheesecake bars need several hours in the refrigerator to set. If you slice them too early, the filling may slump. Give them time. Dessert patience is difficult, but noble.
Serving Ideas
These creme brulee cheesecake bars are rich enough to stand alone, but a few simple additions can make them even more special. Serve them with fresh raspberries, sliced strawberries, or blueberries for a bright contrast. A small spoonful of whipped cream also works, although the bars are already creamy enough to make dairy proud.
For a dinner party, plate each bar individually and torch the sugar topping at the table if you want a little drama. People love fire when it is controlled and attached to dessert. For holidays, cut the bars into smaller squares and arrange them on a chilled platter. Add berries, mint leaves, or edible flowers for color.
Creme Brulee Cheesecake Bars Recipe Card
Prep Time
25 minutes
Cook Time
35 minutes
Chill Time
4 hours minimum, preferably overnight
Total Time
About 5 hours
Servings
9 large bars or 16 small bars
Ingredients
- 1 1/2 cups graham cracker crumbs
- 2 tablespoons granulated sugar
- 1/4 teaspoon fine salt
- 6 tablespoons unsalted butter, melted
- 16 ounces full-fat cream cheese, softened
- 2/3 cup granulated sugar
- 1/2 cup sour cream, room temperature
- 2 large eggs, room temperature
- 1 large egg yolk, room temperature
- 2 teaspoons pure vanilla extract or vanilla bean paste
- 1 tablespoon all-purpose flour
- 1/4 teaspoon fine salt
- 3 to 4 tablespoons sugar for topping
Instructions
- Preheat oven to 325°F. Line an 8-inch square baking pan with parchment paper, leaving overhang on two sides.
- Mix graham cracker crumbs, 2 tablespoons sugar, 1/4 teaspoon salt, and melted butter until evenly moistened.
- Press the crust mixture firmly into the prepared pan. Bake for 8 to 10 minutes, then cool slightly.
- Beat softened cream cheese until smooth. Add 2/3 cup sugar and mix until combined.
- Add sour cream, vanilla, flour, and salt. Mix on low speed until smooth.
- Add eggs and egg yolk one at a time, mixing gently after each addition.
- Pour filling over the crust and smooth the top.
- Bake for 30 to 38 minutes, until edges are set and center slightly jiggles.
- Cool at room temperature for 1 hour, then refrigerate for at least 4 hours or overnight.
- Slice into bars. Sprinkle each bar with a thin layer of sugar.
- Use a kitchen torch to caramelize the sugar until golden and crisp. Let set for 1 to 2 minutes, then serve.
Personal Experience: What I Learned Making Creme Brulee Cheesecake Bars
The first time I made creme brulee cheesecake bars, I approached them with the confidence of someone who had watched enough cooking videos to become mildly dangerous. I had cream cheese on the counter, graham crackers in a bag, and a kitchen torch that made me feel like a dessert scientist. Everything seemed simple. Then I learned the first rule of cheesecake bars: softened cream cheese is not a suggestion; it is the law.
I once tried to rush the process with cream cheese that was still a little too cold. The batter looked smooth from a distance, which is how many kitchen mistakes begin. Up close, tiny lumps were hiding everywhere like they were paying rent. The bars still tasted good, but the texture was not that silky, bakery-style finish I wanted. Since then, I always cut the cream cheese into cubes and let it soften properly. It is a small step that makes a huge difference.
Another lesson came from the sugar topping. More sugar feels like it should mean more crackle, right? Technically yes, but also technically no. A thick layer of sugar can melt unevenly, burn in patches, and turn into something closer to caramel armor. The best topping comes from a thin, even layer. When torched carefully, it becomes crisp, delicate, and beautifully amber. You should be able to tap it with a spoon and hear that tiny dessert applause.
I also learned that these bars are fantastic for entertaining because most of the work happens ahead of time. You can bake the cheesecake the day before, chill it overnight, and slice it before guests arrive. The only last-minute step is torching the sugar, which honestly feels less like work and more like a party trick. People gather around. Someone says, “Ooh.” Someone else asks where you bought the torch. Suddenly you are not just serving dessert; you are hosting a very small culinary theater.
For family gatherings, I like cutting the bars into smaller squares because they are rich. A little piece goes a long way, especially after a big meal. For birthdays or holidays, I make larger bars and serve them with berries. Raspberries are my favorite because their tartness balances the creamy filling and sweet caramel top. Strawberries are great too, especially when they are in season and taste like actual strawberries instead of decorative red water.
My biggest advice is to respect the chill time. Cheesecake bars need patience. When they are fully chilled, they slice cleanly, hold their shape, and taste more balanced. The vanilla becomes rounder, the tang from the cream cheese settles in, and the crust firms up just enough. If you rush, you may still get dessert, but you will not get the luxurious texture that makes these bars memorable.
That is the charm of this creme brulee cheesecake bars recipe: it rewards simple care. You do not need advanced skills. You need softened ingredients, gentle mixing, enough chilling time, and a calm hand with the torch. Do that, and you get a dessert that feels fancy without acting fussy. It is creamy, crunchy, buttery, sweet, tangy, and just dramatic enough to make everyone at the table pay attention.
Conclusion
Creme brulee cheesecake bars are the kind of dessert that makes people pause after the first bite. The creamy vanilla cheesecake filling, buttery graham cracker crust, and crisp caramelized sugar topping create a perfect balance of texture and flavor. They are easier than a full cheesecake, more exciting than plain cheesecake bars, and far more fun than any dessert that does not involve a torch.
Whether you are baking for a holiday, party, potluck, or a quiet weekend treat, this recipe delivers elegance without unnecessary stress. Make the bars ahead, chill them well, torch the sugar right before serving, and enjoy the beautiful crack of caramel over creamy cheesecake. It is classic, modern, and just a little theatricalin the best possible way.
Note: For the crispest brûlée topping, caramelize the sugar shortly before serving. Store the cheesecake bars without the sugar topping when making them ahead.












