
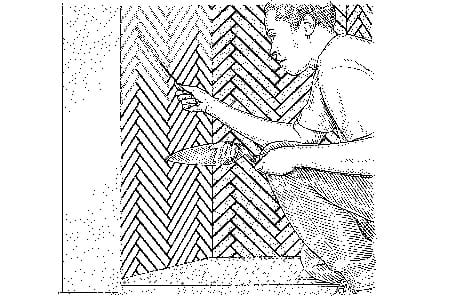
Before the first cold front sneaks under the door and makes your living room feel like a walk-in freezer, your wood stove or fireplace deserves a little attention. Most people think about stacking firewood, cleaning the glass, and maybe locating the poker that mysteriously vanished in April. But one hardworking hero often gets ignored: the firebrick.
Firebrick lines the inside of a wood-burning stove or masonry firebox. It is not there for decoration, although a tidy firebox does look wonderfully “I have my life together.” Firebrick protects the stove body from extreme heat, helps hold steady temperatures, supports cleaner combustion, and keeps the fire where it belongs. When firebricks crack, crumble, shift, or expose metal behind them, your stove can lose efficiency and safety margin.
The good news? Getting your firebrick in shape for the woodburning season is usually straightforward. With a cool stove, a flashlight, gloves, a brush, and a few replacement bricks, you can spot small problems before they become expensive repairs. Think of it as a preseason physical for your stove, minus the awkward paper gown.
Why Firebrick Matters More Than It Looks
Firebrick is made from refractory material designed to tolerate repeated high heat. In a wood stove, it forms a protective lining along the bottom, sides, and sometimes the back of the firebox. In a masonry fireplace, firebrick forms the firebox walls and floor, often joined with refractory mortar.
Its job is simple but important: shield the outer stove shell, cast iron, steel panels, masonry structure, and nearby surfaces from punishing temperatures. Firebrick also absorbs and reflects heat back into the fire, helping wood burn more completely. A healthy firebrick liner means better heat, less stress on the appliance, and fewer surprises when the stove is working hard on a January night.
Start With a Cold, Clean Firebox
Never inspect or repair firebrick in a warm stove. Let the appliance go completely cold, preferably overnight. Remove leftover logs, charcoal chunks, and ash. Use a small shovel and place ashes in a covered metal container. Keep that container outside on a noncombustible surface, away from the house, garage, porch, firewood pile, and anything else that would prefer not to become crispy.
Once the bulk ash is gone, use a soft brush or an ash-rated vacuum to clean loose dust from the brick surfaces. Do not hose down the firebox. Water can encourage rust in steel stoves, soak porous refractory material, and make the next startup smoky and unpleasant. A dry cleaning is usually enough.
How to Inspect Firebrick Before Woodburning Season
Use a bright flashlight and look closely at every brick. Move slowly. Firebrick problems are not always dramatic. Sometimes the first sign is a thin crack, a small missing corner, or a brick that no longer sits flat.
Hairline cracks are not always an emergency
Small, stable cracks are common. Firebrick expands and contracts every time the stove heats and cools. A narrow crack that stays aligned and does not expose the stove wall behind it may simply be normal wear. Mark it mentally, check it again later, and avoid treating every tiny line like a five-alarm crisis.
Replace bricks that are crumbling, loose, or missing chunks
A firebrick should be replaced when it is falling apart, heavily chipped, badly split, thinner than it used to be, or no longer staying in position. If you can see bare metal, cast iron, or an open gap behind the brick, stop using the stove until the problem is fixed. Exposed stove walls can overheat, warp, or deteriorate faster than intended.
Check the firebox floor and back wall first
The floor takes punishment from logs, coals, shovels, and the occasional overenthusiastic poke. The back wall gets battered when logs are tossed in like firewood basketballs. These areas often show wear first. Side bricks matter too, especially near air channels, retainers, and corners.
Common Causes of Firebrick Damage
Firebrick is tough, but it is not immortal. The main causes of damage are impact, thermal shock, overfiring, poor fuel, and age.
Impact happens when heavy logs are dropped or shoved against the liner. Thermal shock happens when a cold stove is blasted with a roaring fire too quickly. Overfiring occurs when the stove is run hotter than the manufacturer allows, often with too much air, too much fuel, or the wrong fuel. Wet wood contributes by creating smoky, uneven, inefficient fires that encourage creosote and make users open the air too much to compensate.
Age is the least dramatic cause. After years of heating and cooling, even good firebrick may wear down. That is normal. Your job is not to keep every brick looking showroom-new forever. Your job is to keep the firebox protected and functional.
Use the Right Replacement Firebrick
Do not grab regular house brick, concrete pavers, landscape blocks, or whatever is hiding behind the shed. Standard bricks are not made for the heat cycles inside a wood stove. They can crack, spall, or hold heat incorrectly. Use firebrick or manufacturer-approved refractory panels designed for your appliance.
Many wood stoves use bricks close to 9 inches by 4.5 inches by 1.25 inches, but that is not a universal law. Some stoves need special sizes, angled cuts, thinner liners, insulating refractory panels, or model-specific kits. Check your owner’s manual before buying replacements. If you do not have the manual, search by stove brand and model number or contact the manufacturer or a reputable stove shop.
Step-by-Step: Replacing Firebrick in a Wood Stove
1. Photograph the layout
Before removing anything, take clear photos of the firebox. Capture the floor, back wall, sides, baffle area, retainers, and odd-shaped pieces. This turns reassembly into a puzzle with a picture on the box instead of a guessing game sponsored by regret.
2. Remove damaged bricks gently
Lift or slide out the damaged brick. Some stoves have retainers, clips, or a specific removal order. Do not force parts. If a brick is stuck behind a bracket, consult the manual before bending metal pieces or inventing a new stove design.
3. Clean the seat
Brush out ash, grit, and loose fragments where the brick sits. A flat, clean surface helps the new brick fit securely. Check for warped metal, damaged retainers, or signs of overheating while the brick is out.
4. Install the correct replacement
Place the new firebrick in the same orientation as the old one. It should sit flat and snug without being hammered into place. Some small gaps are intentional because materials expand when heated. If the manual shows a pattern, follow it exactly.
5. Reinstall retainers and baffles correctly
Many modern stoves rely on baffles, tubes, channels, or ceramic boards for clean combustion. Do not leave these parts out. A stove may still make flames without them, but it may not burn correctly or safely.
Should You Use Refractory Mortar or Furnace Cement?
It depends on the appliance. Many wood-stove firebricks are dry-laid, meaning they are placed without mortar so they can expand, contract, and be replaced. In those stoves, smearing cement everywhere can cause more trouble than it solves.
In a masonry fireplace, damaged mortar joints between firebricks may need refractory mortar. Small chips or gaps may sometimes be repaired with a product rated for fireplace and stove temperatures. Always read the product label and the appliance manual. Some repair materials require curing with small fires before the fireplace is used normally.
If bricks are falling out of a masonry firebox, the back wall is bulging, or mortar joints are deeply eroded, hire a qualified chimney or masonry professional. The firebox is not the place for heroic guesswork.
Clean the Surrounding Stove Parts While You Are There
Firebrick maintenance is a perfect time to check the rest of the stove. Look at door gaskets, glass gaskets, ash-pan seals, air tubes, baffles, catalytic combustors if present, and the chimney connector. A dollar-bill or paper-slip test can help identify a weak door gasket: close the paper in the door and pull. If it slides out with no resistance, the gasket may not be sealing well.
Also inspect the glass. Black glass often points to wet wood, weak draft, low burn temperatures, or leaky gaskets. A little haze is normal. Thick, sticky soot is a clue that the stove is not burning as cleanly as it should.
Pair Firebrick Maintenance With Chimney Safety
A good-looking firebox does not cancel out a dirty chimney. Before woodburning season, schedule a professional chimney inspection and cleaning if needed. Creosote, bird nests, leaves, loose liner tiles, damaged caps, and poor draft can create serious hazards. A chimney system and stove work as a team. If one member of the team is clogged with shiny black creosote, the team is not going to the playoffs.
Keep furniture, curtains, firewood baskets, rugs, and decorations at least three feet from the stove or fireplace. Test smoke alarms and carbon monoxide alarms. Make sure you have a working fire extinguisher. These steps are not glamorous, but neither is explaining to your insurance company that the kindling basket was “only a little close.”
Burn Better Wood to Protect Your Firebrick
The easiest way to make firebrick last longer is to burn dry, seasoned wood. Aim for wood with moisture content under 20 percent. Split a log and test the freshly exposed face with a moisture meter. Testing the outside of a log can fool you because the outside may be dry while the center is still damp.
Store firewood outdoors, off the ground, with the top covered and the sides open to airflow. Softwoods may season in several months under good conditions, while many hardwoods need a year or more. Dry wood lights faster, burns hotter, produces less smoke, reduces creosote, and gives firebrick a steadier heat cycle.
Bad Burning Habits That Beat Up Firebrick
Do not burn trash, cardboard piles, glossy paper, treated lumber, painted wood, driftwood, plastics, or mystery scraps from the garage. These materials can burn too hot, release harmful fumes, or leave corrosive deposits. Do not use gasoline, kerosene, charcoal lighter fluid, or similar liquids to start a fire. Fireplaces are cozy. Explosions are not cozy.
Avoid overloading the firebox. Wood needs air space to burn properly. Cramming logs to the ceiling of the stove may block secondary combustion and stress the baffle or firebrick. Build smaller, hotter fires with dry fuel, then adjust the air according to the manual once the stove is up to temperature.
Real-World Experience: The Weekend Firebrick Tune-Up
Anyone who has owned a wood stove for more than one winter learns that maintenance has its own rhythm. The first year, you may treat every crack like a disaster. By year three, you know the difference between a harmless hairline and a brick that has clearly retired without notice.
A practical preseason routine often starts on a cool Saturday morning. The stove is cold, the coffee is strong, and the ash bucket is waiting like a tiny metal trash can with a serious job. After removing ash, the firebox usually tells a story. The floor bricks show where logs landed all winter. The back bricks may have small chips from enthusiastic loading. The side bricks often look better, unless someone in the household has been using the poker like a fencing sword.
One common discovery is a cracked floor brick that still sits flat. In many cases, that brick can finish another season if it is not crumbling or exposing metal. Another common discovery is a rear brick with a missing corner. That one may be worth replacing, especially if the gap leaves the stove wall visible. Replacement usually takes less time than expected, provided the correct brick is already on hand. Waiting until the first freezing night to shop for firebrick is a classic way to meet other panicked stove owners in the hardware aisle.
The best habit is to keep one or two spare bricks that match your stove. Label them with the stove model if you have multiple appliances or if your storage area is a museum of “useful things.” Also keep a printed or saved copy of the brick layout. When the firebox contains several sizes, the photos you took before removal become priceless.
Another lesson from real homes: dry firewood changes everything. A stove burning properly seasoned wood feels predictable. It lights without drama, the glass stays cleaner, the firebrick heats evenly, and the chimney produces less smoke. Wet wood, on the other hand, turns the stove into a moody appliance that hisses, smokes, blackens the glass, and encourages bad decisions like opening the air too far for too long.
Finally, there is the peace-of-mind factor. When the first cold night arrives and the stove is ready, the chimney is checked, the bricks are solid, and the wood is dry, the whole house feels different. You are not just making heat. You are enjoying the season with confidence. The fire glows, the room settles, and your firebrick quietly does its job like the unsung champion it is.
Conclusion
Getting your firebrick in shape for the woodburning season is one of the simplest ways to improve safety, protect your stove, and enjoy cleaner, warmer fires. Start with a cold firebox, remove ash, inspect every brick, replace anything crumbling or exposing metal, and use the correct refractory parts for your appliance. Pair that with dry firewood, annual chimney care, safe clearances, and sensible burning habits.
Firebrick may not be the flashiest part of your wood-burning setup, but it is one of the hardest working. Treat it well before the season starts, and it will return the favor every time the temperature drops and your home needs that deep, steady, wood-fired warmth.












