
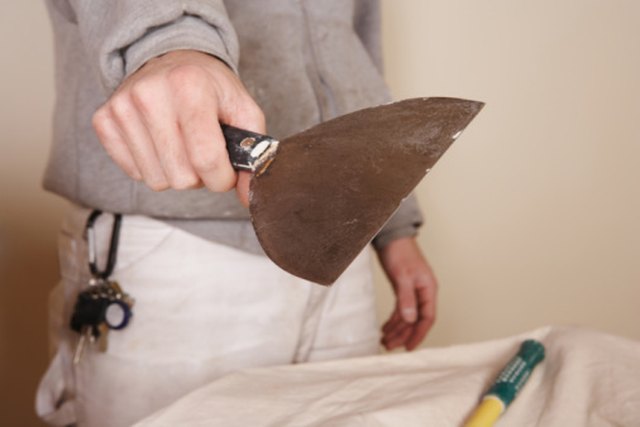
Textured walls are the camouflage pants of home interiors: they hide a lot… until they don’t.
One day your orange peel or knockdown finish looks perfectly “designer,” and the next day a crack shows up like it pays rent.
The good news: most drywall cracks on textured walls are repairable with basic tools, a little patience, and the willingness to accept that your first patch may look like a tiny new continent.
This guide walks you through repairing drywall cracks on textured walls the right wayso the crack stays gone,
the patch blends in, and your wall doesn’t end up wearing a “freshly repaired” badge forever.
First: Figure Out What Kind of Crack You’re Dealing With
“Crack” is a category, not a diagnosis. Before you grab compound and start smearing like frosting,
take 60 seconds to figure out what caused it. That determines whether your repair will last… or return for a sequel.
Common, usually non-scary cracks
- Hairline seam cracks: thin lines along drywall joints, often from seasonal expansion/contraction.
- Corner cracks: along inside corners where walls meet (stress + framing movement = drama).
- Nail/screw pops: little bumps with a ring crackfasteners shifting in framing.
- Door/window corner cracks: diagonal-ish cracks near openings where framing flexes.
Cracks that deserve extra attention
- Wide cracks (especially growing): can suggest ongoing movement or a deeper issue.
- Cracks with staining/soft drywall: moisture or past leaksfix the water problem first.
- Multiple cracks appearing quickly: could be structural or humidity-related; investigate before cosmetic work.
Tools and Materials You’ll Want (and Why)
You can repair textured-wall cracks with “whatever’s in the garage,” but results improve dramatically
when you use the right materials for the right step.
Must-haves
- Utility knife (for opening the crack and removing loose material)
- 6-inch taping knife (for first coats and embedding tape)
- 10–12-inch drywall knife (for feathering wide, invisible edges)
- Sanding sponge (fine/medium) (easier control than loose sandpaper)
- Dust mask/respirator + eye protection (drywall dust gets everywhereespecially your face)
- Primer (prevents “flashing” where the patch shows through paint)
Repair materials (choose based on crack type)
- Setting-type joint compound (“hot mud”) for strength and faster recoat cycles (great for cracks)
- Premixed joint compound for easier finishing coats
- Fiberglass mesh tape for many flat-wall crack repairs (quick and strong when used correctly)
- Paper tape for inside corners (still the gold standard there)
- Texture material (spray texture can, thinned joint compound for sponge/stomp, or knockdown tools)
Step-by-Step: How to Repair a Drywall Crack on a Textured Wall
The long-lasting approach is: prep → reinforce → feather → prime → re-texture → paint.
Skipping reinforcement (tape) is the #1 reason cracks come back.
Step 1: Prep the area (so your repair sticks)
- Clear and protect: Move furniture, lay down a drop cloth, and tape plastic if you hate dust (reasonable).
-
Clean the wall: Wipe the area with a damp cloth to remove dust and oils.
If the wall is greasy (kitchens happen), use a gentle degreaser and let it dry fully. -
Knock down loose texture: Scrape off any flaking paint or crumbling compound.
You want a stable surfacenot a “maybe this will hold” surface.
Step 2: Open the crack (yes, on purpose)
This feels wrong the first time, like you’re “making it worse.”
But surface-only repairs often fail because the crack continues underneath.
- Score a shallow V-groove along the crack with a utility knife.
- Remove loose material so the compound bonds to something solid.
- Vacuum or brush out dust from the groove.
Step 3: Stop movement if the drywall is loose
If the crack is near a popped fastener, a seam that flexes, or a spot that “clicks” when pressed,
the board may be moving. If the drywall moves, your beautiful patch will eventually protest.
-
For nail/screw pops: Add drywall screws near the pop (into framing) to re-secure the board,
then remove or reset the popped fastener if needed. -
For seam movement: You may need a couple of screws along the seam line (into studs)
before you tape and mud.
Step 4: Tape it (the “never skip this” step)
Tape bridges the crack and distributes stress so the repaired area doesn’t split again.
Choose the tape based on location:
- Flat wall cracks: fiberglass mesh tape is commonly used for repairs.
- Inside corners: use paper tape (pre-creased) to fit the corner cleanly.
Pro tip: Keep the tape straight and centered. A crooked tape line becomes a wide patch,
and a wide patch becomes a “why is that wall bulging?” conversation starter.
Step 5: Apply the first coat (embed and reinforce)
- Mix setting-type compound if you’re using it (follow the bag directions; small batches are your friend).
- Press compound into the groove with a 6-inch knife so voids are filled.
-
Embed the tape:
- If using mesh tape, apply it over the crack and press it down firmly.
- Apply compound over the tape, pushing it through the mesh and smoothing excess.
- If using paper tape (especially corners), bed it into a thin layer of compound, then skim over it.
- Feather edges lightlydon’t try to make it perfect on coat one. Coat one is for strength.
Step 6: Add 1–2 wider coats (make it disappear)
The secret to an invisible repair is not “more mud.” It’s fewer ridges and wider feathering.
Each coat should be wider than the last.
- Second coat: Use an 8–10-inch knife. Spread wider than the first coat.
- Third coat (if needed): Use a 10–12-inch knife, feathering to blend the edges.
- Let each coat dry fully before sanding or recoating.
Step 7: Sand carefully (texture is not your enemyover-sanding is)
You’re not sanding the whole wall. You’re sanding edges and tool marks so the repair sits flat.
- Use a sanding sponge for control.
- Feather the edges until you can’t feel a ridge when you lightly run your fingers over it.
- Use a work light at a low angle (raking light) to reveal bumps before paint reveals them publicly.
Step 8: Prime the patch (so paint matches)
Fresh joint compound is porous. Paint soaks in differently than on the surrounding wall,
which causes “flashing” (a visible dull/bright patch).
A quality drywall primer or PVA primer helps create an even surface.
How to Match Texture After the Crack Repair
This is the part people fear. But texture matching is less “magic” and more “testing on scrap and not panicking.”
The key is to mimic size (fine/medium/heavy), density (how packed the bumps are),
and flattening (knockdown vs. raised).
Texture Rule #1: Practice on cardboard first
Spray texture, stomp texture, sponge texturewhatever you’re usingtest it on scrap.
Adjust until it looks right, then do the wall. This one habit saves hours of rework.
Option A: Orange peel texture (common on many U.S. interior walls)
- Mask surrounding areas to protect from overspray.
- Choose the right texture size (many spray textures offer fine/medium/heavy settings).
- Hold the can at a consistent distance and use short bursts.
- Blend outward: Start on the patch and lightly “fade” into the old texture.
- Let dry fully before priming (if required) and painting.
Option B: Knockdown texture (spray + flatten)
- Apply splatter texture (spray can or hopper) over the patch.
- Wait the right amount of time (usually a few minutes) until peaks dull slightly but aren’t rock hard.
- Knock it down with a wide drywall knife held at a shallow anglelight pressure.
- Feather edges so the new knockdown blends into the old.
Option C: Skip trowel or hand-applied textures
These are more “art class” than “spray can,” but still doable:
- Use slightly thinned joint compound.
- Apply with a trowel/knife in the same pattern direction as the wall.
- Keep your wrist motion consistent so the patch doesn’t scream “new guy.”
Option D: Popcorn texture (usually ceilings, but still worth mentioning)
Popcorn is most often on ceilings, but crack repair principles are similar:
fix the crack, prime, then apply matching popcorn texture product.
If your home is older and you suspect legacy materials, use caution and consider professional testing before disturbance.
Painting So the Repair Truly Blends In
Texture hides shapes; paint reveals them. For the most seamless finish:
- Prime the patched area (especially over joint compound).
- Match sheen (flat vs. eggshell vs. satin). Wrong sheen makes patches obvious even if texture is perfect.
- Feather paint if spot-paintingor repaint the entire wall for best results (especially with higher sheen paints).
Troubleshooting: When Repairs Look “Off” (and How to Fix Them)
Problem: The crack came back
- Likely cause: no tape, not enough reinforcement, or the drywall is still moving.
- Fix: open the crack, re-tape, and use a stronger first coat (often setting compound), plus secure the board if needed.
Problem: Tape bubbles or lifts
- Likely cause: insufficient compound under paper tape, dust, or rushing.
- Fix: cut out bubbles, re-bed tape, and feather with thin coats.
Problem: The patch shows through paint
- Likely cause: no primer or uneven porosity.
- Fix: spot-prime, then repaint. Consider repainting the entire wall if sheen is noticeable.
Problem: Texture doesn’t match
- Likely cause: wrong spray setting, wrong distance, or too dense/sparse application.
- Fix: sand/scrape lightly, then re-apply with better test matching on scrap first.
When to Call a Pro (Because “DIY” Doesn’t Mean “Do It Twice”)
Call a professional if:
- Cracks are widening quickly or accompanied by sticking doors/windows.
- You see moisture staining, soft drywall, or recurring dampness.
- The wall is heavily textured (or specialty plaster) and blending is exceptionally hard.
- You suspect older ceiling textures may need testing before disturbance.
A Quick Example Repair Plan (So You Can Visualize It)
Scenario: A thin crack runs along a seam in an orange peel hallway wall near a doorway.
You tried spackle once. It looked okay… for two months. Then the crack returned like it missed you.
- Score a V-groove, remove loose material, and clean dust.
- Add two drywall screws near the seam if the board flexes.
- Apply mesh tape over the crack.
- First coat: setting-type compound to reinforce and fill.
- Second/third coats: wider feathering with finishing compound.
- Sand edges smooth, prime the patch.
- Test orange peel spray on cardboard, then blend texture on the patch.
- Prime texture if needed, then paint (matching sheen).
Conclusion: Smooth Repair, Same Texture, No Drama
Repairing drywall cracks on textured walls is half technique and half patience.
If you remember only three things, make them these:
(1) open and clean the crack,
(2) reinforce with tape,
and (3) feather wider than you think you need.
Then texture and paint like a person who enjoys not redoing the same project next month.
Extra: Real-World Experience Tips That Make Textured Crack Repairs Easier (and Better)
Let’s talk about the stuff you only learn after you’ve patched a crack, painted it, admired it… and then noticed it
every single time you walk past at 3:00 p.m. when the sunlight hits the wall like a spotlight. Textured-wall crack repairs
aren’t hard, but they are full of tiny “gotchas.” Here are the most useful, field-tested lessons homeowners and pros
tend to share after doing a few of these repairs.
1) The wall tells the truth under side lighting. Overhead lighting is forgiving. Daylight from a window is not.
The trick is to check your mud work with a bright light held at a low angle (sometimes called raking light). It reveals
ridges, knife lines, and edges that feel invisible until paint makes them permanent. If you can’t see your patch under raking light,
you’re in fantastic shape.
2) Thin coats beat thick coatsevery time. Thick mud shrinks, takes longer to dry, and loves leaving edges.
Thin coats dry more predictably and sand easier. The best repairs often look “too thin” while you’re workinguntil the final coat
feathers out and everything blends. If you’re tempted to glob on compound to “save time,” congratulations: you have discovered
the shortest route to sanding for the rest of the afternoon.
3) Most “reappearing cracks” are movement problems, not mud problems. When a crack returns, people blame the compound.
In reality, the wall is still movingseasonal framing changes, minor settling, or a loose drywall panel. That’s why reinforcing with tape
and re-securing drywall with screws (when needed) matters so much. Think of tape as a tiny bridge: if the bridge isn’t there, the crack
simply reopens when the wall flexes.
4) Texture matching is 80% practice, 20% application. Spraying texture straight onto the wall without testing is like
cutting your own bangs because you “watched a video once.” It might work, but the odds are spicy. Spray on cardboard or scrap drywall first.
Adjust the nozzle setting (fine/medium/heavy), distance, and burst length until the dots and density match the existing wall.
Once you dial it in, the wall application becomes almost boringin the best way.
5) Blend outwarddon’t stop exactly at the patch edge. A common beginner move is texturing only the repaired rectangle.
That creates a “hard border” where new texture meets old. Instead, apply texture slightly beyond the patch and fade it into the existing surface.
Same with paint: feather it out, or repaint the whole wall when sheen makes touch-ups obvious. The goal is not “perfect texture in one spot”;
it’s “no visible transition.”
6) Paint sheen is the silent patch snitch. Flat paint is the most forgiving. Eggshell and satin are less forgiving.
Semi-gloss is basically an interrogation lamp. If your wall is anything above flat, a repair can be structurally perfect and still show because
the sheen reflects light differently over fresh compound. Priming helps, but sometimes the real fix is repainting the entire wall to make the finish uniform.
7) Keep your workspace clean between steps. Dust under tape or under compound reduces adhesion. Dust under paint reduces smoothness.
A quick wipe-down (or a vacuum with a brush attachment) between sanding and priming makes a bigger difference than people expect.
It’s not glamorous, but neither is redoing a patch because the edge started peeling.
Bottom line: the best textured-wall crack repairs aren’t about having superhero skillsthey’re about slowing down for the “boring” parts:
cleaning, taping, feathering, priming, and testing texture on scrap. Do that, and your wall will stop auditioning for a “before” photo.













