
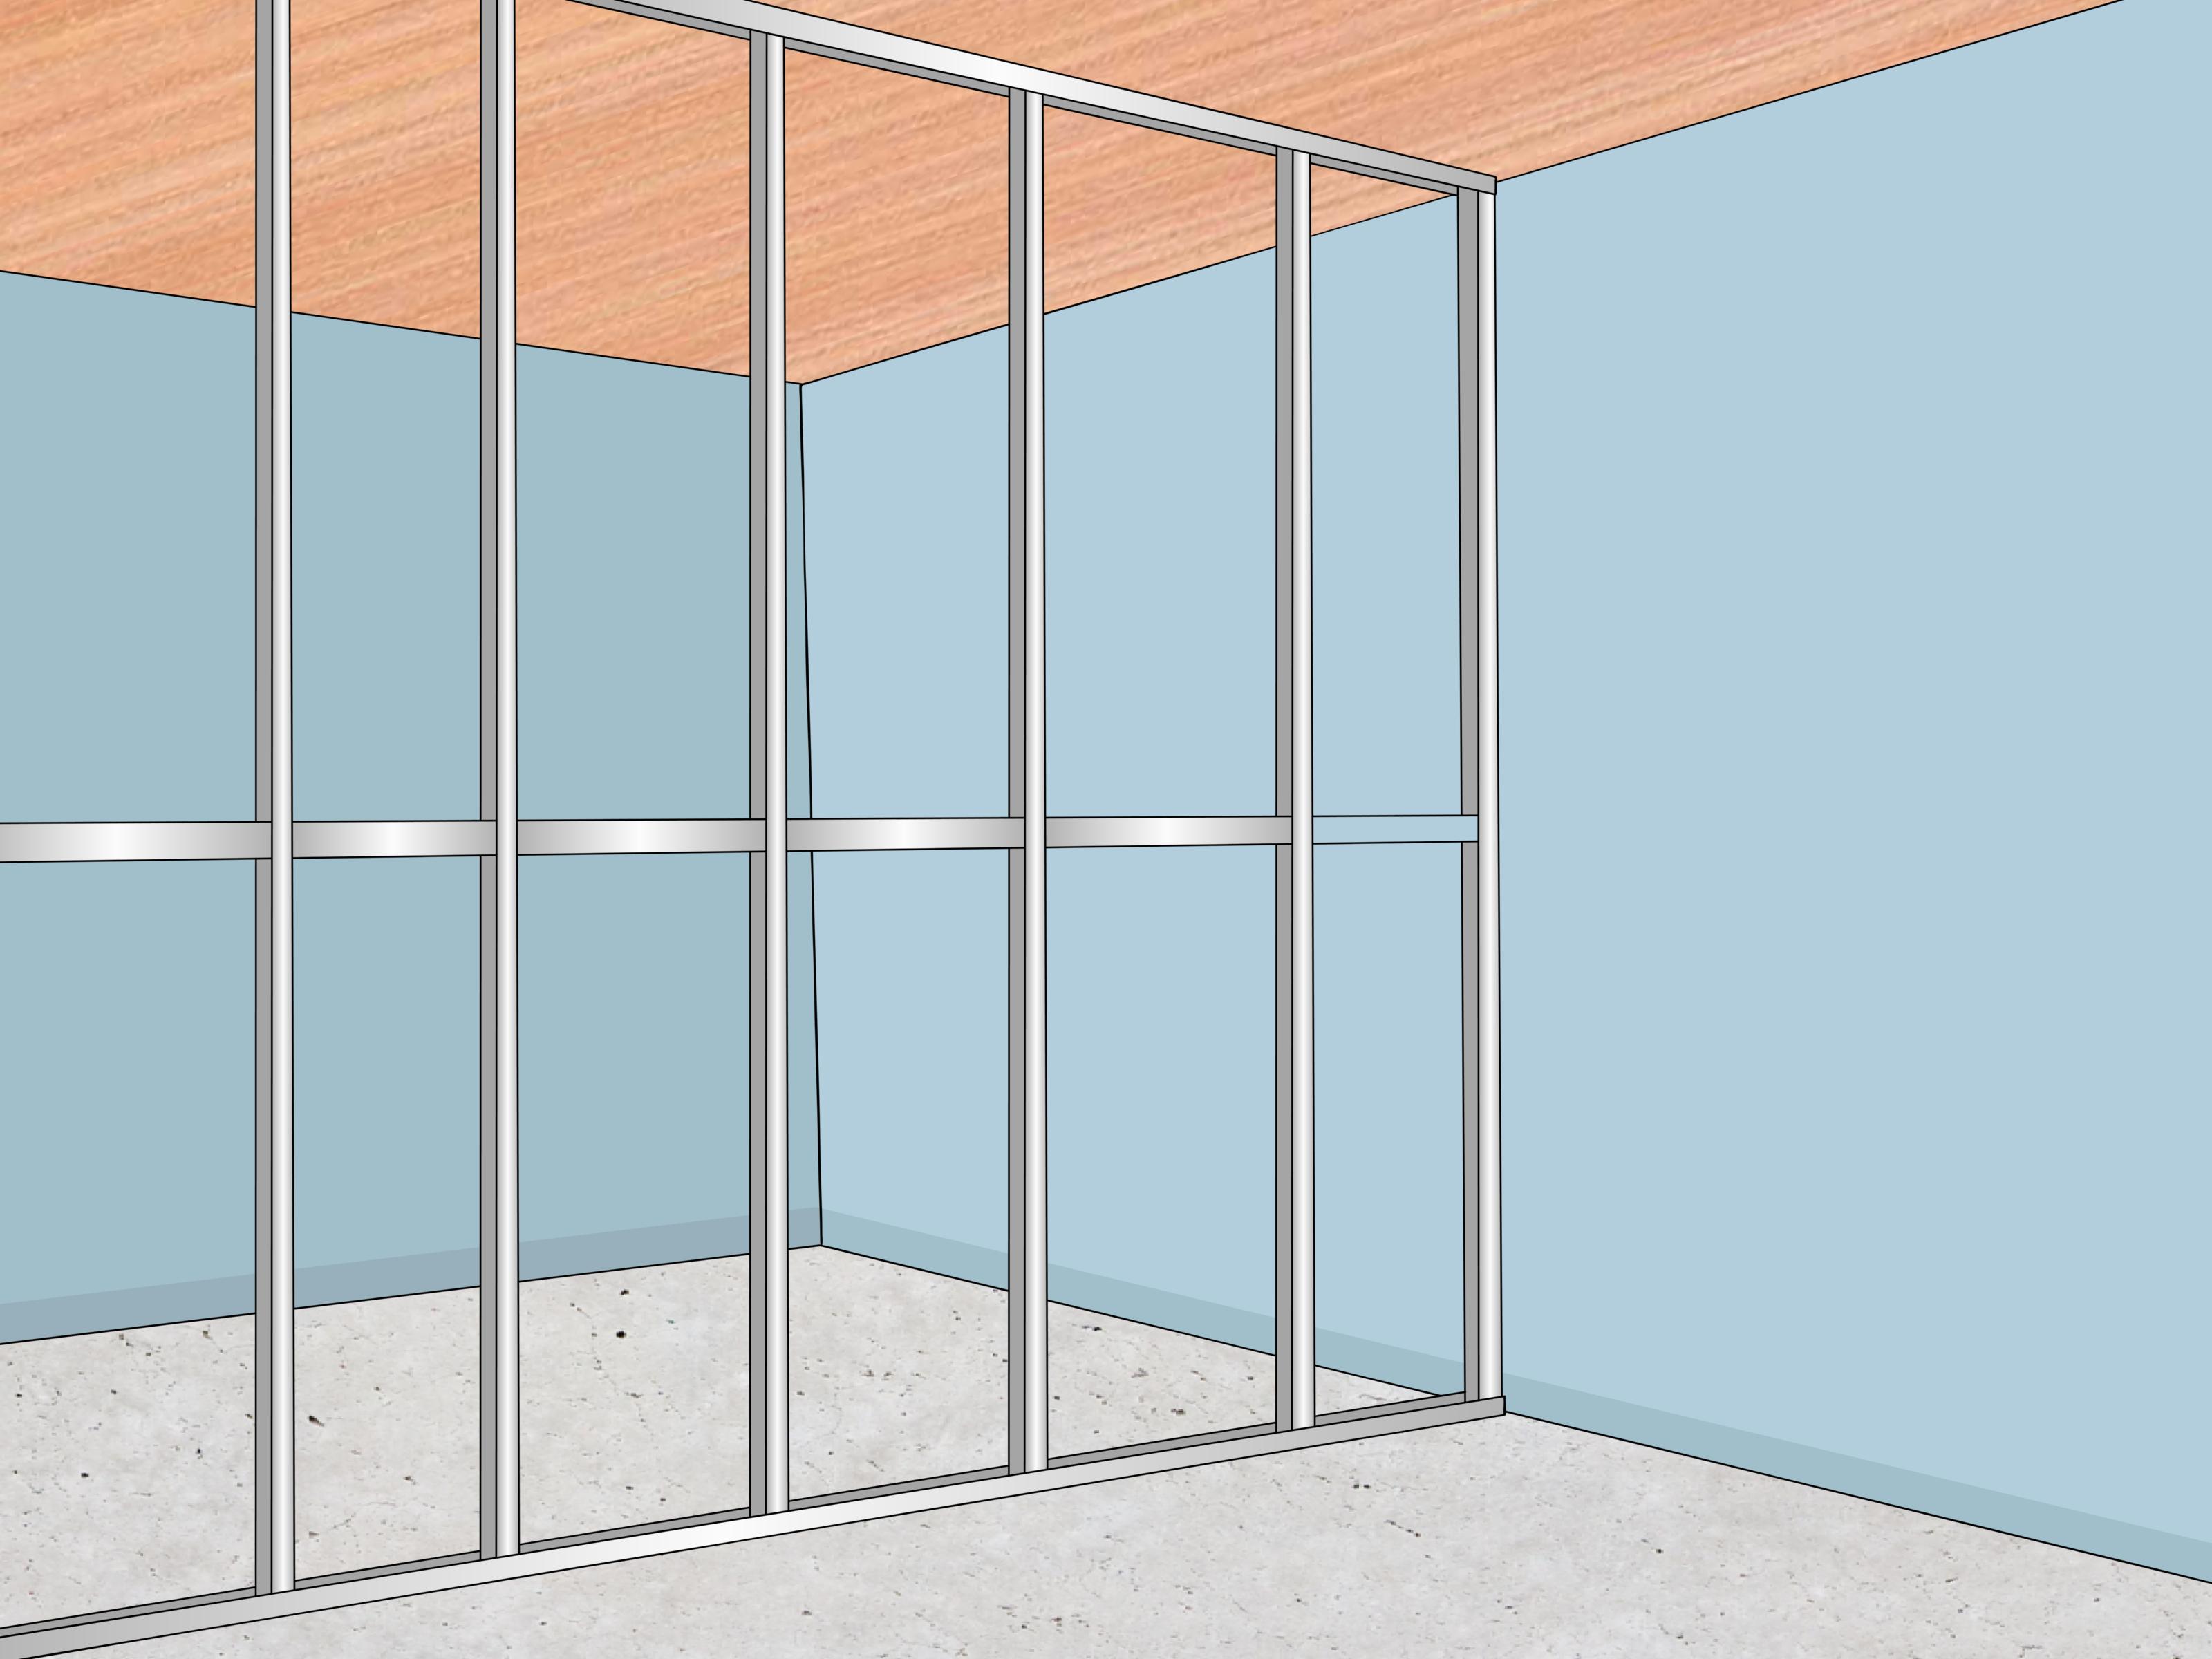
Metal studs are the quiet overachievers of interior framing. They do not warp like lumber, they are resistant to termites, they are lightweight enough to carry without questioning your life choices, and they create straight, clean wall frames for drywall. Whether you are finishing a basement, building a closet wall, dividing a home office, or framing a non-load-bearing partition, learning how to install metal studs can make your project cleaner, faster, and more predictable.
That said, metal stud framing is not just “wood framing, but shinier.” It has its own rules, tools, fasteners, and tiny attitude problemsespecially those sharp edges. This guide walks you through how to install metal studs in 13 steps, from planning the layout to fastening drywall. The focus here is on interior, non-load-bearing walls. If the wall supports floors, roof loads, exterior cladding, cabinets, heavy fixtures, or anything structural, pause the project and talk to a qualified contractor, architect, or engineer.
Note: Always follow local building codes, product instructions, and permit requirements. Wear gloves and eye protection when cutting or handling metal framing. Those edges are not “a little sharp.” They are “why did I not wear gloves?” sharp.
What Are Metal Studs?
Metal studs are cold-formed steel framing members used to build walls, soffits, ceilings, and partitions. A typical metal stud wall uses two main pieces: tracks and studs. The tracks are horizontal channels installed at the floor and ceiling. The studs are vertical C-shaped members that fit into those tracks and form the skeleton of the wall.
For most residential DIY projects, light-gauge steel studs are used for non-load-bearing interior partitions. They are especially popular in basements, utility spaces, office remodels, and anywhere straight framing is important. They also make it easy to run electrical wiring because many studs come with factory punch-outs.
Why Choose Metal Studs Instead of Wood?
Metal studs are not the best choice for every project, but they offer some real advantages. They are straight, consistent, lightweight, and resistant to rot and insect damage. They are also noncombustible, which is one reason they are common in commercial construction. Unlike wood, metal studs will not twist into a banana shape while sitting in your garage waiting for the weekend.
There are trade-offs. Metal studs can be less forgiving when hanging heavy objects, and they require specific screws, snips, and layout habits. If you plan to mount cabinets, grab bars, floating shelves, or a wall-hung vanity, add solid blocking or backing during framing. Do not assume drywall anchors alone will save the day. Drywall anchors are useful, but they are not magic.
Tools and Materials You Will Need
Tools
- Tape measure
- Laser level, chalk line, or plumb bob
- Aviation snips or tin snips
- Drill/driver with clutch control
- Level
- Clamps or locking pliers
- Marker
- Utility knife
- Safety glasses
- Cut-resistant work gloves
- Hearing protection if using loud tools
Materials
- Metal studs sized for your project
- Top and bottom metal track
- Self-drilling framing screws
- Concrete anchors, masonry screws, or suitable fasteners for the floor
- Appropriate fasteners for the ceiling structure
- Drywall screws for metal studs
- Drywall panels
- Grommets or bushings for wiring holes where required
- Wood blocking or metal backing for heavy fixtures
- Sill gasket or moisture barrier if framing on concrete
Before You Start: Know the Wall You Are Building
Before cutting anything, decide what the wall must do. Is it simply dividing a room? Will it hold a door? Will it carry tile, cabinets, shelving, or sound insulation? Will electrical wiring or plumbing run through it? A simple basement partition and a bathroom wall with tile, plumbing, and a wall-mounted sink are very different animals.
For ordinary interior partitions, studs are commonly spaced at 16 inches on center or 24 inches on center, depending on the wall design, drywall thickness, local code, and product instructions. When in doubt, 16 inches on center gives a stiffer wall and more fastening points for drywall. It also makes the wall feel less like a drum when someone bumps into it.
How to Install Metal Studs: 13 Steps
Step 1: Plan the Wall Layout
Start by marking exactly where the wall will go. Measure the room and draw a simple layout showing the wall length, door openings, corners, and any built-in features. Mark the location of outlets, switches, plumbing, HVAC clearances, and anything that needs backing.
If you are framing a basement, check for moisture issues first. Steel is usually galvanized, but constant moisture is still bad news. Fix leaks, manage condensation, and avoid trapping water behind walls. A dry basement is a much better roommate than a moldy one.
Step 2: Choose the Right Stud and Track Size
Choose studs and track that match your wall height, drywall requirements, and local code. Common interior metal studs may be available in widths similar to wood framing dimensions, such as 2-1/2 inches, 3-5/8 inches, or 6 inches. The wider the stud, the more room you have for insulation, wiring, and plumbing.
Gauge matters, too. Light-gauge studs are common for non-load-bearing walls, while heavier members are used for structural or specialty assemblies. Do not mix random parts just because they look close enough. Studs should fit correctly inside the track, and the system should be appropriate for the wall height and use.
Step 3: Mark the Floor Track
Snap a chalk line or use a laser to mark the position of the bottom track on the floor. This line controls the entire wall, so take your time. Measure from existing walls in several locations to make sure the line is straight and parallel where needed.
For door openings, mark the rough opening width directly on the floor. Add space according to the door frame requirements. If the opening is off by even half an inch, the door may later develop a personality disorder: sticking, rubbing, or refusing to close.
Step 4: Transfer the Layout to the Ceiling
Use a laser level, plumb bob, or level to transfer the floor layout to the ceiling. The top track must align with the bottom track. If the tracks are not aligned, the studs will lean, and drywall will reveal your mistake like a very expensive truth serum.
Mark the ceiling line clearly. If you are attaching the top track to joists, locate the joists first. When the wall runs parallel to joists and there is no framing above, you may need to add blocking between joists so the track has something solid to attach to.
Step 5: Cut the Track to Length
Measure and cut the metal track with aviation snips. Cut the flanges first, then bend the track slightly and cut across the web. Wear gloves and safety glasses. Freshly cut metal can be sharp enough to ruin your afternoon.
For corners, overlap or butt tracks neatly according to your preferred layout and product guidance. Keep the track straight and avoid bending it out of shape. A twisted track makes studs harder to install and creates a wall that looks like it learned framing from a funhouse mirror.
Step 6: Fasten the Bottom Track
Place the bottom track on the floor line and fasten it securely. On wood subfloors, use suitable screws. On concrete, use approved concrete anchors or masonry screws. Follow the fastener manufacturer’s requirements for spacing, embedment, and edge distance.
If you are installing track on concrete, consider using a sill gasket or moisture barrier under the track, especially in basements or slab-on-grade spaces. This helps separate the metal from potential moisture and can reduce squeaks or vibration.
Step 7: Fasten the Top Track
Install the top track along the ceiling line. Fasten it into joists, blocking, or other approved overhead framing. Keep checking alignment as you go. A laser level is very helpful because it keeps you honest, and unlike a friend holding a tape measure, it will not get distracted by snacks.
Make sure the top and bottom tracks face the same direction and remain parallel. This helps the studs twist into place smoothly.
Step 8: Lay Out Stud Spacing
Mark stud locations on the top and bottom tracks. For many interior walls, 16 inches on center is a practical spacing choice. Some assemblies allow 24 inches on center, but this depends on wall height, drywall thickness, performance requirements, and manufacturer guidance.
Mark the first stud at the starting wall, then measure each layout mark from the same reference point. Do not “leapfrog” your tape from one mark to the next, because small errors can build up. By the end of the wall, your layout may wander like it is looking for coffee.
Step 9: Cut the Studs
Measure the distance between the inside of the top and bottom tracks, then cut the studs slightly shorter so they fit easily. Many installers cut studs about 1/4 inch short for interior partitions, but always follow the system requirements for your specific wall.
Cut each stud with snips. For a clean cut, mark the stud, cut both flanges, bend the stud, and cut the web. Keep the factory end down or align all cut ends consistently so punch-outs line up for wiring. Consistency matters, especially when electrical work is coming later.
Step 10: Twist the Studs Into Place
Insert each stud into the bottom and top track at an angle, then twist it so the open side faces the same direction as the other studs. Align the stud with your layout mark. Check that the punch-outs face the same way and line up horizontally where possible.
Most metal studs are installed with the web facing the same direction throughout the wall. This makes drywall installation easier and keeps the framing predictable. At door openings, corners, and intersections, you may need additional studs or special fastening details.
Step 11: Plumb and Fasten Each Stud
Use a level to plumb the first stud, then fasten it to the track with self-drilling framing screws. One screw through each side of the track into the stud flange is common for many light-gauge partitions, but follow product and project requirements.
Work down the wall, checking plumb as you go. A clamp or locking pliers can hold the stud in place while you drive screws. Use the clutch on your drill/driver so you do not strip the steel. Overdriven screws can lose holding power, and stripped holes are not exactly a confidence booster.
Step 12: Frame Openings, Corners, and Backing
Door openings need careful framing. Install jamb studs at each side of the opening, reinforce them as required, and add a header track or boxed header above. For light interior doors, product instructions may allow simple metal framing details. For heavier doors, commercial frames, or high-use openings, use approved details.
Add blocking before drywall wherever you plan to mount heavy items. This includes TVs, handrails, cabinets, floating shelves, towel bars, and wall-hung sinks. You can use wood blocking secured inside the metal framing or manufactured backing plates. Installing backing now is easy. Installing it after drywall is a small remodeling tragedy.
Step 13: Run Utilities and Install Drywall
Before drywall, coordinate electrical, plumbing, low-voltage wiring, and insulation. Use protective bushings or grommets where wires pass through metal punch-outs if required. Keep wiring protected from sharp edges and follow electrical code.
When installing drywall over metal studs, use drywall screws designed for steel framing. Fine-thread drywall screws are commonly used for light-gauge metal studs. Keep panels snug but not forced, and avoid breaking the paper face with screw heads. Stagger drywall joints where possible, and follow the drywall manufacturer’s fastening schedule.
Common Mistakes to Avoid
Using Metal Studs for the Wrong Kind of Wall
The biggest mistake is assuming all metal studs are structural. Many light-gauge studs sold for drywall framing are intended for non-load-bearing partitions. If your wall carries weight, supports a ceiling, braces an exterior assembly, or has unusual height or loading, get professional guidance.
Skipping Backing for Heavy Items
Metal studs alone are not ideal for every wall-mounted object. If you know a cabinet, TV, grab bar, or shelf is coming, install backing before drywall. Future you will be grateful. Future you may even forgive present you for buying the wrong screws last time.
Misaligning the Tracks
If the top and bottom tracks are not plumb with each other, every stud becomes a tiny leaning tower. Drywall will be harder to install, corners will look crooked, and trim may not sit right. Use a laser or plumb bob and check twice.
Cutting Without Gloves
Metal framing is light, but it is not gentle. Cut edges can slice skin quickly. Gloves, eye protection, and controlled cutting are not optional extras; they are part of doing the job correctly.
Best Practices for a Cleaner Metal Stud Installation
First, keep your layout clean. Mark both tracks clearly and use the same reference point for all measurements. Second, face studs the same direction so drywall fastening is consistent. Third, line up punch-outs so electricians and low-voltage installers do not secretly curse your name.
Fourth, do not overtighten screws. Metal framing requires a firm connection, not a heroic one. If the screw spins freely, you may have stripped the hole. Move slightly and drive a new screw if needed. Fifth, keep the jobsite organized. Metal offcuts are sneaky. They hide on the floor and wait for shoes, knees, and bare hands.
Example Project: Framing a Small Home Office Partition
Imagine you want to divide a large basement room into a small home office. The wall is 10 feet long and 8 feet high, with one 30-inch door opening. You choose 3-5/8-inch metal studs and matching track. You snap a floor line, transfer it to the ceiling with a laser, fasten the bottom track to concrete with masonry screws, and attach the top track to blocking between joists.
You mark studs at 16 inches on center, leaving space for the door opening. You twist studs into place, fasten them with self-drilling screws, frame the door opening with doubled studs, and add wood backing where a wall-mounted desk shelf will go. Before drywall, an electrician runs wiring through the punch-outs using proper protection. Once drywall is installed, the wall is straight, solid, and ready for paint. Suddenly the basement looks less like storage purgatory and more like a room where emails get answered.
of Real-World Experience: What Installing Metal Studs Teaches You
The first lesson metal studs teach is that straight materials do not automatically create straight walls. Metal studs arrive straighter than most lumber, but your layout still controls the final result. If the floor line is off, the wall is off. If the ceiling track is not plumb over the bottom track, the studs will fight you. A laser level can feel like a luxury tool until you use one on metal framing; then it feels like the adult in the room.
The second lesson is that metal framing rewards patience during layout and speed during assembly. Cutting and twisting studs into track goes quickly once the plan is right. The slow part is deciding where everything belongs: doors, outlets, backing, switches, cable runs, and drywall seams. A common beginner mistake is to build the wall first and think about accessories later. That is how people end up trying to mount a heavy shelf into a wall that has nothing behind the drywall but hope and regret.
The third lesson is about screws. With wood, you can often muscle your way through small mistakes. With steel, finesse matters. Use the right self-drilling framing screws and the right drywall screws. Set the drill clutch so screws tighten without stripping. If the screw spins, stop. Driving it longer will not make it better; it will only make a shiny little problem. A steady hand beats brute force every time.
The fourth lesson is that gloves are not a suggestion. Every installer has either learned this the easy way by wearing gloves or the memorable way by not wearing them. Metal studs are lightweight, but cut edges can be unforgiving. Snips can also send small pieces flying, so eye protection is just as important. A safe project is not slower; it is simply less dramatic.
The fifth lesson is that backing is everything. Any wall that will hold cabinets, grab bars, shelves, towel bars, a TV bracket, or a heavy mirror needs planning before drywall. Wood blocking is often the simplest solution for residential work. Install it securely between studs and document where it is. Taking photos before drywall is a brilliant habit. Later, when you are trying to find backing behind a painted wall, those photos feel like buried treasure.
The sixth lesson is that metal studs are excellent in basements, but basements demand respect. Check moisture first. Use appropriate separation from concrete when needed. Keep framing slightly away from foundation walls if your assembly requires it. Do not trap active leaks behind a beautiful new wall. Water always wins arguments with building materials.
Finally, metal stud installation teaches that good framing is invisible when finished. Nobody walks into a room and says, “Wow, those studs behind the drywall are aligned beautifully.” But they will notice straight corners, flat walls, doors that swing properly, and trim that sits tight. That is the quiet victory of metal framing: when done right, the wall simply behaves.
Conclusion
Installing metal studs is a manageable project when you treat it as a system, not a pile of shiny sticks. Plan the wall, choose the right materials, align the tracks, space the studs correctly, add backing where needed, and use the right screws. The process is clean, efficient, and surprisingly satisfying once you get the rhythm.
For interior, non-load-bearing partitions, metal studs can be a smart alternative to wood. They are straight, lightweight, pest-resistant, and ideal for many remodeling projects. Just remember the golden rules: follow local code, protect wires from sharp metal, wear PPE, and never guess on structural work. Your wall should be strong, straight, and boring in the best possible way.













